이 글에서는 javascript에 대한 관련 지식을 소개합니다. WebAPI 배경지식, 요소 획득, 노드 운영, 사례 공유 등 주로 JavaScript WebAPI와 관련된 내용을 소개합니다. 그것은 모두에게 도움이 됩니다.

【관련 권장 사항: javascript 비디오 튜토리얼, web front-end】
JS는 세 가지 주요 부분으로 나뉩니다.
Dom + BOM.1.2 DOM 기본 개념
DOM이란 무엇입니까은 Document Object Model을 의미합니다.Document Object Model.
W3C 标准给我们提供了一系列的函数, 让我们可以操作:
一个页面的结构是一个树形结构, 称为 DOM 树.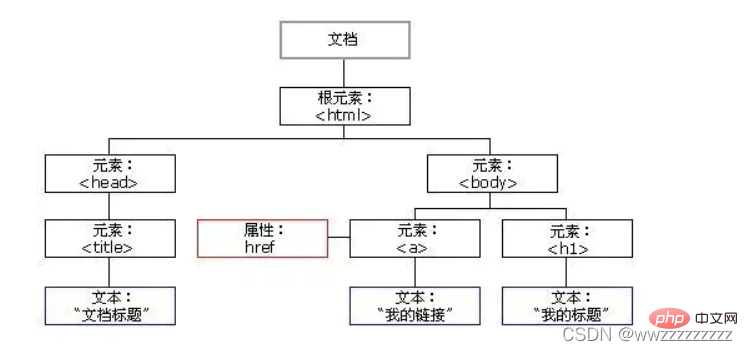
document 表示.element 表示.node表示.使用 querySelector 能够完全复用前面学过的 CSS 选择器知识, 达到更快捷更精准的方式获取到元素对象
语法格式:
let element = document.querySelector(selectirs);
selectors 填一个或者多个选择器使用示例:
<p> abc </p>
<p> def </p>
<p><input></p>
<script>
let one = document.querySelector('.one');
console.log(one);
let two = document.querySelector('#two');
console.log(two);
let three = document.querySelector('input');
console.log(three);
</script>运行截图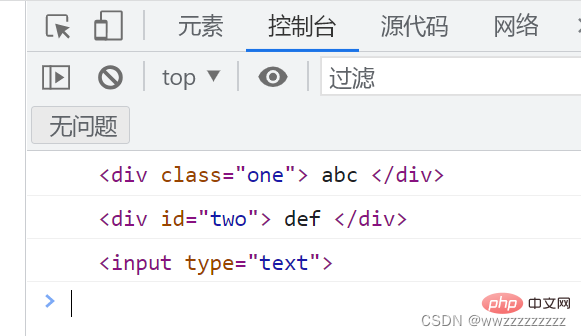
如果您需要与指定选择器匹配的所有元素的列表,则应该使用 querySelectorAll()
使用示例:
<p>123</p>
<p>456</p>
<script>
let ps = document.querySelectorAll('p');
console.log(ps);
</script>运行截图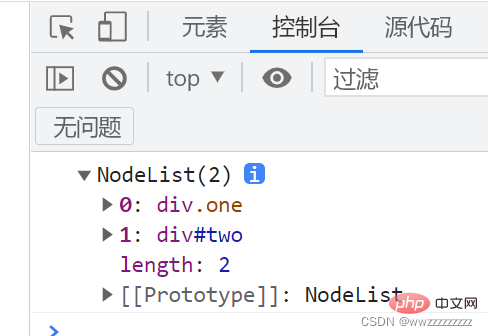
Element.innerText 属性表示一个节点及其后代的“渲染”文本内容
注: 不识别 html 标签. 是非标准的(IE发起的). 读取结果不保留html源码中的 换行和空格.
使用示例:
<p>hello world</p>
<p>hello world</p>
<script>
let p = document.querySelector('.two');
console.log(p);
p.innerText = '<span>world hello';
</script>运行截图:
通过 innerText 无法获取到 p 内部的 html 结构, 只能得到文本内容.
Element.innerHTML 属性设置或获取HTML语法表示的元素的后代
注意:
代码示例:
<p>hello world</p>
<p>hello world</p>
<script>
let p = document.querySelector('.two');
console.log(p);
p.innerHTML = '<span>world hello';
</script>运行截图:
innerHTML 不光能获取到页面的 html 结构, 同时也能修改结构. 并且获取到的内容保留的空格和换行
注: 通过 element.属性W3C
표준은 우리가 작동할 수 있는 일련의 기능을 제공합니다.웹 페이지 콘텐츠
웹 페이지 구조 웹 페이지 스타일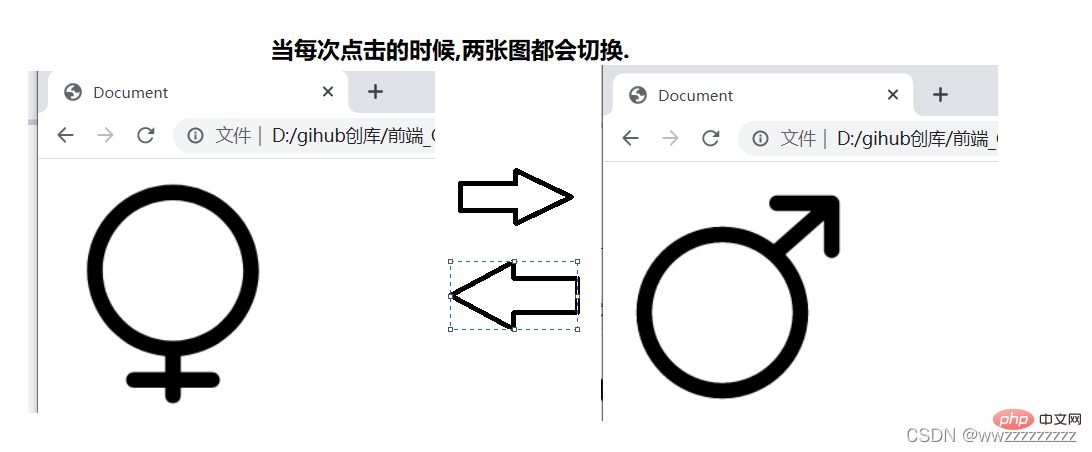 DOM 트리
중요 개념: 
document를 사용하세요. 코드 > 나타냄 .🎜🎜🎜element🎜: 페이지의 모든 태그를 🎜elements🎜라고 합니다. <code>element 를 사용하여 표현합니다.🎜🎜🎜node🎜: 웹 페이지의 모든 콘텐츠를 🎜nodes🎜(라벨 노드)라고 합니다. , 주석 노드, 텍스트 노드, 속성 노드 등)을 표현하려면 node를 사용하세요.🎜🎜🎜2. 요소 가져오기🎜🎜2.1 querySelector🎜🎜querySelector를 사용하여 완전히 표현하세요. 더 빠르고 정확한 방법으로 요소 객체를 얻기 위해 이전에 배운 CSS 선택기 지식을 재사용하세요🎜🎜🎜 문법 형식:🎜🎜 <img src="/static/imghw/default1.png" data-src="male.png" class="lazy" alt="하나의 기사로 JavaScript WebAPI 이해하기" >
<script>
let img = document.querySelector('img');
img.onclick = function() {
if(img.title.lastIndexOf("男") != -1){
img.src = 'female.png';
img.title = '女';
}else{
img.src = 'male.png';
img.title = '男';
}
}
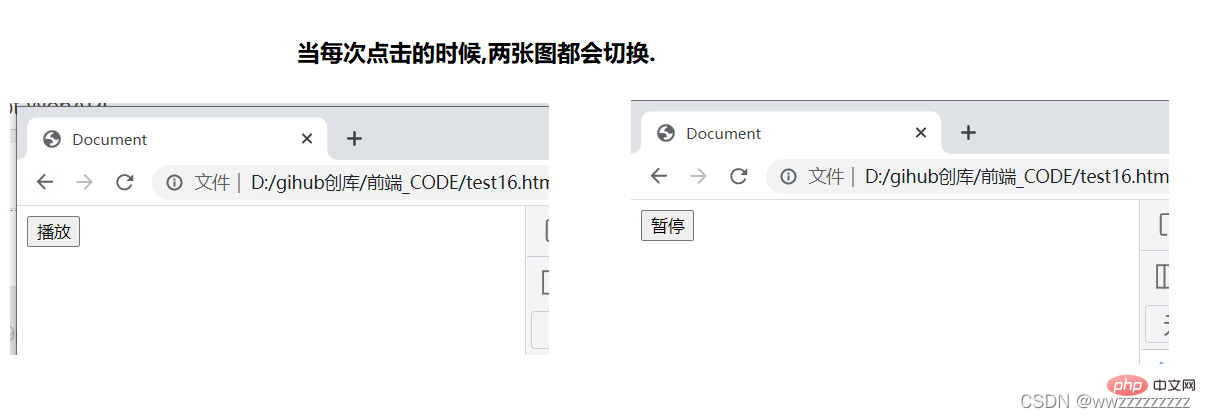
</script>selectors 하나 이상의 선택기 채우기🎜🎜 🎜🎜사용 예: 🎜🎜<input><script>
let input = document.querySelector('input');
input.onclick = function() {
if(input.value == '播放'){
input.value = '暂停';
}else{
input.value = '播放';
}
}</script> 🎜🎜2.2 querySelectorAll🎜🎜지정된 선택기와 일치하는 모든 요소의 목록이 필요한 경우
 querySelectorAll()🎜🎜🎜사용 예: 🎜🎜 <input>
<input>
<script>
let one = document.querySelector('#one');
let add = document.querySelector('#add');
add.onclick = function() {
one.value++;
}
</script> 🎜🎜3 요소 조작 🎜🎜3.1 Get/ 요소 콘텐츠 수정 🎜🎜1. innerText 🎜🎜
Element.innerText 속성은 노드와 그 하위 항목의 "렌더링된" 텍스트 콘텐츠를 나타냅니다. 🎜🎜🎜참고: 🎜 🎜html 태그를 인식하지 못합니다 🎜. 비표준(IE에서 시작됨) 읽기 결과는 html 소스 코드에서 줄바꿈과 공백을 유지하지 않습니다. 🎜p 내부의 html 구조에 접근할 수 없습니다🎜, 텍스트 콘텐츠만 얻을 수 있습니다.🎜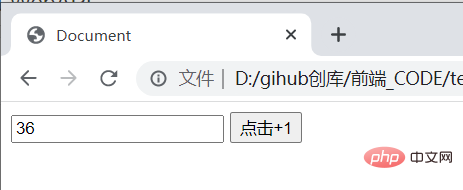 🎜🎜2.innerHTML🎜🎜
Element.innerHTML 속성을 설정하거나 HTML 구문을 가져옵니다. 표현 요소🎜🎜참고🎜:🎜🎜🎜🎜식별🎜 html 태그. 읽기 결과는 html 소스 코드🎜🎜🎜🎜코드 예:🎜🎜 <h3>选择你喜欢玩的游戏</h3>
<input>王者荣耀<br>
<input>和平精英<br>
<input>开心消消乐<br>
<input>我的世界<br>
<input>全选 <script>
let games = document.querySelectorAll('.game');
let all = document.querySelector('.all');
all.onclick = function(){
for (let i = 0; i < games.length; i++) {
games[i].checked = all.checked;
}
}
for (let i = 0; i < games.length; i++) {
games[i].onclick = function() {
all.checked = allChecked();
}
}
function allChecked() {
for (let i = 0; i < games.length; i++) {
if(!games[i].checked){
return false;
}
}
return true;
}
</script>innerHTML은 페이지의 html 구조를 얻을 수 있을 뿐만 아니라 구조를 수정할 수도 있습니다. 그리고 얻은 콘텐츠는 공백과 줄바꿈을 유지합니다🎜 🎜🎜3.2 요소 속성 가져오기/수정🎜🎜🎜참고:🎜 via 속성을 가져오는
 element.property🎜🎜코드 예:🎜🎜element.style.[属性名] = [属性值];element.style.cssText = [属性名+属性值];
<p>你好</p>
<script>
let p = document.querySelector('p');
p.onclick = function() {
let fontSize = parseInt(p.style.fontSize);
fontSize += 10;
p.style.fontSize = fontSize + "px";//注意有单位的要带上单位
}
</script> <input>
<input>
<script>
let one = document.querySelector('#one');
let add = document.querySelector('#add');
add.onclick = function() {
one.value++;
}
</script>
<h3>选择你喜欢玩的游戏</h3>
<input>王者荣耀<br>
<input>和平精英<br>
<input>开心消消乐<br>
<input>我的世界<br>
<input>全选 <script>
let games = document.querySelectorAll('.game');
let all = document.querySelector('.all');
all.onclick = function(){
for (let i = 0; i < games.length; i++) {
games[i].checked = all.checked;
}
}
for (let i = 0; i < games.length; i++) {
games[i].onclick = function() {
all.checked = allChecked();
}
}
function allChecked() {
for (let i = 0; i < games.length; i++) {
if(!games[i].checked){
return false;
}
}
return true;
}
</script>运行截图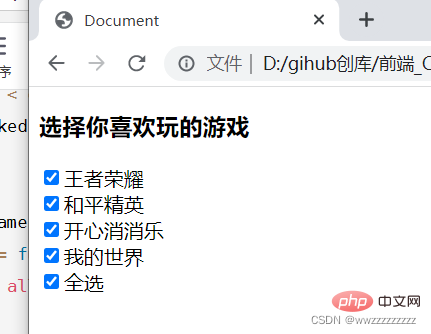
CSS 中指定给元素的属性, 都可以通过 JS 来修改
style 中的属性都是使用 驼峰命名 的方式和 CSS 属性对应的.
例如:font-size => fontSize,background-color => backgroundColor等
element.style.[属性名] = [属性值];element.style.cssText = [属性名+属性值];
<p>你好</p>
<script>
let p = document.querySelector('p');
p.onclick = function() {
let fontSize = parseInt(p.style.fontSize);
fontSize += 10;
p.style.fontSize = fontSize + "px";//注意有单位的要带上单位
}
</script>运行截图:
element.className = [CSS 类名];
<style>
html,body{
height: 100%;
width: 100%;
}
p {
height: 100%;
width: 100%;
}
.black{
background-color:black;
color: gray;
}
.gray {
background-color: gray;
color: black;
}
</style>
<p>
你好!
</p>
<script>
let p = document.querySelector('p');
p.onclick = function() {
if(p.className.indexOf("black") != -1){
p.className = 'gray';
}else{
p.className = 'black';
}
}
</script>运行截图: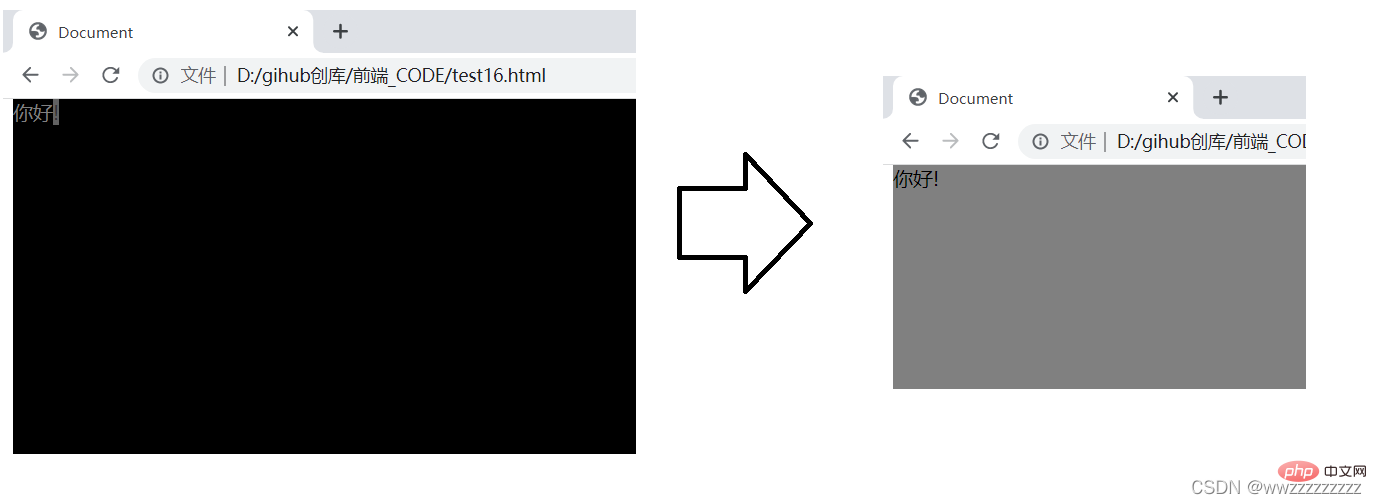
分为两个步骤:
createElement 创建元素节点.createTextNode 创建文本节点createComment 创建注释节点createAttribute 创建属性节点appendChild 将节点插入到指定节点的最后一个孩子之后insertBefore将节点插入到指定节点之前 <p>
</p>
<script>
let p = document.createElement('p');
p.id = 'myp';
p.className = 'one';
p.innerHTML = 'hehe';
let test = document.querySelector('.test');
test.appendChild(p);
</script>运行截图:
<p>
</p><p>1</p>
<p>2</p>
<p>3</p>
<p>4</p>
<script>
let child = document.createElement('p');
child.innerHTML = '100';
let parent = document.querySelector('.parent');
// 本来有四个元素,0号元素没有,就插入一个元素
parent.insertBefore(child,parent.children[0]);
// 插入到2号元素前,1号元素是1不是child,2号元素是2.
parent.insertBefore(child,parent.children[2]);
</script>运行结果: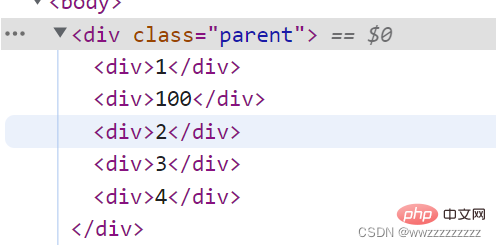
使用 removeChild 删除子节点
oldChild = element.removeChild(child);
注: 如果 child 不是 element 的子节点,会抛异常
<p>
</p><p>1</p>
<p>2</p>
<p>3</p>
<script>
let parent = document.querySelector('.parent');
let childs = document.querySelectorAll('.child');
parent.removeChild(childs[1]);
</script>运行结果: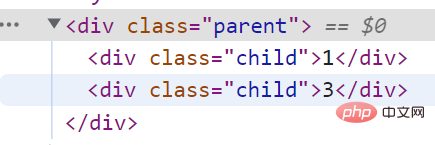
nbsp;html>
<meta>
<meta>
<meta>
<title>猜数字</title>
<p>
</p><p><input></p>
<p>
请输入要猜的数字: <input> <input>
</p>
<p>
已经猜的次数: <span>0</span>
</p>
<p>
结果: <span></span>
</p>
<script>
let guessNum = document.querySelector('.guessNum');
let press = document.querySelector('.press');
let count = document.querySelector('.count');
let result = document.querySelector('.result');
let countCount = 0;
let guessResult = Math.floor(Math.random()*100)+1;
press.onclick = function(){
countCount++;
count.innerHTML = countCount;
guessNumber = parseInt(guessNum.value);
if(guessNumber == guessResult){
result.innerHTML = '猜对了';
result.style = 'color : red';
}else if(guessNumber < guessResult){
result.innerHTML = '猜小了';
result.style = 'color : blue';
}else{
result.innerHTML = '猜大了';
result.style = 'color : orange';
}
}
let again = document.querySelector('.again');
again.onclick = function() {
guessResult = Math.floor(Math.random()*100)+1;
countCount = 0;
count.innerHTML = 0;
guessNum.value = '';
result.innerHTML ='';
}
</script>运行截图: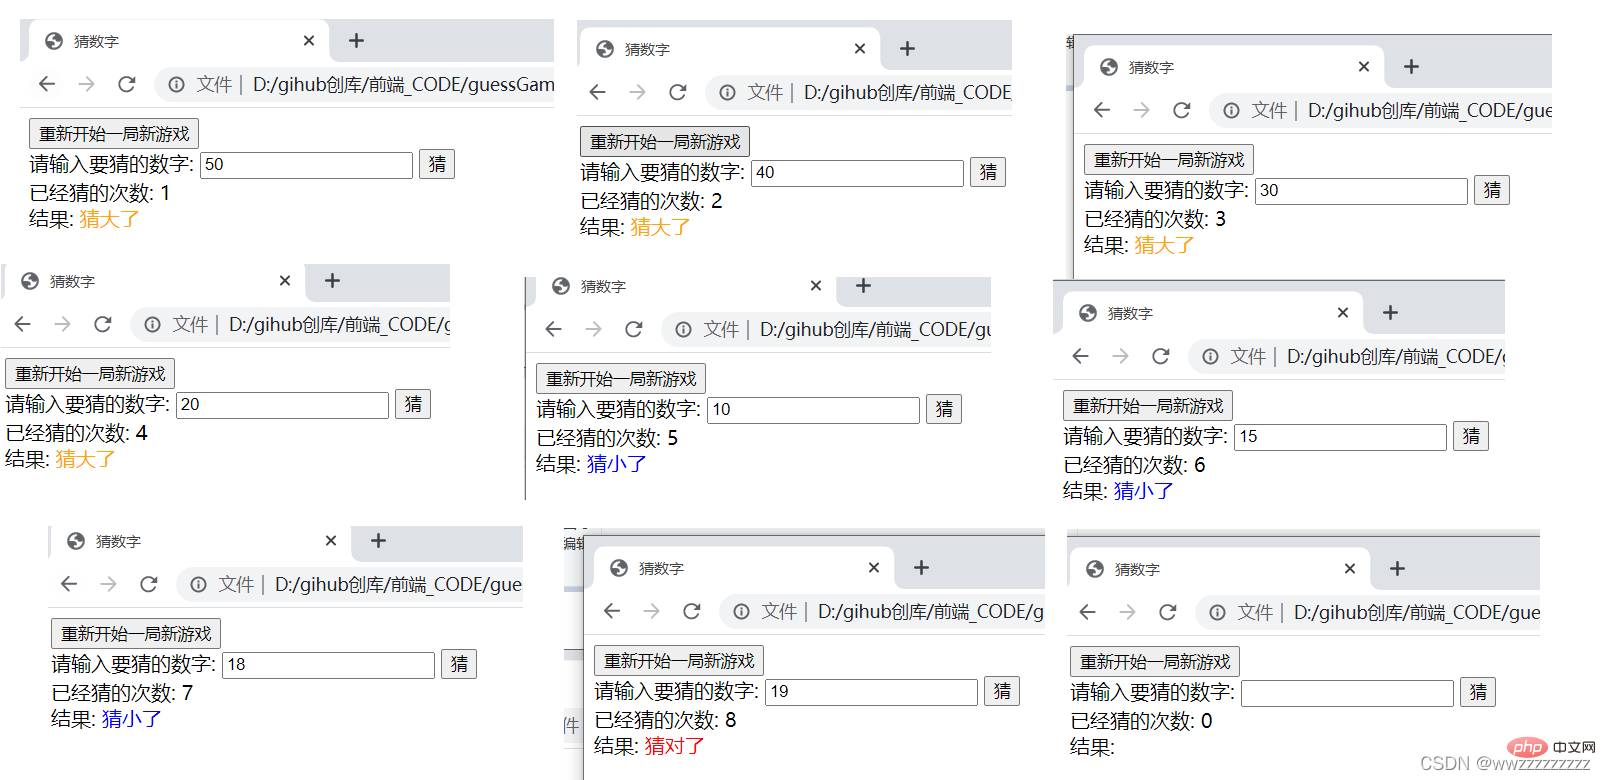
nbsp;html>
<meta>
<meta>
<meta>
<title>表白墙</title>
<p>
</p><p>表白墙</p>
<p>输入后点击提交,会将信息显示在表格中</p>
<p><span>谁:</span><input></p>
<p><span>对谁:</span><input></p>
<p><span>说什么:</span><input></p>
<p><input></p>
<style>
/* 去除浏览器默认样式 */
* {
margin: 0;
padding: 0;
}
/* 设置总宽度 */
.parent {
width: 400px;
margin: 0 auto;
}
/* 涉资表白墙样式 */
#wall {
font-size: 30px;
font-weight: 700;
text-align: center;
margin: 5px;
}
/* 设置提示信息样式 */
#remind{
font-size:13px;
text-align: center;
color:gray;
margin: 5px;
}
/* 设置弹性布局 */
.one {
display: flex;
justify-content: center;
align-items: center;
height: 40px;
}
/* 设置文字内容 */
.two {
width: 100px;
line-height: 40px;
}
/* 设置输入框 */
.one .text{
width: 200px;
height: 20px;
}
/* 提交按钮的设置 */
.one .press{
width: 304px;
height: 40px;
color:white;
background-color: orange;
border-radius: 5px;
border: none;
}
/* 设置鼠标点击的时候改变颜色 */
.one .press:active{
background-color: red;
}
/* 提交之和内容的设置 */
.elem {
text-align: center;
}
</style>
<script>
// 获取到输入框元素
let texts = document.querySelectorAll('.text');
// 获取到提交按钮元素
let press = document.querySelector('.press');
// 设置单击事件
press.onclick = function() {
let user1 = texts[0].value;
let user2 = texts[1].value;
let message = texts[2].value;
// 如果有一个为空,就提交不成功
if(user1=='' || user2=='' || message==''){
return;
}
// 这里都不为空,创建新的节点
let elem = document.createElement('p');
elem.className = 'elem';
elem.innerHTML = user1 + '对' + user2 + '说: ' +message;
// 插入新的节点
let parent = document.querySelector('.parent');
parent.appendChild(elem);
// 提交之后,将输入框置空.
for(let i = 0; i < 3; i++){
texts[i].value='';
}
}
</script>运行截图: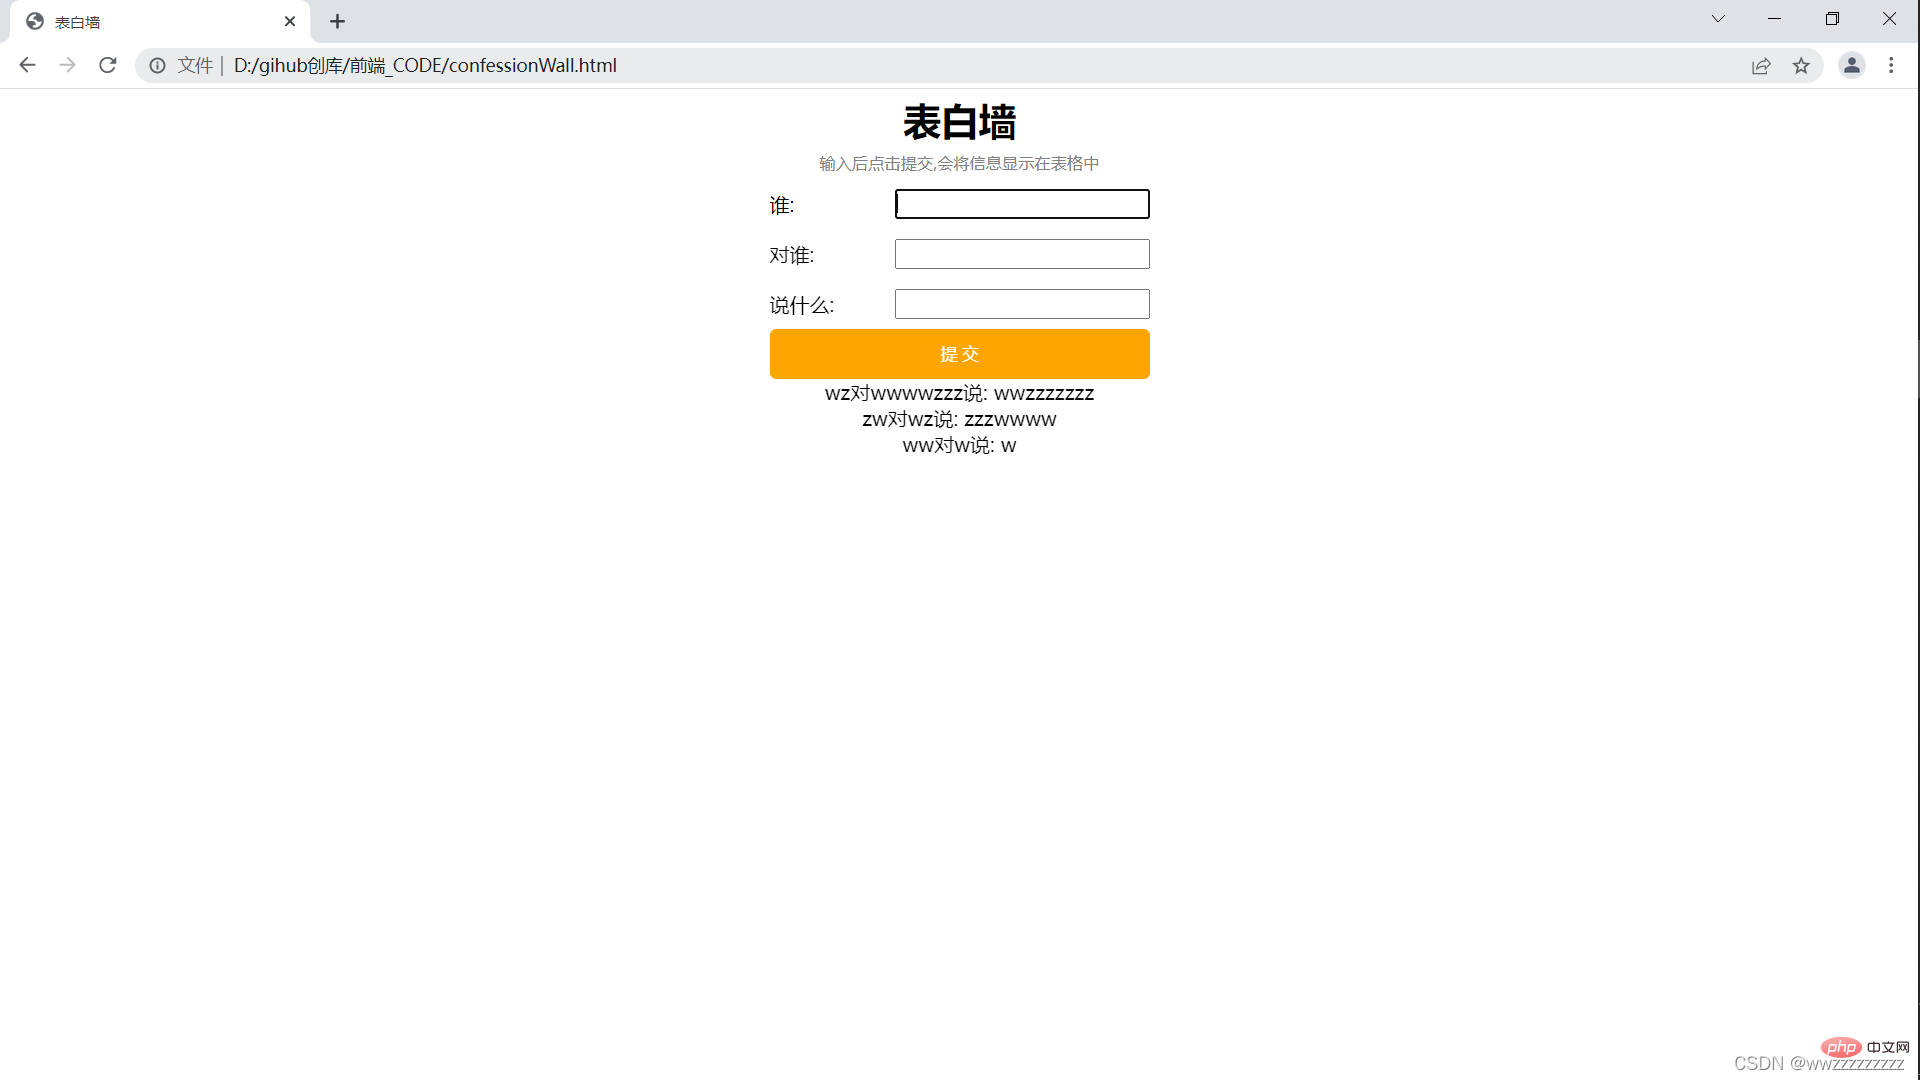
nbsp;html>
<meta>
<meta>
<meta>
<title>待办事项</title>
<p>
</p><p>
<input><input>
</p>
<p>
</p><p>
</p><h3>未完成</h3>
<p>
</p><h3>已完成</h3>
<style>
/* 去除浏览器默认样式 */
* {
margin: 0;
padding: 0;
}
/* 设置宽度 */
.parent {
width: 840px;
margin: 0 auto;
}
/* 设置输入框和新建的样式 */
.one {
height: 50px;
padding: 20px;
}
/* 设置输入框样式 */
.one .text{
height: 50px;
width: 600px;
}
/* 设置提交框样式 */
.one .submit {
background-color: orange;
color: white;
height: 50px;
width: 196px;
border: none;
}
/* 设置点击时的背景 */
.one .submit:active{
background-color: red;
}
/* 设置已完成和未完成的样式 */
.two{
width: 800px;
height: 800px;
display: flex;
margin: 0 auto;
}
/* 设置未完成和已完成字体样式 */
.two h3 {
height: 50px;
text-align: center;
line-height: 50px;
background-color: black;
color: white;
}
/* 设置未完成左边的样式 */
.left {
width: 50%;
height: 100%;
}
/* 设置已完成右边的样式 */
.right {
width: 50%;
height: 100%;
}
/* 新建任务的样式 */
.row {
height: 50px;
display: flex;
align-items: center;
}
/* 新建任务字体的样式 */
.row span {
width: 340px;
}
/* 新建任务的删除按钮样式 */
.row button{
width: 40px;
height: 40px;
}
</style>
<script>
// 首先获取新建按钮元素
let submit = document.querySelector('.submit');
// 设置鼠标单击事件
submit.onclick = function() {
// 获取输入框元素
let text = document.querySelector('.text');
// 判断输入框内容是否为空
if(text.value == '') return;
// 新建代办事项
let row = document.createElement('p');
row.className='row';
let checkBox = document.createElement('input');
checkBox.type='checkbox';
let thing = document.createElement('span');
thing.innerHTML = text.value;
let del = document.createElement('button');
del.innerHTML='删除';
row.appendChild(checkBox);
row.appendChild(thing);
row.appendChild(del);
// 获取左边元素
let left = document.querySelector('.left');
left.appendChild(row);
// 添加节点之后置空
text.value='';
// 设置选择框的鼠标单击事件
checkBox.onclick = function() {
// 如果被选择了就移动已完成
// 如果未完成就移动到未完成
if(checkBox.checked){
let target = document.querySelector('.right');
target.appendChild(row);
}else{
let target = document.q uerySelector('.left');
target.appendChild(row);
}
}
// 设置删除按钮的鼠标单击事件
del.onclick = function() {
// 使用 parentNode 获取到父节点
let parent = row.parentNode;
// 删除该节点
parent.removeChild(row);
}
}
</script>运行截图: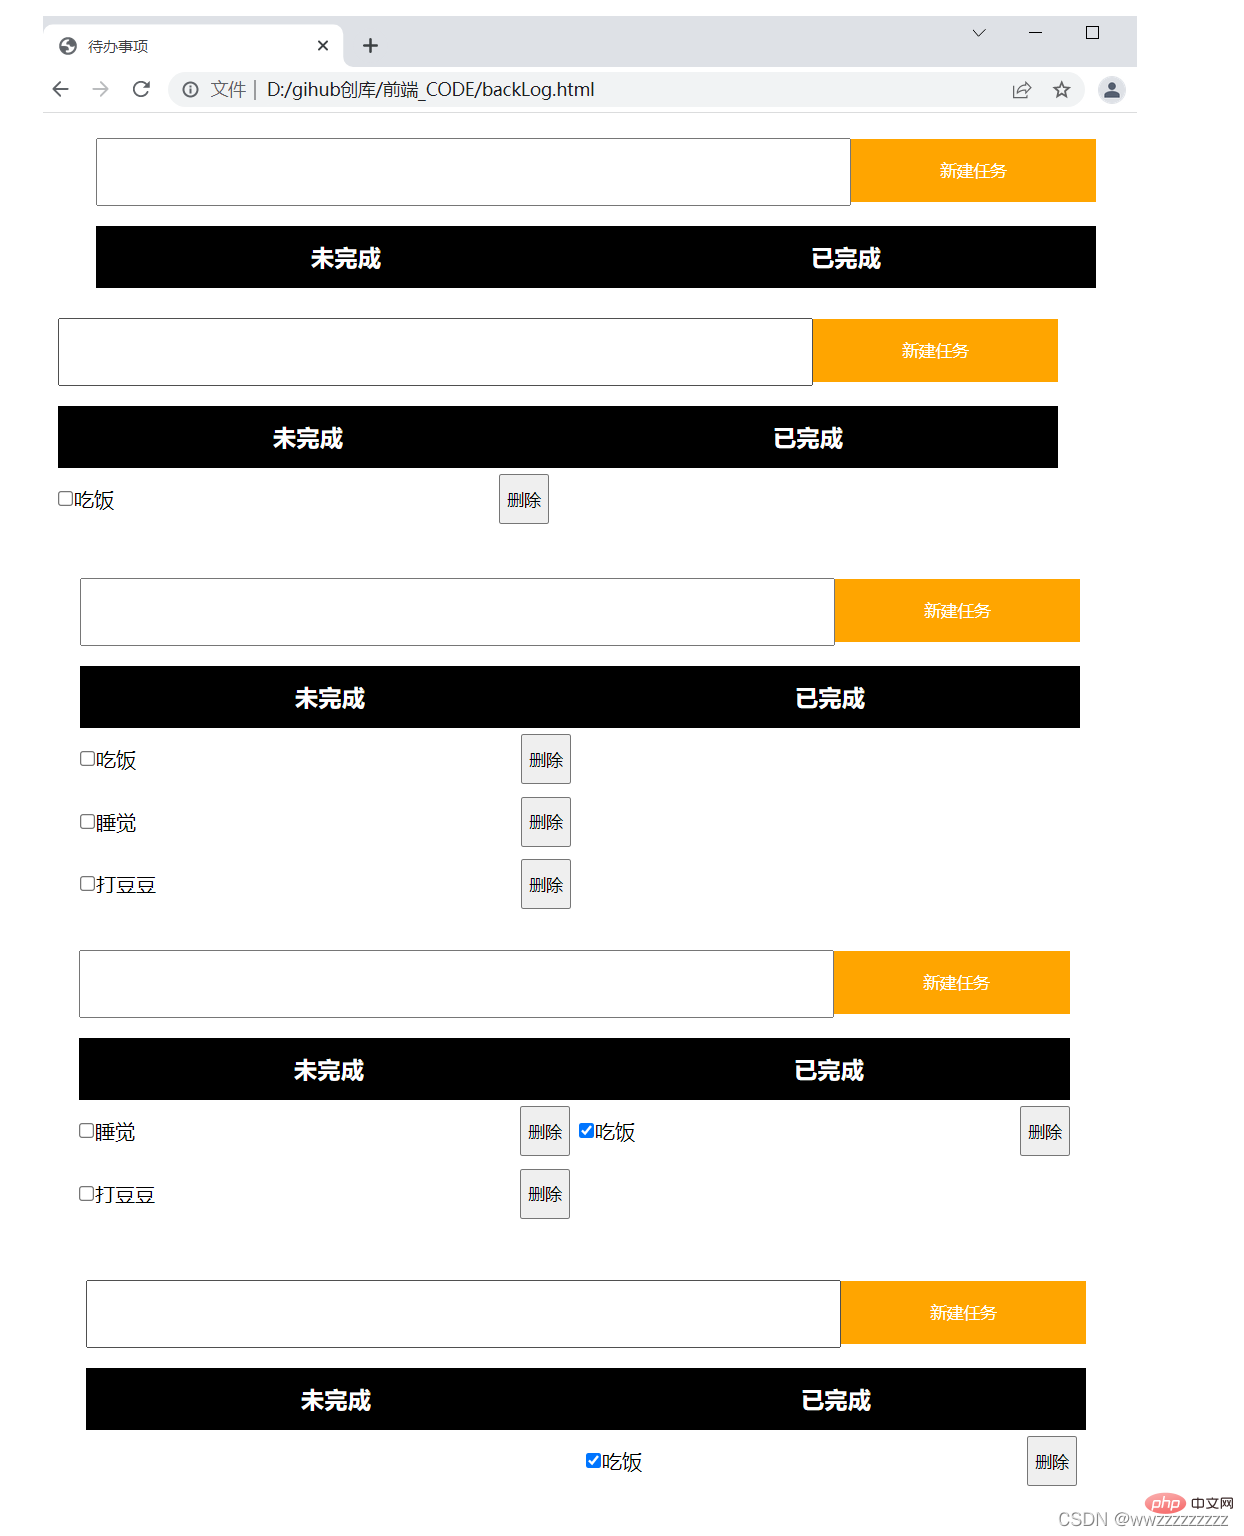
【相关推荐:javascript视频教程、web前端】
위 내용은 하나의 기사로 JavaScript WebAPI 이해하기의 상세 내용입니다. 자세한 내용은 PHP 중국어 웹사이트의 기타 관련 기사를 참조하세요!
