

Node.js 19가 공식적으로 출시되었습니다. Node.js의 6가지 주요 기능에 대해 이야기해 보겠습니다!

Node 19가 정식 출시되었습니다. 이 글에서는 Node.js 19의 6가지 주요 기능에 대해 자세히 설명하겠습니다. 모든 분들께 도움이 되길 바랍니다! ㅋㅋㅋ Node.js 16(LTS)은 2023년 4월 업데이트 점검이 예정되어 있으며, 2023년 9월 업데이트 점검이 종료될 예정입니다.
그리고 Node 19는 2022-10-18에 출시되었습니다. [관련 튜토리얼 추천:  nodejs 동영상 튜토리얼
두 가지 버전이 있다는 것을 알고 있습니다. 그 중 Current 버전은 보통 6개월마다 출시됩니다. 매년 4월에 새로운 짝수 버전이 출시됩니다. 지난 10월에 출시된 V19.0.1이 최신 "현재" 얼리 어답터 버전이 되었습니다. 6가지 뛰어난 기능 중.
1. HTTP(S)/1.1 KeepAlive의 기본값은 true입니다.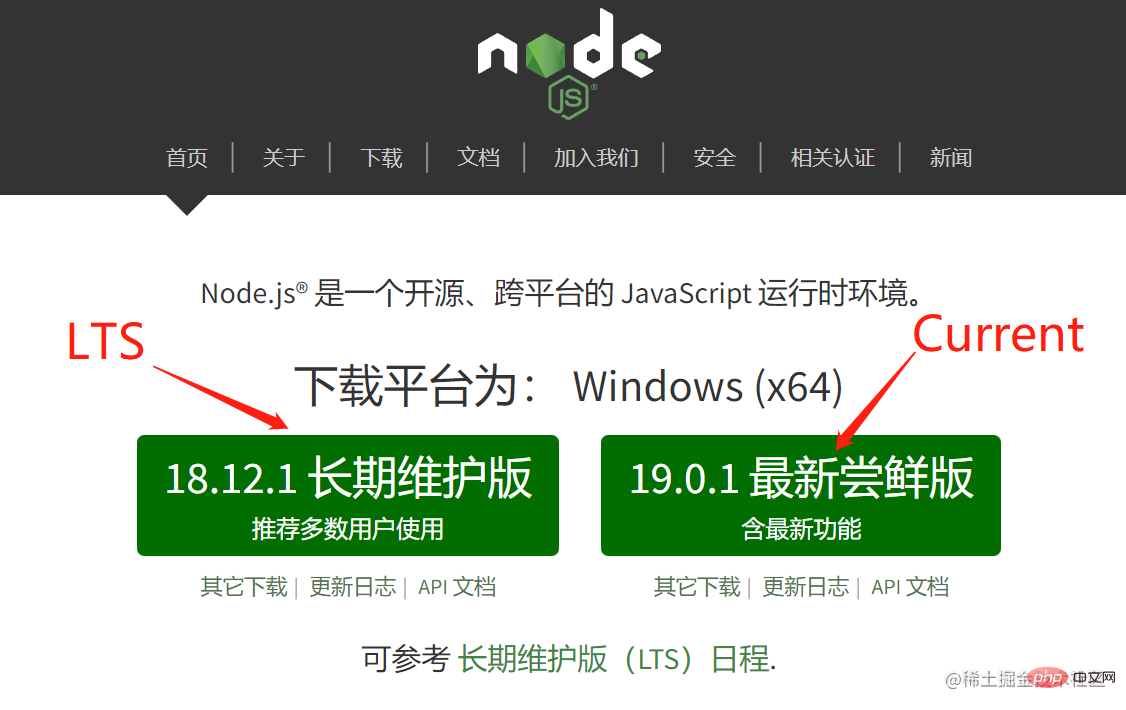
Node.js v19는 keepAlive 기본값을 true로 설정합니다. 이는 모든 아웃바운드 HTTP(s) 연결이 5S의 기본 시간인 HTTP 1.1 keepAlive를 사용함을 의미합니다. ;
코드 테스트:
const http = require('node:http');
console.log(http.globalAgent);
const https = require('node:https');
console.log(https.globalAgent);
v16과 v19 사이의 노드 서버 에이전트 구성 차이점을 비교할 수 있습니다.
V16% nvm use 16
Now using node v16.0.0 (npm v7.10.0)
% node server
Agent {
_events: [Object: null prototype] {
free: [Function (anonymous)],
newListener: [Function: maybeEnableKeylog]
},
_eventsCount: 2,
_maxListeners: undefined,
defaultPort: 80,
protocol: 'http:',
options: [Object: null prototype] { path: null },
requests: [Object: null prototype] {},
sockets: [Object: null prototype] {},
freeSockets: [Object: null prototype] {},
keepAliveMsecs: 1000,
keepAlive : false,
maxSockets: Infinity,
maxFreeSockets: 256,
scheduling: 'lifo',
maxTotalSockets: Infinity,
totalSocketCount: 0,
[Symbol(kCapture)]: false
}
Agent {
_events: [Object: null prototype] {
free: [Function (anonymous)],
newListener: [Function: maybeEnableKeylog]
},
_eventsCount: 2,
_maxListeners: undefined,
defaultPort: 443,
protocol: 'https:',
options: [Object: null prototype] { path: null },
requests: [Object: null prototype] {},
sockets: [Object: null prototype] {},
freeSockets: [Object: null prototype] {},
keepAliveMsecs: 1000,
keepAlive: false,
maxSockets: Infinity,
maxFreeSockets: 256,
scheduling: 'lifo',
maxTotalSockets: Infinity,
totalSocketCount: 0,
maxCachedSessions: 100,
_sessionCache: { map: {}, list: [] },
[Symbol(kCapture)]: false
}로그인 후 복사라인 18 및 40, keepAlive는 기본적으로 false로 설정됩니다. % nvm use 19
Now using node v19.0.0 (npm v8.19.2)
% node server
Agent {
_events: [Object: null prototype] {
free: [Function (anonymous)],
newListener: [Function: maybeEnableKeylog]
},
_eventsCount: 2,
_maxListeners: undefined,
defaultPort: 80,
protocol: 'http:',
options: [Object: null prototype] {
keepAlive: true,
scheduling: 'lifo',
timeout: 5000,
noDelay: true,
path: null
},
requests: [Object: null prototype] {},
sockets: [Object: null prototype] {},
freeSockets: [Object: null prototype] {},
keepAliveMsecs: 1000,
keepAlive: true,
maxSockets: Infinity,
maxFreeSockets: 256,
scheduling: 'lifo',
maxTotalSockets: Infinity,
totalSocketCount: 0,
[Symbol(kCapture)]: false
}
Agent {
_events: [Object: null prototype] {
free: [Function (anonymous)],
newListener: [Function: maybeEnableKeylog]
},
_eventsCount: 2,
_maxListeners: undefined,
defaultPort: 443,
protocol: 'https:',
options: [Object: null prototype] {
keepAlive: true,
scheduling: 'lifo',
timeout: 5000,
noDelay: true,
path: null
},
requests: [Object: null prototype] {},
sockets: [Object: null prototype] {},
freeSockets: [Object: null prototype] {},
keepAliveMsecs: 1000,
keepAlive: true,
maxSockets: Infinity,
maxFreeSockets: 256,
scheduling: 'lifo',
maxTotalSockets: Infinity,
totalSocketCount: 0,
maxCachedSessions: 100,
_sessionCache: { map: {}, list: [] },
[Symbol(kCapture)]: false
}로그인 후 복사
라인 14, 16, 42 및 44는 keepAlive의 기본값과 시간을 설정합니다. keepAlive를 활성화하면 연결을 재사용하고 네트워크 처리량을 향상시킬 수 있습니다. 또한 서버는 % nvm use 16
Now using node v16.0.0 (npm v7.10.0)
% node server
Agent {
_events: [Object: null prototype] {
free: [Function (anonymous)],
newListener: [Function: maybeEnableKeylog]
},
_eventsCount: 2,
_maxListeners: undefined,
defaultPort: 80,
protocol: 'http:',
options: [Object: null prototype] { path: null },
requests: [Object: null prototype] {},
sockets: [Object: null prototype] {},
freeSockets: [Object: null prototype] {},
keepAliveMsecs: 1000,
keepAlive : false,
maxSockets: Infinity,
maxFreeSockets: 256,
scheduling: 'lifo',
maxTotalSockets: Infinity,
totalSocketCount: 0,
[Symbol(kCapture)]: false
}
Agent {
_events: [Object: null prototype] {
free: [Function (anonymous)],
newListener: [Function: maybeEnableKeylog]
},
_eventsCount: 2,
_maxListeners: undefined,
defaultPort: 443,
protocol: 'https:',
options: [Object: null prototype] { path: null },
requests: [Object: null prototype] {},
sockets: [Object: null prototype] {},
freeSockets: [Object: null prototype] {},
keepAliveMsecs: 1000,
keepAlive: false,
maxSockets: Infinity,
maxFreeSockets: 256,
scheduling: 'lifo',
maxTotalSockets: Infinity,
totalSocketCount: 0,
maxCachedSessions: 100,
_sessionCache: { map: {}, list: [] },
[Symbol(kCapture)]: false
}% nvm use 19
Now using node v19.0.0 (npm v8.19.2)
% node server
Agent {
_events: [Object: null prototype] {
free: [Function (anonymous)],
newListener: [Function: maybeEnableKeylog]
},
_eventsCount: 2,
_maxListeners: undefined,
defaultPort: 80,
protocol: 'http:',
options: [Object: null prototype] {
keepAlive: true,
scheduling: 'lifo',
timeout: 5000,
noDelay: true,
path: null
},
requests: [Object: null prototype] {},
sockets: [Object: null prototype] {},
freeSockets: [Object: null prototype] {},
keepAliveMsecs: 1000,
keepAlive: true,
maxSockets: Infinity,
maxFreeSockets: 256,
scheduling: 'lifo',
maxTotalSockets: Infinity,
totalSocketCount: 0,
[Symbol(kCapture)]: false
}
Agent {
_events: [Object: null prototype] {
free: [Function (anonymous)],
newListener: [Function: maybeEnableKeylog]
},
_eventsCount: 2,
_maxListeners: undefined,
defaultPort: 443,
protocol: 'https:',
options: [Object: null prototype] {
keepAlive: true,
scheduling: 'lifo',
timeout: 5000,
noDelay: true,
path: null
},
requests: [Object: null prototype] {},
sockets: [Object: null prototype] {},
freeSockets: [Object: null prototype] {},
keepAliveMsecs: 1000,
keepAlive: true,
maxSockets: Infinity,
maxFreeSockets: 256,
scheduling: 'lifo',
maxTotalSockets: Infinity,
totalSocketCount: 0,
maxCachedSessions: 100,
_sessionCache: { map: {}, list: [] },
[Symbol(kCapture)]: false
}http(s).Server.close API를 사용하여 내부적으로 구현되는 close()를 호출할 때 유휴 클라이언트의 연결을 자동으로 끊습니다. 이러한 수정으로 인해 경험과 성능이 더욱 최적화되었습니다. - 2. 안정적인 WebCrypto API
WebCrypto API는 암호화를 사용하여 구축된 시스템 인터페이스로 node.js v19에서 안정적인 경향이 있습니다(Ed25519, Ed448, X25519 제외). X448 제외).
const { subtle } = globalThis.crypto;

(async function() {

  const key = await subtle.generateKey({
    name: 'HMAC',
    hash: 'SHA-256',
    length: 256
  }, true, ['sign', 'verify']);

  console.log('key =', key);

  const enc = new TextEncoder();
  const message = enc.encode('I love cupcakes');

  console.log('message =', message);

  const digest = await subtle.sign({
    name: 'HMAC'
  }, key, message);

  console.log('digest =', digest);

})();
로그인 후 복사먼저 메시지 데이터 무결성과 신뢰성을 확인하는 데 사용할 수 있는 HMAC 키를 생성합니다.
globalThis.crypto 또는 require('node:crypto').webcrypto를 호출하여 액세스할 수 있습니다. 다음은 미묘한 암호화입니다. 함수: 예 그런 다음 I love cupcakes 문자열을 암호화합니다.
마지막으로 메시지 다이제스트를 만듭니다.
콘솔에 표시: 키, 메시지, 다이제스트 정보close() 自动断开空闲的客户端,内部依靠 http(s).Server.close API 实现;
这些修改,进一步优化了体验和性能。
2. 稳定的 WebCrypto API
WebCrypto API 是一个使用密码学构建的系统接口,在 node.js v19 趋于稳定(除 Ed25519、Ed448、X25519、X448 外)。
我们可以通过调用 globalThis.crypto 或 require('node:crypto').webcrypto 来访问,下面以 subtle 加密函数为例;
% node server
key = CryptoKey {
  type: 'secret',
  extractable: true,
  algorithm: { name: 'HMAC', length: 256, hash: [Object] },
  usages: [ 'sign', 'verify' ]
}
message = Uint8Array(15) [   73, 32, 108, 111, 118,  101, 32,  99, 117, 112,   99, 97, 107, 101, 115]
digest = ArrayBuffer {
  [Uint8Contents]: <30 01 7a 5c d9 e2 82 55 6b 55 90 4f 1d de 36 d7 89 dd fb fb 1a 9e a0 cc 5d d8 49 13 38 2f d1 bc>,
  byteLength: 32
}首先生成 HMAC 密钥,生成的密钥可同时用于验证消息数据完整性和真实性;
然后,对字符串 I love cupcakes 加密;
最后创建 消息摘要,它是一种加密散列函数;
在控制台显示:key 、message 、digest 信息
git clone https://github.com/nodejs/loaders-test.git

% cd loaders-test/commonjs-extension-resolution-loader

% yarn install
3. 自定义 ESM resolution 调整
Node.js 已经删除 --experimental-specifier-resolution ,其功能现在可以通过自定义加载器实现。
可以在这个库中测试:nodejs/loaders-test: Examples demonstrating the Node.js ECMAScript Modules Loaders API
import { version } from 'process';

import { valueInFile } from './file';
import { valueInFolderIndex } from './folder';

console.log(valueInFile);
console.log(valueInFolderIndex);比如 loaders-test/commonjs-extension-resolution-loader/test/basic-fixtures/index.js 文件:
import { isBuiltin } from 'node:module';
import { dirname } from 'node:path';
import { cwd } from 'node:process';
import { fileURLToPath, pathToFileURL } from 'node:url';
import { promisify } from 'node:util';

import resolveCallback from 'resolve/async.js';

const resolveAsync = promisify(resolveCallback);

const baseURL = pathToFileURL(cwd() + '/').href;


export async function resolve(specifier, context, next) {
  const { parentURL = baseURL } = context;

  if (isBuiltin(specifier)) {
    return next(specifier, context);
  }

  // `resolveAsync` works with paths, not URLs
  if (specifier.startsWith('file://')) {
    specifier = fileURLToPath(specifier);
  }
  const parentPath = fileURLToPath(parentURL);

  let url;
  try {
    const resolution = await resolveAsync(specifier, {
      basedir: dirname(parentPath),
      // For whatever reason, --experimental-specifier-resolution=node doesn't search for .mjs extensions
      // but it does search for index.mjs files within directories
      extensions: ['.js', '.json', '.node', '.mjs'],
    });
    url = pathToFileURL(resolution).href;
  } catch (error) {
    if (error.code === 'MODULE_NOT_FOUND') {
      // Match Node's error code
      error.code = 'ERR_MODULE_NOT_FOUND';
    }
    throw error;
  }

  return next(url, context);
}./file 如果没有自定义加载器,不会去查找文件的扩展名,比如 ./file.js 或 ./file.mjs
% node --loader=./loader.js test/basic-fixtures/index
(node:56149) ExperimentalWarning: Custom ESM Loaders is an experimental feature. This feature could change at any time
(Use `node --trace-warnings ...` to show where the warning was created)
hello from file.js
3. ESM 해상도 조정 사용자 정의
Node.js가 제거되었습니다. --experimental-specifier-solution 및 해당 기능은 이제 사용자 정의 로더를 통해 사용할 수 있습니다.
이 라이브러리에서 테스트할 수 있습니다: nodejs/loaders-test: Node.js ECMAScript 모듈 로더 API
Intl.NumberFormat(locales, options)
로그인 후 복사를 보여주는 예(예: loaders-test/commonjs-extension-solution-) loader /test/basic-fixtures/index.js 파일: const number = 123456.789;
console.log(new Intl.NumberFormat('de-DE', { style: 'currency', currency: 'EUR' }).format(number));
console.log(new Intl.NumberFormat('ja-JP', { style: 'currency', currency: 'JPY' }).format(number));
console.log(new Intl.NumberFormat('ar-SA', { style: 'currency', currency: 'EGP' }).format(number));
console.log(new Intl.NumberFormat('zh-CN', { style: 'currency', currency: 'CNY' }).format(number));로그인 후 복사
Intl.NumberFormat(locales, options)
const number = 123456.789;

console.log(new Intl.NumberFormat('de-DE', { style: 'currency', currency: 'EUR' }).format(number));
console.log(new Intl.NumberFormat('ja-JP', { style: 'currency', currency: 'JPY' }).format(number));
console.log(new Intl.NumberFormat('ar-SA', { style: 'currency', currency: 'EGP' }).format(number));
console.log(new Intl.NumberFormat('zh-CN', { style: 'currency', currency: 'CNY' }).format(number));./file 사용자 정의 로더가 없으면 와 같은 파일 확장자가 검색되지 않습니다. . /file.js 또는 ./file.mjs사용자 정의 로더를 설정한 후 위의 문제를 해결할 수 있습니다: const express = require("express");
const path = require("path");
const app = express();
app.use(express.static(path.join(__dirname, "../build")));
app.listen(8080, () =>
console.log("Express server is running on localhost:8080")
);% node --watch server (node:67643) ExperimentalWarning: Watch mode is an experimental feature. This feature could change at any time (Use `node --trace-warnings ...` to show where the warning was created) Express server is running on localhost:8080
4. DTrace/SystemTap/ETW에 대한 지원이 제거되었습니다.
Node.js v19에서는 주로 리소스 우선순위 문제로 인해 DTrace/SystemTap/ETW에 대한 지원이 제거되었습니다. 데이터에 따르면 DTrace, SystemTap 또는 ETW를 사용하는 사람은 거의 없으며 이를 유지하는 데 큰 의미가 없습니다. 사용을 재개하려면 문제를 제기할 수 있습니다 =>github.com/nodejs/node… 10.7에는 민감한 숫자의 형식을 지정하기 위한 새로운 함수 Intl.NumberFormat이 포함되어 있습니다. rrreee다른 언어의 경우 다른 로케일을 전달하세요.
rrreee6. Node 감시 모드 실험🎜🎜🎜실행 시 node --watch 옵션이 추가됩니다. 🎜在 "watch" 模式下运行,当导入的文件被改变时,会重新启动进程。
比如:
const express = require("express");
const path = require("path");
const app = express();
app.use(express.static(path.join(__dirname, "../build")));

app.listen(8080, () =>
  console.log("Express server is running on localhost:8080")
);% node --watch server (node:67643) ExperimentalWarning: Watch mode is an experimental feature. This feature could change at any time (Use `node --trace-warnings ...` to show where the warning was created) Express server is running on localhost:8080
Node.js 14 将在 2023 年 4 月结束更新维护,Node.js 16 (LTS) 预计将在 2023 年 9 月结束更新维护。
建议大家开始计划将版本按需升级到 Node.js 16(LTS)或 Node.js 18(LTS)。
更多node相关知识,请访问:nodejs 教程!
위 내용은 Node.js 19가 공식적으로 출시되었습니다. Node.js의 6가지 주요 기능에 대해 이야기해 보겠습니다!의 상세 내용입니다. 자세한 내용은 PHP 중국어 웹사이트의 기타 관련 기사를 참조하세요!

핫 AI 도구

Undresser.AI Undress
사실적인 누드 사진을 만들기 위한 AI 기반 앱

AI Clothes Remover
사진에서 옷을 제거하는 온라인 AI 도구입니다.

Undress AI Tool
무료로 이미지를 벗다

Clothoff.io
AI 옷 제거제

AI Hentai Generator
AI Hentai를 무료로 생성하십시오.

인기 기사
뜨거운 도구

메모장++7.3.1
사용하기 쉬운 무료 코드 편집기

SublimeText3 중국어 버전
중국어 버전, 사용하기 매우 쉽습니다.

스튜디오 13.0.1 보내기
강력한 PHP 통합 개발 환경

드림위버 CS6
시각적 웹 개발 도구

SublimeText3 Mac 버전
신 수준의 코드 편집 소프트웨어(SublimeText3)
뜨거운 주제
 7481
7481
 15
1377
52
77
11
51
19
19
33
15
1377
52
77
11
51
19
19
33

 PHP와 Vue: 프런트엔드 개발 도구의 완벽한 조합
Mar 16, 2024 pm 12:09 PM
PHP와 Vue: 프런트엔드 개발 도구의 완벽한 조합
Mar 16, 2024 pm 12:09 PM
PHP와 Vue: 프론트엔드 개발 도구의 완벽한 조합 오늘날 인터넷이 빠르게 발전하는 시대에 프론트엔드 개발은 점점 더 중요해지고 있습니다. 사용자가 웹 사이트 및 애플리케이션 경험에 대한 요구 사항이 점점 더 높아짐에 따라 프런트 엔드 개발자는 보다 효율적이고 유연한 도구를 사용하여 반응형 및 대화형 인터페이스를 만들어야 합니다. 프론트엔드 개발 분야의 두 가지 중요한 기술인 PHP와 Vue.js는 함께 사용하면 완벽한 도구라고 볼 수 있습니다. 이 기사에서는 독자가 이 두 가지를 더 잘 이해하고 적용할 수 있도록 PHP와 Vue의 조합과 자세한 코드 예제를 살펴보겠습니다.
 프론트엔드 면접관이 자주 묻는 질문
Mar 19, 2024 pm 02:24 PM
프론트엔드 면접관이 자주 묻는 질문
Mar 19, 2024 pm 02:24 PM
프론트엔드 개발 인터뷰에서 일반적인 질문은 HTML/CSS 기초, JavaScript 기초, 프레임워크 및 라이브러리, 프로젝트 경험, 알고리즘 및 데이터 구조, 성능 최적화, 크로스 도메인 요청, 프론트엔드 엔지니어링, 디자인 패턴, 새로운 기술 및 트렌드. 면접관 질문은 후보자의 기술적 능력, 프로젝트 경험, 업계 동향에 대한 이해를 평가하기 위해 고안되었습니다. 따라서 지원자는 자신의 능력과 전문성을 입증할 수 있도록 해당 분야에 대한 충분한 준비를 갖추어야 합니다.
 간단한 JavaScript 튜토리얼: HTTP 상태 코드를 얻는 방법
Jan 05, 2024 pm 06:08 PM
간단한 JavaScript 튜토리얼: HTTP 상태 코드를 얻는 방법
Jan 05, 2024 pm 06:08 PM
JavaScript 튜토리얼: HTTP 상태 코드를 얻는 방법, 특정 코드 예제가 필요합니다. 서문: 웹 개발에서는 서버와의 데이터 상호 작용이 종종 포함됩니다. 서버와 통신할 때 반환된 HTTP 상태 코드를 가져와서 작업의 성공 여부를 확인하고 다양한 상태 코드에 따라 해당 처리를 수행해야 하는 경우가 많습니다. 이 기사에서는 JavaScript를 사용하여 HTTP 상태 코드를 얻는 방법과 몇 가지 실용적인 코드 예제를 제공합니다. XMLHttpRequest 사용
 Django는 프론트엔드인가요, 백엔드인가요? 확인 해봐!
Jan 19, 2024 am 08:37 AM
Django는 프론트엔드인가요, 백엔드인가요? 확인 해봐!
Jan 19, 2024 am 08:37 AM
Django는 빠른 개발과 깔끔한 방법을 강조하는 Python으로 작성된 웹 애플리케이션 프레임워크입니다. Django는 웹 프레임워크이지만 Django가 프런트엔드인지 백엔드인지에 대한 질문에 답하려면 프런트엔드와 백엔드의 개념에 대한 깊은 이해가 필요합니다. 프론트엔드는 사용자가 직접 상호작용하는 인터페이스를 의미하고, 백엔드는 HTTP 프로토콜을 통해 데이터와 상호작용하는 서버측 프로그램을 의미합니다. 프론트엔드와 백엔드가 분리되면 프론트엔드와 백엔드 프로그램을 독립적으로 개발하여 각각 비즈니스 로직과 인터랙티브 효과, 데이터 교환을 구현할 수 있습니다.
 Go 언어 프런트엔드 기술 탐색: 프런트엔드 개발을 위한 새로운 비전
Mar 28, 2024 pm 01:06 PM
Go 언어 프런트엔드 기술 탐색: 프런트엔드 개발을 위한 새로운 비전
Mar 28, 2024 pm 01:06 PM
빠르고 효율적인 프로그래밍 언어인 Go 언어는 백엔드 개발 분야에서 널리 사용됩니다. 그러나 Go 언어를 프런트엔드 개발과 연관시키는 사람은 거의 없습니다. 실제로 프런트엔드 개발에 Go 언어를 사용하면 효율성이 향상될 뿐만 아니라 개발자에게 새로운 지평을 열어줄 수도 있습니다. 이 기사에서는 프런트엔드 개발에 Go 언어를 사용할 수 있는 가능성을 살펴보고 독자가 이 영역을 더 잘 이해할 수 있도록 구체적인 코드 예제를 제공합니다. 전통적인 프런트엔드 개발에서는 사용자 인터페이스를 구축하기 위해 JavaScript, HTML, CSS를 사용하는 경우가 많습니다.
 Golang과 프런트엔드 기술의 결합: Golang이 프런트엔드 분야에서 어떤 역할을 하는지 살펴보세요.
Mar 19, 2024 pm 06:15 PM
Golang과 프런트엔드 기술의 결합: Golang이 프런트엔드 분야에서 어떤 역할을 하는지 살펴보세요.
Mar 19, 2024 pm 06:15 PM
Golang과 프런트엔드 기술의 결합: Golang이 프런트엔드 분야에서 어떤 역할을 하는지 살펴보려면 구체적인 코드 예제가 필요합니다. 인터넷과 모바일 애플리케이션의 급속한 발전으로 인해 프런트엔드 기술이 점점 더 중요해지고 있습니다. 이 분야에서는 강력한 백엔드 프로그래밍 언어인 Golang도 중요한 역할을 할 수 있습니다. 이 기사에서는 Golang이 프런트엔드 기술과 어떻게 결합되는지 살펴보고 특정 코드 예제를 통해 프런트엔드 분야에서의 잠재력을 보여줍니다. 프론트엔드 분야에서 Golang의 역할은 효율적이고 간결하며 배우기 쉬운 것입니다.
 JavaScript에서 HTTP 상태 코드를 쉽게 얻는 방법
Jan 05, 2024 pm 01:37 PM
JavaScript에서 HTTP 상태 코드를 쉽게 얻는 방법
Jan 05, 2024 pm 01:37 PM
JavaScript에서 HTTP 상태 코드를 얻는 방법 소개: 프런트 엔드 개발에서 우리는 종종 백엔드 인터페이스와의 상호 작용을 처리해야 하며 HTTP 상태 코드는 매우 중요한 부분입니다. HTTP 상태 코드를 이해하고 얻는 것은 인터페이스에서 반환된 데이터를 더 잘 처리하는 데 도움이 됩니다. 이 기사에서는 JavaScript를 사용하여 HTTP 상태 코드를 얻는 방법을 소개하고 구체적인 코드 예제를 제공합니다. 1. HTTP 상태 코드란 무엇입니까? HTTP 상태 코드는 브라우저가 서버에 요청을 시작할 때 서비스가
 Django: 프론트엔드와 백엔드 개발을 모두 처리할 수 있는 마법의 프레임워크!
Jan 19, 2024 am 08:52 AM
Django: 프론트엔드와 백엔드 개발을 모두 처리할 수 있는 마법의 프레임워크!
Jan 19, 2024 am 08:52 AM
Django: 프론트엔드와 백엔드 개발을 모두 처리할 수 있는 마법의 프레임워크! Django는 효율적이고 확장 가능한 웹 애플리케이션 프레임워크입니다. MVC, MTV를 포함한 다양한 웹 개발 모델을 지원할 수 있으며 고품질 웹 애플리케이션을 쉽게 개발할 수 있습니다. Django는 백엔드 개발을 지원할 뿐만 아니라 프런트엔드 인터페이스를 빠르게 구축하고 템플릿 언어를 통해 유연한 뷰 표시를 구현할 수 있습니다. Django는 프론트엔드 개발과 백엔드 개발을 완벽한 통합으로 결합하므로 개발자가 전문적으로 학습할 필요가 없습니다.
