Python 사무 자동화의 상위 10가지 시나리오를 알고 계십니까?
프로그래밍 세계에서 Python은 이미 진정한 인터넷 유명 인사입니다. 한번은 중국어를 공부하는 한 대학원생이 저에게 Python을 배우는 방법을 물었습니다. 수업에서 텍스트 분석을 사용하고 Python을 사용하여 데이터를 실행해야 했기 때문입니다. 이틀 안에 문법을 읽으면 작업을 시작할 수 있다고 말했습니다. 방법을 모르면 정보를 찾아보면 됩니다. 나중에 이 동급생은 Python을 사용하여 반달 만에 종이 데이터를 완성했습니다.
그래서 Python의 가장 큰 장점은 배우기 쉽다는 점이며, Java나 C++에 비해 임계값이 훨씬 낮아 프로그래머가 아닌 사람도 코드 작업을 할 수 있는 가능성을 제공합니다. 물론 Python은 배우기 쉬울 뿐만 아니라 Python이 각계각층에 걸쳐 수천 개의 툴킷을 보유하고 있기 때문에 널리 사용되는 프로그래밍 도구가 될 수 있습니다.

공공기관의 일반적인 예 10개 이상을 꼽자면 Python이 이를 효율적으로 처리할 수 있습니다.
1. Python은 Excel 데이터를 처리합니다
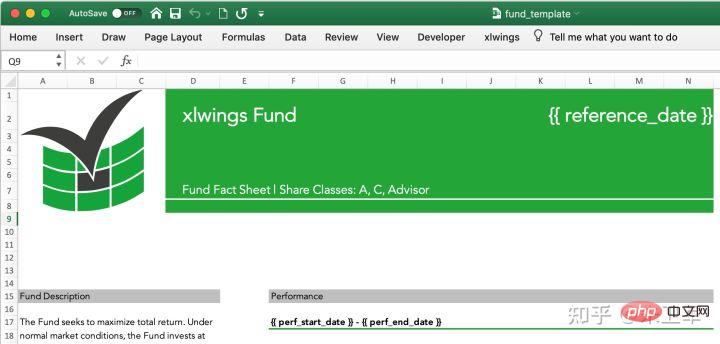
Pandas, xlwings, openpyxl 및 기타 패키지를 사용하여 Excel에서 추가, 삭제, 수정, 확인, 서식 지정 등을 수행할 수 있습니다. Python 기능을 사용하여 Excel 데이터를 분석할 수도 있습니다.

엑셀 표 읽기:
import xlwings as xw
wb = xw.Book()# this will create a new workbook
wb = xw.Book('FileName.xlsx')# connect to a file that is open or in the current working directory
wb = xw.Book(r'C:pathtofile.xlsx')# on Windows: use raw strings to escape backslashesmatplotlib 그리기를 엑셀 표로 작성:
import matplotlib.pyplot as plt
import xlwings as xw

fig = plt.figure()
plt.plot([1, 2, 3])

sheet = xw.Book().sheets[0]
sheet.pictures.add(fig, name='MyPlot', update=True)

2. Python은 PDF 텍스트를 처리합니다
PDF는 거의 가장 일반적인 텍스트 형식입니다. 많은 사람들이 PDF 만들기, 텍스트 가져오기, 사진 가져오기, 테이블 가져오기 등 PDF 처리에 대한 다양한 요구 사항이 있습니다. 이러한 요구 사항을 쉽게 충족할 수 있는 PyPDF, pdfplumber, ReportLab 및 PyMuPDF와 같은 Python 패키지가 있습니다.

PDF 텍스트 추출:
import PyPDF2
pdfFile = open('example.pdf','rb')
pdfReader = PyPDF2.PdfFileReader(pdfFile)
print(pdfReader.numPages)
page = pdfReader.getPage(0)
print(page.extractText())
pdfFile.close()PDF 테이블 추출:
# 提取pdf表格
import pdfplumber
with pdfplumber.open("example.pdf") as pdf:
page01 = pdf.pages[0] #指定页码
table1 = page01.extract_table()#提取单个表格
# table2 = page01.extract_tables()#提取多个表格
print(table1)3. Python 처리 이메일
Python에서는 이메일 자동 전송을 실현하기 위해 이메일 라이브러리와 함께 smtplib를 사용할 수 있습니다. 매우 편리합니다.
import smtplib
import email
# 负责将多个对象集合起来
from email.mime.multipart import MIMEMultipart
from email.header import Header
# SMTP服务器,这里使用163邮箱
mail_host = "smtp.163.com"
# 发件人邮箱
mail_sender = "******@163.com"
# 邮箱授权码,注意这里不是邮箱密码,如何获取邮箱授权码,请看本文最后教程
mail_license = "********"
# 收件人邮箱,可以为多个收件人
mail_receivers = ["******@qq.com","******@outlook.com"]
mm = MIMEMultipart('related')
# 邮件正文内容
body_content = """你好,这是一个测试邮件!"""
# 构造文本,参数1:正文内容,参数2:文本格式,参数3:编码方式
message_text = MIMEText(body_content,"plain","utf-8")
# 向MIMEMultipart对象中添加文本对象
mm.attach(message_text)
# 创建SMTP对象
stp = smtplib.SMTP()
# 设置发件人邮箱的域名和端口,端口地址为25
stp.connect(mail_host, 25)
# set_debuglevel(1)可以打印出和SMTP服务器交互的所有信息
stp.set_debuglevel(1)
# 登录邮箱,传递参数1:邮箱地址,参数2:邮箱授权码
stp.login(mail_sender,mail_license)
# 发送邮件,传递参数1:发件人邮箱地址,参数2:收件人邮箱地址,参数3:把邮件内容格式改为str
stp.sendmail(mail_sender, mail_receivers, mm.as_string())
print("邮件发送成功")
# 关闭SMTP对象
stp.quit()4. Python이 데이터베이스를 처리합니다
데이터베이스는 일반적으로 사용되는 사무용 애플리케이션입니다. Python에는 데이터베이스의 추가, 삭제, 수정 및 운영 관리를 지원하는 다양한 데이터베이스 드라이버 인터페이스 패키지가 있습니다. 예를 들어, pymysql 패키지는 MySQL에 해당하고, psycopg2 패키지는 PostgreSQL에 해당하고, pymssql 패키지는 sqlserver에 해당하고, cxoracle 패키지는 Oracle에 해당하고, PyMongo 패키지는 MongoDB에 해당합니다.
MySQL에 대한 연결 쿼리
import pymysql
# 打开数据库连接
db = pymysql.connect(host='localhost',
 user='testuser',
 password='test123',
 database='TESTDB')
# 使用 cursor() 方法创建一个游标对象 cursor
cursor = db.cursor()
# 使用 execute()方法执行 SQL 查询
cursor.execute("SELECT VERSION()")
# 使用 fetchone() 方法获取单条数据.
data = cursor.fetchone()
print ("Database version : %s " % data)
# 关闭数据库连接
db.close()5. 배치 파일을 처리하는 Python
많은 사무실 시나리오에서 파일의 배치 처리는 항상 지저분한 작업이었으며 Python은 불행. Python에는 sys, os, quitil, glob, path.py 등과 같은 시스템 파일 처리를 위한 많은 패키지가 있습니다.
다른 폴더에서 동일한 이름을 가진 폴더 일괄 삭제:
import os,shutil
import sys
import numpy as np
def arrange_file(dir_path0):
for dirpath,dirnames,filenames in os.walk(dir_path0):
if 'my_result' in dirpath:
# print(dirpath)
shutil.rmtree(dirpath)
파일 접미사 이름 일괄 수정:
import os
def file_rename():
path = input("请输入你需要修改的目录(格式如'F:\test'):")
old_suffix = input('请输入你需要修改的后缀(需要加点.):')
new_suffix = input('请输入你要改成的后缀(需要加点.):')
file_list = os.listdir(path)
for file in file_list:
old_dir = os.path.join(path, file)
print('当前文件:', file)
if os.path.isdir(old_dir):
continue
if old_suffix != os.path.splitext(file)[1]:
continue
filename = os.path.splitext(file)[0]
new_dir = os.path.join(path, filename + new_suffix)
os.rename(old_dir, new_dir)
if __name__ == '__main__':
file_rename()6. Python 제어 마우스
이것은 많은 사람들이 자동 제어를 실현해야 합니다. 마우스 제어 및 소프트웨어 테스트와 같은 일부 조립 라인 작업을 수행합니다.
Python에는 마우스를 임의로 제어할 수 있는 pyautogui 라이브러리가 있습니다.
마우스 왼쪽 클릭/오른쪽 클릭/더블 클릭 제어 및 소스 코드 테스트:
# 获取鼠标位置
import pyautogui as pg
try:
while True:
x, y = pg.position()
print(str(x) + " " + str(y))#输出鼠标位置

if 1746 < x < 1800 and 2 < y < 33:
pg.click()#左键单击
if 1200 < x < 1270 and 600 < y < 620:
pg.click(button='right')#右键单击
if 1646 < x < 1700 and 2 < y < 33:
pg.doubleClick()#左键双击
except KeyboardInterrupt:
print("n")7、Python控制键盘
同样的,Python也可以通过pyautogui控制键盘。
键盘写入:
import pyautogui
#typewrite()无法输入中文内容,中英文混合的只能输入英文
#interval设置文本输入速度,默认值为0
pyautogui.typewrite('你好,world!',interval=0.5)8、Python压缩文件
压缩文件是办公中常见的操作,一般压缩会使用压缩软件,需要手动操作。
Python中有很多包支持文件压缩,可以让你自动化压缩或者解压缩本地文件,或者将内存中的分析结果进行打包。比如zipfile、zlib、tarfile等可以实现对.zip、.rar、.7z等压缩文件格式的操作。
压缩文件:
import zipfile
try:
with zipfile.ZipFile("c://test.zip",mode="w") as f:
f.write("c://test.txt")#写入压缩文件,会把压缩文件中的原有覆盖
except Exception as e:
print("异常对象的类型是:%s"%type(e))
print("异常对象的内容是:%s"%e)
finally:
f.close()解压文件:
import zipfile
try:
with zipfile.ZipFile("c://test.zip",mode="a") as f:
 f.extractall("c://",pwd=b"root") ##将文件解压到指定目录,解压密码为root
except Exception as e:
 print("异常对象的类型是:%s"%type(e))
 print("异常对象的内容是:%s"%e)
finally:
f.close()9、Python爬取网络数据
python爬虫应该是最受欢迎的功能,也是广大Python爱好者们入坑的主要的原因。
Python中有非常多的包支持爬虫,而爬虫包又分为抓取、解析两种。
比如说requests、urllib这种是网络数据请求工具,也就是抓取包;xpath、re、bs4这种会对抓取下来的网页内容进行解析,称为解析包。
爬取百度首页图片,并保存到本地:
# 导入urlopen
from urllib.request import urlopen
# 导入BeautifulSoup
from bs4 import BeautifulSoup as bf
# 导入urlretrieve函数,用于下载图片
from urllib.request import urlretrieve
# 请求获取HTML
html = urlopen("http://www.baidu.com/")
# 用BeautifulSoup解析html
obj = bf(html.read(),'html.parser')
# 从标签head、title里提取标题
title = obj.head.title
# 只提取logo图片的信息
logo_pic_info = obj.find_all('img',class_="index-logo-src")
# 提取logo图片的链接
logo_url = "https:"+logo_pic_info[0]['src']
# 使用urlretrieve下载图片
urlretrieve(logo_url, 'logo.png')10、Python处理图片图表
图片处理、图表可视化涉及到图像处理,这也是Python的强项,现在诸如图像识别、计算机视觉等前沿领域也都会用到Python。
在Python中处理图像的包有scikit Image、PIL、OpenCV等,处理图表的包有matplotlib、plotly、seaborn等。
对图片进行黑白化处理:
from PIL import Image
from PIL import ImageEnhance
img_main = Image.open(u'E:/login1.png')
img_main = img_main.convert('L')
threshold1 = 138
table1 = []
for i in range(256):
if i < threshold1:
table1.append(0)
else:
table1.append(1)
img_main = img_main.point(table1, "1")
img_main.save(u'E:/login3.png')生成统计图表:
import numpy as np
import matplotlib.pyplot as plt
N = 5
menMeans = (20, 35, 30, 35, 27)
womenMeans = (25, 32, 34, 20, 25)
menStd = (2, 3, 4, 1, 2)
womenStd = (3, 5, 2, 3, 3)
ind = np.arange(N)# the x locations for the groups
width = 0.35 # the width of the bars: can also be len(x) sequence
p1 = plt.bar(ind, menMeans, width, yerr=menStd)
p2 = plt.bar(ind, womenMeans, width,
 bottom=menMeans, yerr=womenStd)
plt.ylabel('Scores')
plt.title('Scores by group and gender')
plt.xticks(ind, ('G1', 'G2', 'G3', 'G4', 'G5'))
plt.yticks(np.arange(0, 81, 10))
plt.legend((p1[0], p2[0]), ('Men', 'Women'))
plt.show()小结
总之Python会成为大众化的编程语言,帮助到更多需要的人。
위 내용은 Python 사무 자동화의 상위 10가지 시나리오를 알고 계십니까?의 상세 내용입니다. 자세한 내용은 PHP 중국어 웹사이트의 기타 관련 기사를 참조하세요!

핫 AI 도구

Undresser.AI Undress
사실적인 누드 사진을 만들기 위한 AI 기반 앱

AI Clothes Remover
사진에서 옷을 제거하는 온라인 AI 도구입니다.

Undress AI Tool
무료로 이미지를 벗다

Clothoff.io
AI 옷 제거제

AI Hentai Generator
AI Hentai를 무료로 생성하십시오.

인기 기사

뜨거운 도구

메모장++7.3.1
사용하기 쉬운 무료 코드 편집기

SublimeText3 중국어 버전
중국어 버전, 사용하기 매우 쉽습니다.

스튜디오 13.0.1 보내기
강력한 PHP 통합 개발 환경

드림위버 CS6
시각적 웹 개발 도구

SublimeText3 Mac 버전
신 수준의 코드 편집 소프트웨어(SublimeText3)

뜨거운 주제
 7461
7461
 15
15
 1376
1376
 52
52
 77
77
 11
11
 44
44
 19
19
 17
17
 17
17
 PS가 계속 로딩을 보여주는 이유는 무엇입니까?
Apr 06, 2025 pm 06:39 PM
PS "로드"문제는 자원 액세스 또는 처리 문제로 인한 것입니다. 하드 디스크 판독 속도는 느리거나 나쁘다 : CrystalDiskinfo를 사용하여 하드 디스크 건강을 확인하고 문제가있는 하드 디스크를 교체하십시오. 불충분 한 메모리 : 고해상도 이미지 및 복잡한 레이어 처리에 대한 PS의 요구를 충족시키기 위해 메모리 업그레이드 메모리. 그래픽 카드 드라이버는 구식 또는 손상됩니다. 운전자를 업데이트하여 PS와 그래픽 카드 간의 통신을 최적화하십시오. 파일 경로는 너무 길거나 파일 이름에는 특수 문자가 있습니다. 짧은 경로를 사용하고 특수 문자를 피하십시오. PS 자체 문제 : PS 설치 프로그램을 다시 설치하거나 수리하십시오.
 PS가 파일을 열 때로드 문제를 해결하는 방법은 무엇입니까?
Apr 06, 2025 pm 06:33 PM
"로드"는 PS에서 파일을 열 때 말더듬이 발생합니다. 그 이유에는 너무 크거나 손상된 파일, 메모리 불충분, 하드 디스크 속도가 느리게, 그래픽 카드 드라이버 문제, PS 버전 또는 플러그인 충돌이 포함될 수 있습니다. 솔루션은 다음과 같습니다. 파일 크기 및 무결성 확인, 메모리 증가, 하드 디스크 업그레이드, 그래픽 카드 드라이버 업데이트, 의심스러운 플러그인 제거 또는 비활성화 및 PS를 다시 설치하십시오. 이 문제는 PS 성능 설정을 점차적으로 확인하고 잘 활용하고 우수한 파일 관리 습관을 개발함으로써 효과적으로 해결할 수 있습니다.
 PS가 시작될 때 로딩 문제를 해결하는 방법은 무엇입니까?
Apr 06, 2025 pm 06:36 PM
부팅 할 때 "로드"에 PS가 붙어있는 여러 가지 이유로 인해 발생할 수 있습니다. 손상되거나 충돌하는 플러그인을 비활성화합니다. 손상된 구성 파일을 삭제하거나 바꾸십시오. 불충분 한 메모리를 피하기 위해 불필요한 프로그램을 닫거나 메모리를 업그레이드하십시오. 하드 드라이브 독서 속도를 높이기 위해 솔리드 스테이트 드라이브로 업그레이드하십시오. 손상된 시스템 파일 또는 설치 패키지 문제를 복구하기 위해 PS를 다시 설치합니다. 시작 오류 로그 분석의 시작 과정에서 오류 정보를 봅니다.
 설치 후 MySQL을 사용하는 방법
Apr 08, 2025 am 11:48 AM
이 기사는 MySQL 데이터베이스의 작동을 소개합니다. 먼저 MySQLworkBench 또는 명령 줄 클라이언트와 같은 MySQL 클라이언트를 설치해야합니다. 1. MySQL-Uroot-P 명령을 사용하여 서버에 연결하고 루트 계정 암호로 로그인하십시오. 2. CreateABase를 사용하여 데이터베이스를 작성하고 데이터베이스를 선택하십시오. 3. CreateTable을 사용하여 테이블을 만들고 필드 및 데이터 유형을 정의하십시오. 4. InsertInto를 사용하여 데이터를 삽입하고 데이터를 쿼리하고 업데이트를 통해 데이터를 업데이트하고 DELETE를 통해 데이터를 삭제하십시오. 이러한 단계를 마스터하고 일반적인 문제를 처리하는 법을 배우고 데이터베이스 성능을 최적화하면 MySQL을 효율적으로 사용할 수 있습니다.
 PS 페더 링은 어떻게 전환의 부드러움을 제어합니까?
Apr 06, 2025 pm 07:33 PM
깃털 통제의 열쇠는 점진적인 성격을 이해하는 것입니다. PS 자체는 그라디언트 곡선을 직접 제어하는 옵션을 제공하지 않지만 여러 깃털, 일치하는 마스크 및 미세 선택으로 반경 및 구배 소프트를 유연하게 조정하여 자연스럽게 전이 효과를 달성 할 수 있습니다.
 MySQL은 지불해야합니다
Apr 08, 2025 pm 05:36 PM
MySQL에는 무료 커뮤니티 버전과 유료 엔터프라이즈 버전이 있습니다. 커뮤니티 버전은 무료로 사용 및 수정할 수 있지만 지원은 제한되어 있으며 안정성이 낮은 응용 프로그램에 적합하며 기술 기능이 강합니다. Enterprise Edition은 안정적이고 신뢰할 수있는 고성능 데이터베이스가 필요하고 지원 비용을 기꺼이 지불하는 응용 프로그램에 대한 포괄적 인 상업적 지원을 제공합니다. 버전을 선택할 때 고려 된 요소에는 응용 프로그램 중요도, 예산 책정 및 기술 기술이 포함됩니다. 완벽한 옵션은없고 가장 적합한 옵션 만 있으므로 특정 상황에 따라 신중하게 선택해야합니다.
 PS 카드가 로딩 인터페이스에 있으면 어떻게해야합니까?
Apr 06, 2025 pm 06:54 PM
PS 카드의로드 인터페이스는 소프트웨어 자체 (파일 손상 또는 플러그인 충돌), 시스템 환경 (DIFE 드라이버 또는 시스템 파일 손상) 또는 하드웨어 (하드 디스크 손상 또는 메모리 스틱 고장)로 인해 발생할 수 있습니다. 먼저 컴퓨터 자원이 충분한 지 확인하고 배경 프로그램을 닫고 메모리 및 CPU 리소스를 릴리스하십시오. PS 설치를 수정하거나 플러그인의 호환성 문제를 확인하십시오. PS 버전을 업데이트하거나 폴백합니다. 그래픽 카드 드라이버를 확인하고 업데이트하고 시스템 파일 확인을 실행하십시오. 위의 문제를 해결하면 하드 디스크 감지 및 메모리 테스트를 시도 할 수 있습니다.
 PS 페더 링을 설정하는 방법?
Apr 06, 2025 pm 07:36 PM
PS 페더 링은 이미지 가장자리 블러 효과로, 가장자리 영역에서 픽셀의 가중 평균에 의해 달성됩니다. 깃털 반경을 설정하면 흐림 정도를 제어 할 수 있으며 값이 클수록 흐려집니다. 반경을 유연하게 조정하면 이미지와 요구에 따라 효과를 최적화 할 수 있습니다. 예를 들어, 캐릭터 사진을 처리 할 때 더 작은 반경을 사용하여 세부 사항을 유지하고 더 큰 반경을 사용하여 예술을 처리 할 때 흐릿한 느낌을줍니다. 그러나 반경이 너무 커서 가장자리 세부 사항을 쉽게 잃을 수 있으며 너무 작아 효과는 분명하지 않습니다. 깃털 효과는 이미지 해상도의 영향을받으며 이미지 이해 및 효과 파악에 따라 조정해야합니다.


