[정리 및 공유] 인기 있는 React 상태 관리 도구 7가지
![[정리 및 공유] 인기 있는 React 상태 관리 도구 7가지](https://img.php.cn/upload/article/000/000/024/6448f30165876684.jpg)
최근에는 프로젝트 기술 스택을 정리하는 작업을 하고 있습니다.
팀이 점점 더 커지고, 더 많은 사람이 참여하고, 더 많은 프로젝트가 늘어나면서
기술 스택을 통합하는 것은 매우 필요한 일입니다. React 상태 관리 많은 도구가 있지만 실제로 적합한 상태 관리 도구를 선택하는 것이 매우 중요합니다.
오늘 저는 제가 정리한 매우 인기 있는 React 상태 관리를 여러분과 공유하고 싶습니다. 너. 
【 1. Mobx 】
Mobx
MobX는 React와 독립적으로 실행될 수 있지만 일반적으로 함께 사용됩니다. 새로운 버전의 mobx-react-lite 라이브러리는 매우 가볍습니다. 내보낸 관찰자 패키지 구성 요소만 사용하면 됩니다. 
import React from "react"
import ReactDOM from "react-dom"
import { makeAutoObservable } from "mobx"
import { observer } from "mobx-react-lite"

class Timer {
    secondsPassed = 0

    constructor() {
        makeAutoObservable(this)
    }

    increaseTimer() {
        this.secondsPassed += 1
    }
}

const myTimer = new Timer()

//被`observer`包裹的函数式组件会被监听在它每一次调用前发生的任何变化
const TimerView = observer(({ timer }) =>
           <span>Seconds passed: {timer.secondsPassed}
</span>)

ReactDOM.render(<TimerView timer={myTimer} />, document.body)【 2. Redux 】
Redux
Redux도 매우 인기 있는 상태 관리 도구이지만 다른 상태 관리 도구에 비해 물론 Redux를 사용하는 사람들은 Redux를 매우 우아하다고 생각할 것입니다. 
import { createStore } from 'redux'

/**
 * This is a reducer - a function that takes a current state value and an
 * action object describing "what happened", and returns a new state value.
 * A reducer's function signature is: (state, action) => newState
 *
 * The Redux state should contain only plain JS objects, arrays, and primitives.
 * The root state value is usually an object. It's important that you should
 * not mutate the state object, but return a new object if the state changes.
 *
 * You can use any conditional logic you want in a reducer. In this example,
 * we use a switch statement, but it's not required.
 */
function counterReducer(state = { value: 0 }, action) {
  switch (action.type) {
    case 'counter/incremented':
      return { value: state.value + 1 }
    case 'counter/decremented':
      return { value: state.value - 1 }
    default:
      return state
  }
}

// Create a Redux store holding the state of your app.
// Its API is { subscribe, dispatch, getState }.
let store = createStore(counterReducer)

// You can use subscribe() to update the UI in response to state changes.
// Normally you'd use a view binding library (e.g. React Redux) rather than subscribe() directly.
// There may be additional use cases where it's helpful to subscribe as well.

store.subscribe(() => console.log(store.getState()))

// The only way to mutate the internal state is to dispatch an action.
// The actions can be serialized, logged or stored and later replayed.
store.dispatch({ type: 'counter/incremented' })
// {value: 1}
store.dispatch({ type: 'counter/incremented' })
// {value: 2}
store.dispatch({ type: 'counter/decremented' })
// {value: 1}【 3. Rematch 】
Rematch
Rematch는 Redux의 장점을 이어가고 핵심 개념은 여전히 Redux를 기반으로 하지만 Redux에 비해 너무 강력합니다. . 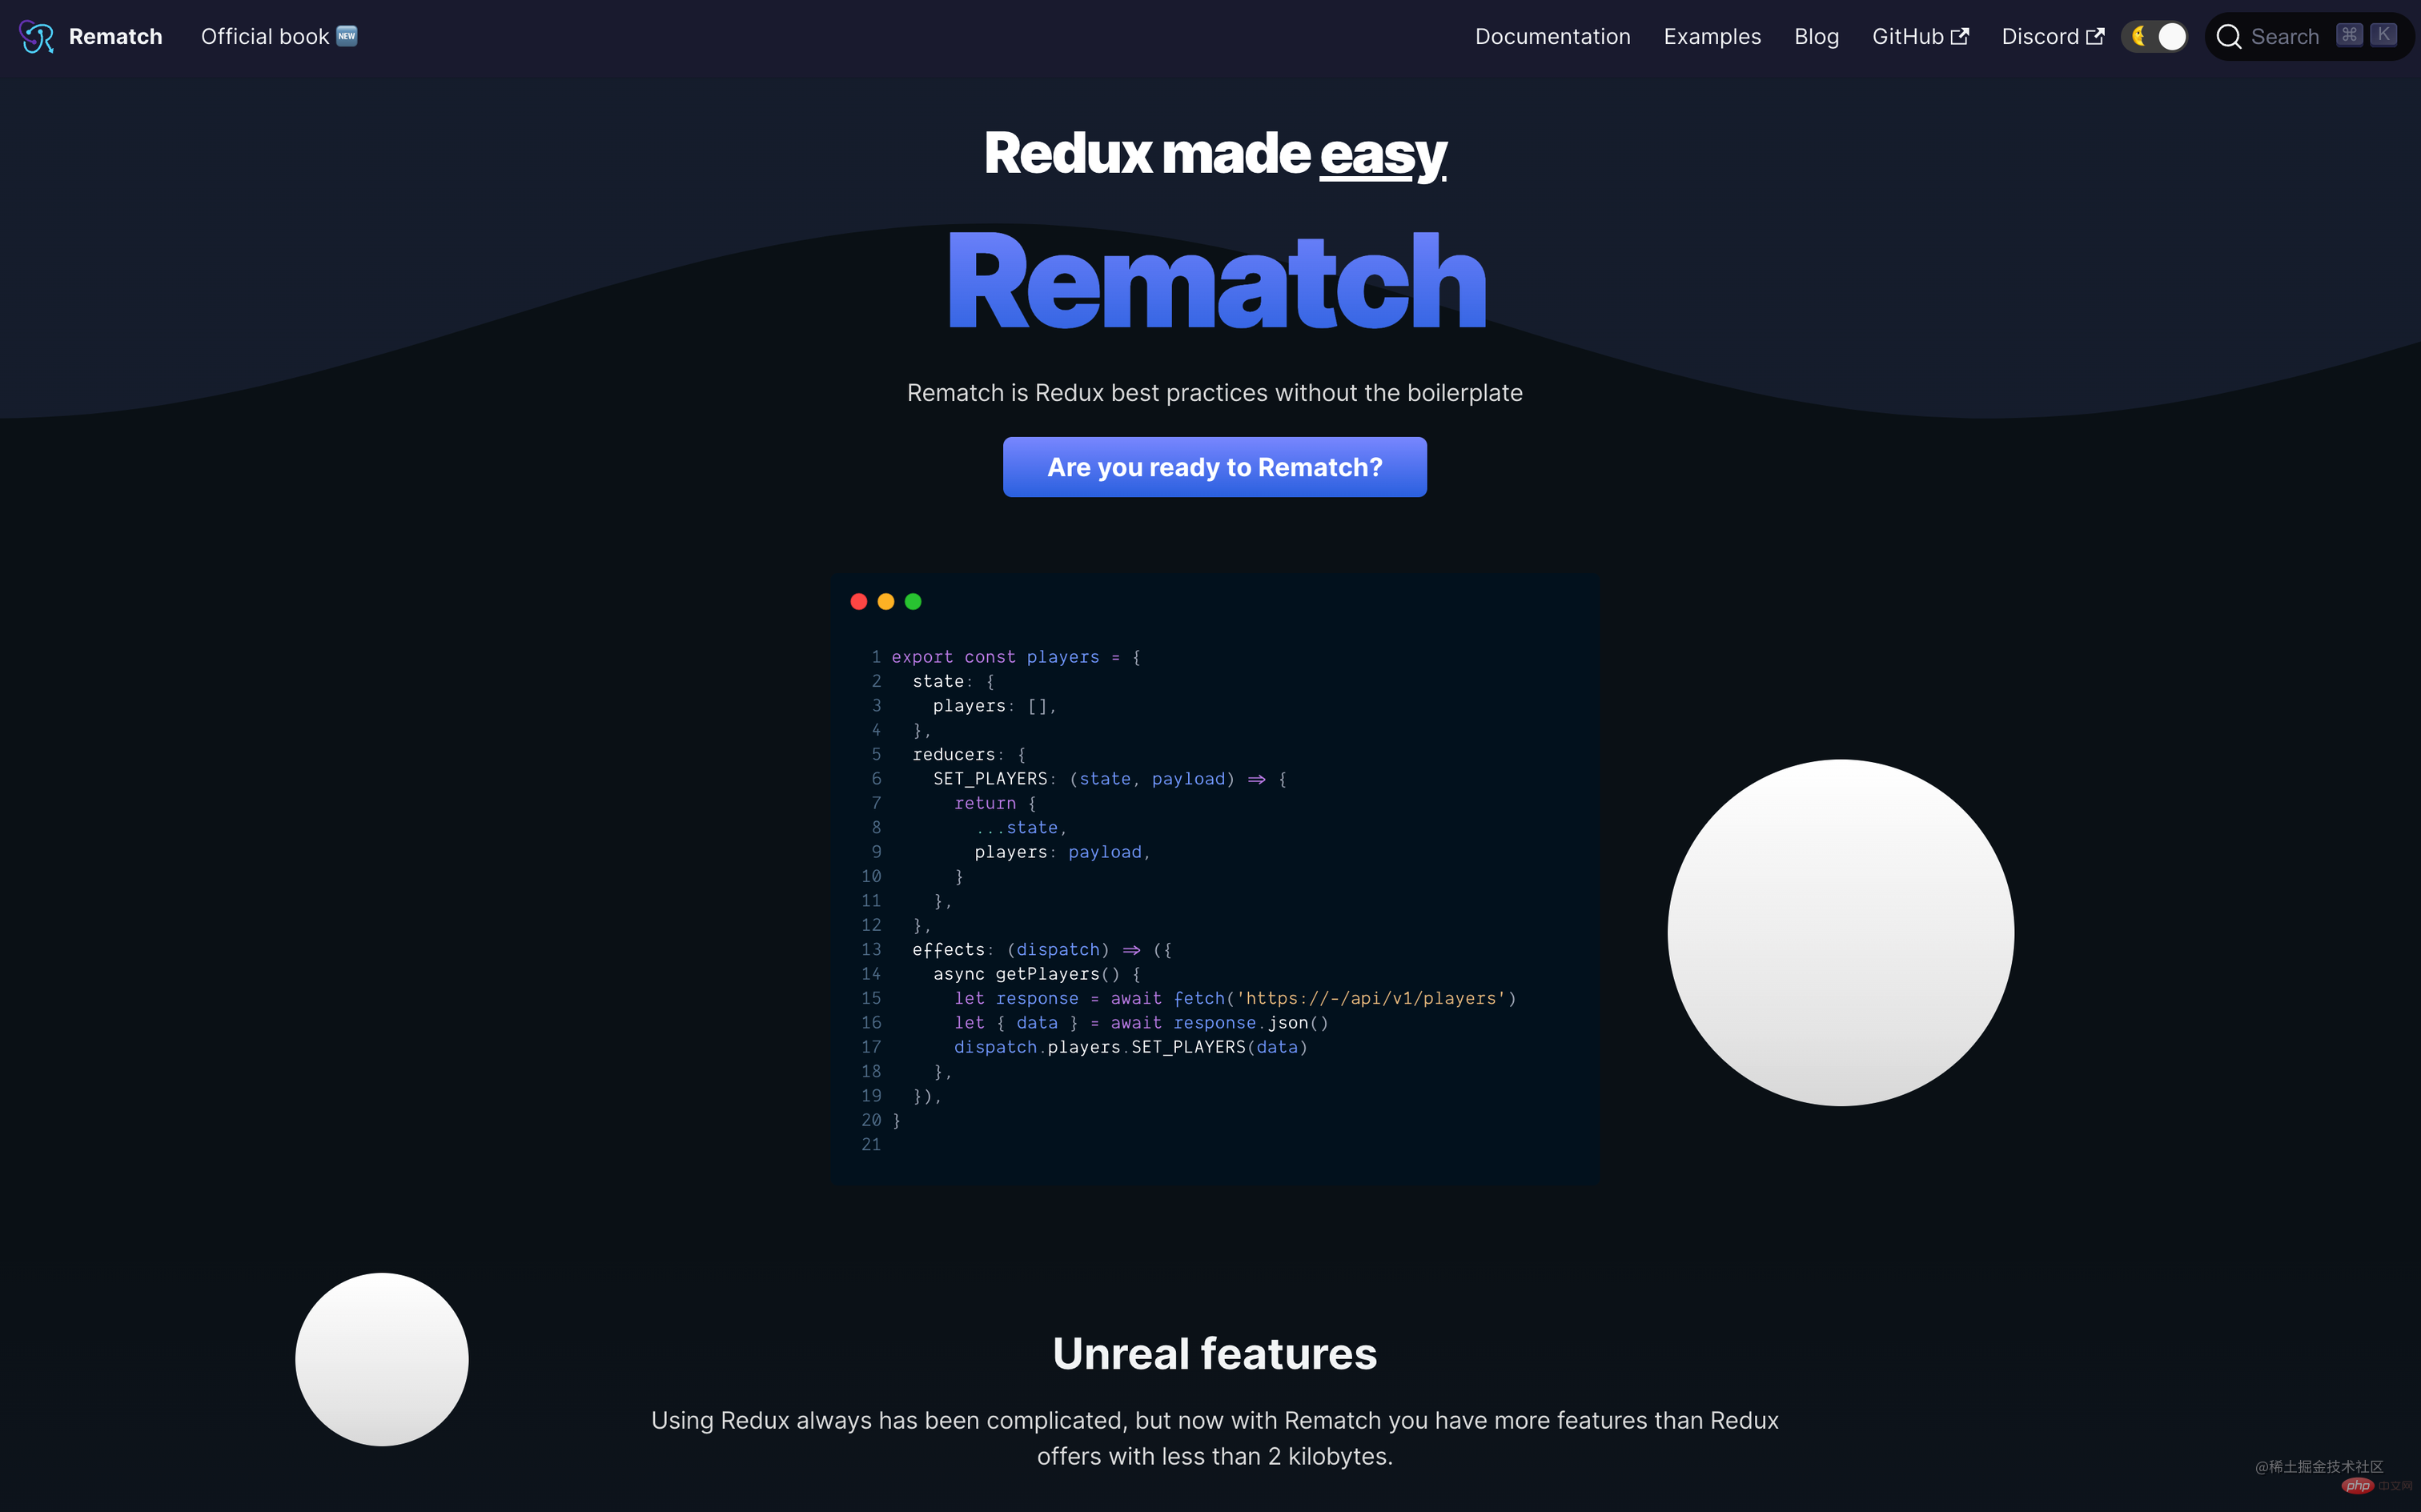
import { createModel } from "@rematch/core";
import { RootModel } from ".";

export const count = createModel<RootModel>()({
  state: 0, // initial state
  reducers: {
    // handle state changes with pure functions
    increment(state, payload: number) {
      return state + payload;
    },
  },
  effects: (dispatch) => ({
    // handle state changes with impure functions.
    // use async/await for async actions
    async incrementAsync(payload: number, state) {
      console.log("This is current root state", state);
      await new Promise((resolve) => setTimeout(resolve, 1000));
      dispatch.count.increment(payload);
    },
  }),
});크기가 2kb 미만
구성이 필요하지 않음
- Redux 상용구 줄이기 내장 부작용 지원 React Devtools 지원 TypeScript 기본 지원 지원 동적으로 리듀서 추가
- 핫 리로드 지원여러 스토어 생성 허용React Native 지원확장 가능한 플러그인
- Rematch의 스토어는 여전히 일부 Redux 작성 방법을 계속하지만 전체적으로 훨씬 더 간소화되었습니다. 시작하는 것도 매우 쉽습니다. 【 4. Recoil 】
Recoil
Recoil은 복잡한 상태 로직을 더 잘 처리할 수 있는 새로운 상태 관리 모델인 Atom 모델을 제공합니다. 
import React from 'react';
import {
  RecoilRoot,
  atom,
  selector,
  useRecoilState,
  useRecoilValue,
} from 'recoil';

function App() {
  return (
    <RecoilRoot>
      <CharacterCounter />
    </RecoilRoot>
  );
}atom
은state
를 나타냅니다. Atom은 모든 구성 요소에서 읽고 쓸 수 있습니다. 원자 값을 읽는 구성 요소는 암시적으로 원자를 구독하므로 원자를 업데이트하면 원자에 해당하는 구성 요소가 다시 렌더링됩니다.원자 상태를 사용하려면 구성 요소에 useRecoilState를 도입해야 합니다. const textState = atom({
key: 'textState', // unique ID (with respect to other atoms/selectors)
default: '', // default value (aka initial value)
});
function CharacterCounter() {
return (
<div>
<TextInput />
<CharacterCount />
</div>
);
}
function TextInput() {
const [text, setText] = useRecoilState(textState);
const onChange = (event) => {
setText(event.target.value);
};
return (
<div>
<input type="text" value={text} onChange={onChange} />
<br />
Echo: {text}
</div>
);
}
hookState
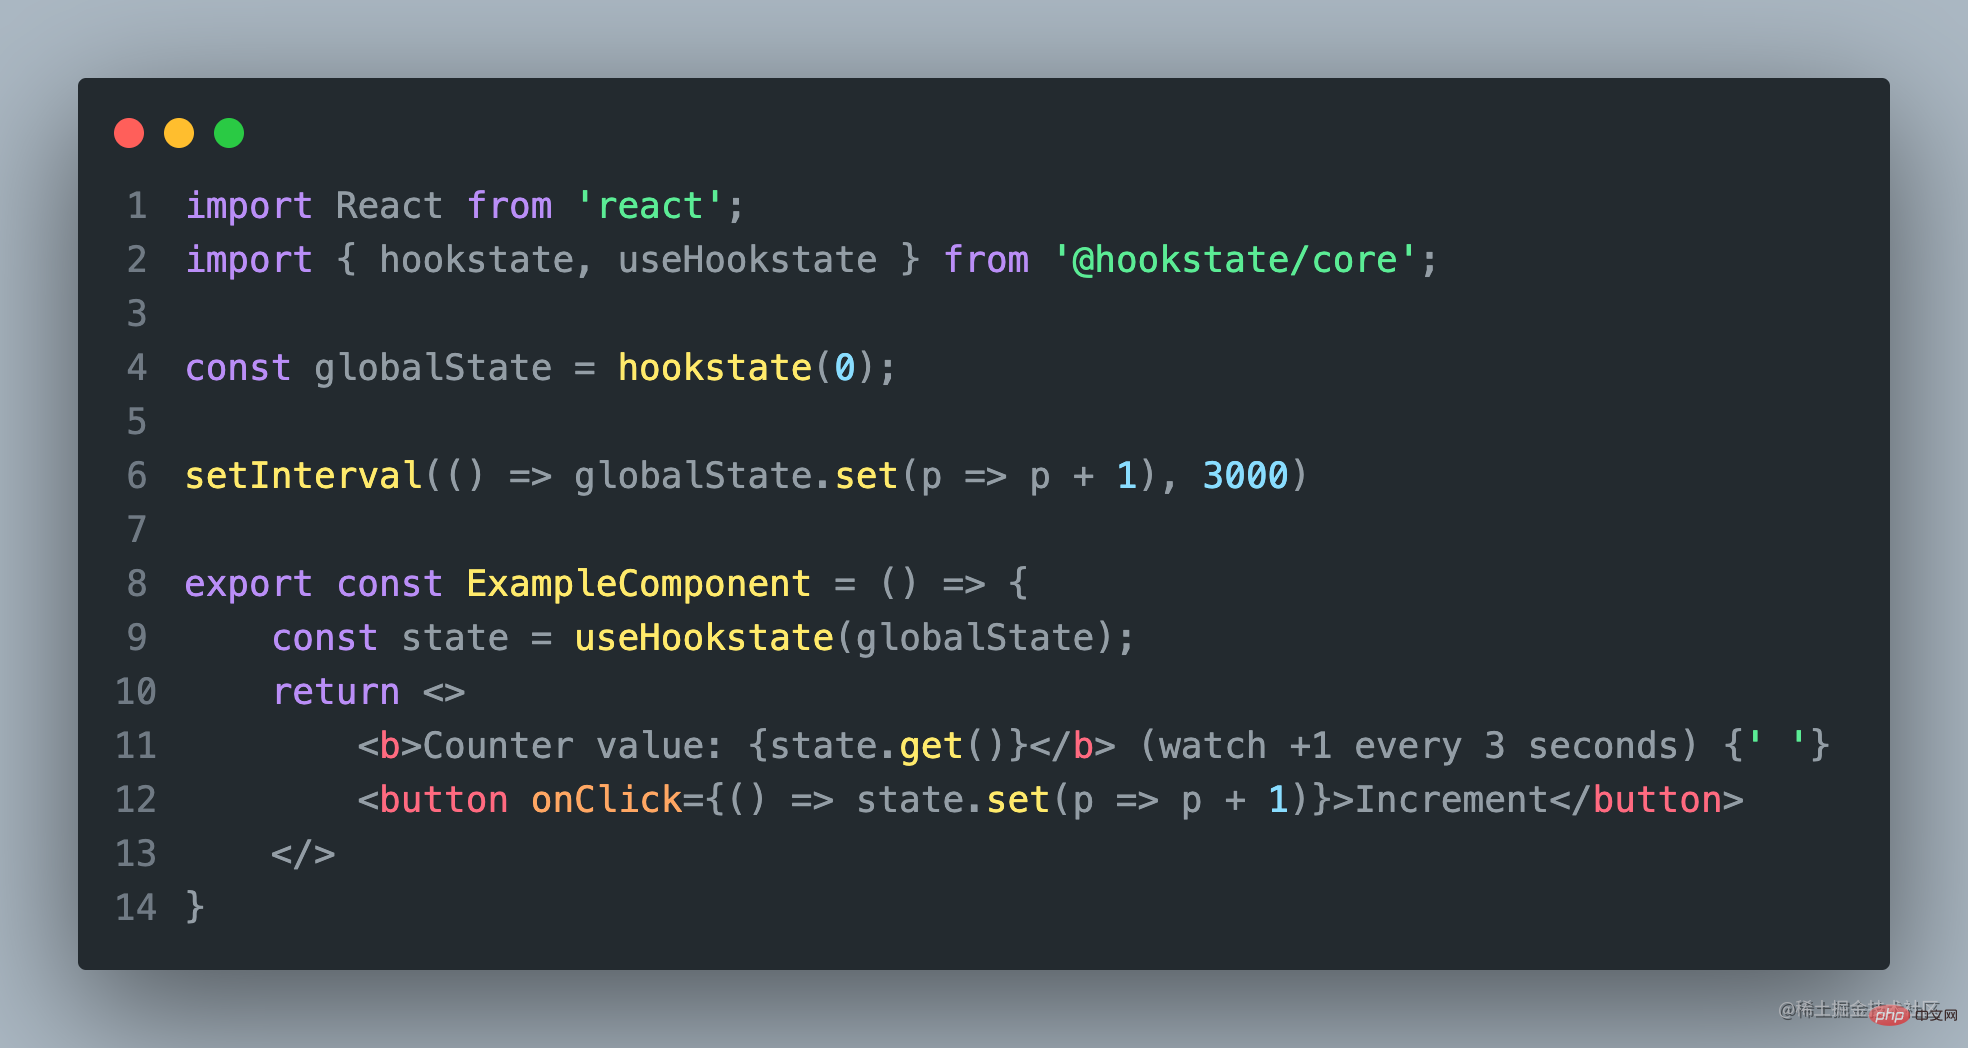
HookState는 또한 직관적인 API를 통해 상태에 쉽게 액세스할 수 있습니다. 
 부분 상태
부분 상태
빈 상태
- HookState에는 주로 두 가지 중요한 Api HookState와 useHookState가 포함됩니다.
- 다른 기능이 필요한 경우 다른 공식 API를 참고하세요. 【 6. Jotai 】
Jotai
Jotai는 독창적이고 유연한 React용 상태 관리 라이브러리입니다. Recoil과 유사하지만 패키지 크기가 더 작고, API가 더 미니멀하며, TypeScript 지원이 더 좋고, 문서가 더 광범위하며, 실험적인 태그가 없습니다.
Jotai를 사용하면 상태를 단일 저장소에 저장하고 사용자 정의 후크를 사용하여 상태에 액세스하고 업데이트할 수 있습니다.
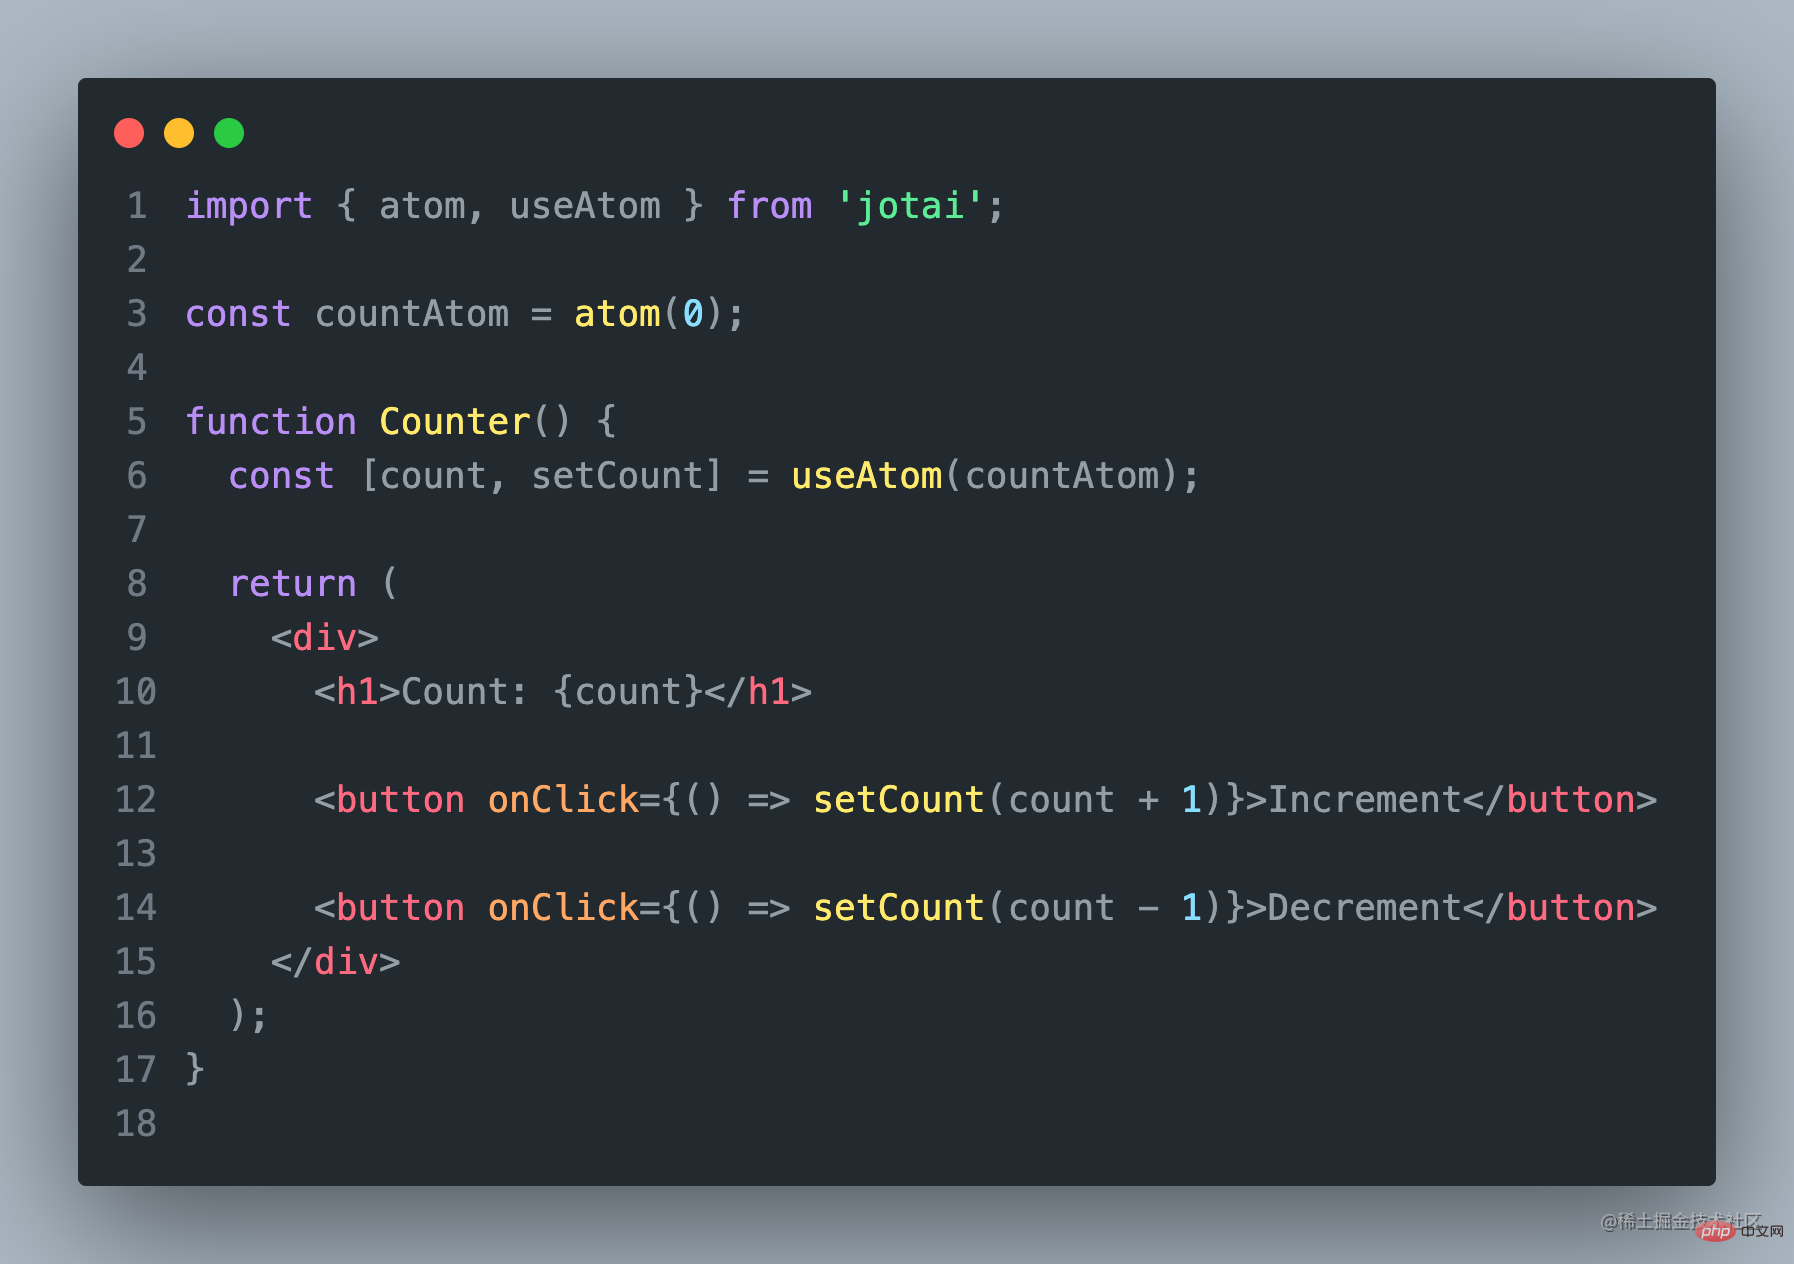
import { atom, useAtom } from 'jotai';

const countAtom = atom(0);

function Counter() {
  const [count, setCount] = useAtom(countAtom);

  return (
    <div>
      <h1>Count: {count}</h1>

      <button onClick={() => setCount(count + 1)}>Increment</button>

      <button onClick={() => setCount(count - 1)}>Decrement</button>
    </div>
  );
} 위는 Jotai를 사용하기 위한 샘플 코드입니다. 【7. Zustand】
Zustand는 React 애플리케이션에서 상태를 관리하는 간단한 방법을 제공합니다.
주요 기능은 사용하기 쉽고 가볍습니다.
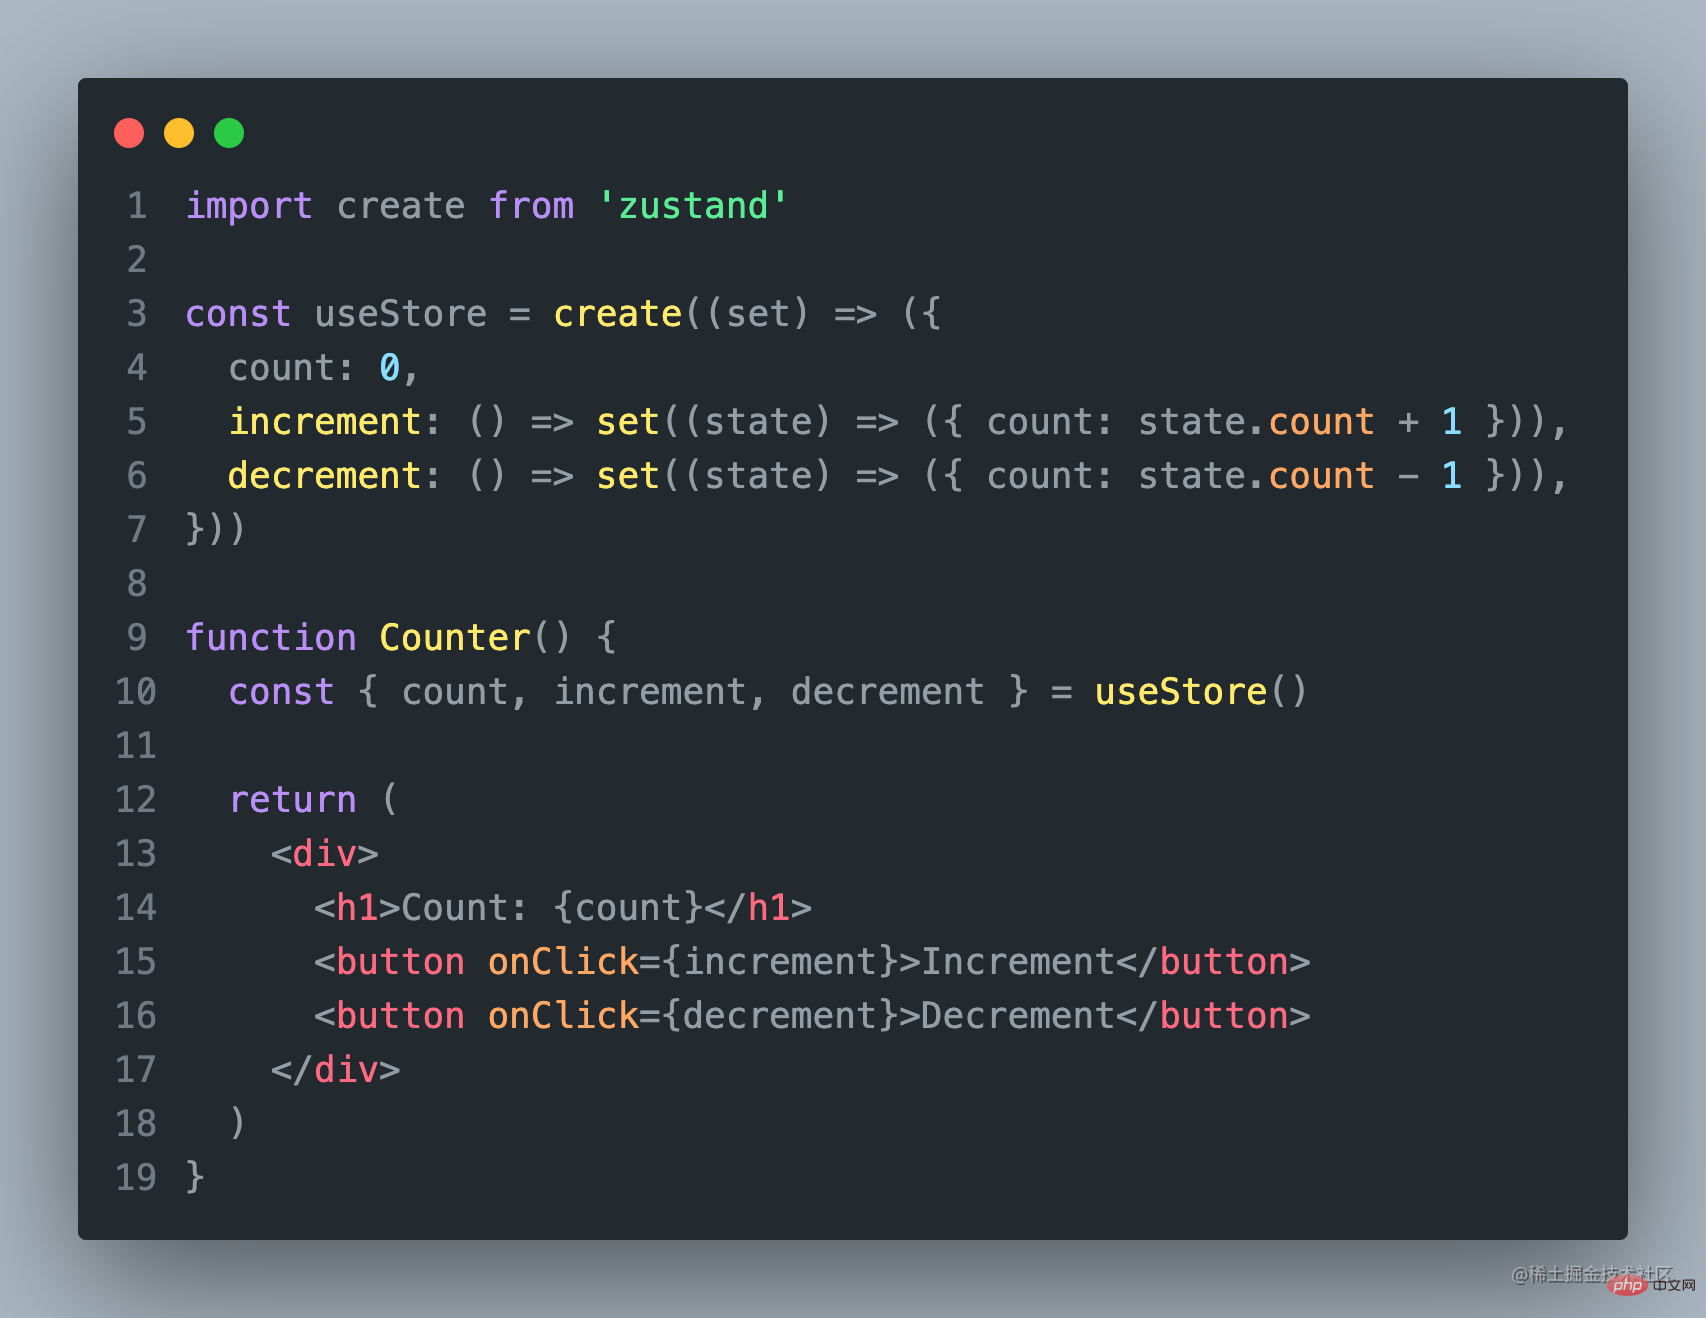
Zustand Code
使用Zustand,你可以将状态存储在一个单一的store中,并使用自定义的hooks来访问和更新状态。这使得状态管理变得非常简单和直观。
import create from 'zustand'

const useStore = create((set) => ({
  count: 0,
  increment: () => set((state) => ({ count: state.count + 1 })),
  decrement: () => set((state) => ({ count: state.count - 1 })),
}))

function Counter() {
  const { count, increment, decrement } = useStore()

  return (
    <div>
      <h1>Count: {count}</h1>
      <button onClick={increment}>Increment</button>
      <button onClick={decrement}>Decrement</button>
    </div>
  )
}使用Zustand也非常的简单!
在这个例子中,我们使用 create 函数创建了一个新的store,
并定义了一个名为 count 的状态和两个更新状态的
函数 increment 和 decrement 。
然后,我们使用 useStore 自定义 hook 来访问和更新状态。
【以上7个状态管理工具各有特点】
考虑到团队人员技术的参差不齐,未来项目的可维护、延展性;
建议大家选择入门简单,上手快的工具;
因为之前最早我们选择的是Redux,现在再回头看原来的项目,简直难以维护了。
如果你的团队还是倾向于Redux,这里建议还是使用Rematch比较好。
如果是还没使用状态管理,又想用的,建议使用mobx吧!
(学习视频分享:编程基础视频)
위 내용은 [정리 및 공유] 인기 있는 React 상태 관리 도구 7가지의 상세 내용입니다. 자세한 내용은 PHP 중국어 웹사이트의 기타 관련 기사를 참조하세요!

핫 AI 도구

Undresser.AI Undress
사실적인 누드 사진을 만들기 위한 AI 기반 앱

AI Clothes Remover
사진에서 옷을 제거하는 온라인 AI 도구입니다.

Undress AI Tool
무료로 이미지를 벗다

Clothoff.io
AI 옷 제거제

Video Face Swap
완전히 무료인 AI 얼굴 교환 도구를 사용하여 모든 비디오의 얼굴을 쉽게 바꾸세요!

인기 기사

뜨거운 도구

메모장++7.3.1
사용하기 쉬운 무료 코드 편집기

SublimeText3 중국어 버전
중국어 버전, 사용하기 매우 쉽습니다.

스튜디오 13.0.1 보내기
강력한 PHP 통합 개발 환경

드림위버 CS6
시각적 웹 개발 도구

SublimeText3 Mac 버전
신 수준의 코드 편집 소프트웨어(SublimeText3)

뜨거운 주제
 7652
7652
 15
15
 1393
1393
 52
52
 91
91
 11
11
 73
73
 19
19
 37
37
 110
110
 PHP와 Vue: 프런트엔드 개발 도구의 완벽한 조합
Mar 16, 2024 pm 12:09 PM
PHP와 Vue: 프론트엔드 개발 도구의 완벽한 조합 오늘날 인터넷이 빠르게 발전하는 시대에 프론트엔드 개발은 점점 더 중요해지고 있습니다. 사용자가 웹 사이트 및 애플리케이션 경험에 대한 요구 사항이 점점 더 높아짐에 따라 프런트 엔드 개발자는 보다 효율적이고 유연한 도구를 사용하여 반응형 및 대화형 인터페이스를 만들어야 합니다. 프론트엔드 개발 분야의 두 가지 중요한 기술인 PHP와 Vue.js는 함께 사용하면 완벽한 도구라고 볼 수 있습니다. 이 기사에서는 독자가 이 두 가지를 더 잘 이해하고 적용할 수 있도록 PHP와 Vue의 조합과 자세한 코드 예제를 살펴보겠습니다.
 PHP, Vue 및 React: 가장 적합한 프런트엔드 프레임워크를 선택하는 방법은 무엇입니까?
Mar 15, 2024 pm 05:48 PM
PHP, Vue 및 React: 가장 적합한 프런트엔드 프레임워크를 선택하는 방법은 무엇입니까? 인터넷 기술이 지속적으로 발전함에 따라 프런트엔드 프레임워크는 웹 개발에서 중요한 역할을 합니다. PHP, Vue, React는 세 가지 대표적인 프론트엔드 프레임워크로 각각 고유한 특성과 장점을 가지고 있습니다. 사용할 프런트 엔드 프레임워크를 선택할 때 개발자는 프로젝트 요구 사항, 팀 기술 및 개인 선호도를 기반으로 정보를 바탕으로 결정을 내려야 합니다. 이 글에서는 세 가지 프론트엔드 프레임워크인 PHP, Vue, React의 특징과 용도를 비교해보겠습니다.
 Java 프레임워크와 프런트엔드 React 프레임워크의 통합
Jun 01, 2024 pm 03:16 PM
Java 프레임워크와 React 프레임워크의 통합: 단계: 백엔드 Java 프레임워크를 설정합니다. 프로젝트 구조를 만듭니다. 빌드 도구를 구성합니다. React 애플리케이션을 만듭니다. REST API 엔드포인트를 작성합니다. 통신 메커니즘을 구성합니다. 실제 사례(SpringBoot+React): Java 코드: RESTfulAPI 컨트롤러를 정의합니다. React 코드: API에서 반환된 데이터를 가져오고 표시합니다.
 프론트엔드 면접관이 자주 묻는 질문
Mar 19, 2024 pm 02:24 PM
프론트엔드 개발 인터뷰에서 일반적인 질문은 HTML/CSS 기초, JavaScript 기초, 프레임워크 및 라이브러리, 프로젝트 경험, 알고리즘 및 데이터 구조, 성능 최적화, 크로스 도메인 요청, 프론트엔드 엔지니어링, 디자인 패턴, 새로운 기술 및 트렌드. 면접관 질문은 후보자의 기술적 능력, 프로젝트 경험, 업계 동향에 대한 이해를 평가하기 위해 고안되었습니다. 따라서 지원자는 자신의 능력과 전문성을 입증할 수 있도록 해당 분야에 대한 충분한 준비를 갖추어야 합니다.
 Django는 프론트엔드인가요, 백엔드인가요? 확인 해봐!
Jan 19, 2024 am 08:37 AM
Django는 빠른 개발과 깔끔한 방법을 강조하는 Python으로 작성된 웹 애플리케이션 프레임워크입니다. Django는 웹 프레임워크이지만 Django가 프런트엔드인지 백엔드인지에 대한 질문에 답하려면 프런트엔드와 백엔드의 개념에 대한 깊은 이해가 필요합니다. 프론트엔드는 사용자가 직접 상호작용하는 인터페이스를 의미하고, 백엔드는 HTTP 프로토콜을 통해 데이터와 상호작용하는 서버측 프로그램을 의미합니다. 프론트엔드와 백엔드가 분리되면 프론트엔드와 백엔드 프로그램을 독립적으로 개발하여 각각 비즈니스 로직과 인터랙티브 효과, 데이터 교환을 구현할 수 있습니다.
 Go 언어 프런트엔드 기술 탐색: 프런트엔드 개발을 위한 새로운 비전
Mar 28, 2024 pm 01:06 PM
빠르고 효율적인 프로그래밍 언어인 Go 언어는 백엔드 개발 분야에서 널리 사용됩니다. 그러나 Go 언어를 프런트엔드 개발과 연관시키는 사람은 거의 없습니다. 실제로 프런트엔드 개발에 Go 언어를 사용하면 효율성이 향상될 뿐만 아니라 개발자에게 새로운 지평을 열어줄 수도 있습니다. 이 기사에서는 프런트엔드 개발에 Go 언어를 사용할 수 있는 가능성을 살펴보고 독자가 이 영역을 더 잘 이해할 수 있도록 구체적인 코드 예제를 제공합니다. 전통적인 프런트엔드 개발에서는 사용자 인터페이스를 구축하기 위해 JavaScript, HTML, CSS를 사용하는 경우가 많습니다.
 Django: 프론트엔드와 백엔드 개발을 모두 처리할 수 있는 마법의 프레임워크!
Jan 19, 2024 am 08:52 AM
Django: 프론트엔드와 백엔드 개발을 모두 처리할 수 있는 마법의 프레임워크! Django는 효율적이고 확장 가능한 웹 애플리케이션 프레임워크입니다. MVC, MTV를 포함한 다양한 웹 개발 모델을 지원할 수 있으며 고품질 웹 애플리케이션을 쉽게 개발할 수 있습니다. Django는 백엔드 개발을 지원할 뿐만 아니라 프런트엔드 인터페이스를 빠르게 구축하고 템플릿 언어를 통해 유연한 뷰 표시를 구현할 수 있습니다. Django는 프론트엔드 개발과 백엔드 개발을 완벽한 통합으로 결합하므로 개발자가 전문적으로 학습할 필요가 없습니다.
 Golang과 프런트엔드 기술의 결합: Golang이 프런트엔드 분야에서 어떤 역할을 하는지 살펴보세요.
Mar 19, 2024 pm 06:15 PM
Golang과 프런트엔드 기술의 결합: Golang이 프런트엔드 분야에서 어떤 역할을 하는지 살펴보려면 구체적인 코드 예제가 필요합니다. 인터넷과 모바일 애플리케이션의 급속한 발전으로 인해 프런트엔드 기술이 점점 더 중요해지고 있습니다. 이 분야에서는 강력한 백엔드 프로그래밍 언어인 Golang도 중요한 역할을 할 수 있습니다. 이 기사에서는 Golang이 프런트엔드 기술과 어떻게 결합되는지 살펴보고 특정 코드 예제를 통해 프런트엔드 분야에서의 잠재력을 보여줍니다. 프론트엔드 분야에서 Golang의 역할은 효율적이고 간결하며 배우기 쉬운 것입니다.


