Python을 사용하여 앱을 개발하는 방법
준비
Python을 사용하여 앱을 개발하려면 Python 모듈을 사용해야 합니다. kivy는 혁신적인 애플리케이션 개발을 위한 오픈 소스, 크로스 플랫폼 Python 개발 프레임워크입니다. 간단히 말해서 이것은 Python 데스크톱 프로그램 개발 프레임워크입니다(wxpython 및 기타 모듈과 유사). 강력한 점은 kivy가 Linux, Mac, Windows, Android 및 iOS 플랫폼을 지원한다는 것입니다. 이것이 바로 앱을 개발하는 데 이 모듈이 필요한 이유입니다.
kivy는 크로스 플랫폼이지만, Python 코드를 다른 플랫폼에서 사용하려면 Python 코드를 해당 플랫폼에 맞는 실행 프로그램으로 패키징해야 합니다. 다행히 kivy 프로젝트 아래에 패키징 도구 프로젝트가 있습니다. – 공식적으로 권장되는 패키징 도구인 buildozer는 비교적 간단하고 자동화 수준이 높습니다. Python-for-android와 같은 다른 프로젝트도 비슷한 역할을 할 수 있으므로 여기서는 소개하지 않습니다.
kivy 개발 환경 구축
PC에 kivy 개발 환경을 설치해야 합니다. 다음은 Mac 및 Linux에서의 설치 과정을 보여줍니다.
install kivy for mac
일부 종속 패키지 설치:
brew install pkg-config sdl2 sdl2_image sdl2_ttf sdl2_mixer gstreamer
cython 및 kivy 설치:
pip install cython==0.25
pip install kivy
kivy를 설치할 때 오류가 발생하면 다음 방법을 사용하여 kivy를 설치하십시오.
git clone https://github.com/kivy/kivy
python setup.py install
설치 후 테스트:
$python
Python 2.7.10 (default, Jul 15 2017, 17:16:57)
[GCC 4.2.1 Compatible Apple LLVM 9.0.0 (clang-900.0.31)] on darwin
Type "help", "copyright", "credits" or "license" for more information.
>>>
>>> import kivy
[INFO ] [Logger] Record log in /Users/didi/.kivy/logs/kivy_18-05-08_4.txt
[INFO ] [Kivy] v1.10.1.dev0, git-5f6c66e, 20180507
[INFO ] [Python] v2.7.10 (default, Jul 15 2017, 17:16:57)
[GCC 4.2.1 Compatible Apple LLVM 9.0.0 (clang-900.0.31)]
지침: 있음 가져온 kivy 모듈이 없습니다. 오류가 보고되면 설치가 성공한 것입니다.
centos7용 kivy 설치
먼저 종속성 설치:
yum install
make
mercurial
automake
gcc
gcc-c++
SDL_ttf-devel
SDL_mixer-devel
khrplatform-devel
mesa-libGLES
mesa-libGLES-devel
gstreamer-plugins-good
gstreamer
gstreamer-python
mtdev-devel
python-devel
python-pip
java-devel
cython 및 kivy 설치:
pip install Cython==0.20
pip install kivy
kivy를 사용하여 첫 번째 Python 앱 개발
kivy를 설치한 후 앱 프로그램을 개발할 수 있습니다. hello -world 프로그램 시연에서 kivy의 더 복잡한 사용법은 이 기사의 초점이 아니며 나중에 서면으로 소개될 것입니다.
main.py 파일을 만들고 작성하세요:
#! -*- coding:utf-8 -*-
from kivy.app import App
class HelloApp(App):
pass
if __name__ == '__main__':
HelloApp().run()
hello.kv 파일을 만들고 작성하세요:
Label:
text: 'Hello, World! I am nMask'
간단한 설명: main.py는 입력 함수이고 The kivy를 상속하는 HelloApp 클래스를 정의합니다. app; hello.kv 파일은 kivy 프로그램으로 인터페이스 스타일 등을 정의하는 것과 동일합니다. 이 파일의 명명 규칙은 클래스 이름을 소문자로 지정하고 app을 제거하는 것입니다.
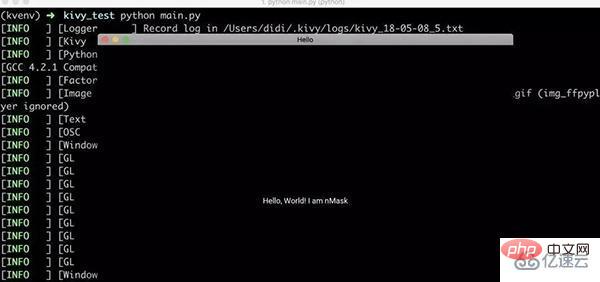
첫 번째 Python 앱 실행
python main.py
실행 결과:
buildozer 도구 설치
위 코딩을 통해 It running on에서 직접 사용할 수 있는 첫 번째 Python 앱 프로그램을 만들었습니다. Mac, Linux, Windows 플랫폼을 지원하는데 Android나 Apple 휴대폰에서 어떻게 실행하나요? Android에서 실행하려면 apk 설치 프로그램으로 패키징해야 한다는 것을 알고 있으므로 앞서 언급한 buildozer 도구를 사용해야 합니다. (buildozer 도구는 kivy 프로그램을 패키징할 수 있으며 android, ios 등을 지원합니다.) buildozer 프로세스는 비교적 간단합니다. :
pip install buildozer
buildozer 도구를 사용하여 kivy 프로그램을 apk로 패키징합니다.
파이썬 프로젝트 디렉토리에서 실행하세요.
buildozer init
성공적으로 실행하면 buildozer.spec 구성 파일이 생성됩니다. . 구성 파일을 수정하여 앱 이름을 변경할 수 있습니다.
buildozer android debug deploy run
위 명령을 실행하면 Android, iOS 등에 적용할 수 있는 크로스 플랫폼 설치 패키지가 생성됩니다. Android에 사용되는 경우 python-for-android 프로젝트를 사용하세요.
위 명령을 처음 실행하면 아래와 같이 Android SDK 등 필요한 파일이 시스템에 자동으로 다운로드됩니다. (이 프로세스에는 벽을 우회해야 하며 다운로드해야 하는 종속성이 많습니다.)
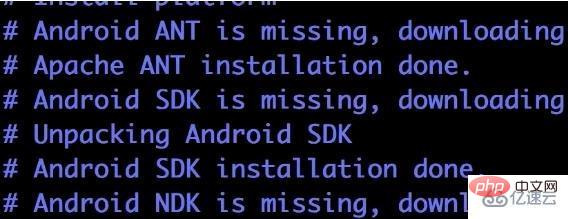
참고: 여기서는 apk 파일로 패키징하는 방법만 보여 주며 iso 플랫폼에서 직접 학습할 수 있습니다.
python apk 프로그램 테스트
위 단계가 성공적으로 실행되면 프로젝트 디렉토리 아래의 bin 디렉토리에 다음과 유사한 apk 파일이 생성되어야 합니다.
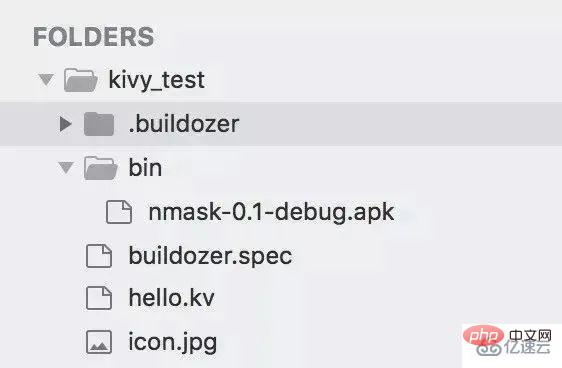
그런 다음 apk를 Android 시스템 휴대폰에 설치만 하면 테스트 결과는 다음과 같습니다.
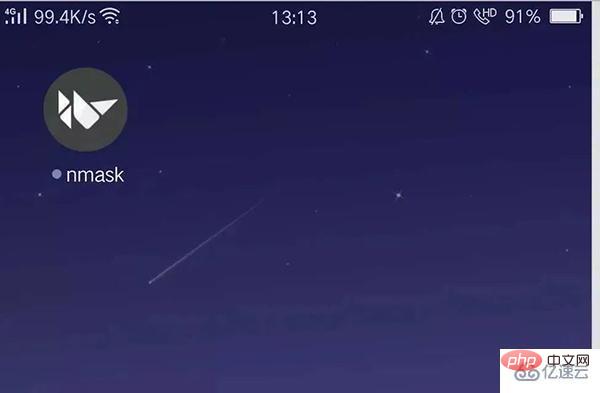
앱 열기

buildozer 사용 지침
Usage:
buildozer [--profile] [--verbose] [target]...
buildozer --version
Available targets:
androidAndroid target, based on python-for-android project
iosiOS target, based on kivy-ios project
android_oldAndroid target, based on python-for-android project (old toolchain)
Global commands (without target):
distcleanClean the whole Buildozer environment.
help Show the Buildozer help.
init Create a initial buildozer.spec in the current directory
serveServe the bin directory via SimpleHTTPServer
setdefault Set the default command to run when no arguments are given
versionShow the Buildozer version
Target commands:
cleanClean the target environment
update Update the target dependencies
debugBuild the application in debug mode
releaseBuild the application in release mode
deploy Deploy the application on the device
runRun the application on the device
serveServe the bin directory via SimpleHTTPServer
Target "android_old" commands:
adbRun adb from the Android SDK. Args must come after --, or
use --alias to make an alias
logcat Show the log from the device
Target "ios" commands:
list_identitiesList the available identities to use for signing.
xcodeOpen the xcode project.
Target "android" commands:
adbRun adb from the Android SDK. Args must come after --, or
use --alias to make an alias
logcat Show the log from the device
p4aRun p4a commands. Args must come after --, or use --alias
to make an alias
Buildozer 패키징 과정의 함정
패키징 과정에서 오류가 발생하면 buildozer.spec 구성 파일의 log_level을 2로 수정한 후 다시 실행하여 구체적인 오류 정보를 확인할 수 있습니다.
오류: 32비트 libs를 설치하지 않았을 수 있습니다
이 오류는 centos7에서 실행할 때 보고되었습니다. 일반적인 생각은 시스템에 일부 32비트 종속 파일이 없다는 것입니다.
해결책:
yum -y install --skip-broken glibc.i686 arts.i686 audiofile.i686 bzip2-libs.i686 cairo.i686 cyrus-sasl-lib.i686 dbus-libs.i686 directfb.i686 esound-libs.i686 fltk.i686 freeglut.i686 gtk2.i686 hal-libs.i686 imlib.i686 lcms-libs.i686 lesstif.i686 libacl.i686 libao.i686 libattr.i686 libcap.i686 libdrm.i686 libexif.i686 libgnomecanvas.i686 libICE.i686 libieee1284.i686 libsigc++20.i686 libSM.i686 libtool-ltdl.i686 libusb.i686 libwmf.i686 libwmf-lite.i686 libX11.i686 libXau.i686 libXaw.i686 libXcomposite.i686 libXdamage.i686 libXdmcp.i686 libXext.i686 libXfixes.i686 libxkbfile.i686 libxml2.i686 libXmu.i686 libXp.i686 libXpm.i686 libXScrnSaver.i686 libxslt.i686 libXt.i686 libXtst.i686 libXv.i686 libXxf86vm.i686 lzo.i686 mesa-libGL.i686 mesa-libGLU.i686 nas-libs.i686 nss_ldap.i686 cdk.i686 openldap.i686 pam.i686 popt.i686 pulseaudio-libs.i686 sane-backends-libs-gphoto2.i686 sane-backends-libs.i686 SDL.i686 svgalib.i686 unixODBC.i686 zlib.i686 compat-expat1.i686 compat-libstdc++-33.i686 openal-soft.i686 alsa-oss-libs.i686 redhat-lsb.i686 alsa-plugins-pulseaudio.i686 alsa-plugins-oss.i686 alsa-lib.i686 nspluginwrapper.i686 libXv.i686 libXScrnSaver.i686 qt.i686 qt-x11.i686 pulseaudio-libs.i686 pulseaudio-libs-glib2.i686 alsa-plugins-pulseaudio.i686 python-matplotli
오류: Cython 파일 컴파일 오류
오류는 cython 파일에 오류가 있음을 의미합니다. cython 모듈이 설치되지 않았거나 버전에 문제가 있을 수 있습니다. . 해결 방법:
pip install cython==0.25
Error: IOError: [Errno 2] No such file or Directory.... 패키징 마지막 단계에서 apk 파일을 프로젝트 bin 디렉터리에 복사할 때 보고되는 오류입니다. 빌더저.
해결책:
/usr/local/lib/python2.7/dist-packages/buildozer/tagets/android.py 파일 수정:
파일 시작 부분에서 가져오기:
from distutils.version import LooseVersion
将786行:XXX found how the apk name is really built from the title这一行以下的代码替换为:
__sdk_dir = self.android_sdk_dir
build_tools_versions = os.listdir(join(__sdk_dir, 'build-tools'))
build_tools_versions = sorted(build_tools_versions, key=LooseVersion)
build_tools_version = build_tools_versions[-1]
gradle_files = ["build.gradle", "gradle", "gradlew"]
is_gradle_build = any((exists(join(dist_dir, x)) for x in gradle_files)) and build_tools_version >= ’25.0'
buildozer虚拟机
kivy官方推出了一个buildozer虚拟机镜像,已经安装好了buildozer以及一些依赖文件,为buildozer打包测试提供平台。由于之前我在mac上利用buildozer打包一直报错,后来换成centos也依然没有成功,因此便下载了此虚拟机,测试效果如下:
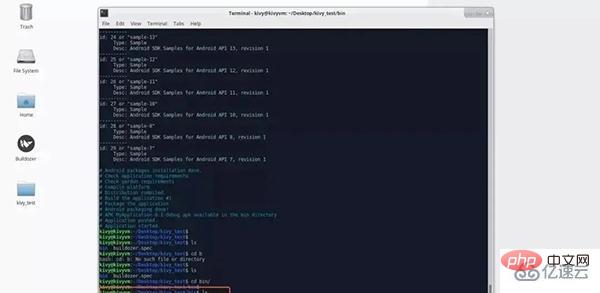
说明:对于无法解决依赖问题的朋友,可以使用此虚拟机进行程序打包,开发环境还是推荐用自己的本机。
위 내용은 Python을 사용하여 앱을 개발하는 방법의 상세 내용입니다. 자세한 내용은 PHP 중국어 웹사이트의 기타 관련 기사를 참조하세요!

핫 AI 도구

Undresser.AI Undress
사실적인 누드 사진을 만들기 위한 AI 기반 앱

AI Clothes Remover
사진에서 옷을 제거하는 온라인 AI 도구입니다.

Undress AI Tool
무료로 이미지를 벗다

Clothoff.io
AI 옷 제거제

AI Hentai Generator
AI Hentai를 무료로 생성하십시오.

인기 기사

뜨거운 도구

메모장++7.3.1
사용하기 쉬운 무료 코드 편집기

SublimeText3 중국어 버전
중국어 버전, 사용하기 매우 쉽습니다.

스튜디오 13.0.1 보내기
강력한 PHP 통합 개발 환경

드림위버 CS6
시각적 웹 개발 도구

SublimeText3 Mac 버전
신 수준의 코드 편집 소프트웨어(SublimeText3)

뜨거운 주제
 7322
7322
 9
9
 1625
1625
 14
14
 1350
1350
 46
46
 1262
1262
 25
25
 1209
1209
 29
29
 램프 아키텍처에서 Node.js 또는 Python 서비스를 효율적으로 통합하는 방법은 무엇입니까?
Apr 01, 2025 pm 02:48 PM
많은 웹 사이트 개발자는 램프 아키텍처에서 Node.js 또는 Python 서비스를 통합하는 문제에 직면 해 있습니다. 기존 램프 (Linux Apache MySQL PHP) 아키텍처 웹 사이트 요구 사항 ...
 Linux 터미널에서 Python 버전을 볼 때 발생하는 권한 문제를 해결하는 방법은 무엇입니까?
Apr 01, 2025 pm 05:09 PM
Linux 터미널에서 Python 버전을 보려고 할 때 Linux 터미널에서 Python 버전을 볼 때 권한 문제에 대한 솔루션 ... Python을 입력하십시오 ...
 SCAPY 크롤러를 사용할 때 파이프 라인 영구 스토리지 파일을 작성할 수없는 이유는 무엇입니까?
Apr 01, 2025 pm 04:03 PM
SCAPY 크롤러를 사용할 때 파이프 라인 영구 스토리지 파일을 작성할 수없는 이유는 무엇입니까? 토론 Data Crawler에 Scapy Crawler를 사용하는 법을 배울 때 종종 ...
 Python Process Pool이 동시 TCP 요청을 처리하고 클라이언트가 막히게하는 이유는 무엇입니까?
Apr 01, 2025 pm 04:09 PM
Python Process Pool은 클라이언트가 갇히게하는 동시 TCP 요청을 처리합니다. 네트워크 프로그래밍에 Python을 사용하는 경우 동시 TCP 요청을 효율적으로 처리하는 것이 중요합니다. ...
 Python functools.partial 객체가 내부적으로 캡슐화 한 원래 함수를 보는 방법?
Apr 01, 2025 pm 04:15 PM
functools.partial in Python의 파이썬 funcTools.partial 객체의 시청 방법을 깊이 탐구하십시오 ...
 Python Cross-Platform 데스크탑 응용 프로그램 개발 : 어떤 GUI 라이브러리가 가장 적합합니까?
Apr 01, 2025 pm 05:24 PM
Python 크로스 플랫폼 데스크톱 응용 프로그램 개발 라이브러리 선택 많은 Python 개발자가 Windows 및 Linux 시스템 모두에서 실행할 수있는 데스크탑 응용 프로그램을 개발하고자합니다 ...
 파이썬 모래시 그래프 그리기 : 가변적 인 정의되지 않은 오류를 피하는 방법?
Apr 01, 2025 pm 06:27 PM
Python : 모래 시계 그래픽 도면 및 입력 검증을 시작 하기이 기사는 모래 시계 그래픽 드로잉 프로그램에서 Python 초보자가 발생하는 변수 정의 문제를 해결합니다. 암호...
 Google과 AWS는 공개 PYPI 이미지 소스를 제공합니까?
Apr 01, 2025 pm 05:15 PM
많은 개발자들이 PYPI (PythonPackageIndex)에 의존합니다 ...


