

springboot가 netty 프레임워크를 통합하는 방법은 무엇입니까?

Netty는 고성능 IO 프레임워크로서 매우 사용하기 쉬운 기술 프레임워크입니다.
Netty는 NIO 기반의 클라이언트 및 서버 측 프로그래밍 프레임워크로, 빠르고 쉽게 개발할 수 있습니다. 특정 프로토콜을 채택하는 클라이언트 및 서버 애플리케이션 구현과 같은 네트워크 애플리케이션. Netty는 TCP 및 UDP 기반 소켓 서비스 개발과 같은 네트워크 애플리케이션의 프로그래밍 및 개발 프로세스를 단순화하고 합리화하는 것과 같습니다.
"빠름"과 "간단함"은 유지 관리나 성능 문제를 일으키지 않습니다. Netty는 여러 프로토콜(FTP, SMTP, HTTP 등과 같은 다양한 바이너리 텍스트 프로토콜 포함)의 구현 경험을 흡수하고 매우 신중하게 설계된 프로젝트입니다. 결국 Netty는 애플리케이션의 성능, 안정성, 확장성을 보장하면서 손쉬운 개발을 보장하는 방법을 성공적으로 찾았습니다
우선 전체 프로젝트에 pom
<?xml version="1.0" encoding="UTF-8"?>
<project xmlns="http://maven.apache.org/POM/4.0.0" xmlns:xsi="http://www.w3.org/2001/XMLSchema-instance"
         xsi:schemaLocation="http://maven.apache.org/POM/4.0.0 https://maven.apache.org/xsd/maven-4.0.0.xsd">
    <modelVersion>4.0.0</modelVersion>
    <parent>
        <groupId>org.springframework.boot</groupId>
        <artifactId>spring-boot-starter-parent</artifactId>
        <version>2.2.1.RELEASE</version>
        <relativePath/> <!-- lookup parent from repository -->
    </parent>
    <groupId>com.cxy</groupId>
    <artifactId>netty</artifactId>
    <version>0.0.1-SNAPSHOT</version>
    <name>netty</name>
    <description>Demo project for Spring Boot</description>

    <properties>
        <java.version>1.8</java.version>
    </properties>

    <dependencies>
        <dependency>
            <groupId>org.springframework.boot</groupId>
            <artifactId>spring-boot-starter-web</artifactId>
        </dependency>
        <dependency>
            <groupId>io.netty</groupId>
            <artifactId>netty-all</artifactId>
            <version>4.1.25.Final</version>
        </dependency>
        <dependency>
            <groupId>org.springframework.boot</groupId>
            <artifactId>spring-boot-starter-test</artifactId>
            <scope>test</scope>
            <exclusions>
                <exclusion>
                    <groupId>org.junit.vintage</groupId>
                    <artifactId>junit-vintage-engine</artifactId>
                </exclusion>
            </exclusions>
        </dependency>
    </dependencies>

    <build>
        <plugins>
            <plugin>
                <groupId>org.springframework.boot</groupId>
                <artifactId>spring-boot-maven-plugin</artifactId>
            </plugin>
        </plugins>
    </build>

</project>handler 클래스를 도입하는 것은 변하지 않을 것입니다
package com.cxy.netty.controller;
import io.netty.buffer.ByteBuf;
import io.netty.channel.ChannelFutureListener;
import io.netty.channel.ChannelHandlerContext;
import io.netty.channel.ChannelInboundHandlerAdapter;
import io.netty.util.CharsetUtil;
public class EchoServerHandler extends ChannelInboundHandlerAdapter {
    @Override
    public void channelRead(ChannelHandlerContext ctx, Object msg){
        ByteBuf in = (ByteBuf) msg;
        System.out.println("Server received: " + in.toString(CharsetUtil.UTF_8));
        ctx.write(in);
    }
    public void channelReadComplete(ChannelHandlerContext ctx){
        ctx.writeAndFlush(ChannelFutureListener.CLOSE);
    public void exceptionCaught(ChannelHandlerContext ctx, Throwable cause){
        cause.printStackTrace();
        ctx.close();
}이것은 핸들러는 공식 웹사이트에서 복사되었습니다
방법 1: @PostConstruct에 주석 달기
package com.cxy.netty.controller;
import io.netty.bootstrap.ServerBootstrap;
import io.netty.channel.ChannelFuture;
import io.netty.channel.ChannelInitializer;
import io.netty.channel.EventLoopGroup;
import io.netty.channel.nio.NioEventLoopGroup;
import io.netty.channel.socket.SocketChannel;
import io.netty.channel.socket.nio.NioServerSocketChannel;
import org.slf4j.Logger;
import org.slf4j.LoggerFactory;
import org.springframework.boot.autoconfigure.web.ServerProperties;
import org.springframework.stereotype.Component;
import javax.annotation.PostConstruct;
import javax.annotation.PreDestroy;
import java.net.InetSocketAddress;
@Component
public class NettyServer {
    /*private  int port =8080;
    public int getPort() {
        return port;
    }
    public void setPort(int port) {
        this.port = port;
    }
    public NettyServer(int port) {
        this.port = port;
    }*/
    @PostConstruct
    public void start() throws Exception {
        System.out.println("启动记载netty");
        EventLoopGroup boss = new NioEventLoopGroup();
        EventLoopGroup work = new NioEventLoopGroup();
        ServerBootstrap b = new ServerBootstrap();
        b.group(boss,work)
                .channel(NioServerSocketChannel.class)
                .localAddress(new InetSocketAddress(8082))
                .childHandler(new ChannelInitializer<SocketChannel>() {
                    @Override
                    protected void initChannel(SocketChannel ch) throws Exception {
                        ch.pipeline().addLast(new EchoServerHandler());
                    }
                });
        System.out.println("启动加载netty2");
        ChannelFuture channelFuturef = b.bind().sync();
        if (channelFuturef.isSuccess()){
        System.out.println("启动成功");
        }
    }
}시작하려면 클릭하세요:
로그를 살펴보세요:
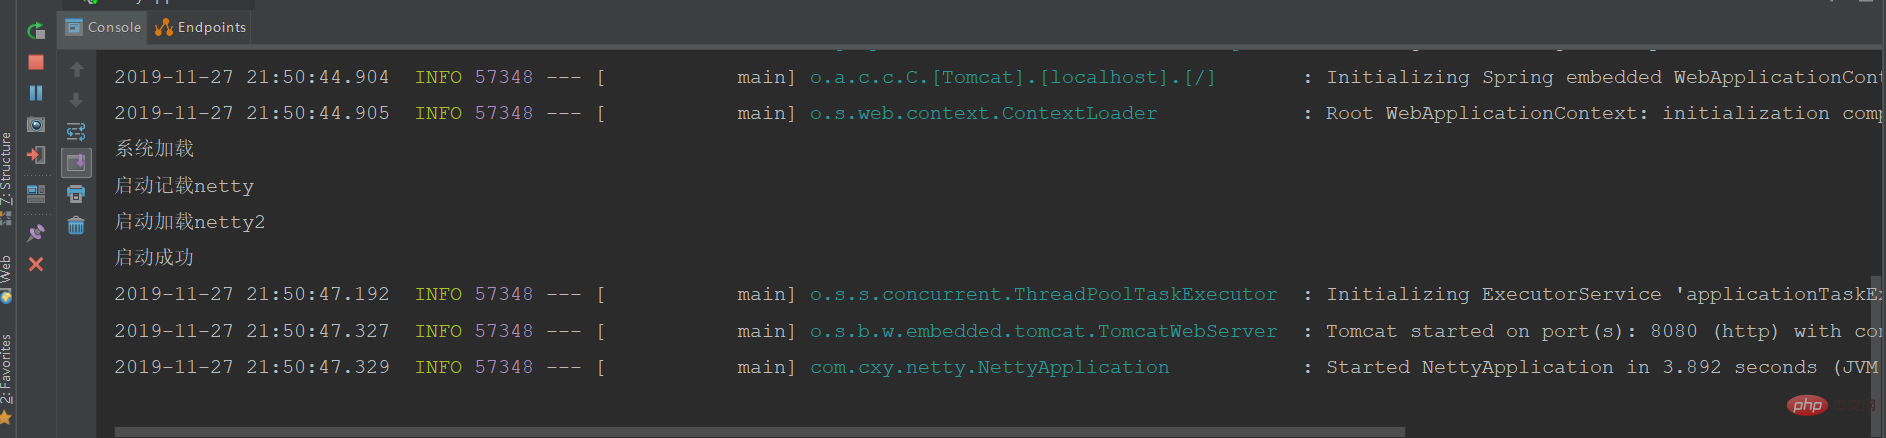
설명이 시작되었습니다
이 주석이 그토록 마술적인 이유는 다음과 같습니다.

일반적인 의미는 클래스가 로드될 때 이 메서드도 로드된다는 의미입니다. 초기 로드의 의미:
@Documented
@Retention (RUNTIME)
@Target(METHOD)
public @interface PostConstruct {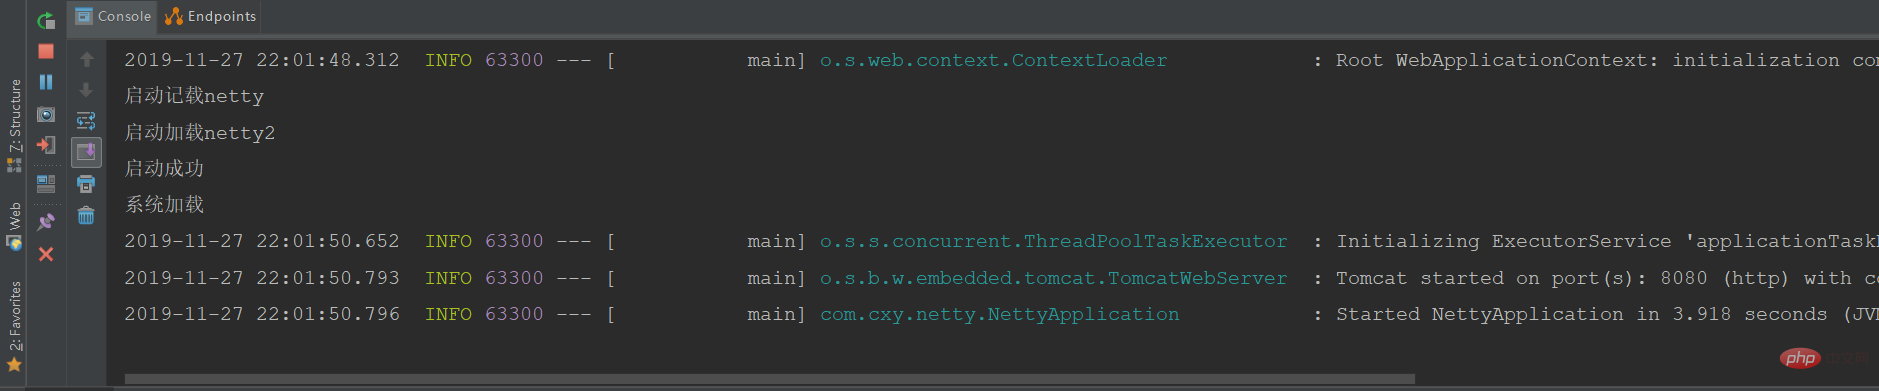
}방법 2: 리스너를 사용하여 시작:
package com.cxy.netty.controller;
import javax.servlet.ServletContextEvent;
import javax.servlet.ServletContextListener;
/**
 * 系统初始化监听器
 * @author Administrator
 *
 */
public class InitListener implements ServletContextListener {
    @Override
    public void contextInitialized(ServletContextEvent sce) {

        NettyServer nettyServer = new NettyServer(8081);
        try {
            nettyServer.start();
        } catch (Exception e) {
            e.printStackTrace();
        }
    }

    @Override
    public void contextDestroyed(ServletContextEvent sce) {

    }
}시작 클래스:
package com.cxy.netty;
import com.cxy.netty.controller.InitListener;
import com.cxy.netty.controller.NettyServer;
import org.springframework.boot.CommandLineRunner;
import org.springframework.boot.SpringApplication;
import org.springframework.boot.autoconfigure.SpringBootApplication;
import org.springframework.boot.web.servlet.ServletListenerRegistrationBean;
import org.springframework.context.annotation.Bean;
@SpringBootApplication
public class NettyApplication {
    /**
     * 注册监听器
     * @return
     */
    @SuppressWarnings({ "rawtypes", "unchecked" })
    @Bean
    public ServletListenerRegistrationBean servletListenerRegistrationBean() {
        ServletListenerRegistrationBean servletListenerRegistrationBean =
                new ServletListenerRegistrationBean();
        servletListenerRegistrationBean.setListener(new InitListener());
        return servletListenerRegistrationBean;
    }
    public static void main(String[] args) {
        SpringApplication.run(NettyApplication.class, args);
    }
}로그 보기:
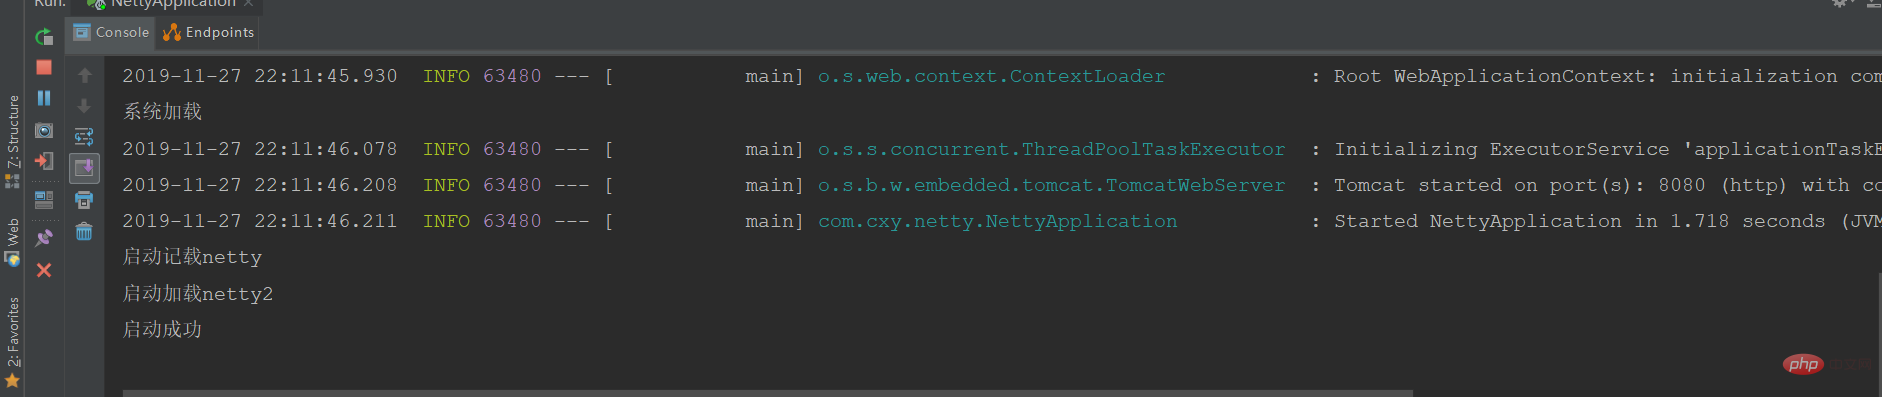
방법 3: ApplicationListener 컨텍스트 리스너 사용
package com.cxy.netty.controller;
import com.cxy.netty.controller.NettyServer;
import org.springframework.context.ApplicationListener;
import org.springframework.context.event.ContextRefreshedEvent;
import org.springframework.stereotype.Component;
@Component
public class NettyBooter implements ApplicationListener<ContextRefreshedEvent> {
    @Override
    public void onApplicationEvent(ContextRefreshedEvent event) {
        NettyServer nettyServer = new NettyServer(8081);
        try {
            nettyServer.start();
        } catch (Exception e) {
            e.printStackTrace();
        }
    }
}시작 클래스:
package com.cxy.netty;
import com.cxy.netty.controller.NettyServer;
import org.springframework.boot.CommandLineRunner;
import org.springframework.boot.SpringApplication;
import org.springframework.boot.autoconfigure.SpringBootApplication;
import org.springframework.boot.web.servlet.ServletListenerRegistrationBean;
import org.springframework.context.annotation.Bean;
@SpringBootApplication
public class NettyApplication {
   /**
     * 注册监听器
     * @return
     */
   /* @SuppressWarnings({ "rawtypes", "unchecked" })
    @Bean
    public ServletListenerRegistrationBean servletListenerRegistrationBean() {
        ServletListenerRegistrationBean servletListenerRegistrationBean =
                new ServletListenerRegistrationBean();
        servletListenerRegistrationBean.setListener(new InitListener());
        return servletListenerRegistrationBean;
    }*/
    public static void main(String[] args) {
        SpringApplication.run(NettyApplication.class, args);
    }
}시작 로그 보기:

방법 4: commiandLinerunner 시작
package com.cxy.netty;
import com.cxy.netty.controller.NettyServer;
import org.springframework.boot.CommandLineRunner;
import org.springframework.boot.SpringApplication;
import org.springframework.boot.autoconfigure.SpringBootApplication;
import org.springframework.boot.web.servlet.ServletListenerRegistrationBean;
import org.springframework.context.annotation.Bean;
/*
@SpringBootApplication
public class NettyApplication {
   */
/**
     * 注册监听器
     * @return
     *//*
   */
/* @SuppressWarnings({ "rawtypes", "unchecked" })
    @Bean
    public ServletListenerRegistrationBean servletListenerRegistrationBean() {
        ServletListenerRegistrationBean servletListenerRegistrationBean =
                new ServletListenerRegistrationBean();
        servletListenerRegistrationBean.setListener(new InitListener());
        return servletListenerRegistrationBean;
    }*//*
    public static void main(String[] args) {
        SpringApplication.run(NettyApplication.class, args);
    }
}
*/
@SpringBootApplication
public class NettyApplication implements CommandLineRunner {
    public static void main(String[] args) {
        SpringApplication.run(NettyApplication.class, args);
    }
    @Override
    public void run(String... args) throws Exception {
        NettyServer echoServer = new NettyServer(8083);
        echoServer.start();
    }
}로그를 보세요:
위 내용은 springboot가 netty 프레임워크를 통합하는 방법은 무엇입니까?의 상세 내용입니다. 자세한 내용은 PHP 중국어 웹사이트의 기타 관련 기사를 참조하세요!

핫 AI 도구

Undresser.AI Undress
사실적인 누드 사진을 만들기 위한 AI 기반 앱

AI Clothes Remover
사진에서 옷을 제거하는 온라인 AI 도구입니다.

Undress AI Tool
무료로 이미지를 벗다

Clothoff.io
AI 옷 제거제

AI Hentai Generator
AI Hentai를 무료로 생성하십시오.

인기 기사
뜨거운 도구

메모장++7.3.1
사용하기 쉬운 무료 코드 편집기

SublimeText3 중국어 버전
중국어 버전, 사용하기 매우 쉽습니다.

스튜디오 13.0.1 보내기
강력한 PHP 통합 개발 환경

드림위버 CS6
시각적 웹 개발 도구

SublimeText3 Mac 버전
신 수준의 코드 편집 소프트웨어(SublimeText3)
뜨거운 주제
 7532
7532
 15
1379
52
82
11
55
19
21
84
15
1379
52
82
11
55
19
21
84

 Springboot가 Jasypt를 통합하여 구성 파일 암호화를 구현하는 방법
Jun 01, 2023 am 08:55 AM
Springboot가 Jasypt를 통합하여 구성 파일 암호화를 구현하는 방법
Jun 01, 2023 am 08:55 AM
Jasypt 소개 Jasypt는 개발자가 최소한의 노력으로 프로젝트에 기본 암호화 기능을 추가할 수 있게 해주며 암호화 작동 방식에 대한 깊은 이해가 필요하지 않은 단방향 및 양방향 암호화에 대한 높은 보안을 제공합니다. 표준 기반 암호화 기술. 비밀번호, 텍스트, 숫자, 바이너리 암호화... Spring 기반 애플리케이션, 개방형 API와의 통합에 적합하며 모든 JCE 공급자와 함께 사용할 수 있습니다... 다음 종속성을 추가합니다: com.github.ulisesbocchiojasypt-spring-boot-starter2. Jasypt의 이점은 코드가 유출되더라도 데이터 소스를 보장할 수 있어 시스템 보안을 보호합니다.
 SpringBoot가 Redisson을 통합하여 지연 대기열을 구현하는 방법
May 30, 2023 pm 02:40 PM
SpringBoot가 Redisson을 통합하여 지연 대기열을 구현하는 방법
May 30, 2023 pm 02:40 PM
사용 시나리오 1. 주문이 성공적으로 이루어졌으나 30분 이내에 결제가 이루어지지 않았습니다. 결제 시간이 초과되어 주문이 자동으로 취소되었습니다. 2. 주문이 서명되었으며 서명 후 7일 동안 평가가 수행되지 않았습니다. 주문 시간이 초과되어 평가되지 않으면 시스템은 기본적으로 긍정적 평가로 설정됩니다. 3. 판매자가 5분 동안 주문을 받지 않으면 주문이 취소됩니다. 문자 메시지 알림이 전송됩니다... 지연이 길고 실시간 성능이 낮은 시나리오의 경우 작업 예약을 사용하여 정기적인 폴링 처리를 수행할 수 있습니다. 예: xxl-job 오늘은 다음을 선택하겠습니다.
 Redis를 사용하여 SpringBoot에서 분산 잠금을 구현하는 방법
Jun 03, 2023 am 08:16 AM
Redis를 사용하여 SpringBoot에서 분산 잠금을 구현하는 방법
Jun 03, 2023 am 08:16 AM
1. Redis는 분산 잠금 원칙과 분산 잠금이 필요한 이유를 구현합니다. 분산 잠금에 대해 이야기하기 전에 분산 잠금이 필요한 이유를 설명해야 합니다. 분산 잠금의 반대는 독립형 잠금입니다. 다중 스레드 프로그램을 작성할 때 공유 변수를 동시에 작동하여 발생하는 데이터 문제를 방지하기 위해 일반적으로 잠금을 사용하여 공유 변수를 상호 제외합니다. 공유 변수의 사용 범위는 동일한 프로세스에 있습니다. 동시에 공유 리소스를 운영해야 하는 여러 프로세스가 있는 경우 어떻게 상호 배타적일 수 있습니까? 오늘날의 비즈니스 애플리케이션은 일반적으로 마이크로서비스 아키텍처입니다. 이는 하나의 애플리케이션이 여러 프로세스를 배포한다는 의미이기도 합니다. 여러 프로세스가 MySQL에서 동일한 레코드 행을 수정해야 하는 경우 잘못된 작업으로 인해 발생하는 더티 데이터를 방지하려면 배포가 필요합니다. 현재 소개할 스타일은 잠겨 있습니다. 포인트를 얻고 싶다
 springboot가 파일을 jar 패키지로 읽은 후 파일에 액세스할 수 없는 문제를 해결하는 방법
Jun 03, 2023 pm 04:38 PM
springboot가 파일을 jar 패키지로 읽은 후 파일에 액세스할 수 없는 문제를 해결하는 방법
Jun 03, 2023 pm 04:38 PM
Springboot가 파일을 읽지만 jar 패키지로 패키징한 후 최신 개발에 액세스할 수 없습니다. springboot가 파일을 jar 패키지로 패키징한 후 파일을 읽을 수 없는 상황이 발생합니다. 그 이유는 패키징 후 파일의 가상 경로 때문입니다. 유효하지 않으며 읽기를 통해서만 액세스할 수 있습니다. 파일은 리소스 publicvoidtest(){Listnames=newArrayList();InputStreamReaderread=null;try{ClassPathResourceresource=newClassPathResource("name.txt");Input 아래에 있습니다.
 여러 테이블을 추가하기 위해 SQL 문을 사용하지 않고 Springboot+Mybatis-plus를 구현하는 방법
Jun 02, 2023 am 11:07 AM
여러 테이블을 추가하기 위해 SQL 문을 사용하지 않고 Springboot+Mybatis-plus를 구현하는 방법
Jun 02, 2023 am 11:07 AM
Springboot+Mybatis-plus가 다중 테이블 추가 작업을 수행하기 위해 SQL 문을 사용하지 않을 때 내가 직면한 문제는 테스트 환경에서 생각을 시뮬레이션하여 분해됩니다. 매개 변수가 있는 BrandDTO 개체를 생성하여 배경으로 매개 변수 전달을 시뮬레이션합니다. Mybatis-plus에서 다중 테이블 작업을 수행하는 것은 매우 어렵다는 것을 Mybatis-plus-join과 같은 도구를 사용하지 않으면 해당 Mapper.xml 파일을 구성하고 냄새나고 긴 ResultMap만 구성하면 됩니다. 해당 SQL 문을 작성합니다. 이 방법은 번거로워 보이지만 매우 유연하며 다음을 수행할 수 있습니다.
 SpringBoot와 SpringMVC의 비교 및 차이점 분석
Dec 29, 2023 am 11:02 AM
SpringBoot와 SpringMVC의 비교 및 차이점 분석
Dec 29, 2023 am 11:02 AM
SpringBoot와 SpringMVC는 모두 Java 개발에서 일반적으로 사용되는 프레임워크이지만 둘 사이에는 몇 가지 분명한 차이점이 있습니다. 이 기사에서는 이 두 프레임워크의 기능과 용도를 살펴보고 차이점을 비교할 것입니다. 먼저 SpringBoot에 대해 알아봅시다. SpringBoot는 Spring 프레임워크를 기반으로 하는 애플리케이션의 생성 및 배포를 단순화하기 위해 Pivotal 팀에서 개발되었습니다. 독립 실행형 실행 파일을 구축하는 빠르고 가벼운 방법을 제공합니다.
 SpringBoot가 Redis를 사용자 정의하여 캐시 직렬화를 구현하는 방법
Jun 03, 2023 am 11:32 AM
SpringBoot가 Redis를 사용자 정의하여 캐시 직렬화를 구현하는 방법
Jun 03, 2023 am 11:32 AM
1. RedisAPI 기본 직렬화 메커니즘인 RedisTemplate1.1을 사용자 정의합니다. API 기반 Redis 캐시 구현은 데이터 캐싱 작업에 RedisTemplate 템플릿을 사용합니다. 여기서 RedisTemplate 클래스를 열고 클래스의 소스 코드 정보를 봅니다. 키 선언, 값의 다양한 직렬화 방법, 초기 값은 비어 있음 @NullableprivateRedisSe
 springboot에서 application.yml의 값을 얻는 방법
Jun 03, 2023 pm 06:43 PM
springboot에서 application.yml의 값을 얻는 방법
Jun 03, 2023 pm 06:43 PM
프로젝트에서는 일부 구성 정보가 필요한 경우가 많습니다. 이 정보는 테스트 환경과 프로덕션 환경에서 구성이 다를 수 있으며 실제 비즈니스 상황에 따라 나중에 수정해야 할 수도 있습니다. 이러한 구성은 코드에 하드 코딩할 수 없습니다. 예를 들어 이 정보를 application.yml 파일에 작성할 수 있습니다. 그렇다면 코드에서 이 주소를 어떻게 얻거나 사용합니까? 2가지 방법이 있습니다. 방법 1: @Value 주석이 달린 ${key}를 통해 구성 파일(application.yml)의 키에 해당하는 값을 가져올 수 있습니다. 이 방법은 마이크로서비스가 상대적으로 적은 상황에 적합합니다. 프로젝트, 업무가 복잡할 때는 논리
