MyBatis는 사용자 정의 SQL, 저장 프로시저 및 고급 매핑을 지원하는 탁월한 지속성 계층 프레임워크입니다. MyBatis는 거의 모든 JDBC 코드와 매개변수 설정 및 결과 세트 가져오기 작업을 제거합니다. MyBatis는 간단한 XML이나 주석을 통해 기본 유형, 인터페이스 및 Java POJO(Plain Old Java Objects)를 데이터베이스의 레코드로 구성하고 매핑할 수 있습니다.
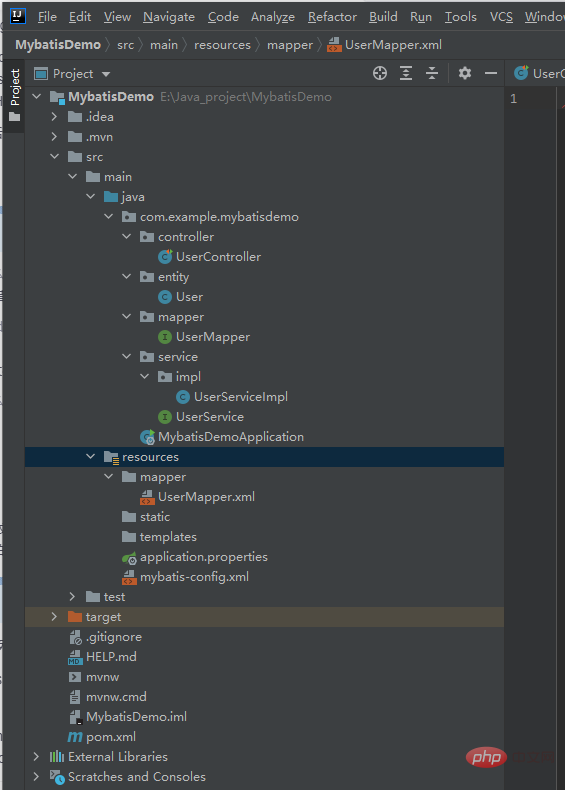
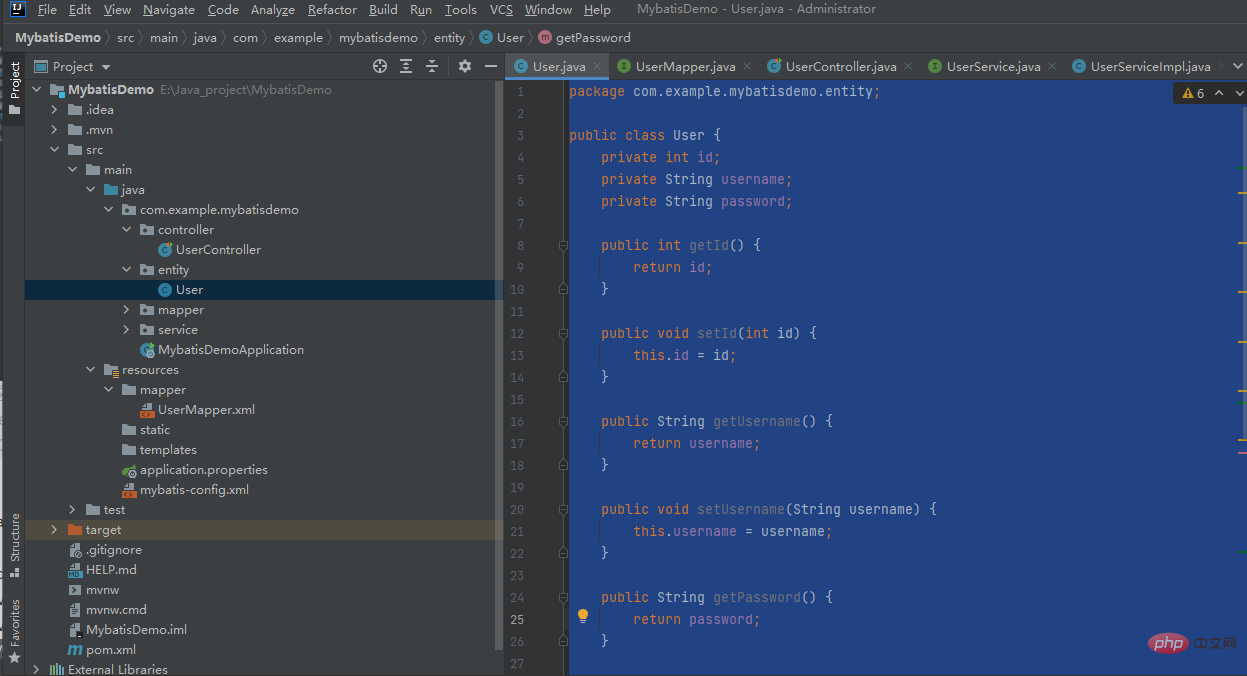
1. MyBatis 프로젝트의 전체 디렉토리 구조
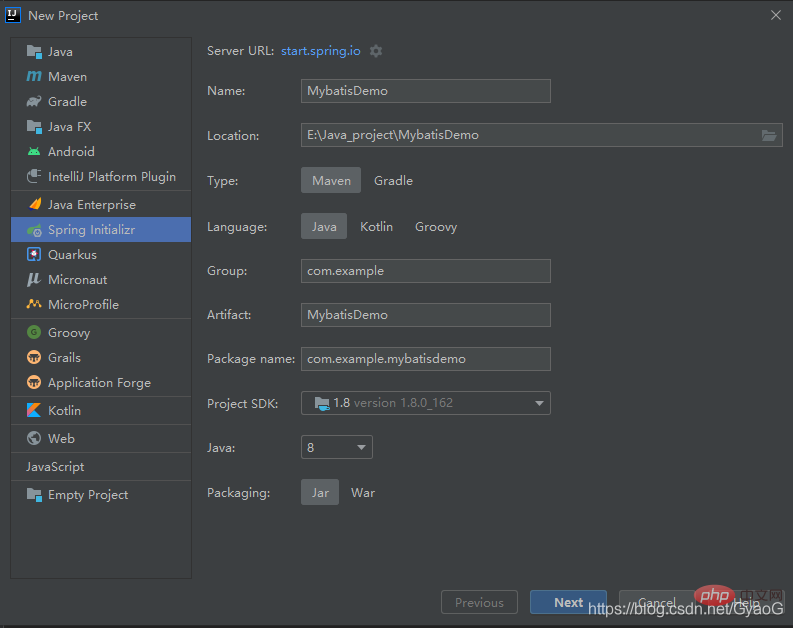
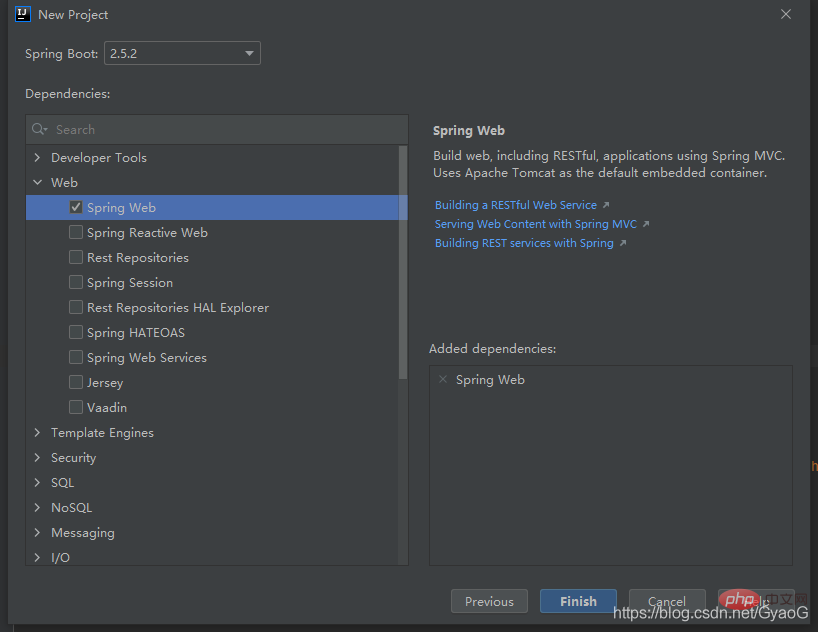
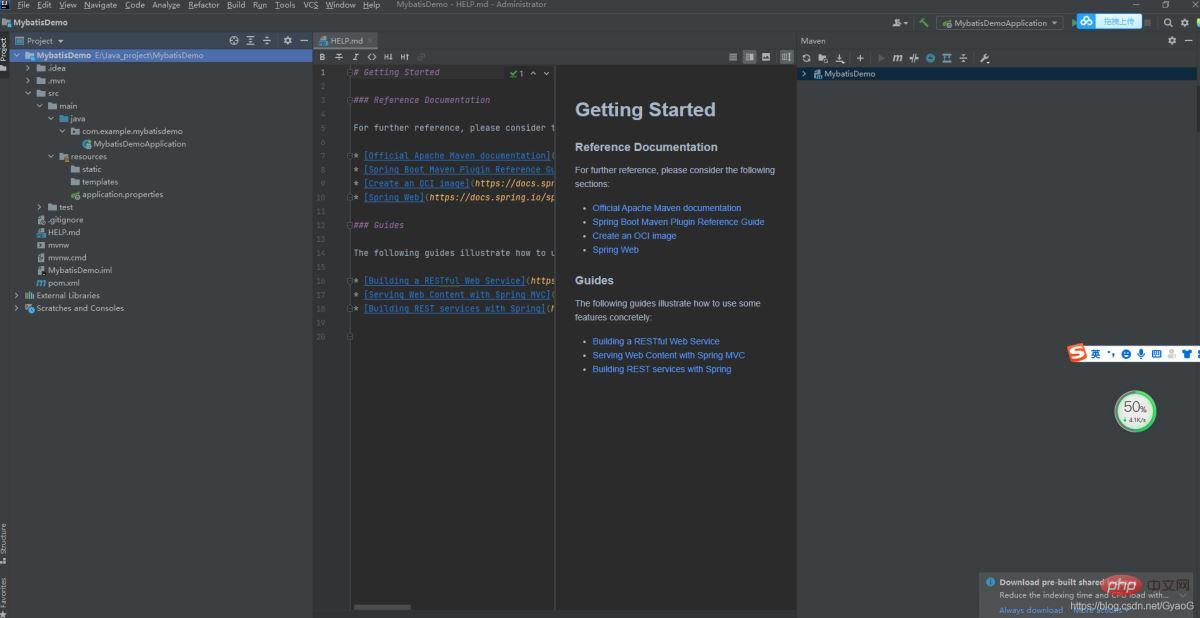
2. 간단한 SpringBoot 프로젝트를 생성합니다
3.
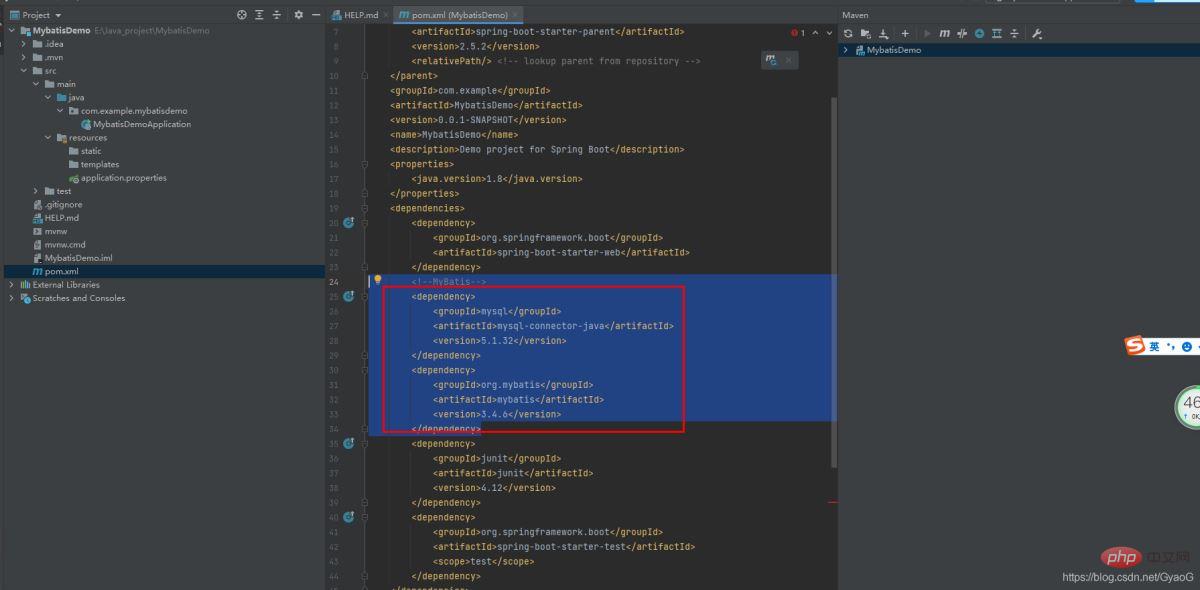

  <!--MyBatis-->
        <dependency>
            <groupId>mysql</groupId>
            <artifactId>mysql-connector-java</artifactId>
            <version>5.1.32</version>
        </dependency>
        <dependency>
            <groupId>org.mybatis</groupId>
            <artifactId>mybatis</artifactId>
            <version>3.4.6</version>
</dependency>CREATE TABLE `user` ( `id` int(11) NOT NULL AUTO_INCREMENT, `username` varchar(20) NOT NULL DEFAULT "" COMMENT "用户名", `password` varchar(50) NOT NULL DEFAULT "" COMMENT "密码", PRIMARY KEY (`id`) USING BTREE ) ENGINE=InnoDB DEFAULT CHARSET=utf8mb4 ROW_FORMAT=DYNAMIC;
#数据库相关配置
spring.datasource.driver-class-name=com.mysql.jdbc.Driver
spring.datasource.url=jdbc:mysql://127.0.0.1:3306/test?useSSL=false&characterEncoding=utf8&allowMultiQueries=true&serverTimezone=Asia/Shanghai&useAffectedRows=true
spring.datasource.username=root
spring.datasource.password=QQ796413

#mybaits配置
#mapper加载路径
mybatis.mapper-locations= classpath:mapper/*.xml
#实体包位置
mybatis.type-aliases-package= com.example.mybatisdemo.entity
#myatbis配置文件
mybatis.config-location= classpath:mybatis-config.xml

package com.example.mybatisdemo.entity;

public class User {
    private int id;
    private String username;
    private String password;

    public int getId() {
        return id;
    }

    public void setId(int id) {
        this.id = id;
    }

    public String getUsername() {
        return username;
    }

    public void setUsername(String username) {
        this.username = username;
    }

    public String getPassword() {
        return password;
    }

    public void setPassword(String password) {
        this.password = password;
    }

    @Override
    public String toString() {
        return "User{" +
                "id=" + id +
                ", username="" + username + """ +
                ", password="" + password + """ +
                "}";
    }
package com.example.mybatisdemo.mapper;

import com.example.mybatisdemo.entity.User;
import org.apache.ibatis.annotations.Mapper;

@Mapper
public interface UserMapper{

     User findUserById(Integer id);
}
package com.example.mybatisdemo.service;

import com.example.mybatisdemo.entity.User;

public interface UserService {
    User findUserById(Integer id);
}
package com.example.mybatisdemo.service.impl;

import com.example.mybatisdemo.entity.User;
import com.example.mybatisdemo.mapper.UserMapper;
import com.example.mybatisdemo.service.UserService;
import org.springframework.beans.factory.annotation.Autowired;
import org.springframework.stereotype.Service;

@Service
public class UserServiceImpl implements UserService {
        @Autowired
        private UserMapper userMapper;

        @Override
        public User findUserById(Integer id) {
            return userMapper.findUserById(id);
        }
}위 내용은 SpringBoot MyBatis를 빠르게 시작하는 방법의 상세 내용입니다. 자세한 내용은 PHP 중국어 웹사이트의 기타 관련 기사를 참조하세요!