Centos7 시스템에서 .NET Core2.0+Nginx+Supervisor 환경을 구축하는 방법
1. Linux .net 코어 소개
역사적으로 Microsoft는 자체 플랫폼에 대해서만 .net 지원을 제공했습니다. 즉, 이 "이론적으로" 크로스 플랫폼 프레임워크는 Linux 및 Macos에서만 지원될 수 있습니다. 타사 프로젝트(예: mono.net).
Microsoft가 완전한 오픈 소스 .net 코어를 출시할 때까지입니다. 이 오픈 소스 플랫폼은 .NET 표준과 호환되며 Windows, Linux 및 macOS에서 완전히 일관된 API를 제공합니다. 이 소형 .net 프레임워크는 표준 .net의 하위 집합일 뿐이지만 이미 매우 강력합니다.
한편으로는 이 작은 프레임워크를 사용하면 특정 기능적 애플리케이션을 세 가지 플랫폼에서 동시에 실행할 수 있습니다(일부 기능적 Python 스크립트와 마찬가지로). 다른 한편으로는 서버 운영 및 유지 관리 담당자가 ASP를 사용할 수도 있습니다. net 서비스 프로그램은 Linux 서버(특히 Windows 서버 실행에 어려움이 있는 서버)에 배포됩니다.
2. Linux .net core2.0 환경 배포 전 준비
1. 환경 설명:
서버 시스템: centos 7.2.1511
2. 설치 전 준비(방화벽 끄기, selinux 끄기) )
1 )방화벽 닫기:
systemctl stop firewalld.service #停止firewall
systemctl disable firewalld.service #禁止firewall开机启动
firewall-cmd --state #查看默认防火墙状态(关闭后显示notrunning,开启后显示running)
2) selinux
sed -i "s/selinux=enforcing/selinux=disabled/g" /etc/selinux/config
닫기 다음과 같이 수정된 파일 보기:
[root@localhost ~]# cat /etc/selinux/config

# this file controls the state of selinux on the system.
# selinux= can take one of these three values:
#   enforcing - selinux security policy is enforced.
#   permissive - selinux prints warnings instead of enforcing.
#   disabled - no selinux policy is loaded.
selinux=disabled
# selinuxtype= can take one of three two values:
#   targeted - targeted processes are protected,
#   minimum - modification of targeted policy. only selected processes are protected.
#   mls - multi level security protection.
selinuxtype=targeted
3) centos 재시작
reboot
3. Centos는 .net core2.0 환경을 배포합니다
1. dotnet 제품 추가
.net core를 설치하기 전에 Microsoft Product Feed에 등록해야 합니다. 이 작업은 한 번만 수행하면 됩니다. 먼저 Microsoft 서명 키를 등록한 다음 Microsoft 제품 피드를 추가하세요.
rpm --import https://packages.microsoft.com/keys/microsoft.asc
sh -c 'echo -e "[packages-microsoft-com-prod]nname=packages-microsoft-com-prod nbaseurl=https://packages.microsoft.com/yumrepos/microsoft-rhel7.3-prodnenabled=1ngpgcheck=1ngpgkey=https://packages.microsoft.com/keys/microsoft.asc" > /etc/yum.repos.d/dotnetdev.repo'
2.Install .net core sdk
다음 단계를 진행하기 전에 시스템에서 .net의 이전 미리보기 버전을 모두 제거하세요.
다음 명령은 설치할 제품 목록을 업데이트하고, .net Core에 필요한 구성 요소를 설치한 다음, .net Core SDK를 설치합니다.
yum update
yum install libunwind libicu -y
yum install dotnet-sdk-2.0.0 -y
3. dotnet이 성공적으로 설치되었는지 확인하고 버전을 확인합니다
dotnet --info
dotnet --version
4. .net core2.0 환경을 테스트합니다
1. 홈 디렉터리에서 테스트 환경을 초기화하고 "hello world"를 출력합니다. 콘텐츠(테스트 방법 1, 무시 가능)
cd /home
dotnet new console -o hwapp
cd hwapp
dotnet run
출력된 빈 콘텐츠는 다음과 같습니다.
[root@localhost hwapp]# dotnet run
hello world!
2. 테스트를 위해 .net 코어의 인스턴스 페이지를 업로드합니다(테스트 방법 2, 권장)
centos는 .net 코어 아래에 있습니다. 2 환경 테스트 케이스 (/home 디렉터리 또는 사용자 지정 디렉터리에 업로드)
다운로드 주소:
http://down.51cto.com/data/2334968
다음 명령을 실행
cd /home/webapplication1
dotnet restore  //如果使过用测试方式一,就需先执行这命令重新加载一下当前新的网站文件
dotnet run
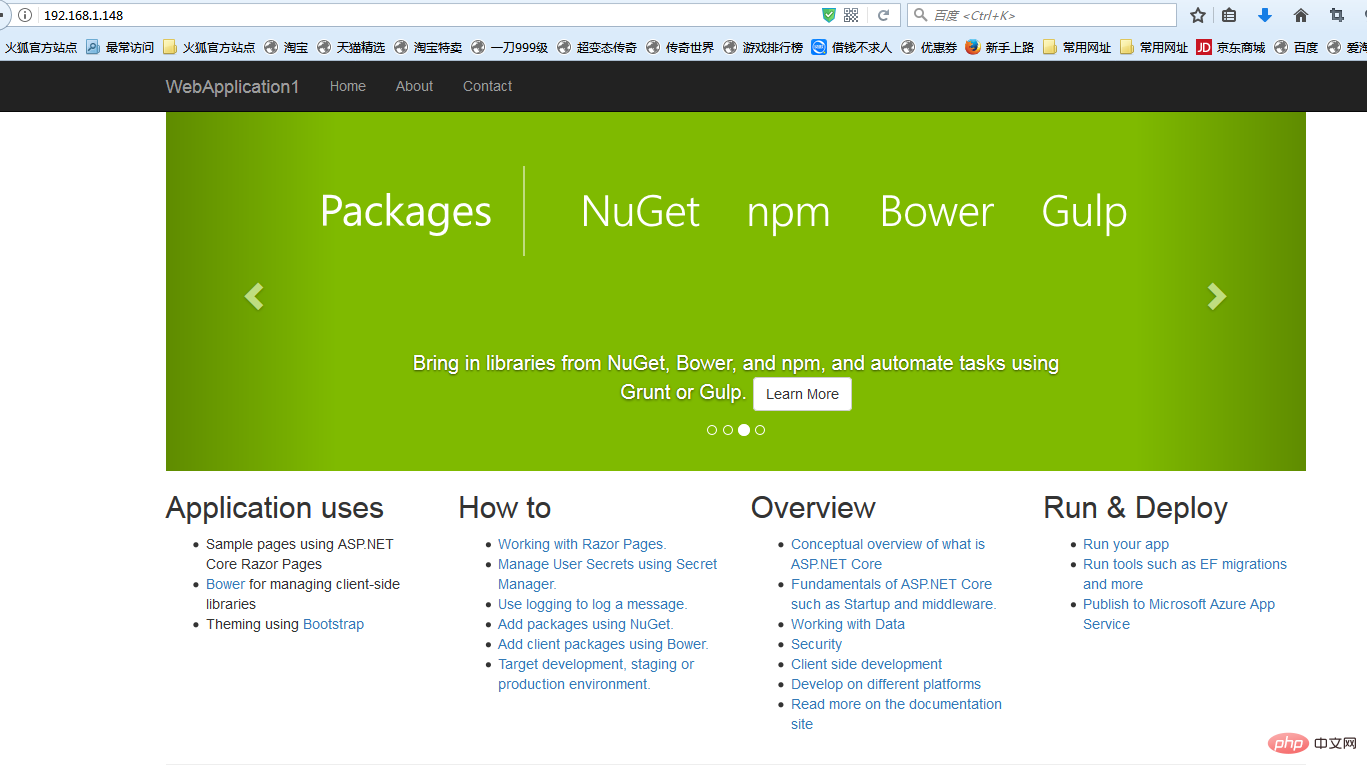
실행 후 아래와 같이 :

ie를 통해 테스트 페이지 방문

5. asp.net 핵심 애플리케이션을 전달하기 위해 nginx 설치 및 구성
1. nginx 환경 설치
[root@localhost ~]#curl -o nginx.rpm http://nginx.org/packages/centos/7/noarch/rpms/nginx-release-centos-7-0.el7.ngx.noarch.rpm
[root@localhost ~]#rpm -ivh nginx.rpm
[root@localhost ~]#yum install nginx -y
Enter: systemctl start nginx to nginx를 시작하세요.
[root@localhost ~]# systemctl start nginx
Enter: systemctl에서 nginx를 활성화하여 nginx 시작 설정(Linux는 종료하고 다시 시작할 때 자동으로 nginx를 실행하므로 명령을 입력하기 위해 연결할 필요가 없습니다)
[root@localhost ~]#systemctl enable nginx
created symlink from /etc/systemd/system/multi-user.target.wants/nginx.service to /usr/lib/systemd/system/nginx.service.
2
[root@localhost nginx-1.8.1]# ps -ef|grep nginx
root   14626   1 0 08:47 ?    00:00:00 nginx: master process nginx
nginx   14627 14626 0 08:47 ?    00:00:00 nginx: worker process
root   14636  3269 0 08:49 pts/1  00:00:00 grep --color=auto nginx

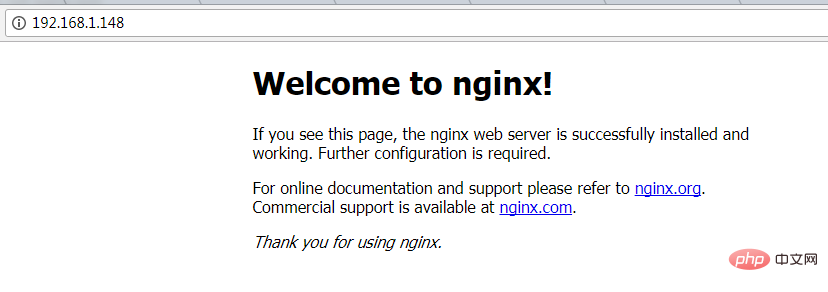
에 액세스할 수 있는지 확인하세요. nginx에서 IE까지 자주 사용하는 운영 명령어
systemctl start nginx.service
systemctl status nginx.service #서비스 현재 상태 보기 systemctl restart nginx.service #서비스 재시작systemctl 목록 -units –type=service # 시작된 모든 서비스 보기 4. 방화벽 구성(시스템에 방화벽이 있는 경우 규칙을 작성해야 함) 명령: Firewall-cmd –zone=public –add-port=80/tcp –permanent(포트 80 열기) 명령: systemctl restart Firewalld(구성이 즉시 적용되도록 방화벽을 다시 시작) 5. nginx를 asp.net으로 구성 핵심 애플리케이션 전달 /etc/nginx/conf 수정 .d/default.conf 파일. 파일 콘텐츠를
server {
  listen 80;
  location / {
    proxy_pass http://localhost:88;
    proxy_http_version 1.1;
    proxy_set_header upgrade $http_upgrade;
    proxy_set_header connection keep-alive;
    proxy_set_header host $host;
    proxy_cache_bypass $http_upgrade;
  }
}[root@localhost nginx]# nginx -s reload
[root@localhost ~]# cd /home/webapplication1/
[root@localhost webapplication1]# dotnet run
using launch settings from /home/webapplication1/properties/launchsettings.json...
hosting environment: development
content root path: /home/webapplication1
now listening on: http://[::]:88
application started. press ctrl+c to shut down.

问题1:asp.net core应用程序运行在shell之中,如果关闭shell则会发现asp.net core应用被关闭,从而导致应用无法访问,这种情况当然是我们不想遇到的,而且生产环境对这种情况是零容忍的。
问题2:如果asp.net core进程意外终止那么需要人为连进shell进行再次启动,往往这种操作都不够及时。
问题3:如果服务器宕机或需要重启我们则还是需要连入shell进行启动。
为了解决这个问题,我们需要有一个程序来监听asp.net core 应用程序的状况。在应用程序停止运行的时候立即重新启动。这边我们用到了supervisor这个工具,supervisor使用python开发的。
1.安装supervisor
[root@localhost /]# yum install python-setuptools -y
[root@localhost /]#easy_install supervisor
2.配置supervisor
[root@localhost /]#mkdir /etc/supervisor
[root@localhost /]#echo_supervisord_conf > /etc/supervisor/supervisord.conf
修改supervisord.conf文件,将文件尾部的配置
[root@localhost /]# vi /etc/supervisor/supervisord.conf
将里面的最后两行:
;[include]
;files = relative/directory/*.ini
改为
[include]
files = conf.d/*.conf
ps:如果服务已启动,修改配置文件可用“supervisorctl reload”命令来使其生效
3.配置对asp.net core应用的守护
创建一个 webapplication1.conf文件,内容大致如下
[root@localhost /]# vi webapplication1.conf
[program:webapplication1]
command=dotnet webapplication1.dll ; 运行程序的命令
directory=/home/webapplication1/ ; 命令执行的目录
autorestart=true ; 程序意外退出是否自动重启
stderr_logfile=/var/log/webapplication1.err.log ; 错误日志文件
stdout_logfile=/var/log/webapplication1.out.log ; 输出日志文件
environment=aspnetcore_environment=production ; 进程环境变量
user=root ; 进程执行的用户身份
stopsignal=int
将文件拷贝至:“/etc/supervisor/conf.d/webapplication1.conf”下
[root@localhost /]#mkdir /etc/supervisor/conf.d
[root@localhost /]#cp webapplication1.conf /etc/supervisor/conf.d/
运行supervisord,查看是否生效
[root@localhost /]#supervisord -c /etc/supervisor/supervisord.confsupervisord -c /etc/supervisor/supervisord.conf
[root@localhost /]# ps -ef | grep webapplication1
root   29878 29685 0 09:57 ?    00:00:00 dotnet webapplication1.dll
root   29892 29363 0 09:57 pts/3  00:00:00 grep --color=auto webapplication1
如果存在dotnet webapplication1.dll 进程则代表运行成功,这时候在使用浏览器进行访问。

至此关于asp.net core应用程序的守护即配置完成。
supervisor守护进程常用操作
【启动supervisord】
确保配置无误后可以在每台主机上使用下面的命令启动supervisor的服务器端supervisord
supervisord
【停止supervisord】
supervisorctl shutdown
【重新加载配置文件】
supervisorctl reload
七 、配置supervisor开机启动
新建一个“supervisord.service”文件
[root@localhost /]# vi supervisord.service
# dservice for systemd (centos 7.0+)
# by et-cs (https://github.com/et-cs)
[unit]
description=supervisor daemon
[service]
type=forking
execstart=/usr/bin/supervisord -c /etc/supervisor/supervisord.conf
execstop=/usr/bin/supervisorctl shutdown
execreload=/usr/bin/supervisorctl reload
killmode=process
restart=on-failure
restartsec=42s
[install]
wantedby=multi-user.target
将文件拷贝至:“/usr/lib/systemd/system/supervisord.service”
[root@localhost /]# cp supervisord.service /usr/lib/systemd/system/
执行命令:systemctl enable supervisord
[root@localhost /]# systemctl enable supervisord
created symlink from /etc/systemd/system/multi-user.target.wants/supervisord.service to /usr/lib/systemd/system/supervisord.service.
执行命令:systemctl is-enabled supervisord #来验证是否为开机启动
[root@localhost /]# systemctl is-enabled supervisord
重启系统看能否能成功访问
[root@localhost /]# reboot

위 내용은 Centos7 시스템에서 .NET Core2.0+Nginx+Supervisor 환경을 구축하는 방법의 상세 내용입니다. 자세한 내용은 PHP 중국어 웹사이트의 기타 관련 기사를 참조하세요!

핫 AI 도구

Undresser.AI Undress
사실적인 누드 사진을 만들기 위한 AI 기반 앱

AI Clothes Remover
사진에서 옷을 제거하는 온라인 AI 도구입니다.

Undress AI Tool
무료로 이미지를 벗다

Clothoff.io
AI 옷 제거제

AI Hentai Generator
AI Hentai를 무료로 생성하십시오.

인기 기사

뜨거운 도구

메모장++7.3.1
사용하기 쉬운 무료 코드 편집기

SublimeText3 중국어 버전
중국어 버전, 사용하기 매우 쉽습니다.

스튜디오 13.0.1 보내기
강력한 PHP 통합 개발 환경

드림위버 CS6
시각적 웹 개발 도구

SublimeText3 Mac 버전
신 수준의 코드 편집 소프트웨어(SublimeText3)

뜨거운 주제
 7439
7439
 15
15
 1369
1369
 52
52
 76
76
 11
11
 32
32
 19
19
 Tomcat 서버에 대한 외부 네트워크 액세스를 허용하는 방법
Apr 21, 2024 am 07:22 AM
Tomcat 서버가 외부 네트워크에 액세스하도록 허용하려면 다음을 수행해야 합니다. 외부 연결을 허용하도록 Tomcat 구성 파일을 수정합니다. Tomcat 서버 포트에 대한 액세스를 허용하는 방화벽 규칙을 추가합니다. Tomcat 서버 공용 IP에 대한 도메인 이름을 가리키는 DNS 레코드를 만듭니다. 선택 사항: 역방향 프록시를 사용하여 보안 및 성능을 향상합니다. 선택 사항: 보안 강화를 위해 HTTPS를 설정합니다.
 thinkphp를 실행하는 방법
Apr 09, 2024 pm 05:39 PM
ThinkPHP Framework를 로컬에서 실행하는 단계: ThinkPHP Framework를 로컬 디렉터리에 다운로드하고 압축을 풉니다. ThinkPHP 루트 디렉터리를 가리키는 가상 호스트(선택 사항)를 만듭니다. 데이터베이스 연결 매개변수를 구성합니다. 웹 서버를 시작합니다. ThinkPHP 애플리케이션을 초기화합니다. ThinkPHP 애플리케이션 URL에 접속하여 실행하세요.
 nginx에 오신 것을 환영합니다! 어떻게 해결하나요?
Apr 17, 2024 am 05:12 AM
"Welcome to nginx!" 오류를 해결하려면 가상 호스트 구성을 확인하고, 가상 호스트를 활성화하고, Nginx를 다시 로드하고, 가상 호스트 구성 파일을 찾을 수 없으면 기본 페이지를 만들고, Nginx를 다시 로드해야 합니다. 그러면 오류 메시지가 나타납니다. 사라지고 웹사이트는 정상적으로 표시됩니다.
 도커 컨테이너 간 통신 방법
Apr 07, 2024 pm 06:24 PM
Docker 환경에는 공유 네트워크, Docker Compose, 네트워크 프록시, 공유 볼륨 및 메시지 큐의 5가지 컨테이너 통신 방법이 있습니다. 격리 및 보안 요구 사항에 따라 Docker Compose를 활용하여 연결을 단순화하거나 네트워크 프록시를 사용하여 격리를 높이는 등 가장 적절한 통신 방법을 선택하세요.
 phpmyadmin을 등록하는 방법
Apr 07, 2024 pm 02:45 PM
phpMyAdmin을 등록하려면 먼저 MySQL 사용자를 생성하고 권한을 부여한 다음 phpMyAdmin을 다운로드, 설치 및 구성하고 마지막으로 phpMyAdmin에 로그인하여 데이터베이스를 관리해야 합니다.
 nodejs 프로젝트를 서버에 배포하는 방법
Apr 21, 2024 am 04:40 AM
Node.js 프로젝트의 서버 배포 단계: 배포 환경 준비: 서버 액세스 권한 획득, Node.js 설치, Git 저장소 설정. 애플리케이션 빌드: npm run build를 사용하여 배포 가능한 코드와 종속성을 생성합니다. Git 또는 파일 전송 프로토콜을 통해 서버에 코드를 업로드합니다. 종속성 설치: SSH를 서버에 연결하고 npm install을 사용하여 애플리케이션 종속성을 설치합니다. 애플리케이션 시작: node index.js와 같은 명령을 사용하여 애플리케이션을 시작하거나 pm2와 같은 프로세스 관리자를 사용합니다. 역방향 프록시 구성(선택 사항): Nginx 또는 Apache와 같은 역방향 프록시를 사용하여 트래픽을 애플리케이션으로 라우팅합니다.
 HTML 파일에서 URL을 생성하는 방법
Apr 21, 2024 pm 12:57 PM
HTML 파일을 URL로 변환하려면 다음 단계를 포함하는 웹 서버가 필요합니다. 웹 서버를 얻습니다. 웹 서버를 설정합니다. HTML 파일을 업로드하세요. 도메인 이름을 만듭니다. 요청을 라우팅합니다.
 phpmyadmin 설치에 실패하면 어떻게 해야 할까요?
Apr 07, 2024 pm 03:15 PM
실패한 phpMyAdmin 설치에 대한 문제 해결 단계: 시스템 요구 사항(PHP 버전, MySQL 버전, 웹 서버)을 확인하고 PHP 확장(mysqli, pdo_mysql, mbstring, token_get_all)을 활성화하고 구성 파일 설정(호스트, 포트, 사용자 이름, 비밀번호)을 확인합니다. 권한(디렉터리 소유권, 파일 권한), 방화벽 설정 확인(웹 서버 포트 허용 목록), 오류 로그 보기(/var/log/apache2/error.log 또는 /var/log/nginx/error.log) phpMyAdmin


