

디스크 파일의 전체 텍스트 검색 기능을 구현하기 위해 springboot에 ES를 통합하는 방법

整体架构
考虑到磁盘文件分布到不同的设备上,所以采用磁盘扫瞄代理的模式构建系统,即把扫描服务以代理的方式部署到目标磁盘所在的服务器上,作为定时任务执行,索引统一建立到ES中,当然ES采用分布式高可用部署方法,搜索服务和扫描代理部署到一起来简化架构并实现分布式能力。

磁盘文件快速检索架构
部署ES
ES(elasticsearch)是本项目唯一依赖的第三方软件,ES支持docker方式部署,以下是部署过程
docker pull docker.elastic.co/elasticsearch/elasticsearch:6.3.2
docker run -e ES_JAVA_OPTS="-Xms256m -Xmx256m" -d -p 9200:9200 -p 9300:9300 --name es01 docker.elastic.co/elasticsearch/elasticsearch:6.3.2
部署完成后,通过浏览器打开http://localhost:9200,如果正常打开,出现如下界面,则说明ES部署成功。
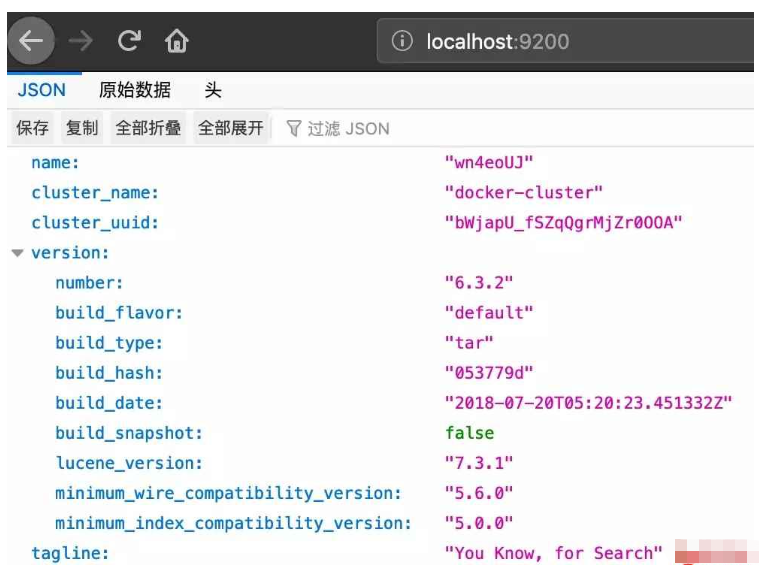
ES界面
工程结构

工程结构
依赖包
本项目除了引入springboot的基础starter外,还需要引入ES相关包
  <dependencies>
    <dependency>
      <groupid>org.springframework.boot</groupid>
      <artifactid>spring-boot-starter-data-elasticsearch</artifactid>
    </dependency>
    <dependency>
      <groupid>io.searchbox</groupid>
      <artifactid>jest</artifactid>
      <version>5.3.3</version>
    </dependency>
    <dependency>
      <groupid>net.sf.jmimemagic</groupid>
      <artifactid>jmimemagic</artifactid>
      <version>0.1.4</version>
    </dependency>
  </dependencies>
配置文件
需要将ES的访问地址配置到application.yml里边,同时为了简化程序,需要将待扫描磁盘的根目录(index-root)配置进去,后面的扫描任务就会递归遍历该目录下的全部可索引文件。
server:
 port: @elasticsearch.port@
spring:
 application:
  name: @project.artifactId@
 profiles:
  active: dev
 elasticsearch:
  jest:
   uris: http://127.0.0.1:9200
index-root: /Users/crazyicelee/mywokerspace
索引结构数据定义
因为要求文件所在目录、文件名、文件正文都有能够检索,所以要将这些内容都作为索引字段定义,而且添加ES client要求的JestId来注解id。
package com.crazyice.lee.accumulation.search.data;

import io.searchbox.annotations.JestId;
import lombok.Data;

@Data
public class Article {
  @JestId
  private Integer id;
  private String author;
  private String title;
  private String path;
  private String content;
  private String fileFingerprint;
}扫描磁盘并创建索引
因为要扫描指定目录下的全部文件,所以采用递归的方法遍历该目录,并标识已经处理的文件以提升效率,在文件类型识别方面采用两种方式可供选择,一个是文件内容更为精准判断(Magic),一种是以文件扩展名粗略判断。这部分是整个系统的核心组件。
这里有个小技巧
对目标文件内容计算MD5值并作为文件指纹存储到ES的索引字段里边,每次在重建索引的时候判断该MD5是否存在,如果存在就不用重复建立索引了,可以避免文件索引重复,也能避免系统重启后重复遍历文件。
package com.crazyice.lee.accumulation.search.service;

import com.alibaba.fastjson.JSONObject;
import com.crazyice.lee.accumulation.search.data.Article;
import com.crazyice.lee.accumulation.search.utils.Md5CaculateUtil;
import io.searchbox.client.JestClient;
import io.searchbox.core.Index;
import io.searchbox.core.Search;
import io.searchbox.core.SearchResult;
import lombok.extern.slf4j.Slf4j;
import net.sf.jmimemagic.*;
import org.apache.poi.hwpf.extractor.WordExtractor;
import org.apache.poi.xwpf.extractor.XWPFWordExtractor;
import org.apache.poi.xwpf.usermodel.XWPFDocument;
import org.elasticsearch.index.query.QueryBuilders;
import org.elasticsearch.search.builder.SearchSourceBuilder;
import org.springframework.beans.factory.annotation.Autowired;
import org.springframework.stereotype.Component;

import java.io.File;
import java.io.FileInputStream;
import java.io.FileNotFoundException;
import java.io.IOException;

@Component
@Slf4j
public class DirectoryRecurse {

  @Autowired
  private JestClient jestClient;

  //读取文件内容转换为字符串
  private String readToString(File file, String fileType) {
    StringBuffer result = new StringBuffer();
    switch (fileType) {
      case "text/plain":
      case "java":
      case "c":
      case "cpp":
      case "txt":
        try (FileInputStream in = new FileInputStream(file)) {
          Long filelength = file.length();
          byte[] filecontent = new byte[filelength.intValue()];
          in.read(filecontent);
          result.append(new String(filecontent, "utf8"));
        } catch (FileNotFoundException e) {
          log.error("{}", e.getLocalizedMessage());
        } catch (IOException e) {
          log.error("{}", e.getLocalizedMessage());
        }
        break;
      case "doc":
        //使用HWPF组件中WordExtractor类从Word文档中提取文本或段落
        try (FileInputStream in = new FileInputStream(file)) {
          WordExtractor extractor = new WordExtractor(in);
          result.append(extractor.getText());
        } catch (Exception e) {
          log.error("{}", e.getLocalizedMessage());
        }
        break;
      case "docx":
        try (FileInputStream in = new FileInputStream(file); XWPFDocument doc = new XWPFDocument(in)) {
          XWPFWordExtractor extractor = new XWPFWordExtractor(doc);
          result.append(extractor.getText());
        } catch (Exception e) {
          log.error("{}", e.getLocalizedMessage());
        }
        break;
    }
    return result.toString();
  }

  //判断是否已经索引
  private JSONObject isIndex(File file) {
    JSONObject result = new JSONObject();
    //用MD5生成文件指纹,搜索该指纹是否已经索引
    String fileFingerprint = Md5CaculateUtil.getMD5(file);
    result.put("fileFingerprint", fileFingerprint);
    SearchSourceBuilder searchSourceBuilder = new SearchSourceBuilder();
    searchSourceBuilder.query(QueryBuilders.termQuery("fileFingerprint", fileFingerprint));
    Search search = new Search.Builder(searchSourceBuilder.toString()).addIndex("diskfile").addType("files").build();
    try {
      //执行
      SearchResult searchResult = jestClient.execute(search);
      if (searchResult.getTotal() > 0) {
        result.put("isIndex", true);
      } else {
        result.put("isIndex", false);
      }
    } catch (IOException e) {
      log.error("{}", e.getLocalizedMessage());
    }
    return result;
  }

  //对文件目录及内容创建索引
  private void createIndex(File file, String method) {
    //忽略掉临时文件,以~$起始的文件名
    if (file.getName().startsWith("~$")) return;

    String fileType = null;
    switch (method) {
      case "magic":
        Magic parser = new Magic();
        try {
          MagicMatch match = parser.getMagicMatch(file, false);
          fileType = match.getMimeType();
        } catch (MagicParseException e) {
          //log.error("{}",e.getLocalizedMessage());
        } catch (MagicMatchNotFoundException e) {
          //log.error("{}",e.getLocalizedMessage());
        } catch (MagicException e) {
          //log.error("{}",e.getLocalizedMessage());
        }
        break;
      case "ext":
        String filename = file.getName();
        String[] strArray = filename.split("\\.");
        int suffixIndex = strArray.length - 1;
        fileType = strArray[suffixIndex];
    }

    switch (fileType) {
      case "text/plain":
      case "java":
      case "c":
      case "cpp":
      case "txt":
      case "doc":
      case "docx":
        JSONObject isIndexResult = isIndex(file);
        log.info("文件名:{},文件类型:{},MD5:{},建立索引:{}", file.getPath(), fileType, isIndexResult.getString("fileFingerprint"), isIndexResult.getBoolean("isIndex"));

        if (isIndexResult.getBoolean("isIndex")) break;
        //1. 给ES中索引(保存)一个文档
        Article article = new Article();
        article.setTitle(file.getName());
        article.setAuthor(file.getParent());
        article.setPath(file.getPath());
        article.setContent(readToString(file, fileType));
        article.setFileFingerprint(isIndexResult.getString("fileFingerprint"));
        //2. 构建一个索引
        Index index = new Index.Builder(article).index("diskfile").type("files").build();
        try {
          //3. 执行
          if (!jestClient.execute(index).getId().isEmpty()) {
            log.info("构建索引成功!");
          }
        } catch (IOException e) {
          log.error("{}", e.getLocalizedMessage());
        }
        break;
    }
  }

  public void find(String pathName) throws IOException {
    //获取pathName的File对象
    File dirFile = new File(pathName);

    //判断该文件或目录是否存在,不存在时在控制台输出提醒
    if (!dirFile.exists()) {
      log.info("do not exit");
      return;
    }

    //判断如果不是一个目录,就判断是不是一个文件,时文件则输出文件路径
    if (!dirFile.isDirectory()) {
      if (dirFile.isFile()) {
        createIndex(dirFile, "ext");
      }
      return;
    }

    //获取此目录下的所有文件名与目录名
    String[] fileList = dirFile.list();

    for (int i = 0; i <p><strong>扫描任务</strong><br></p><p>这里采用定时任务的方式来扫描指定目录以实现动态增量创建索引。</p><pre class="brush:php;toolbar:false">package com.crazyice.lee.accumulation.search.service;

import lombok.extern.slf4j.Slf4j;
import org.springframework.beans.factory.annotation.Autowired;
import org.springframework.beans.factory.annotation.Value;
import org.springframework.context.annotation.Configuration;
import org.springframework.scheduling.annotation.Scheduled;
import org.springframework.stereotype.Component;

import java.io.IOException;

@Configuration
@Component
@Slf4j
public class CreateIndexTask {
  @Autowired
  private DirectoryRecurse directoryRecurse;

  @Value("${index-root}")
  private String indexRoot;

  @Scheduled(cron = "* 0/5 * * * ?")
  private void addIndex(){
    try {
      directoryRecurse.find(indexRoot);
      directoryRecurse.writeIndexStatus();
    } catch (IOException e) {
      log.error("{}",e.getLocalizedMessage());
    }
  }
}搜索服务
这里以restFul的方式提供搜索服务,将关键字以高亮度模式提供给前端UI,浏览器端可以根据返回的JSON进行展示。
package com.crazyice.lee.accumulation.search.web;

import com.alibaba.fastjson.JSONObject;
import com.crazyice.lee.accumulation.search.data.Article;
import io.searchbox.client.JestClient;
import io.searchbox.core.Search;
import io.searchbox.core.SearchResult;
import io.swagger.annotations.ApiImplicitParam;
import io.swagger.annotations.ApiImplicitParams;
import io.swagger.annotations.ApiOperation;
import lombok.extern.slf4j.Slf4j;
import org.elasticsearch.index.query.BoolQueryBuilder;
import org.elasticsearch.index.query.QueryBuilders;
import org.elasticsearch.search.builder.SearchSourceBuilder;
import org.elasticsearch.search.fetch.subphase.highlight.HighlightBuilder;
import org.springframework.beans.factory.annotation.Autowired;
import org.springframework.lang.NonNull;
import org.springframework.web.bind.annotation.PathVariable;
import org.springframework.web.bind.annotation.RequestMapping;
import org.springframework.web.bind.annotation.RequestMethod;
import org.springframework.web.bind.annotation.RestController;

import java.io.IOException;
import java.util.HashMap;
import java.util.List;
import java.util.Map;

@RestController
@Slf4j
public class Controller {
  @Autowired
  private JestClient jestClient;

  @RequestMapping(value = "/search/{keyword}",method = RequestMethod.GET)
  @ApiOperation(value = "全部字段搜索关键字",notes = "es验证")
  @ApiImplicitParams(
      @ApiImplicitParam(name = "keyword",value = "全文检索关键字",required = true,paramType = "path",dataType = "String")
  )
  public List search(@PathVariable String keyword){
    SearchSourceBuilder searchSourceBuilder = new SearchSourceBuilder();
    searchSourceBuilder.query(QueryBuilders.queryStringQuery(keyword));

    HighlightBuilder highlightBuilder = new HighlightBuilder();
    //path属性高亮度
    HighlightBuilder.Field highlightPath = new HighlightBuilder.Field("path");
    highlightPath.highlighterType("unified");
    highlightBuilder.field(highlightPath);
    //title字段高亮度
    HighlightBuilder.Field highlightTitle = new HighlightBuilder.Field("title");
    highlightTitle.highlighterType("unified");
    highlightBuilder.field(highlightTitle);
    //content字段高亮度
    HighlightBuilder.Field highlightContent = new HighlightBuilder.Field("content");
    highlightContent.highlighterType("unified");
    highlightBuilder.field(highlightContent);

    //高亮度配置生效
    searchSourceBuilder.highlighter(highlightBuilder);

    log.info("搜索条件{}",searchSourceBuilder.toString());

    //构建搜索功能
    Search search = new Search.Builder(searchSourceBuilder.toString()).addIndex( "gf" ).addType( "news" ).build();
    try {
      //执行
      SearchResult result = jestClient.execute( search );
      return result.getHits(Article.class);
    } catch (IOException e) {
      log.error("{}",e.getLocalizedMessage());
    }
    return null;
  }
}搜索restFul结果测试
这里以swagger的方式进行API测试。其中keyword是全文检索中要搜索的关键字。

搜索结果
使用thymeleaf生成UI
集成thymeleaf的模板引擎直接将搜索结果以web方式呈现。模板包括主搜索页和搜索结果页,通过@Controller注解及Model对象实现。
<div>
<div>
<form>
<input>
<input>
</form>
</div>
<div>
<div>
<p></p>
<p></p>
<p></p>
<a>更多</a>
</div>
<div>
<p></p>
</div>
</div>
<script>
document.querySelectorAll('.con-more').forEach(item => {
item.onclick = () => {
item.style.cssText = 'display: none';
item.parentNode.querySelector('.con-preview').style.cssText = 'max-height: none;';
}});
</script>
</div>위 내용은 디스크 파일의 전체 텍스트 검색 기능을 구현하기 위해 springboot에 ES를 통합하는 방법의 상세 내용입니다. 자세한 내용은 PHP 중국어 웹사이트의 기타 관련 기사를 참조하세요!

핫 AI 도구

Undresser.AI Undress
사실적인 누드 사진을 만들기 위한 AI 기반 앱

AI Clothes Remover
사진에서 옷을 제거하는 온라인 AI 도구입니다.

Undress AI Tool
무료로 이미지를 벗다

Clothoff.io
AI 옷 제거제

AI Hentai Generator
AI Hentai를 무료로 생성하십시오.

인기 기사
뜨거운 도구

메모장++7.3.1
사용하기 쉬운 무료 코드 편집기

SublimeText3 중국어 버전
중국어 버전, 사용하기 매우 쉽습니다.

스튜디오 13.0.1 보내기
강력한 PHP 통합 개발 환경

드림위버 CS6
시각적 웹 개발 도구

SublimeText3 Mac 버전
신 수준의 코드 편집 소프트웨어(SublimeText3)
뜨거운 주제
 7491
7491
 15
1377
52
77
11
52
19
19
41
15
1377
52
77
11
52
19
19
41

 Springboot가 Jasypt를 통합하여 구성 파일 암호화를 구현하는 방법
Jun 01, 2023 am 08:55 AM
Springboot가 Jasypt를 통합하여 구성 파일 암호화를 구현하는 방법
Jun 01, 2023 am 08:55 AM
Jasypt 소개 Jasypt는 개발자가 최소한의 노력으로 프로젝트에 기본 암호화 기능을 추가할 수 있게 해주며 암호화 작동 방식에 대한 깊은 이해가 필요하지 않은 단방향 및 양방향 암호화에 대한 높은 보안을 제공합니다. 표준 기반 암호화 기술. 비밀번호, 텍스트, 숫자, 바이너리 암호화... Spring 기반 애플리케이션, 개방형 API와의 통합에 적합하며 모든 JCE 공급자와 함께 사용할 수 있습니다... 다음 종속성을 추가합니다: com.github.ulisesbocchiojasypt-spring-boot-starter2. Jasypt의 이점은 코드가 유출되더라도 데이터 소스를 보장할 수 있어 시스템 보안을 보호합니다.
 SpringBoot가 Redisson을 통합하여 지연 대기열을 구현하는 방법
May 30, 2023 pm 02:40 PM
SpringBoot가 Redisson을 통합하여 지연 대기열을 구현하는 방법
May 30, 2023 pm 02:40 PM
사용 시나리오 1. 주문이 성공적으로 이루어졌으나 30분 이내에 결제가 이루어지지 않았습니다. 결제 시간이 초과되어 주문이 자동으로 취소되었습니다. 2. 주문이 서명되었으며 서명 후 7일 동안 평가가 수행되지 않았습니다. 주문 시간이 초과되어 평가되지 않으면 시스템은 기본적으로 긍정적 평가로 설정됩니다. 3. 판매자가 5분 동안 주문을 받지 않으면 주문이 취소됩니다. 문자 메시지 알림이 전송됩니다... 지연이 길고 실시간 성능이 낮은 시나리오의 경우 작업 예약을 사용하여 정기적인 폴링 처리를 수행할 수 있습니다. 예: xxl-job 오늘은 다음을 선택하겠습니다.
 Redis를 사용하여 SpringBoot에서 분산 잠금을 구현하는 방법
Jun 03, 2023 am 08:16 AM
Redis를 사용하여 SpringBoot에서 분산 잠금을 구현하는 방법
Jun 03, 2023 am 08:16 AM
1. Redis는 분산 잠금 원칙과 분산 잠금이 필요한 이유를 구현합니다. 분산 잠금에 대해 이야기하기 전에 분산 잠금이 필요한 이유를 설명해야 합니다. 분산 잠금의 반대는 독립형 잠금입니다. 다중 스레드 프로그램을 작성할 때 공유 변수를 동시에 작동하여 발생하는 데이터 문제를 방지하기 위해 일반적으로 잠금을 사용하여 공유 변수를 상호 제외합니다. 공유 변수의 사용 범위는 동일한 프로세스에 있습니다. 동시에 공유 리소스를 운영해야 하는 여러 프로세스가 있는 경우 어떻게 상호 배타적일 수 있습니까? 오늘날의 비즈니스 애플리케이션은 일반적으로 마이크로서비스 아키텍처입니다. 이는 하나의 애플리케이션이 여러 프로세스를 배포한다는 의미이기도 합니다. 여러 프로세스가 MySQL에서 동일한 레코드 행을 수정해야 하는 경우 잘못된 작업으로 인해 발생하는 더티 데이터를 방지하려면 배포가 필요합니다. 현재 소개할 스타일은 잠겨 있습니다. 포인트를 얻고 싶다
 springboot가 파일을 jar 패키지로 읽은 후 파일에 액세스할 수 없는 문제를 해결하는 방법
Jun 03, 2023 pm 04:38 PM
springboot가 파일을 jar 패키지로 읽은 후 파일에 액세스할 수 없는 문제를 해결하는 방법
Jun 03, 2023 pm 04:38 PM
Springboot가 파일을 읽지만 jar 패키지로 패키징한 후 최신 개발에 액세스할 수 없습니다. springboot가 파일을 jar 패키지로 패키징한 후 파일을 읽을 수 없는 상황이 발생합니다. 그 이유는 패키징 후 파일의 가상 경로 때문입니다. 유효하지 않으며 읽기를 통해서만 액세스할 수 있습니다. 파일은 리소스 publicvoidtest(){Listnames=newArrayList();InputStreamReaderread=null;try{ClassPathResourceresource=newClassPathResource("name.txt");Input 아래에 있습니다.
 SpringBoot와 SpringMVC의 비교 및 차이점 분석
Dec 29, 2023 am 11:02 AM
SpringBoot와 SpringMVC의 비교 및 차이점 분석
Dec 29, 2023 am 11:02 AM
SpringBoot와 SpringMVC는 모두 Java 개발에서 일반적으로 사용되는 프레임워크이지만 둘 사이에는 몇 가지 분명한 차이점이 있습니다. 이 기사에서는 이 두 프레임워크의 기능과 용도를 살펴보고 차이점을 비교할 것입니다. 먼저 SpringBoot에 대해 알아봅시다. SpringBoot는 Spring 프레임워크를 기반으로 하는 애플리케이션의 생성 및 배포를 단순화하기 위해 Pivotal 팀에서 개발되었습니다. 독립 실행형 실행 파일을 구축하는 빠르고 가벼운 방법을 제공합니다.
 여러 테이블을 추가하기 위해 SQL 문을 사용하지 않고 Springboot+Mybatis-plus를 구현하는 방법
Jun 02, 2023 am 11:07 AM
여러 테이블을 추가하기 위해 SQL 문을 사용하지 않고 Springboot+Mybatis-plus를 구현하는 방법
Jun 02, 2023 am 11:07 AM
Springboot+Mybatis-plus가 다중 테이블 추가 작업을 수행하기 위해 SQL 문을 사용하지 않을 때 내가 직면한 문제는 테스트 환경에서 생각을 시뮬레이션하여 분해됩니다. 매개 변수가 있는 BrandDTO 개체를 생성하여 배경으로 매개 변수 전달을 시뮬레이션합니다. Mybatis-plus에서 다중 테이블 작업을 수행하는 것은 매우 어렵다는 것을 Mybatis-plus-join과 같은 도구를 사용하지 않으면 해당 Mapper.xml 파일을 구성하고 냄새나고 긴 ResultMap만 구성하면 됩니다. 해당 SQL 문을 작성합니다. 이 방법은 번거로워 보이지만 매우 유연하며 다음을 수행할 수 있습니다.
 SpringBoot가 Redis를 사용자 정의하여 캐시 직렬화를 구현하는 방법
Jun 03, 2023 am 11:32 AM
SpringBoot가 Redis를 사용자 정의하여 캐시 직렬화를 구현하는 방법
Jun 03, 2023 am 11:32 AM
1. RedisAPI 기본 직렬화 메커니즘인 RedisTemplate1.1을 사용자 정의합니다. API 기반 Redis 캐시 구현은 데이터 캐싱 작업에 RedisTemplate 템플릿을 사용합니다. 여기서 RedisTemplate 클래스를 열고 클래스의 소스 코드 정보를 봅니다. 키 선언, 값의 다양한 직렬화 방법, 초기 값은 비어 있음 @NullableprivateRedisSe
 springboot에서 application.yml의 값을 얻는 방법
Jun 03, 2023 pm 06:43 PM
springboot에서 application.yml의 값을 얻는 방법
Jun 03, 2023 pm 06:43 PM
프로젝트에서는 일부 구성 정보가 필요한 경우가 많습니다. 이 정보는 테스트 환경과 프로덕션 환경에서 구성이 다를 수 있으며 실제 비즈니스 상황에 따라 나중에 수정해야 할 수도 있습니다. 이러한 구성은 코드에 하드 코딩할 수 없습니다. 예를 들어 이 정보를 application.yml 파일에 작성할 수 있습니다. 그렇다면 코드에서 이 주소를 어떻게 얻거나 사용합니까? 2가지 방법이 있습니다. 방법 1: @Value 주석이 달린 ${key}를 통해 구성 파일(application.yml)의 키에 해당하는 값을 가져올 수 있습니다. 이 방법은 마이크로서비스가 상대적으로 적은 상황에 적합합니다. 프로젝트, 업무가 복잡할 때는 논리
