Eclipse에서 springboot 프로젝트를 만드는 방법은 무엇입니까?
May 22, 2023 pm 07:19 PM
eclipse
springboot
방법 1
STS 플러그인 설치


플러그인 설치 가이드 창이 완료되면 이클립스 우측하단에 플러그인 설치 진행 상황이 표시됩니다. 플러그인 설치가 완료되면 Eclipse를 다시 시작하여 적용하세요
새 스프링 부트 프로젝트 만들기


프로젝트 시작
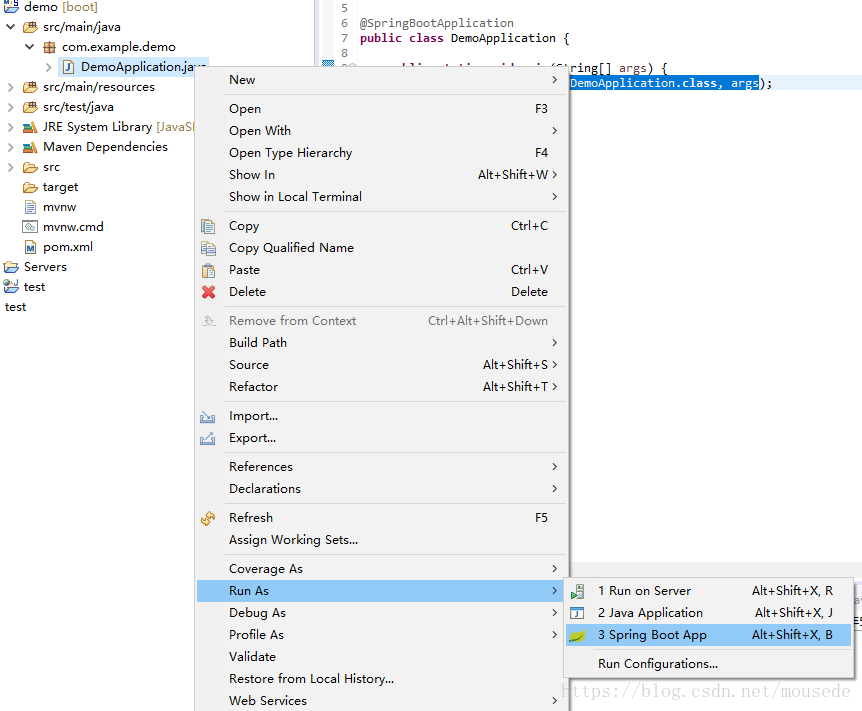
방법 2
1. Maven 프로젝트를 생성합니다
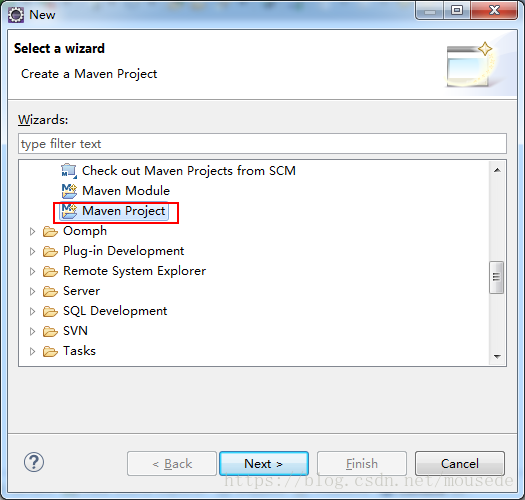
2. 프로젝트 유형을 선택합니다

3. 프로젝트 그룹을 선택하고 이름을 -finish

5로 지정합니다. .xml 파일
<!-- spring boot基本环境 -->
<parent>
    <groupId>org.springframework.boot</groupId>
    <artifactId>spring-boot-starter-parent</artifactId>
    <version>2.0.2.RELEASE</version>
</parent>
로그인 후 복사

6. pom.xml
<!--web应用基本环境配置 -->
<dependency>
    <groupId>org.springframework.boot</groupId>
    <artifactId>spring-boot-starter-web</artifactId>
</dependency>
로그인 후 복사

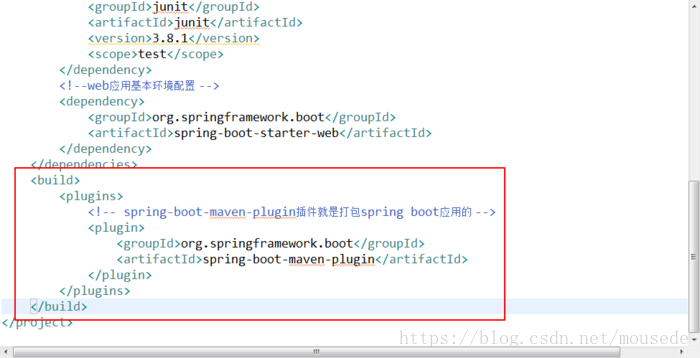
에 종속성을 추가합니다. 7. pom.xml
<build>
    <plugins>
    <!-- spring-boot-maven-plugin插件就是打包spring boot应用的 -->
        <plugin>
            <groupId>org.springframework.boot</groupId>
            <artifactId>spring-boot-maven-plugin</artifactId>
        </plugin>
    </plugins
</build>
로그인 후 복사

8에 컴파일 플러그인을 추가합니다
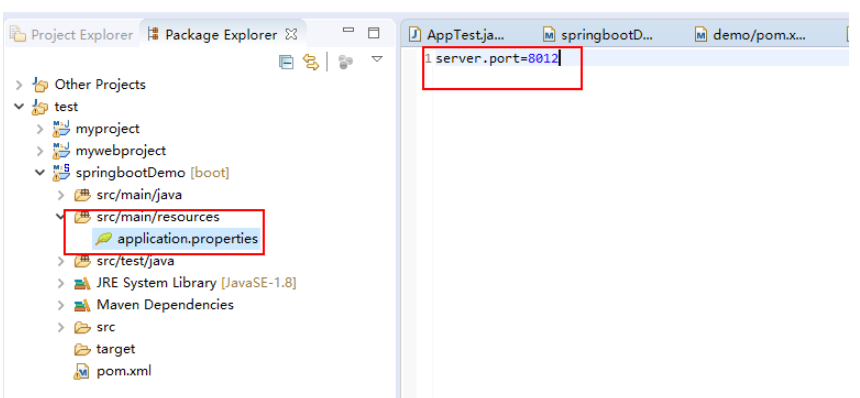
9. 리소스 폴더 및 application.properties 파일을 생성합니다

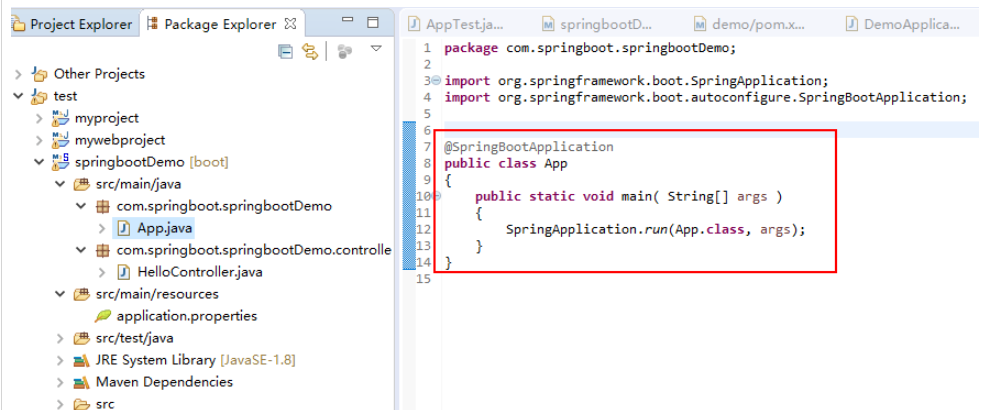
10.App.java
package com.springboot.springbootDemo;
import org.springframework.boot.SpringApplication;
import org.springframework.boot.autoconfigure.SpringBootApplication;
@SpringBootApplication
public class App
{
    public static void main( String[] args )
    {
        SpringApplication.run(App.class, args);
    }
}
로그인 후 복사
11.HelloController.java
package com.springboot.springbootDemo.controller;
import org.springframework.web.bind.annotation.RequestMapping;
import org.springframework.web.bind.annotation.RestController;
@RestController
@RequestMapping("hello2")
public class HelloController {
       @RequestMapping("")
       public String hello() {
              return "helloworld2";
       }
}
로그인 후 복사
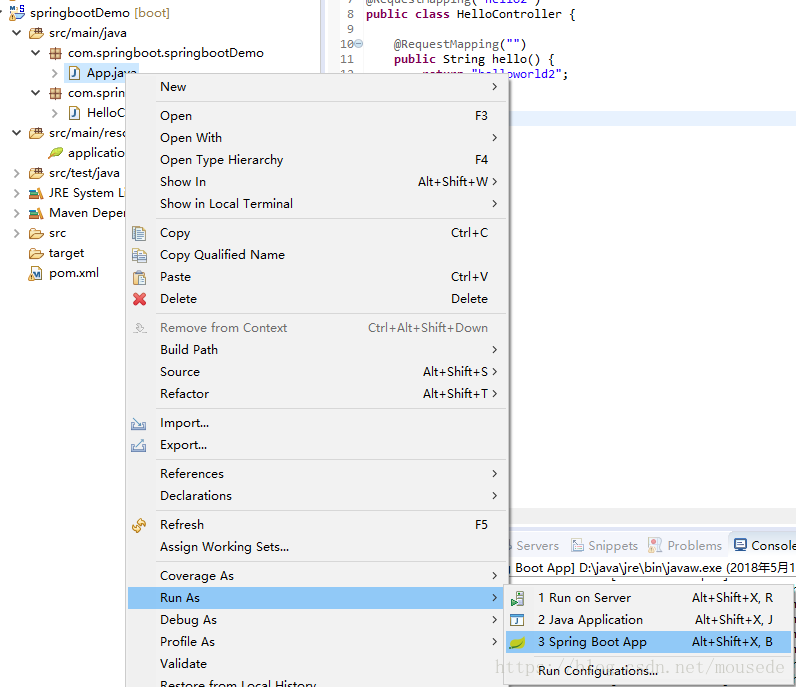
12.
13. 프로젝트에 접속하세요 (낮은 버전은 접속이 불가능할 수 있습니다. 버전 2는 사용 가능합니다)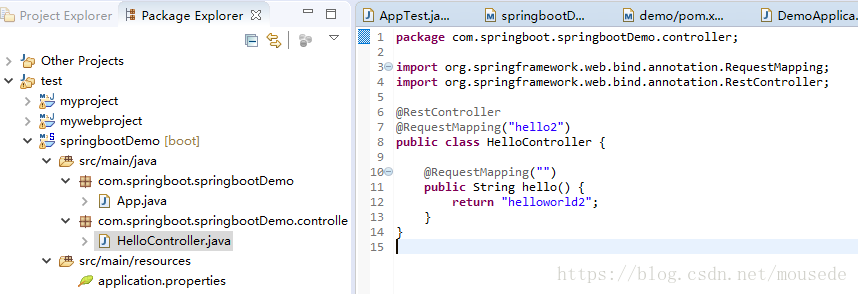
Method 3
http://start.spring.io/를 방문하세요 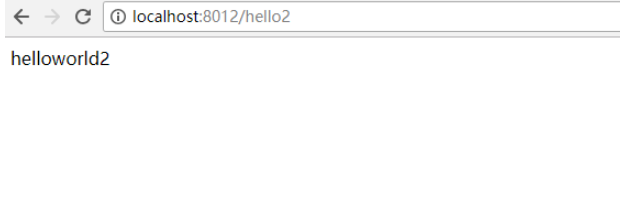
프로젝트 압축 패키지를 다운로드하려면 프로젝트 생성을 클릭하세요.
압축 해제 후 eclipse 사용 -> 기존 Maven 프로젝트 -> 압축 해제된 폴더 선택 -> Finsh 완료!
위 내용은 Eclipse에서 springboot 프로젝트를 만드는 방법은 무엇입니까?의 상세 내용입니다. 자세한 내용은 PHP 중국어 웹사이트의 기타 관련 기사를 참조하세요!
본 웹사이트의 성명
본 글의 내용은 네티즌들의 자발적인 기여로 작성되었으며, 저작권은 원저작자에게 있습니다. 본 사이트는 이에 상응하는 법적 책임을 지지 않습니다. 표절이나 침해가 의심되는 콘텐츠를 발견한 경우 admin@php.cn으로 문의하세요.

인기 기사
Repo : 팀원을 부활시키는 방법
3 몇 주 전
By 尊渡假赌尊渡假赌尊渡假赌
R.E.P.O. 에너지 결정과 그들이하는 일 (노란색 크리스탈)
1 몇 주 전
By 尊渡假赌尊渡假赌尊渡假赌
헬로 키티 아일랜드 어드벤처 : 거대한 씨앗을 얻는 방법
3 몇 주 전
By 尊渡假赌尊渡假赌尊渡假赌
스플릿 소설을이기는 데 얼마나 걸립니까?
3 몇 주 전
By DDD

인기 기사
Repo : 팀원을 부활시키는 방법
3 몇 주 전
By 尊渡假赌尊渡假赌尊渡假赌
R.E.P.O. 에너지 결정과 그들이하는 일 (노란색 크리스탈)
1 몇 주 전
By 尊渡假赌尊渡假赌尊渡假赌
헬로 키티 아일랜드 어드벤처 : 거대한 씨앗을 얻는 방법
3 몇 주 전
By 尊渡假赌尊渡假赌尊渡假赌
스플릿 소설을이기는 데 얼마나 걸립니까?
3 몇 주 전
By DDD

뜨거운 기사 태그

메모장++7.3.1
사용하기 쉬운 무료 코드 편집기

SublimeText3 중국어 버전
중국어 버전, 사용하기 매우 쉽습니다.

스튜디오 13.0.1 보내기
강력한 PHP 통합 개발 환경

드림위버 CS6
시각적 웹 개발 도구

SublimeText3 Mac 버전
신 수준의 코드 편집 소프트웨어(SublimeText3)

뜨거운 주제
Gmail 이메일의 로그인 입구는 어디에 있나요?
 7297
7297
 9
9
 7297
7297
 9
9
자바 튜토리얼
 1622
1622
 14
14
 1622
1622
 14
14
Cakephp 튜토리얼
 1342
1342
 46
46
 1342
1342
 46
46
라라벨 튜토리얼
 1259
1259
 25
25
 1259
1259
 25
25
PHP 튜토리얼
 1206
1206
 29
29
 1206
1206
 29
29
 전문가 지침: Eclipse Lombok 플러그인을 성공적으로 설치하는 방법에 대한 전문가 조언 및 단계
Jan 28, 2024 am 09:15 AM
전문가 지침: Eclipse Lombok 플러그인을 성공적으로 설치하는 방법에 대한 전문가 조언 및 단계
 Eclipse 코드 실행 문제에 대한 솔루션 공개: 다양한 실행 오류 문제 해결에 도움
Jan 28, 2024 am 09:22 AM
Eclipse 코드 실행 문제에 대한 솔루션 공개: 다양한 실행 오류 문제 해결에 도움
 Eclipse를 사용하여 배경색을 변경하는 방법에 대한 단계별 가이드
Jan 28, 2024 am 08:28 AM
Eclipse를 사용하여 배경색을 변경하는 방법에 대한 단계별 가이드


