IIS 웹 사이트에 액세스하기 위해 Windows에 nginx1.10.1 역방향 프록시를 설치하는 방법
먼저 공식 웹사이트에 가서 소프트웨어 패키지를 다운로드하고 압축을 푸는 것이 가장 좋습니다.
nginx 구성 경로 문제
Windows에서는 ""를 사용할 수 있습니다. , "\"를 사용할 수도 있고 "/"를 경로 구분 기호로 사용할 수도 있습니다. 하지만 ""는 문제를 일으킬 가능성이 가장 높으므로 사용하지 않도록 하세요.
경로를 추가하지 마세요. 그렇지 않으면 오류가 발생하고 구성 파일 경로를 찾을 수 없습니다.
예를 들어 e 드라이브에 압축을 풀면
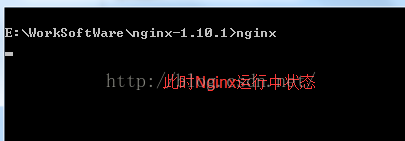
cmd 명령으로 nginx.exe가 있는 폴더를 찾습니다. cd e:worksoftwarenginx-1.10.1
그런 다음 실행하려면 먼저 nginx.conf 파일 구성이 올바른지 확인하세요
사실 nginx의 가장 중요하고 주요한 작업은 구성 파일 외에는 없습니다. 기본 소스 코드를 수정하려는 경우가 아니면 개발자는 주의를 기울여야 합니다.
nginx.conf 구성은 다음과 같습니다.
#user nobody;
worker_processes 1;
#工作进程的个数,可以配置多个

#全局错误日志及pid文件
error_log /worksoftware/nginx-1.10.1/logs/error.log;
#error_log logs/error.log notice;
#error_log logs/error.log info;

pid  /worksoftware/nginx-1.10.1/logs/nginx.pid;


events {
 worker_connections 1024; #单个进程最大连接数(最大连接数=连接数*进程数)
}

#设定http服务器,利用它的反向代理功能提供负载均衡支持
http {
 include  mime.types; #设定配置文件位置,这里的conf是指nginx.conf所在的目录,也可以用绝对路径指定其他地方的配置文件
 default_type application/octet-stream; #默认类型-8进制文件流

 #设定日志格式
 #log_format main '$remote_addr - $remote_user [$time_local] "$request" '
 #     '$status $body_bytes_sent "$http_referer" '
 #     '"$http_user_agent" "$http_x_forwarded_for"';

 #设定访问日志
 #access_log /worksoftware/nginx-1.10.1/logs/access.log main;

 sendfile  on; #是否激活sendfile()函数,比默认模式更有效率
 #tcp_nopush  on; #将http响应头压缩到一个包中发送,仅在sendfile开启时才能配合使用

 #连接超时时间
 #keepalive_timeout 0;
 keepalive_timeout 65;

 gzip on; #启用gzip压缩

 #服务器的集群
 #设定负载均衡的服务器列表 支持多组的负载均衡,可以配置多个upstream 来服务于不同的server.
 #nginx 的 upstream 支持 几 种方式的分配
 #1)、轮询(默认) 每个请求按时间顺序逐一分配到不同的后端服务器,如果后端服务器down掉,能自动剔除。
 #2)、weight 指定轮询几率,weight和访问比率成正比,用于后端服务器性能不均的情况。 跟上面样,指定了权重。
 #3)、ip_hash 每个请求按访问ip的hash结果分配,这样每个访客固定访问一个后端服务器,可以解决session的问题。
 #4)、fair
 #5)、url_hash #urlhash

 #upstream imicrosoft.net
 #{
  #服务器集群名字
  #服务器配置 weight是权重的意思,权重越大,分配的概率越大。
  #server 192.98.12.60:1985 weight=3 max_fails=2 fail_timeout=30s;
  #server 192.98.12.42:8086 weight=3 max_fails=2 fail_timeout=30s;

  #weigth参数表示权值,权值越高被分配到的几率越大
  #1.down 表示单前的server暂时不参与负载
  #2.weight 默认为1.weight越大,负载的权重就越大。
  #3.backup: 其它所有的非backup机器down或者忙的时候,请求backup机器。所以这台机器压力会最轻。
  #本例是指在同一台服务器,多台服务器改变ip即可
 # server 127.0.0.1:8055 weight=4 down;
 # server 127.0.0.1:8010 weight=5 backup;
 #}


 upstream localhost
 {
  server 127.0.0.1:9000 weight=3 max_fails=2 fail_timeout=200s;
  server 127.0.0.1:8086 weight=5 max_fails=2 fail_timeout=200s;
 }


 #当前的nginx的配置,代理服务器的地址,即nginx安装的服务器地址、监听端口、默认地址,
 #设定虚拟主机,默认为监听80端口
 server
 {
  listen  9090; #侦听9090端口
  #对于server_name,如果需要将多个域名的请求进行反向代理,可以配置多个server_name来满足要求
  server_name localhost; #当前服务的域名

  charset utf8;
  #charset koi8-r;

  #设定本虚拟主机的访问日志
  #access_log logs/host.access.log main;


  #如果访问 /images/*, /js/*, /css/* 资源,则直接取本地文件,不用转发。
  #但如果文件较多效果不是太好。
  #location ~ .*\.(jpg|jpeg|gif|css|png|ico|html)$
  #{
  # expires 30d;
  # root /nginx-1.10.1;#root:
  # break;
  #}

  #对 "/" 启用负载均衡
  location / {

   root html;  #默认主页目录在nginx安装目录的html子目录

   index index.html index.htm index.aspx; #没有索引页时,罗列文件和子目录
   #proxy_pass http://www.imicrosoft.net; #跟载均衡服务器的upstream对应
   autoindex on; #没有索引页时,罗列文件和子目录

   #保留用户真实信息
   proxy_redirect off; #url不跳转
   proxy_set_header host $host;
   proxy_set_header x-real-ip $remote_addr;
   proxy_set_header x-forwarded-for $proxy_add_x_forwarded_for;
   #缓冲区代理缓冲用户端请求的最大字节数,可以理解为先保存到本地再传给用户
   # client_body_buffer_size 128k;
   # #跟后端服务器连接超时时间 发起握手等候响应超时时间
   # proxy_connect_timeout 12;
   # #连接成功后 等待后端服务器响应时间 其实已进入后端的排队之中等候处理
   # proxy_read_timeout 90;
   # #代理请求缓存区 这个缓存区间会保存用户的头信息一共nginx进行规则处理 一般只要能保存下头信息即可
   # proxy_send_timeout 90;
   # #同上 告诉nginx保存单个用的几个buffer最大用多大空间
   # proxy_buffer_size 4k;
   # proxy_buffers 4 32k;
   # #如果系统很忙的时候可以申请国内各大的proxy_buffers 官方推荐 *2
   # proxy_busy_buffers_size 64k;
   # #proxy 缓存临时文件的大小
   proxy_temp_file_write_size 64k;
   # proxy_next_upstream error timeout invalid_header http_500 http_503 http_404;
   proxy_max_temp_file_size 128m;
   #启动代理
   proxy_pass http://localhost;
   client_max_body_size 10m; #允许客户端请求的最大单个文件字节数
  }


  #示例一
  #location / {
  #  proxy_pass http://imicrosoft.net;
  #
  #  proxy_redirect default;
  #
  #  proxy_set_header host $host;
  #  proxy_set_header x-forwarded-for $proxy_add_x_forwarded_for;
  #}

  #示例二
  #location /tileservice {
  #  proxy_pass http://cluster/mongotileservice/tileservice;
  #  proxy_set_header host $host;
  #  proxy_set_header x-forwarded-for $proxy_add_x_forwarded_for;
  #}


  #error_page 404    /404.html;

  # redirect server error pages to the static page /50x.html
  #
  error_page 500 502 503 504 /50x.html;
  location = /50x.html {
   root html;
  }

  # proxy the php scripts to apache listening on 127.0.0.1:80
  #对 "/xxxxx.php" 启用负载均衡
  #location ~ \.php$ {
  # proxy_pass http://127.0.0.1;
  #}

  #location /baidu
  #{
  #proxy_pass http://www.google.com;
  #proxy_set_header host $host;
  #proxy_set_header x-forwarded-for $proxy_add_x_forwarded_for;
  #}

  # pass the php scripts to fastcgi server listening on 127.0.0.1:9000
  #
  #location ~ \.php$ {
  # root   html;
  # fastcgi_pass 127.0.0.1:9000;
  # fastcgi_index index.php;
  # fastcgi_param script_filename /scripts$fastcgi_script_name;
  # include  fastcgi_params;
  #}

  # deny access to .htaccess files, if apache's document root
  # concurs with nginx's one
  #
  #location ~ /\.ht {
  # deny all;
  #}
 }


 # another virtual host using mix of ip-, name-, and port-based configuration
 #
 #server {
 # listen  8000;
 # listen  somename:8080;
 # server_name somename alias another.alias;

 # location / {
 #  root html;
 #  index index.html index.htm;
 # }
 #}


 # https server
 #
 #server {
 # listen  443 ssl;
 # server_name localhost;

 # ssl_certificate  cert.pem;
 # ssl_certificate_key cert.key;

 # ssl_session_cache shared:ssl:1m;
 # ssl_session_timeout 5m;

 # ssl_ciphers high:!anull:!md5;
 # ssl_prefer_server_ciphers on;

 # location / {
 #  root html;
 #  index index.html index.htm;
 # }
 #}

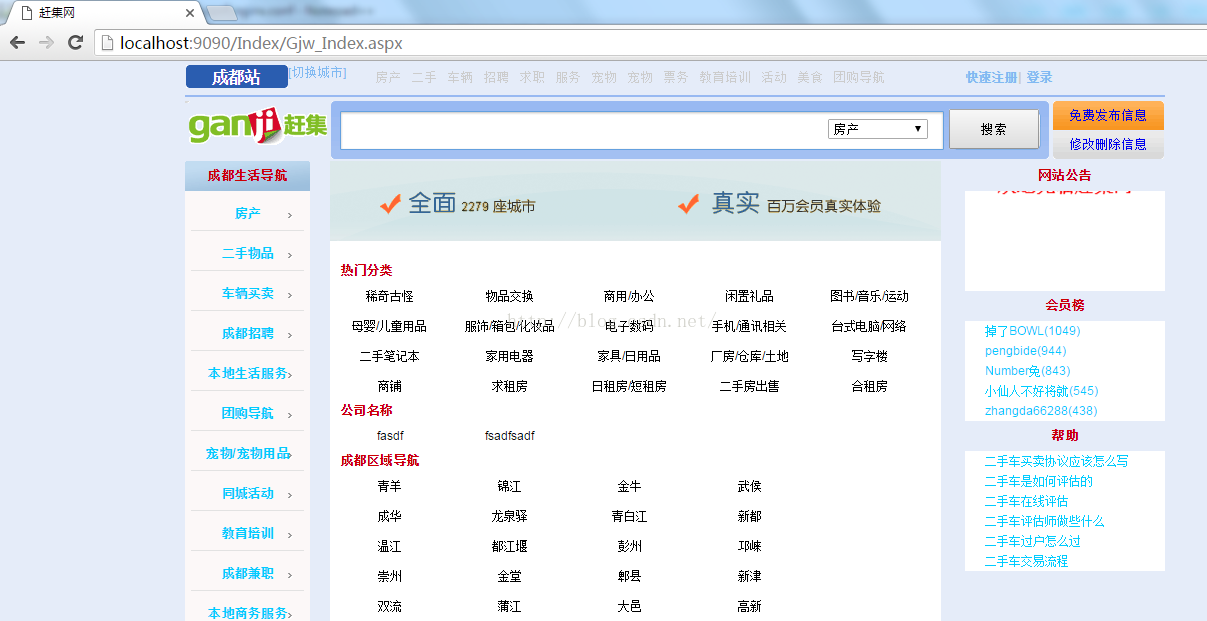
}결과는 다음과 같습니다.


iis 사이트

위 내용은 IIS 웹 사이트에 액세스하기 위해 Windows에 nginx1.10.1 역방향 프록시를 설치하는 방법의 상세 내용입니다. 자세한 내용은 PHP 중국어 웹사이트의 기타 관련 기사를 참조하세요!

핫 AI 도구

Undresser.AI Undress
사실적인 누드 사진을 만들기 위한 AI 기반 앱

AI Clothes Remover
사진에서 옷을 제거하는 온라인 AI 도구입니다.

Undress AI Tool
무료로 이미지를 벗다

Clothoff.io
AI 옷 제거제

AI Hentai Generator
AI Hentai를 무료로 생성하십시오.

인기 기사

뜨거운 도구

메모장++7.3.1
사용하기 쉬운 무료 코드 편집기

SublimeText3 중국어 버전
중국어 버전, 사용하기 매우 쉽습니다.

스튜디오 13.0.1 보내기
강력한 PHP 통합 개발 환경

드림위버 CS6
시각적 웹 개발 도구

SublimeText3 Mac 버전
신 수준의 코드 편집 소프트웨어(SublimeText3)

뜨거운 주제
 7489
7489
 15
15
 1377
1377
 52
52
 77
77
 11
11
 52
52
 19
19
 19
19
 41
41
 H5 프로젝트를 실행하는 방법
Apr 06, 2025 pm 12:21 PM
H5 프로젝트를 실행하려면 다음 단계가 필요합니다. Web Server, Node.js, 개발 도구 등과 같은 필요한 도구 설치. 개발 환경 구축, 프로젝트 폴더 작성, 프로젝트 초기화 및 코드 작성. 개발 서버를 시작하고 명령 줄을 사용하여 명령을 실행하십시오. 브라우저에서 프로젝트를 미리보고 개발 서버 URL을 입력하십시오. 프로젝트 게시, 코드 최적화, 프로젝트 배포 및 웹 서버 구성을 설정하십시오.
 PS의 로딩 속도 속도를 높이는 방법?
Apr 06, 2025 pm 06:27 PM
느린 Photoshop 스타트 업 문제를 해결하려면 다음을 포함한 다중 프론트 접근 방식이 필요합니다. 하드웨어 업그레이드 (메모리, 솔리드 스테이트 드라이브, CPU); 구식 또는 양립 할 수없는 플러그인 제거; 정기적으로 시스템 쓰레기 및 과도한 배경 프로그램 청소; 주의를 기울여 관련없는 프로그램 폐쇄; 시작하는 동안 많은 파일을 열지 않도록합니다.
 프론트 엔드 개발에서 CSS 및 JavaScript를 사용하여 Windows 10 설정 인터페이스와 유사한 검색등 효과를 달성하는 방법은 무엇입니까?
Apr 05, 2025 pm 10:21 PM
프론트 엔드 개발에서 Windows와 같은 구현 방법 ...
 Windows 7에 MySQL을 설치할 수 있습니까?
Apr 08, 2025 pm 03:21 PM
예, MySQL은 Windows 7에 설치 될 수 있으며 Microsoft는 Windows 7 지원을 중단했지만 MySQL은 여전히 호환됩니다. 그러나 설치 프로세스 중에 다음 지점이 표시되어야합니다. Windows 용 MySQL 설치 프로그램을 다운로드하십시오. MySQL의 적절한 버전 (커뮤니티 또는 기업)을 선택하십시오. 설치 프로세스 중에 적절한 설치 디렉토리 및 문자를 선택하십시오. 루트 사용자 비밀번호를 설정하고 올바르게 유지하십시오. 테스트를 위해 데이터베이스에 연결하십시오. Windows 7의 호환성 및 보안 문제에 주목하고 지원되는 운영 체제로 업그레이드하는 것이 좋습니다.
 부트 스트랩 내비게이션 바를 설정하는 방법
Apr 07, 2025 pm 01:51 PM
Bootstrap은 내비게이션 막대 설정을위한 간단한 안내서를 제공합니다. 내비게이션 바 컨테이너 추가 브랜드 아이덴티티 추가 내비게이션 링크 추가 (선택 사항) 스타일 조정 스타일 (선택 사항)
 PS의 수직 기준선을 당기는 방법
Apr 06, 2025 pm 08:18 PM
Photoshop에서 수직 가이드를 당기기 : 통치자보기 (보기 & gt; inuler)를 활성화하십시오. 통치자의 수직 가장자리 위로 마우스를 마우스로 덮은 다음 커서는 이중 화살표가있는 수직선이되고 마우스를 잡고 드래그하여 참조 라인을 꺼냅니다. 가이드를 드래그하거나 십자가로 가져 가서 삭제를 클릭하십시오.
 특정 시스템 버전에서 MySQL이보고 한 오류에 대한 솔루션
Apr 08, 2025 am 11:54 AM
MySQL 설치 오류에 대한 솔루션은 다음과 같습니다. 1. MySQL 종속성 라이브러리 요구 사항이 충족되도록 시스템 환경을주의 깊게 확인하십시오. 다른 운영 체제 및 버전 요구 사항이 다릅니다. 2. 오류 메시지를주의 깊게 읽고 프롬프트 (예 : 라이브러리 파일 누락 또는 부족한 권한)에 따라 종속성 설치 또는 Sudo 명령 사용과 같은 해당 조치를 취합니다. 3. 필요한 경우 소스 코드를 설치하고 컴파일 로그를주의 깊게 확인하십시오. 그러나 일정량의 Linux 지식과 경험이 필요합니다. 궁극적으로 문제를 해결하는 핵심은 시스템 환경 및 오류 정보를 신중하게 확인하고 공식 문서를 참조하는 것입니다.
 다운로드 후 MySQL을 설치할 수 없습니다
Apr 08, 2025 am 11:24 AM
MySQL 설치 실패의 주된 이유는 다음과 같습니다. 1. 권한 문제, 관리자로 실행하거나 Sudo 명령을 사용해야합니다. 2. 종속성이 누락되었으며 관련 개발 패키지를 설치해야합니다. 3. 포트 충돌, 포트 3306을 차지하는 프로그램을 닫거나 구성 파일을 수정해야합니다. 4. 설치 패키지가 손상되어 무결성을 다운로드하여 확인해야합니다. 5. 환경 변수가 잘못 구성되었으며 운영 체제에 따라 환경 변수를 올바르게 구성해야합니다. 이러한 문제를 해결하고 각 단계를 신중하게 확인하여 MySQL을 성공적으로 설치하십시오.


