

nginx+redis가 세션 공유를 실현하는 방법

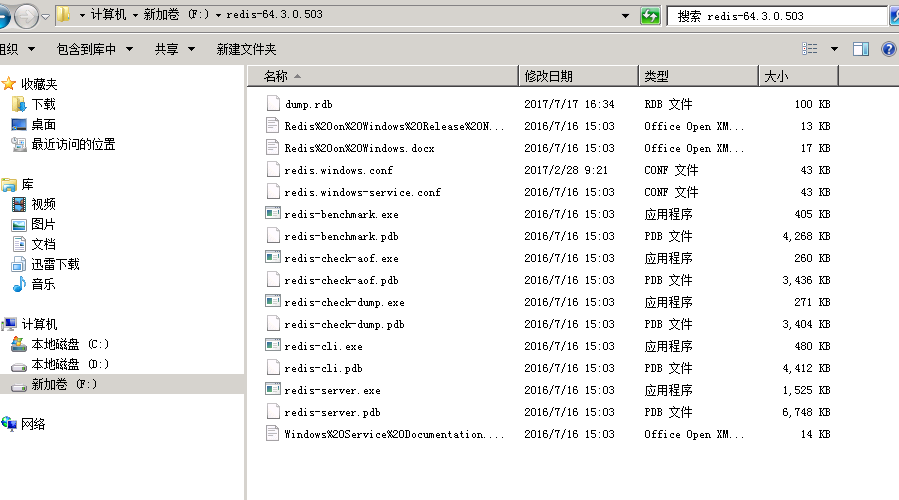
1. 첫 번째 단계는 redis를 설치하는 것입니다. 내 서버는 Windows입니다. 압축을 풀면 다음과 같습니다. 처음에 redis는 기본적으로 비밀번호를 요구하지 않습니다. 비밀번호를 설정하려면 redis.windows.conf 파일에 가서 requirepass를 찾아 앞에 # 기호를 삭제하고 그 뒤에 비밀번호를 설정하면 됩니다.
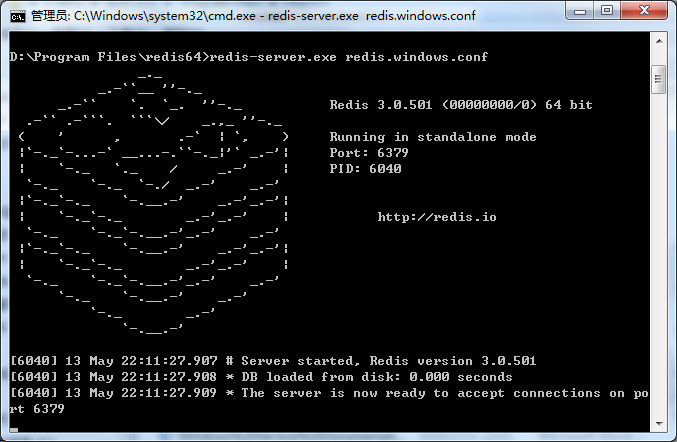
2. cmd에서 redis의 루트 디렉터리를 입력하고 redis-server.exeredis.windows.conf 명령을 입력합니다. 이렇게 하면 redis가 시작될 수 있습니다. 성공적으로 시작되면 다음 화면이 나타납니다. 물론 conf 파일을 수정하고 비밀번호를 추가할 수도 있습니다. requirepass xxxxxx
3. 다음으로 세션 데이터의 글로벌 캐싱을 달성하기 위한 몇 가지 구성 작업을 수행할 수 있습니다.
1) 먼저 jar 패키지를 추가합니다. Maven 프로젝트인 경우 pom.xml
<!-- redis -->
 <dependency>
  <groupid>org.springframework.session</groupid>
  <artifactid>spring-session-data-redis</artifactid>
  <version>1.3.1.release</version>
  <type>pom</type>
 </dependency>
Maven 프로젝트가 아닌 경우 다음 jar 패키지를 추가해야 합니다.

2) redis.properties를 작성하면, 코드는 다음과 같습니다
redis_isopen:yes
#主机地址
redis_hostname=xxx.xxx.xxx.xxx
#端口
redis_port=6379
#密码
redis_password=xxxxxxxx
#连接超时时间
redis_timeout=200000
redis_maxidle:300
redis_maxactive:600
redis_maxwait:100000
redis_testonborrow:true
기본적으로 우리가 데이터베이스를 구성하는 연결문과 비슷합니다.
3) spring-redis.xml 구성 파일을 작성합니다. 이 파일은 redis에 대한 몇 가지 기본 정보를 구성합니다.
<?xml version="1.0" encoding="utf-8" standalone="no"?>
<beans xmlns="http://www.springframework.org/schema/beans"
 xmlns:context="http://www.springframework.org/schema/context" xmlns:tx="http://www.springframework.org/schema/tx"
 xmlns:util="http://www.springframework.org/schema/util" xmlns:xsi="http://www.w3.org/2001/xmlschema-instance"
 xsi:schemalocation="http://www.springframework.org/schema/beans http://www.springframework.org/schema/beans/spring-beans.xsd http://www.springframework.org/schema/context http://www.springframework.org/schema/context/spring-context.xsd http://www.springframework.org/schema/tx http://www.springframework.org/schema/tx/spring-tx.xsd http://www.springframework.org/schema/util http://www.springframework.org/schema/util/spring-util.xsd ">
 <!-- session设置 maxinactiveintervalinseconds为session的失效时间,单位为秒-->
 <bean
 class="org.springframework.session.data.redis.config.annotation.web.http.redishttpsessionconfiguration">
 <property name="maxinactiveintervalinseconds" value="3600"></property>
 </bean>
 <!-- redis连接池 -->
 <bean id="poolconfig" class="redis.clients.jedis.jedispoolconfig">
 <property name="maxidle" value="${redis_maxidle}" />
 <property name="testonborrow" value="${redis_testonborrow}" />
 </bean>
 <!-- redis连接工厂 -->
 <bean id="connectionfactory"
 class="org.springframework.data.redis.connection.jedis.jedisconnectionfactory">
 <property name="hostname" value="${redis_hostname}" />
 <property name="port" value="${redis_port}" />
 <property name="password" value="${redis_password}" />
 <property name="timeout" value="${redis_timeout}" />
 <property name="poolconfig" ref="poolconfig"></property>
 </bean>
</beans>4) application.xml(spring의 기본 구성 파일)에 다음과 같이 redis.properties 구성 파일에 대한 스캐닝을 추가해야 합니다.
<!-- 读取redis参数配置 -->
 <bean id="propertyconfigurer"
 class="org.springframework.beans.factory.config.propertyplaceholderconfigurer">
 <property name="locations">
  <list>
  <value>/web-inf/classes/redis.properties</value>
  </list>
 </property>
 </bean>
5) 기본 구성 파일에 다음과 같이 spring-redis.xml을 추가합니다.
<import resource="spring-redis.xml" />
6) web.xml에서 세션에 대한 필터를 추가합니다. 이 방법으로만 세션이 redis에 의해 조작됩니다.
<filter>
 <filter-name>springsessionrepositoryfilter</filter-name>
 <filter-class>org.springframework.web.filter.delegatingfilterproxy</filter-class>
 </filter>
 <filter-mapping>
 <filter-name>springsessionrepositoryfilter</filter-name>
 <url-pattern>/*</url-pattern>
 </filter-mapping>
이후에는 redis의 세션 관리를 구현하겠습니다.
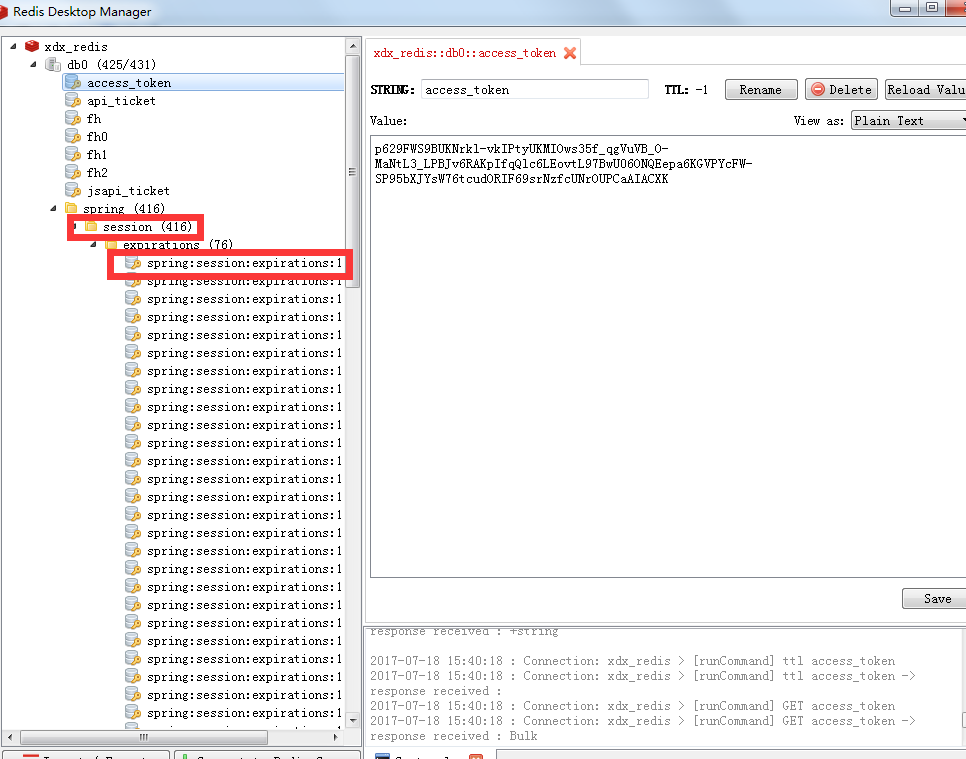
7) Redis 데스크톱 관리자라는 Redis 클라이언트를 설치하여 내부 데이터를 볼 수 있습니다. 아래와 같이 매우 유용하며 redis 데이터베이스에서 데이터를 볼 수 있습니다.
ps. 다시 나갈 때 실수하지 않으려면 이렇게 적어야 합니다. (ssh 프로젝트)
public string yipinexit(){
 iterator<string>keys=session.keyset().iterator();
 while(keys.hasnext()){
  string key=keys.next();
  session.remove(key);
 }
 return "yipinexit";
}위 내용은 nginx+redis가 세션 공유를 실현하는 방법의 상세 내용입니다. 자세한 내용은 PHP 중국어 웹사이트의 기타 관련 기사를 참조하세요!

핫 AI 도구

Undresser.AI Undress
사실적인 누드 사진을 만들기 위한 AI 기반 앱

AI Clothes Remover
사진에서 옷을 제거하는 온라인 AI 도구입니다.

Undress AI Tool
무료로 이미지를 벗다

Clothoff.io
AI 옷 제거제

Video Face Swap
완전히 무료인 AI 얼굴 교환 도구를 사용하여 모든 비디오의 얼굴을 쉽게 바꾸세요!

인기 기사
뜨거운 도구

메모장++7.3.1
사용하기 쉬운 무료 코드 편집기

SublimeText3 중국어 버전
중국어 버전, 사용하기 매우 쉽습니다.

스튜디오 13.0.1 보내기
강력한 PHP 통합 개발 환경

드림위버 CS6
시각적 웹 개발 도구

SublimeText3 Mac 버전
신 수준의 코드 편집 소프트웨어(SublimeText3)
뜨거운 주제
 7930
7930
 15
1652
14
1411
52
1303
25
1250
29
15
1652
14
1411
52
1303
25
1250
29

 Docker 컨테이너의 이름을 확인하는 방법
Apr 15, 2025 pm 12:21 PM
Docker 컨테이너의 이름을 확인하는 방법
Apr 15, 2025 pm 12:21 PM
단계를 따르면 Docker 컨테이너 이름을 쿼리 할 수 있습니다. 모든 컨테이너 (Docker PS)를 나열하십시오. 컨테이너 목록을 필터링합니다 (GREP 명령 사용). 컨테이너 이름 ( "이름"열에 위치)을 가져옵니다.
 Centos redis에서 lua 스크립트 실행 시간을 구성하는 방법
Apr 14, 2025 pm 02:12 PM
Centos redis에서 lua 스크립트 실행 시간을 구성하는 방법
Apr 14, 2025 pm 02:12 PM
CentOS 시스템에서는 Redis 구성 파일을 수정하거나 Redis 명령을 사용하여 악의적 인 스크립트가 너무 많은 리소스를 소비하지 못하게하여 LUA 스크립트의 실행 시간을 제한 할 수 있습니다. 방법 1 : Redis 구성 파일을 수정하고 Redis 구성 파일을 찾으십시오. Redis 구성 파일은 일반적으로 /etc/redis/redis.conf에 있습니다. 구성 파일 편집 : 텍스트 편집기 (예 : VI 또는 Nano)를 사용하여 구성 파일을 엽니 다. Sudovi/etc/redis/redis.conf LUA 스크립트 실행 시간 제한을 설정 : 구성 파일에서 다음 줄을 추가 또는 수정하여 LUA 스크립트의 최대 실행 시간을 설정하십시오 (Unit : Milliseconds).
 Docker가 컨테이너를 시작하는 방법
Apr 15, 2025 pm 12:27 PM
Docker가 컨테이너를 시작하는 방법
Apr 15, 2025 pm 12:27 PM
Docker Container Startup 단계 : 컨테이너 이미지를 당기기 : "Docker Pull [Mirror Name]"을 실행하십시오. 컨테이너 생성 : "docker"[옵션] [미러 이름] [명령 및 매개 변수]를 사용하십시오. 컨테이너를 시작하십시오 : "Docker start [컨테이너 이름 또는 ID]"를 실행하십시오. 컨테이너 상태 확인 : 컨테이너가 "Docker PS"로 실행 중인지 확인하십시오.
 Docker 용 컨테이너를 만드는 방법
Apr 15, 2025 pm 12:18 PM
Docker 용 컨테이너를 만드는 방법
Apr 15, 2025 pm 12:18 PM
Docker에서 컨테이너 만들기 : 1. 이미지를 당기기 : Docker Pull [Mirror Name] 2. 컨테이너 만들기 : Docker Run [옵션] [미러 이름] [명령] 3. 컨테이너 시작 : Docker Start [컨테이너 이름]
 Centos redis에서 느린 쿼리 로그를 구성하는 방법
Apr 14, 2025 pm 04:54 PM
Centos redis에서 느린 쿼리 로그를 구성하는 방법
Apr 14, 2025 pm 04:54 PM
CentOS 시스템에서 Redis Slow Query 로그를 활성화하여 성능 진단 효율성을 향상시킵니다. 다음 단계는 구성을 안내합니다. 1 단계 : Redis 구성 파일 찾기 및 편집 먼저, 일반적으로 /etc/redis/redis.conf에있는 redis 구성 파일을 찾으십시오. 다음 명령으로 구성 파일을 엽니 다. sudovi/etc/redis/redis.conf 2 단계 : 구성 파일에서 느린 쿼리 로그 매개 변수 조정, 다음 매개 변수를 찾고 수정하십시오.
 CentOS7에 Redis를 설치하는 방법 7
Apr 14, 2025 pm 08:21 PM
CentOS7에 Redis를 설치하는 방법 7
Apr 14, 2025 pm 08:21 PM
공식 Redis 소스에서 소스 코드 패키지를 다운로드하여 최신 버전을 보장하고 개인화 된 방식으로 사용자 정의 할 수 있도록 컴파일하고 설치하십시오. 특정 단계는 다음과 같습니다. 소프트웨어 패키지 목록을 업데이트하고 Redis 디렉토리 생성 Redis 소스 코드 패키지 다운로드 소스 코드 패키지를 압축하고 설치 구성을 컴파일하고 Redis 구성을 수정하여 시작 상태를 확인하십시오.
 Docker에 오프라인 미러를 설치하는 방법
Apr 15, 2025 am 11:36 AM
Docker에 오프라인 미러를 설치하는 방법
Apr 15, 2025 am 11:36 AM
Docker 이미지를 오프라인으로 설치하려면 다음 단계가 필요합니다. 1. Mirror Tar 파일을 얻으십시오. 2. 미러 파일 내보내기; 3. 미러 파일을 전송하십시오. 4. 미러 파일을 가져옵니다. 5. 거울 설치를 확인하십시오.
 Redis 캐시 솔루션을 사용하여 제품 순위 목록의 요구 사항을 효율적으로 실현하는 방법은 무엇입니까?
Apr 19, 2025 pm 11:36 PM
Redis 캐시 솔루션을 사용하여 제품 순위 목록의 요구 사항을 효율적으로 실현하는 방법은 무엇입니까?
Apr 19, 2025 pm 11:36 PM
Redis 캐싱 솔루션은 제품 순위 목록의 요구 사항을 어떻게 인식합니까? 개발 과정에서 우리는 종종 a ... 표시와 같은 순위의 요구 사항을 처리해야합니다.
