
SpringBoot에서 캐시 관리 및 데이터 저장은 Spring 프레임워크의 캐시 관련 org.springframework.cache.Cache 및 org.springframework.cache.CacheManager 캐시 관리자 인터페이스에 의존합니다.
프로그램에 정의된 CacheManager 유형의 Bean 구성 요소 또는 CacheResolver라는 CacheResolver 캐시 확인자가 없는 경우 SpringBoot는 다음 캐시 구성 요소(지정된 순서대로)를 선택하고 활성화하려고 시도합니다.
(1) 일반
( 2) JCache(JSR-107) (EhCache 3, Hazelcast, Infinispan 등)
(3) EhCache 2.x
(4) Hazelcast
(5) Infinispan
(6) Couchbase
(7 ) Redis
(8) Caffeine
(9) Simple
위에는 SpringBoot 캐시 구성 요소의 로딩 순서에 따라 SpringBoot에서 지원하는 9가지 캐시 구성 요소가 나열되어 있습니다. 프로젝트에 캐시 관리 구성 요소(예: Redis)를 추가한 후, SpringBoot 프로젝트는 해당 캐시 관리자를 선택하고 활성화합니다. 프로젝트에 여러 캐시 구성 요소가 동시에 추가되고 캐시 관리자나 캐시 확인자(CacheManager 또는 캐시 리졸버)가 지정되지 않은 경우 SpringBoot는 위 순서로 추가된 여러 캐시 구성 요소 중 첫 번째 캐시 구성 요소를 우선적으로 활성화합니다. 캐시 관리를 수행합니다(예를 들어 두 개의 캐시 구성 요소인 Couchbase와 Redis가 동시에 추가된 경우 Couchbase 구성 요소가 먼저 활성화됩니다).
이전 글 SpringBoot 캐시 관리 (1) 기본 캐시 관리에서 소개한 기본 캐시 관리에서 우리가 구축한 프로젝트에는 캐시 관리 구성 요소를 추가하지 않았지만 캐시 관리는 계속 구현되었습니다. 캐시 관리를 활성화한 후 SpringBoot는 위의 캐시 구성 요소 순서대로 캐시 관리에 유효한 캐시 구성 요소를 검색하므로 캐시 구성 요소가 없으면 기본적으로 마지막 단순 캐시 구성 요소가 관리에 사용됩니다. Simple 캐시 구성요소는 SpringBoot의 기본 캐시 관리 구성요소입니다. 기본적으로 캐시 저장을 위해 메모리 내 ConcurrentMap을 사용하므로 타사 캐시 구성요소를 추가하지 않고도 메모리 내 캐시 관리가 가능하지만 이는 권장되지 않습니다. .
SpringBoot Cache Management로 구축된 프로젝트를 기반으로 Redis 캐시 구성요소를 소개합니다. (1) 기본 캐시 관리, 주석 기반 방법을 사용하여 SpringBoot의 Redis 캐시 통합에 대한 구체적인 구현을 설명합니다.
(1) Spring Data Redis 종속성 스타터 추가
pom에 Spring Data Redis 종속성 스타터 추가 캐시 관련 자동 어셈블리 클래스(이전 기본 SimpleCacheConfiguration)를 수행하면 컨테이너에 사용되는 캐시 관리자가 RedisCacheManager( 이전에는 기본 캐시 관리자) 이 캐시 관리자가 생성한 Cache는 RedisCache이며 Redis를 제어하여 데이터를 캐시합니다.
(2) Redis 서버 연결 구성
프로젝트의 전역 구성 파일 application.properties에 Redis 데이터베이스 연결 구성을 추가합니다. 샘플 코드는 다음과 같습니다.
<dependency>
  <groupId>org.springframework.boot</groupId>
  <artifactId>spring-boot-starter-data-redis</artifactId>
</dependency>
(3) CommentService 클래스에서 메서드를 수정합니다
사용 @ 캐시 관리에는 Cacheable, @CachePut, @CacheEvict 세 가지 주석이 사용되며 각각 캐시 저장, 캐시 업데이트, 캐시 삭제 등의 작업이 수행됩니다.
# Redis服务器地址
spring.redis.host=127.0.0.1
# Redis服务器连接端口
spring.redis.port=6379
# Redis服务器连接密码(默认为空)
spring.redis.password=
위 코드에서는 @Cacheable, @CachePut, 데이터 쿼리에는 @CacheEvict 주석이 사용되며, 데이터 업데이트 및 데이터 삭제 방법에 대해 캐시 관리가 수행됩니다.
이 중 쿼리 캐시 @Cacheable 주석에는 표시된 키 값이 없으며 기본 매개 변수 값인 comment_id가 데이터를 저장하는 키로 사용됩니다. 캐시를 업데이트할 때도 마찬가지로 사용해야 합니다. Unified= "#result==null"을 정의하는 쿼리 캐시 @Cacheable 주석은 쿼리 결과가 비어 있으면 캐시되지 않음을 의미합니다.
(4) CommentController 클래스에 두 개의 새로운 인터페이스를 추가합니다.
업데이트 및 삭제 인터페이스 추가:
package com.hardy.springbootdatacache.service;

import com.hardy.springbootdatacache.entity.Comment;
import com.hardy.springbootdatacache.repository.CommentRepository;
import org.springframework.beans.factory.annotation.Autowired;
import org.springframework.cache.annotation.CacheEvict;
import org.springframework.cache.annotation.CachePut;
import org.springframework.cache.annotation.Cacheable;
import org.springframework.stereotype.Service;

import java.util.Optional;

/**
 * @Author: HardyYao
 * @Date: 2021/6/19
 */
@Service
public class CommentService {

    @Autowired
    private CommentRepository commentRepository;

    /**
     * 根据评论id查询评论
     * @Cacheable:将该方法的查询结果comment存放在SpringBoot默认缓存中
     * cacheNames:起一个缓存命名空间,对应缓存唯一标识
     * @param id
     * @return
     */
    @Cacheable(cacheNames = "comment", unless = "#result==null")
    public Comment findCommentById(Integer id){
        Optional<Comment> comment = commentRepository.findById(id);
        if(comment.isPresent()){
            Comment comment1 = comment.get();
            return comment1;
        }
        return null;
    }

    /**
     * 更新评论
     * @param comment
     * @return
     */
    @CachePut(cacheNames = "comment",key = "#result.id")
    public Comment updateComment(Comment comment) {
        commentRepository.updateComment(comment.getAuthor(), comment.getaId());
        return comment;
    }

    /**
     * 删除评论
     * @param comment_id
     */
    @CacheEvict(cacheNames = "comment")
    public void deleteComment(int comment_id) {
        commentRepository.deleteById(comment_id);
    }

}(5) 주석 기반 Redis 쿼리 캐시 테스트
브라우저에 입력: http://localhost :8080/findCommentById ?id=1 액세스:
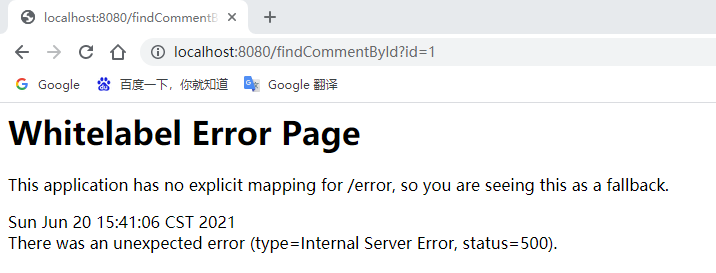 페이지에서 오류가 보고되었습니다. 콘솔 정보를 확인하세요.
 오류 메시지에 따르면: 사용자 댓글 정보를 쿼리할 때 해당 SQL 문이 실행되었습니다. 댓글이지만 An에 있습니다. 캐시 저장 중에 IllegalArgumentException이 발생했으며 해당 Comment 엔터티 클래스를 직렬화해야 한다는 프롬프트 메시지가 표시되었습니다(DefaultSerializer에는 직렬화 가능 페이로드가 필요하지만 [com.hardy.springbootdatacache.entity.Comment] 유형의 객체를 수신함).
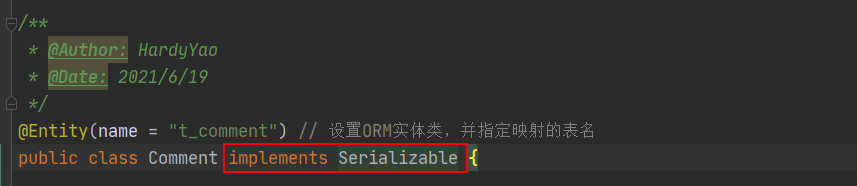
(6) 캐시 객체 직렬화
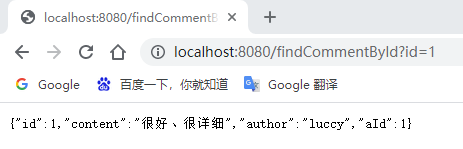
 (7) 프로젝트를 다시 시작하여 쿼리 캐시 테스트
在浏览器中输入:http://localhost:8080/findCommentById?id=1 进行访问(连续访问三次):
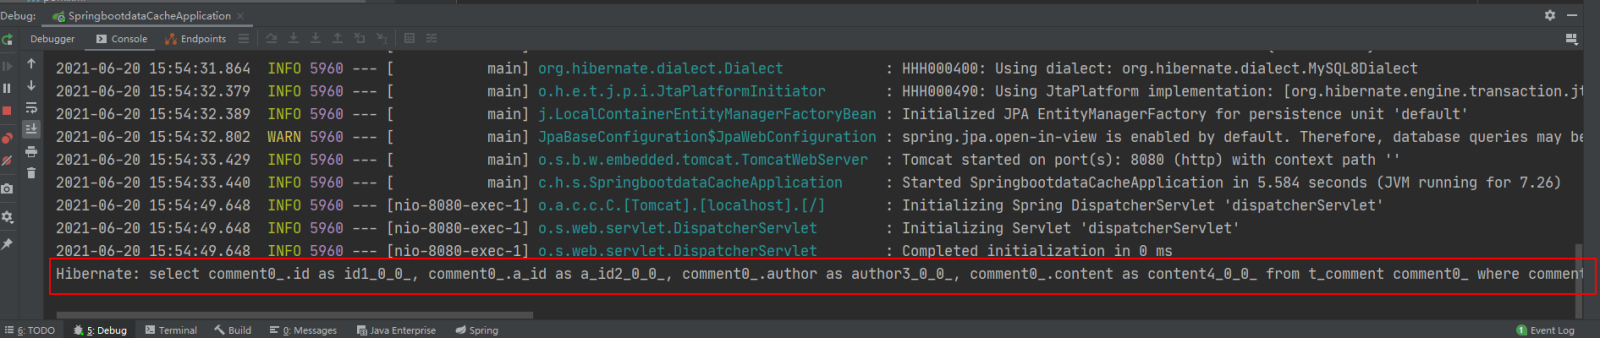
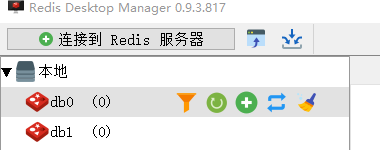
打开Redis客户端可视化工具Redis Desktop Manager,连接本地启用的Redis服务,查看具体的数据缓存效果:

执行findById()方法查询出的用户评论信息Comment正确存储到了Redis缓存库中名为comment的名称空间下。
其中缓存数据的唯一标识key值是以“名称空间comment::+参数值(comment::1)”的字符串形式体现的,而value值则是经过JDK默认序列格式化后的HEX格式存储。这种JDK默认序列格式化后的数据显然不方便缓存数据的可视化查看和管理,所以在实际开发中,通常会自定义数据的序列化格式,这方面的内容在后面会介绍。
(8)基于注解的Redis缓存更新测试
先通过浏览器访问:http://localhost:8080/updateComment?id=1&author=hardy;
接着在访问:http://localhost:8080/findCommentById?id=1,查看浏览器返回信息及控制台打印信息:
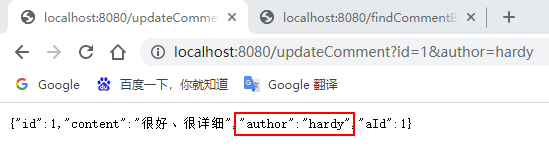


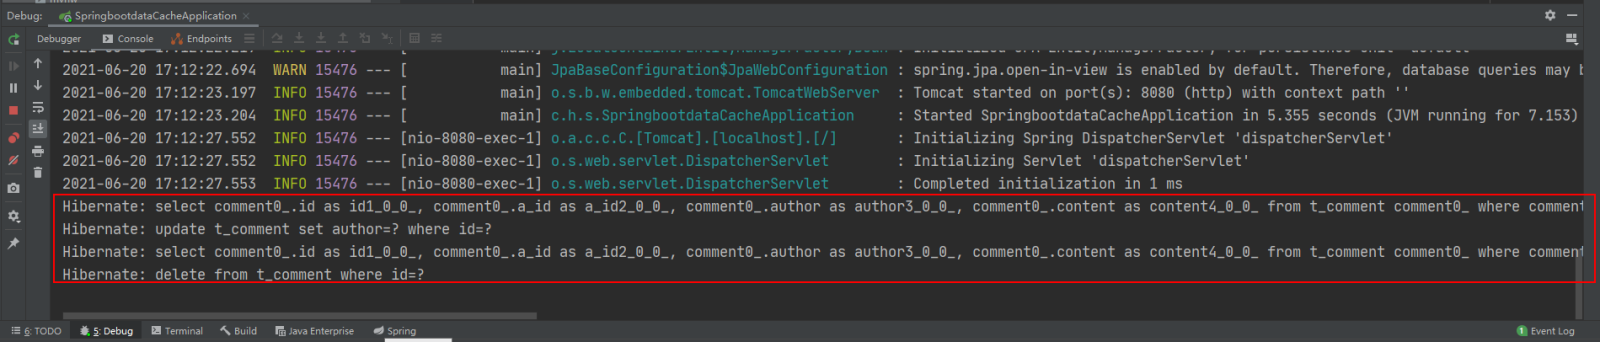
可以看到,执行updateComment()更新id为1的数据时执行了一条更新的SQL语句,后续调用findById()方法查询id为1的用户评论信息时没有再次执行查询的SQL语句,且浏览器返回了更新后的正确结果,这说明@CachePut缓存更新配置成功。
(9)基于注解的Redis缓存删除测试
通过浏览器访问:http://localhost:8080/deleteComment?id=1 和 http://localhost:8080/findCommentById?id=1
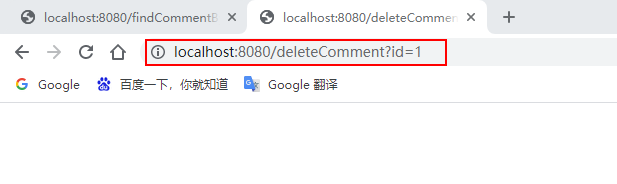
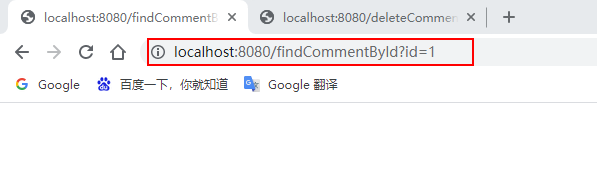
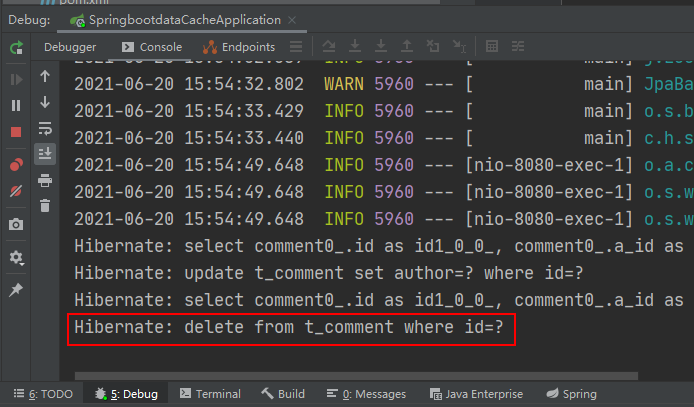
执行deleteComment()方法删除id为1的数据后查询结果为空,查看Redis缓存数据库:
可以看到之前存储的comment相关数据被删除掉了,这表明@CacheEvict注解缓存删除成功实现。
通过上面的案例可以看出:使用基于注解的Redis缓存实现只需要添加Redis依赖、并使用几个注解在对应的方法上,就可以实现对数据的缓存管理。
另外,还可以在SpringBoot全局配置文件中配置Redis有效期,示例代码如下:
# 对基于注解的Redis缓存数据统一设置有效期为1分钟,单位毫秒
spring.cache.redis.time-to-live=60000
上述代码中,在SpringBoot全局配置文件中添加了“spring.cache.redis.time-to-live”属性统一设置Redis数据的有效期(单位为毫秒),但这种方式不够灵活,因此一般不用。
在SpringBoot整合Redis缓存实现中,除了基于注解形式的Redis缓存形式外,还有一种开发中更常用的方式——基于API的Redis缓存实现。这种基于API的Redis缓存实现,需要在某种业务需求下通过Redis提供的API调用相关方法实现数据缓存管理。同时,这种方法还可以手动管理缓存的有效期。
下面,通过Redis API的方式讲解SpringBoot整合Redis缓存的具体实现。
(1)使用Redis API进行业务数据缓存管理
在 com.hardy.springbootdatacache.service 包下新建一个 ApiCommentService:
package com.hardy.springbootdatacache.service;

import com.hardy.springbootdatacache.entity.Comment;
import com.hardy.springbootdatacache.repository.CommentRepository;
import org.springframework.beans.factory.annotation.Autowired;
import org.springframework.cache.annotation.CacheEvict;
import org.springframework.cache.annotation.CachePut;
import org.springframework.cache.annotation.Cacheable;
import org.springframework.data.redis.core.RedisTemplate;
import org.springframework.stereotype.Service;

import java.util.Optional;
import java.util.concurrent.TimeUnit;

/**
 * @Author: HardyYao
 * @Date: 2021/6/19
 */
@Service
public class ApiCommentService {

    @Autowired
    private CommentRepository commentRepository;

    @Autowired
    private RedisTemplate redisTemplate;

    /**
     * 根据评论id查询评论
     * @param id
     * @return
     */
    public Comment findCommentById(Integer id){
        // 先查Redis缓存
        Object o = redisTemplate.opsForValue().get("comment_" + id);
        if (o != null) {
            return (Comment) o;
        } else {
            // 如果缓存中没有,则从数据库查询
            Optional<Comment> dbComment = commentRepository.findById(id);
            if (dbComment.isPresent()) {
                Comment redisComment = dbComment.get();
                // 将查询结果存储到缓存中,并设置有效期为1天
                redisTemplate.opsForValue().set("comment_"+id, redisComment,1, TimeUnit.DAYS);
                return redisComment;
            } else {
                return null;
            }
        }

    }

    /**
     * 更新评论
     * @param comment
     * @return
     */
    public Comment updateComment(Comment comment) {
        commentRepository.updateComment(comment.getAuthor(), comment.getId());
        // 更新数据库数据后进行缓存更新
        redisTemplate.opsForValue().set("comment_" + comment.getId(), comment);
        return comment;
    }

    /**
     * 删除评论
     * @param comment_id
     */
    public void deleteComment(int comment_id) {
        commentRepository.deleteById(comment_id);
        // 删除数据库数据后进行缓存删除
        redisTemplate.delete("comment_" + comment_id);
    }

}(2)编写Web访问层ApiCommentController
package com.hardy.springbootdatacache.controller;

import com.hardy.springbootdatacache.entity.Comment;
import com.hardy.springbootdatacache.service.ApiCommentService;
import org.springframework.beans.factory.annotation.Autowired;
import org.springframework.web.bind.annotation.RequestMapping;
import org.springframework.web.bind.annotation.RestController;

/**
 * @Author: HardyYao
 * @Date: 2021/6/19
 */
@RestController
@RequestMapping("api")  // 改变请求路径
public class ApiCommentController {

    @Autowired
    private ApiCommentService apiCommentService;

    @RequestMapping(value = "/findCommentById")
    public Comment findCommentById(Integer id){
        Comment comment = apiCommentService.findCommentById(id);
        return comment;
    }

    @RequestMapping(value = "/updateComment")
    public Comment updateComment(Comment comment){
        Comment oldComment = apiCommentService.findCommentById(comment.getId());
        oldComment.setAuthor(comment.getAuthor());
        Comment comment1 = apiCommentService.updateComment(oldComment);
        return comment1;
    }

    @RequestMapping(value = "/deleteComment")
    public void deleteComment(Integer id){
        apiCommentService.deleteComment(id);
    }

}(3)测试基于API的Redis缓存实现
输入:http://localhost:8080/api/findCommentById?id=2(连续输入三次)、http://localhost:8080/api/updateComment?id=2&author=hardy、http://localhost:8080/deleteComment?id=2进行访问:
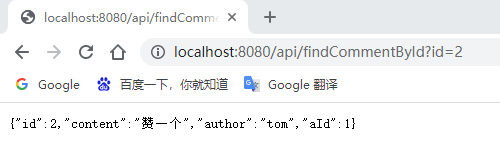
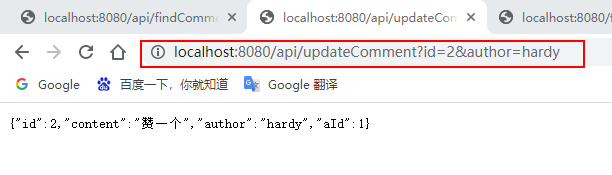
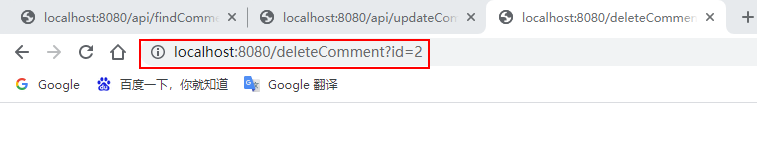
콘솔 메시지 및 Redis 데이터베이스 보기:

API 기반 Redis 캐시 구현 관련 구성: API 기반 Redis 캐시 구현에는 주석 기반 캐싱을 활성화하기 위해 @EnableCaching 주석이 필요하지 않습니다. 따라서 여기서는 프로젝트 시작 클래스에 추가된 @EnableCaching 주석을 삭제하거나 주석을 달도록 선택할 수 있습니다. 이는 프로젝트의 기능적 구현에 영향을 주지 않습니다.
위 내용은 SpringBoot가 Redis 캐시 구현을 통합하는 방법의 상세 내용입니다. 자세한 내용은 PHP 중국어 웹사이트의 기타 관련 기사를 참조하세요!


![[웹 프런트엔드] Node.js 빠른 시작](https://img.php.cn/upload/course/000/000/067/662b5d34ba7c0227.png)


