실험 환경
최소 설치 Centos 7.3 가상 머신
기본 환경 구성
1. nginx
yum install -y epel-*
yum isntall -y nginx vim
2를 설치합니다. 2. 가상 머신 호스트의 사이트 루트 디렉토리를 설정합니다
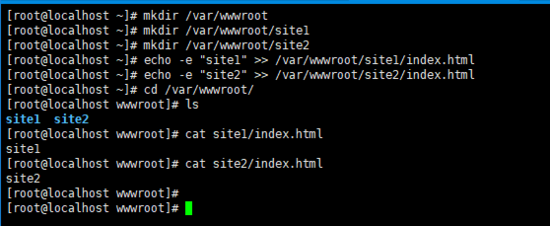
mkdir /var/wwwroot
mkdir /var/wwwroot/site1
mkdir /var/wwwroot/site2
echo -e "site1" >> /var/wwwroot/site1/index.html
echo -e "site2" >> /var/wwwroot/site2/index.html

3 .centos 방화벽을 끄세요
setenforce 0
systemctl stop firewalld
systemctl disable firewalld

포트 기반 가상 호스트 구성
1. nginx 구성 파일을 편집하세요
vim /etc/nginx/conf.d/vhosts.conf
2. 를 시작하세요. nginx</ code> 서비스</p><div class="code" style="position:relative; padding:0px; margin:0px;"><pre class='brush:php;toolbar:false;'>server {
listen 8081;
root /var/wwwroot/site1;
index index.html;
location / {
}
}
server {
listen 8082;
root /var/wwwroot/site2;
index index.html;
location / {
}
}</pre><div class="contentsignin">로그인 후 복사</div></div><p >4. 호스트 시스템의 두 사이트에 액세스<img src="/static/imghw/default1.png" data-src="https://img.php.cn/upload/article/000/000/164/168545433191248.png" class="lazy" alt="CentOS에서 Nginx 가상 호스트를 구성하는 방법" /></p><code>http://192.168.204.135:8081/
http://192.168.204.135:8082 /</ code><code>nginx 服务
systemctl start nginx
4. 在宿主机访问两个站点
http://192.168.204.135:8081/http://192.168.204.135:8082/


配置基于域名的虚拟主机
1. 重新编辑nginx配置文件
vim /etc/nginx/conf.d/vhosts.conf
2. 删除原内容,重新添加以下内容
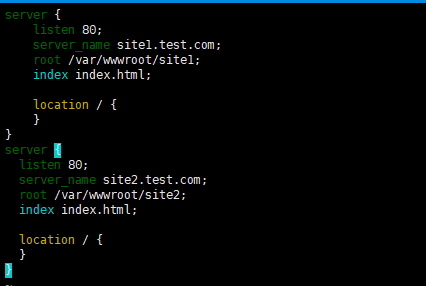
server {
  listen 80;
  server_name site1.test.com;
  root /var/wwwroot/site1;
  index index.html;

  location / {
  }
}
server {
 listen 80;
 server_name site2.test.com;
 root /var/wwwroot/site2;
 index index.html;

 location / {
 }
}
3. 重启 nginx 服务
systemctl restart nginx
4. 在windows上修改 hosts 文件
编辑 c:windowssystem32driversetchosts 文件,
添加以下内容(根据实际情况自己修改)
192.168.204.135 site1.test.com
192.168.204.135 site2.test.com

5. 在宿主机访问两个站点
http://site1.test.com/http://site2.test.com/


配置基于ip的虚拟主机
1. 在虚拟机增加两个ip地址
ifconfig ens33:1 192.168.204.151
ifconfig ens33:2 192.168.204.152
2. 重新编辑nginx配置文件
vim /etc/nginx/conf.d/vhosts.conf
3. 删除原内容,重新添加以下内容
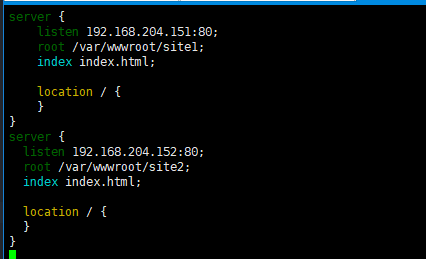
server {
  listen 192.168.204.151:80;
  root /var/wwwroot/site1;
  index index.html;

  location / {
  }
}
server {
 listen 192.168.204.152:80;
 root /var/wwwroot/site2;
 index index.html;

 location / {
 }
}
4. 重启 nginx 服务
systemctl restart nginx
5. 在宿主机访问两个站点
http://192.168.204.151/http://192.168.204.152/


 구성 도메인 이름 기반 가상 호스트
 🎜🎜3.
🎜🎜3. nginx 서비스를 다시 시작하세요🎜rrreee🎜4 .windows에서 hosts 파일 수정🎜🎜c:windowssystem32driversetchosts 파일 편집, 🎜🎜다음 내용 추가(실제 상황에 맞게 수정) 🎜🎜192.168 .204.135 site1.test.com🎜🎜192.168.204.135 site2 .test.com🎜🎜 🎜🎜5. 호스트 시스템에서 두 사이트에 액세스🎜🎜
http://site1.test.com/🎜<code>http://site2.test.com/🎜 🎜 🎜🎜
🎜🎜 🎜🎜🎜IP 기반 가상 호스트 구성🎜🎜🎜1. 가상 머신에 두 개의 IP 주소 추가🎜rrreee🎜2. nginx 구성 파일을 다시 편집🎜rrreee🎜 3. 원본 콘텐츠를 삭제하고 다음 콘텐츠를 다시 추가하세요🎜rrreee🎜
 🎜🎜4.
🎜🎜4. nginx 서비스를 다시 시작합니다🎜rrreee🎜5. 호스트 시스템에서 두 사이트에 액세스합니다 🎜🎜http://192.168.204.151/🎜<code>http://192.168.204.152/🎜🎜🎜🎜 🎜🎜🎜🎜위 내용은 CentOS에서 Nginx 가상 호스트를 구성하는 방법의 상세 내용입니다. 자세한 내용은 PHP 중국어 웹사이트의 기타 관련 기사를 참조하세요!