

二进制安装MySQL5.5.39,磁盘空间不足导致MySQL无法启动_MySQL

[root@zlm local]# useradd -g mysql -s /sbin/nologin -d /opt/msyql mysql
--创建目录 [root@zlm local]# mkdir /data/mysql/mysql_3306/{data,logs,tmp} -p
--做软链接到/usr/local/mysql [root@zlm local]# ln -s /opt/mysql/mysql-5.5.39-linux2.6-i686/ mysql [root@zlm local]# ll -l mysql lrwxrwxrwx 1 root root 38 Sep 24 00:12 mysql -> /opt/mysql/mysql-5.5.39-linux2.6-i686/
--赋权限 [root@zlm local]# chown -R mysql:mysql /data/mysql/ [root@zlm local]# chown -R mysql:mysql /usr/local/mysql/
--添加环境变量 [root@zlm local]# echo 'export PATH=$PATH:/usr/local/mysql/bin' >> /etc/profile [root@zlm local]# cd mysql
--初始化数据库 [root@zlm mysql]# ./scripts/mysql_install_db --user=mysql --defaults-file=/etc/my.cnf Installing MySQL system tables... 140924 0:12:43 [Warning] options --log-slow-admin-statements, --log-queries-not-using-indexes and --log-slow-slave-statements have no effect if --log_slow_queries is not set OK Filling help tables... 140924 0:12:44 [Warning] options --log-slow-admin-statements, --log-queries-not-using-indexes and --log-slow-slave-statements have no effect if --log_slow_queries is not set OK
To start mysqld at boot time you have to copy support-files/mysql.server to the right place for your system
PLEASE REMEMBER TO SET A PASSWORD FOR THE MySQL root USER ! To do so, start the server, then issue the following commands:
/usr/local/mysql/bin/mysqladmin -u root password 'new-password' /usr/local/mysql/bin/mysqladmin -u root -h zlm password 'new-password'
Alternatively you can run: /usr/local/mysql/bin/mysql_secure_installation
which will also give you the option of removing the test databases and anonymous user created by default. This is strongly recommended for production servers.
See the manual for more instructions.
You can start the MySQL daemon with: cd /usr/local/mysql ; /usr/local/mysql/bin/mysqld_safe &
You can test the MySQL daemon with mysql-test-run.pl cd /usr/local/mysql/mysql-test ; perl mysql-test-run.pl
Please report any problems at http://bugs.mysq?l.com/
--复制mysql.server文件到/etc/init.d/下并改名为mysql [root@zlm mysql]# cp support-files/mysql.server /etc/init.d/mysql cp: overwrite `/etc/init.d/mysql'? yes
--启动MySQL [root@zlm mysql]# service mysql start Starting MySQL...............The server quit without updating PID file (/data/mysql/mysql_3306/data/zlm.pid). [FAILED]
--查看错误日志error.log(如未在/etc/my.cnf中定义,默认格式为hostname.err) [root@zlm local]# cd /data/mysql/mysql_3306/data/
[root@zlm data]# ll total 403024 -rw-rw---- 1 mysql mysql 2824 Sep 24 00:13 error.log -rw-rw---- 1 mysql mysql 104857600 Sep 24 00:13 ibdata1 -rw-rw---- 1 mysql mysql 104857600 Sep 24 00:13 ib_logfile0 -rw-rw---- 1 mysql mysql 104857600 Sep 24 00:13 ib_logfile1 -rw-rw---- 1 mysql mysql 97685504 Sep 24 00:13 ib_logfile2 drwx------ 2 mysql root 4096 Sep 24 00:12 mysql drwx------ 2 mysql mysql 4096 Sep 24 00:12 performance_schema drwx------ 2 mysql root 4096 Sep 24 00:12 test [root@zlm data]# cat error.log 140924 00:13:33 mysqld_safe Starting mysqld daemon with databases from /data/mysql/mysql_3306/data 140924 0:13:33 [Warning] options --log-slow-admin-statements, --log-queries-not-using-indexes and --log-slow-slave-statements have no effect if --log_slow_queries is not set 140924 0:13:33 [Warning] Using unique option prefix myisam_recover instead of myisam-recover-options is deprecated and will be removed in a future release. Please use the full name instead. 140924 0:13:33 [Note] Plugin 'FEDERATED' is disabled. 140924 0:13:33 InnoDB: The InnoDB memory heap is disabled 140924 0:13:33 InnoDB: Mutexes and rw_locks use InnoDB's own implementation 140924 0:13:33 InnoDB: Compressed tables use zlib 1.2.3 140924 0:13:33 InnoDB: Using Linux native AIO 140924 0:13:33 InnoDB: Initializing buffer pool, size = 128.0M 140924 0:13:33 InnoDB: Completed initialization of buffer pool InnoDB: The first specified data file ./ibdata1 did not exist: InnoDB: a new database to be created! 140924 0:13:33 InnoDB: Setting file ./ibdata1 size to 100 MB InnoDB: Database physically writes the file full: wait... InnoDB: Progress in MB: 100 140924 0:13:40 InnoDB: Log file ./ib_logfile0 did not exist: new to be created InnoDB: Setting log file ./ib_logfile0 size to 100 MB InnoDB: Database physically writes the file full: wait... InnoDB: Progress in MB: 100 140924 0:13:43 InnoDB: Log file ./ib_logfile1 did not exist: new to be created InnoDB: Setting log file ./ib_logfile1 size to 100 MB InnoDB: Database physically writes the file full: wait... InnoDB: Progress in MB: 100 140924 0:13:44 InnoDB: Log file ./ib_logfile2 did not exist: new to be created InnoDB: Setting log file ./ib_logfile2 size to 100 MB InnoDB: Database physically writes the file full: wait... InnoDB: Progress in MB:140924 0:13:45 InnoDB: Error: Write to file ./ib_logfile2 failed at offset 0 97517568. InnoDB: 1048576 bytes should have been written, only 167936 were written. InnoDB: Operating system error number 2. InnoDB: Check that your OS and file system support files of this size. InnoDB: Check also that the disk is not full or a disk quota exceeded. InnoDB: Error number 2 means 'No such file or directory'. InnoDB: Some operating system error numbers are described at InnoDB: http://dev.mysql.com/doc/refman/5.5/en/operating-system-error-codes.html InnoDB: Error in creating ./ib_logfile2: probably out of disk space 140924 0:13:45 [ERROR] Plugin 'InnoDB' init function returned error. 140924 0:13:45 [ERROR] Plugin 'InnoDB' registration as a STORAGE ENGINE failed. 140924 0:13:45 [ERROR] Unknown/unsupported storage engine: InnoDB 140924 0:13:45 [ERROR] Aborting
140924 0:13:45 [Note] /usr/local/mysql/bin/mysqld: Shutdown complete
140924 00:13:45 mysqld_safe mysqld from pid file /data/mysql/mysql_3306/data/zlm.pid ended [root@zlm data]# perror 2 --perror是用于查询Linux错误代码的命令 OS error code 2: No such file or directory [root@zlm data]# df -h Filesystem Size Used Avail Use% Mounted on /dev/mapper/VolGroup00-LogVol00 7.7G 7.3G 0 100% / --磁盘空间使用率100%,没有剩余空间了 /dev/sda1 99M 12M 82M 13% /boot tmpfs 506M 0 506M 0% /dev/shm
--关机添加磁盘 [root@zlm data]# init 0 [root@zlm ~]# rm -rf /data --先删除掉现有的/data目录中全部数据,因为重新挂载后也会丢失的,提前先释放掉这部分空间 [root@zlm ~]# fdisk -l
Disk /dev/sda: 10.7 GB, 10737418240 bytes 255 heads, 63 sectors/track, 1305 cylinders Units = cylinders of 16065 * 512 = 8225280 bytes
Device Boot Start End Blocks Id System /dev/sda1 * 1 13 104391 83 Linux /dev/sda2 14 1305 10377990 8e Linux LVM
Disk /dev/sdb: 5368 MB, 5368709120 bytes --增加了1个5G的磁盘 255 heads, 63 sectors/track, 652 cylinders Units = cylinders of 16065 * 512 = 8225280 bytes
Disk /dev/sdb doesn't contain a valid partition table --还未分区
--对新添加的磁盘分区 [root@zlm ~]# fdisk /dev/sdb
Device contains neither a valid DOS partition table, nor Sun, SGI or OSF disklabel Building a new DOS disklabel. Changes will remain in memory only, until you decide to write them. After that, of course, the previous content won't be recoverable.
Warning: invalid flag 0x0000 of partition table 4 will be corrected by w(rite)
Command (m for help): n Command action e extended p primary partition (1-4) p Partition number (1-4): 1 First cylinder (1-652, default 1): Using default value 1 Last cylinder or +size or +sizeM or +sizeK (1-652, default 652): Using default value 652
Command (m for help): w The partition table has been altered!
Calling ioctl() to re-read partition table. Syncing disks.
--查看磁盘信息 [root@zlm ~]# fdisk -l
Disk /dev/sda: 10.7 GB, 10737418240 bytes 255 heads, 63 sectors/track, 1305 cylinders Units = cylinders of 16065 * 512 = 8225280 bytes
Device Boot Start End Blocks Id System /dev/sda1 * 1 13 104391 83 Linux /dev/sda2 14 1305 10377990 8e Linux LVM
Disk /dev/sdb: 5368 MB, 5368709120 bytes 255 heads, 63 sectors/track, 652 cylinders Units = cylinders of 16065 * 512 = 8225280 bytes
Device Boot Start End Blocks Id System /dev/sdb1 1 652 5237158+ 83 Linux --分完区了
--格式化ext3文件系统 [root@zlm ~]# mkfs.ext3 /dev/sdb1
mke2fs 1.39 (29-May-2006) Filesystem label= OS type: Linux Block size=4096 (log=2) Fragment size=4096 (log=2) 655360 inodes, 1309289 blocks 65464 blocks (5.00%) reserved for the super user First data block=0 Maximum filesystem blocks=1342177280 40 block groups 32768 blocks per group, 32768 fragments per group 16384 inodes per group Superblock backups stored on blocks: 32768, 98304, 163840, 229376, 294912, 819200, 884736
Writing inode tables: done Creating journal (32768 blocks): done Writing superblocks and filesystem accounting information: done
This filesystem will be automatically checked every 21 mounts or 180 days, whichever comes first. Use tune2fs -c or -i to override. [root@zlm ~]# mkdir /data/mysql/mysql_3306/{data,logs,tmp} -p [root@zlm ~]# mount /dev/sdb1 /data [root@zlm ~]# df -h Filesystem Size Used Avail Use% Mounted on /dev/mapper/VolGroup00-LogVol00 7.7G 6.9G 398M 95% / --可以看到,重启完以后又释放了一部分空间 /dev/sda1 99M 12M 82M 13% /boot tmpfs 506M 0 506M 0% /dev/shm /dev/sdb1 5.0G 139M 4.6G 3% /data --/data目录已经挂载到新增的5G磁盘上去了
--为了使挂载持久化,重启后依然不会丢失,需要修改/etc/fstab [root@zlm ~]# vi /etc/fstab /dev/VolGroup00/LogVol00 / ext3 defaults 1 1 /dev/VolGroup00/LogVol00 / ext3 defaults 1 1 LABEL=/boot /boot ext3 defaults 1 2 tmpfs /dev/shm tmpfs defaults 0 0 devpts /dev/pts devpts gid=5,mode=620 0 0 sysfs /sys sysfs defaults 0 0 proc /proc proc defaults 0 0 /dev/VolGroup00/LogVol01 swap swap defaults 0 0 /data /dev/sdb1 ext3 defaults 0 0 --在文件末尾加入这一行,指定挂载的目录与磁盘的对应关系
--重新创建/data下面的相关目录 [root@zlm ~]# cd /data/ [root@zlm data]# ll total 1
drwx------ 2 root root 16384 Sep 24 00:32 lost+found
[root@zlm data]# rm -rf lost+found [root@zlm data]# ll total 0
[root@zlm data]# mkdir /data/mysql/mysql_3306/{data,logs,tmp} -p
--重新赋权限后初始化数据库 [root@zlm mysql]# pwd /usr/local/mysql [root@zlm mysql]# chown -R mysql:mysql /data/mysql/
[root@zlm mysql]# ./scripts/mysql_install_db --user=mysql --defaults-file=/etc/my.cnf
注意必须是先给/data目录赋予权限后再初始化,否则会报错,因为/data目录是重新创建并挂载到sdb1磁盘分区上的 如: Installation of system tables failed! Examine the logs in /data/mysql/mysql_3306/data for more information.
--再次重启MySQL服务 [root@zlm mysql]# service mysql start Starting MySQL........... [ OK ] [root@zlm mysql]# mysql Welcome to the MySQL monitor. Commands end with ; or \g. Your MySQL connection id is 1 Server version: 5.5.39-log MySQL Community Server (GPL)
Copyright (c) 2000, 2014, Oracle and/or its affiliates. All rights reserved.
Oracle is a registered trademark of Oracle Corporation and/or its affiliates. Other names may be trademarks of their respective owners.
Type 'help;' or '\h' for help. Type '\c' to clear the current input statement.
(testing)root@localhost [(none)]> exit Bye [root@zlm mysql]# ps aux|grep mysql root 2744 0.4 0.1 4528 1276 pts/0 S 00:54 0:00 /bin/sh /usr/local/mysql/bin/mysqld_safe --datadir=/data/mysql/mysql_3306/data --pid-file=/data/mysql/mysql_3306/data/zlm.pid mysql 3452 3.2 3.4 319580 35472 pts/0 Sl 00:55 0:03 /usr/local/mysql/bin/mysqld --basedir=/usr/local/mysql --datadir=/data/mysql/mysql_3306/data --plugin-dir=/usr/local/mysql/lib/plugin --user=mysql --log-error=/data/mysql/mysql_3306/data/error.log --open-files-limit=8192 --pid-file=/data/mysql/mysql_3306/data/zlm.pid --socket=/tmp/mysql.sock --port=3306 root 3493 0.0 0.0 3912 672 pts/0 R+ 00:56 0:00 grep mysql [root@zlm mysql]# mysqladmin shutdown [root@zlm mysql]# ps aux|grep mysql root 3501 0.0 0.0 3912 668 pts/0 R+ 00:56 0:00 grep mysql [root@zlm mysql]#
第2种启动方式: [root@zlm mysql]# /etc/init.d/mysql start Starting MySQL...... [ OK ] [root@zlm mysql]#
第3种启动方式: [root@zlm mysql]# mysqld_safe --defaults-file=/etc/my.cnf & [1] 4612 [root@zlm mysql]# Starting mysqld daemon with databases from /data/mysql/mysql_3306/data STOPPING server from pid file /data/mysql/mysql_3306/data/zlm.pid 140924 01:09:02 mysqld ended
这里启动失败了,查看error.log,提示说xxx参数设置得不合理,如: [root@zlm mysql]# cat error.log 140924 01:03:00 mysqld started
140924 1:03:00 [ERROR] /usr/libexec/mysqld: unknown variable 'slow_query_log_file=slow.log'
140924 01:03:00 mysqld ended
140924 01:04:54 mysqld started 140924 1:04:54 [ERROR] /usr/libexec/mysqld: unknown variable 'slow_query_log=0'
140924 01:04:54 mysqld ended
140924 01:05:39 mysqld started Unknown suffix '.' used for variable 'long_query_time' (value '0.5') 140924 1:05:39 [ERROR] /usr/libexec/mysqld: Error while setting value '0.5' to 'long_query_time'
140924 01:05:39 mysqld ended
140924 01:06:26 mysqld started 140924 1:06:26 [ERROR] /usr/libexec/mysqld: unknown variable 'min_examined_row_limit=100'
140924 01:06:26 mysqld ended
140924 01:09:02 mysqld started 140924 1:09:02 [ERROR] /usr/libexec/mysqld: unknown variable 'general_log_file=general.log'
140924 01:09:02 mysqld ended
造成这个问题的原因其实是我之前在安装RHEL 5.3操作系统的时候,选了系统盘里自带的那个mysql-5.0.45-7.el5 rpm包引起的,即便已经删除掉了。这个rpm包安装后会拷贝mysqld到/usr/libexec/目录下,很多在MySQL 5.5中可以识别的参数,在MySQL 5.0中是不认的,所以造成启动失败,一直提示"unknown variable",比方说以下这些: table_definition_cache table_open_cache slow_query_log_file
slow_query_log
long_query_time
min_examined_row_limit ...
解决办法:
--用新版本的mysqld可执行文件去覆盖掉原来/usr/libexec下的mysqld以后,就能用mysqld_safe & 的方式启动了
[root@zlm mysql]# cp /usr/local/mysql/bin/mysqld /usr/libexec/mysqld
cp: overwrite `/usr/libexec/mysqld'? yes
[root@zlm mysql]# mysqld_safe --defaults-file=/etc/my.cnf &
[1] 4687 Starting mysqld daemon with databases from /data/mysql/mysql_3306/data
这里会一直停在这一行,按ctrl+c可以重新返回到shell命令行
--查看mysql进程 [root@zlm mysql]# ps aux|grep mysql root 4687 0.0 0.1 4484 1152 pts/0 S 01:10 0:00 /bin/sh /usr/bin/mysqld_safe --defaults-file=/etc/my.cnf mysql 4721 0.0 3.1 329828 32704 pts/0 Sl 01:10 0:00 /usr/libexec/mysqld --defaults-file=/etc/my.cnf --basedir=/usr/local/mysql --datadir=/data/mysql/mysql_3306/data --user=mysql --pid-file=/data/mysql/mysql_3306/data/zlm.pid --skip-external-locking --port=3306 --socket=/tmp/mysql.sock root 4768 0.0 0.0 3912 668 pts/0 R+ 01:25 0:00 grep mysql
可以看到,用mysqld_safe方式,也已经启动成功了,注意,用这种方式启动,比单纯用mysqld方式启动要更佳,即使去kill掉mysqld的进程后,mysqld_safe可以保证mysqld进程重启
[root@zlm mysql]# ps aux | grep mysql root 5134 0.5 0.1 4484 1152 pts/0 S 01:32 0:00 /bin/sh /usr/bin/mysqld_safe --defaults-file=/etc/my.cnf mysql 5171 2.4 3.1 319584 32708 pts/0 Sl 01:32 0:00 /usr/libexec/mysqld --defaults-file=/etc/my.cnf --basedir=/usr/local/mysql --datadir=/data/mysql/mysql_3306/data --user=mysql --pid-file=/data/mysql/mysql_3306/data/zlm.pid --skip-external-locking --port=3306 --socket=/tmp/mysql.sock root 5193 0.0 0.0 3912 668 pts/0 R+ 01:32 0:00 grep mysql [root@zlm mysql]# kill -9 5171 [root@zlm mysql]# /usr/bin/mysqld_safe: line 388: 5171 Killed nohup /usr/libexec/mysqld --defaults-file=/etc/my.cnf --basedir=/usr/local/mysql --datadir=/data/mysql/mysql_3306/data --user=mysql --pid-file=/data/mysql/mysql_3306/data/zlm.pid --skip-external-locking --port=3306 --socket=/tmp/mysql.sock >> error.log 2>&1
Number of processes running now: 0 140924 01:32:54 mysqld restarted 按ctrl+c返回到shell命令行
[root@zlm mysql]# ps -ef | grep mysql root 5134 2531 0 01:32 pts/0 00:00:00 /bin/sh /usr/bin/mysqld_safe --defaults-file=/etc/my.cnf mysql 5205 5134 0 01:32 pts/0 00:00:00 /usr/libexec/mysqld --defaults-file=/etc/my.cnf --basedir=/usr/local/mysql --datadir=/data/mysql/mysql_3306/data --user=mysql --pid-file=/data/mysql/mysql_3306/data/zlm.pid --skip-external-locking --port=3306 --socket=/tmp/mysql.sock root 5229 2531 0 01:33 pts/0 00:00:00 grep mysql
mysqld_safe进程依然还是5134,但刚才被kill掉的mysqld进程5171已经变成5205这个新的进程了,其实mysqld_safe就是mysqld的守护进程,用来保证mysqld的正常运行的,当我们执行mysqld_safe &来启动MySQL的时候,其实最终还是去调用mysqld这个命令的

핫 AI 도구

Undresser.AI Undress
사실적인 누드 사진을 만들기 위한 AI 기반 앱

AI Clothes Remover
사진에서 옷을 제거하는 온라인 AI 도구입니다.

Undress AI Tool
무료로 이미지를 벗다

Clothoff.io
AI 옷 제거제

AI Hentai Generator
AI Hentai를 무료로 생성하십시오.

인기 기사
뜨거운 도구

메모장++7.3.1
사용하기 쉬운 무료 코드 편집기

SublimeText3 중국어 버전
중국어 버전, 사용하기 매우 쉽습니다.

스튜디오 13.0.1 보내기
강력한 PHP 통합 개발 환경

드림위버 CS6
시각적 웹 개발 도구

SublimeText3 Mac 버전
신 수준의 코드 편집 소프트웨어(SublimeText3)
뜨거운 주제
 7411
7411
 15
1358
52
76
11
17
19
15
1358
52
76
11
17
19

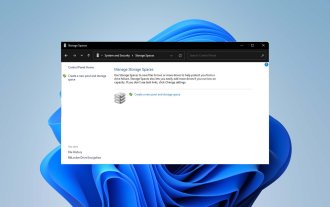 Windows 11에서 RAID 1을 구성하는 단계
Sep 22, 2023 pm 03:05 PM
Windows 11에서 RAID 1을 구성하는 단계
Sep 22, 2023 pm 03:05 PM
Windows 11에는 엄격한 요구 사항이 있으므로 해당 저장소를 확보하는 데 어려움을 겪은 후에 하드 드라이브와 데이터를 잃는 것은 부끄러운 일입니다. 하드 드라이브 오류에 대비하는 데 도움이 될 수 있는 좋은 소식이 있습니다. 내장된 Windows 도구를 사용하면 한 드라이브에서 다른 드라이브로 모든 데이터를 복사할 수 있습니다. 이렇게 하면 드라이브 하나에 오류가 발생하면 교체 드라이브에 원본 데이터를 미러링하고 재구축할 수 있습니다. Windows 11에서 RAID를 사용할 수 있나요? Windows 저장소 공간 기능을 사용하면 Windows 11에서 RAID를 수행할 수 있습니다. 이 기능을 사용하면 성능 저하 없이 컴퓨터에 직접 연결된 하드 드라이브를 사용하여 여러 개의 가상 디스크를 생성할 수 있습니다. Raid의 장점: 디스크 비용 절감
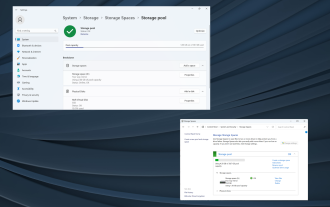 Windows 11에서 외장 하드 드라이브를 RAID하는 방법
Sep 16, 2023 pm 10:05 PM
Windows 11에서 외장 하드 드라이브를 RAID하는 방법
Sep 16, 2023 pm 10:05 PM
RAID(Redundant Array of Independent Disks)는 여러 외부 드라이브를 하나로 결합하는 데이터 저장 기술입니다. 대용량 하드 드라이브의 가격이 비쌀 때 널리 사용되었지만 여전히 많은 사람들이 RAID 외장 드라이브 방식을 선호합니다. RAID에는 여러 수준이 있으며 각 수준은 특정 목적을 수행합니다. 일반 사용자는 복잡함을 깊이 파고들 필요가 없으며 RAID0 또는 RAID1의 간단한 설정만으로도 제대로 작동한다는 점을 명심하십시오. 외장 드라이브 RAID를 고려해야 하는 이유: 향상된 PC 성능 구성이 쉽고 기존 대안보다 저렴함 더 빠른 데이터 읽기 및 쓰기 미러링을 통한 효율적인 백업 솔루션 Windows 11에서 외장 드라이브를 RAID하는 방법은 무엇입니까? RAID 외장 하드 드라이브를 사용하기 전에 먼저 다음 사항에 주의해야 합니다.
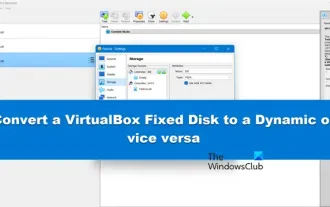 VirtualBox 고정 디스크를 동적 디스크로 또는 그 반대로 변환
Mar 25, 2024 am 09:36 AM
VirtualBox 고정 디스크를 동적 디스크로 또는 그 반대로 변환
Mar 25, 2024 am 09:36 AM
가상 머신을 생성할 때 디스크 유형을 선택하라는 메시지가 표시되며 고정 디스크 또는 동적 디스크를 선택할 수 있습니다. 고정 디스크를 선택했지만 나중에 동적 디스크가 필요하다는 사실을 깨닫게 된다면 어떻게 될까요? 아니면 그 반대의 경우도 가능합니다. 이번 포스팅에서는 VirtualBox 고정 디스크를 동적 디스크로 또는 그 반대로 변환하는 방법을 살펴보겠습니다. 동적 디스크는 처음에는 크기가 작다가 가상 머신에 데이터를 저장함에 따라 크기가 커지는 가상 하드 디스크입니다. 동적 디스크는 필요한 만큼만 호스트 저장 공간을 차지하므로 저장 공간을 절약하는 데 매우 효율적입니다. 그러나 디스크 용량이 늘어나면 컴퓨터 성능이 약간 영향을 받을 수 있습니다. 고정 디스크와 동적 디스크는 일반적으로 가상 머신에서 사용됩니다.
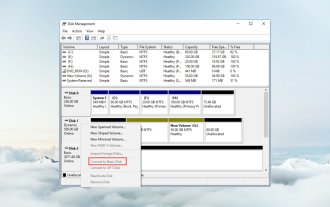 Windows 11에서 동적 디스크를 기본 디스크로 변환하는 방법
Sep 23, 2023 pm 11:33 PM
Windows 11에서 동적 디스크를 기본 디스크로 변환하는 방법
Sep 23, 2023 pm 11:33 PM
Windows 11에서 동적 디스크를 기본 디스크로 변환하려면 먼저 백업을 생성해야 합니다. 프로세스에서 해당 디스크의 모든 데이터가 지워지기 때문입니다. Windows 11에서 동적 디스크를 기본 디스크로 변환해야 하는 이유는 무엇입니까? Microsoft에 따르면 동적 디스크는 Windows에서 더 이상 사용되지 않으며 더 이상 사용이 권장되지 않습니다. 또한 Windows Home Edition은 동적 디스크를 지원하지 않으므로 이러한 논리 드라이브에 액세스할 수 없습니다. 더 많은 디스크를 더 큰 볼륨으로 결합하려면 기본 디스크 또는 저장소 공간을 사용하는 것이 좋습니다. 이 기사에서는 Windows 11에서 동적 디스크를 기본 디스크로 변환하는 방법을 설명합니다. Windows 11에서 동적 디스크를 기본 디스크로 변환하는 방법은 무엇입니까? 처음에는
 Ubuntu 시스템에서 디스크 사용량을 마스터하는 방법
Jan 03, 2024 pm 11:13 PM
Ubuntu 시스템에서 디스크 사용량을 마스터하는 방법
Jan 03, 2024 pm 11:13 PM
시스템의 하드 디스크 사용량을 확인해야 합니다. Ubuntu 시스템을 확인하는 방법은 무엇입니까? Ubuntu 시스템에서 하드 디스크 사용량을 확인하는 방법에 대한 튜토리얼을 살펴보겠습니다. 1. 그림과 같이 시스템에서 바탕 화면 왼쪽 하단 모서리에 있는 를 클릭합니다. 2. 그림과 같이 시스템에서 유틸리티를 클릭합니다. 3. 그림과 같이 디스크 사용량을 클릭합니다. 4. 그러면 디스크 사용량을 확인할 수 있습니다. 즉, 그림과 같이 중앙에 있는 디스크가 컴퓨터의 하드 디스크입니다. 디스크 아래의 작은 글씨는 사용량을 보여줍니다. 5. 또는 그림과 같이 유틸리티 프로그램에서 디스크를 클릭합니다. 6. 그러면 용량 아래에서 그림과 같이 하드 디스크 사용량을 볼 수 있습니다. 다음은 디스크 사용량을 볼 수 있는 텍스트 버전입니다: df-h 결과는 다음과 같습니다: FilesystemSizeUsedAvailU
 작업 관리자 디스크 100%는 무엇을 의미합니까?
Jan 03, 2024 pm 06:13 PM
작업 관리자 디스크 100%는 무엇을 의미합니까?
Jan 03, 2024 pm 06:13 PM
많은 친구들이 작업 관리자 CPU를 열면 디스크가 100%로 표시되는 것을 발견합니다. 무슨 일이 일어나고 있는 걸까요? Windows Defender가 검사를 수행하는 동안 다른 작업을 수행하면 디스크 사용량이 100%에 도달하거나 다른 기능이 사용되기 때문입니다. 아래에서 구체적인 소개와 해결방안을 살펴보겠습니다. 작업 관리자 디스크 100%의 의미: 답변: 현재 디스크 리소스가 많이 사용되고 있습니다. 디스크 사용량의 가장 큰 문제는 실제로 Windows 검색으로 인해 발생합니다. 이 기능은 지속적인 재개가 필요하므로 사용량이 매우 높습니다. 작업 관리자 디스크가 100%인 경우 어떻게 해야 하나요? 1. 먼저 작업 표시줄을 마우스 오른쪽 버튼으로 클릭하고 "작업 관리자"를 엽니다. 2. 그다음 점유율이 높은 것을 보고 우클릭을 해주세요.
 win11 디스크 정리 확인 위치
Jun 29, 2023 pm 09:25 PM
win11 디스크 정리 확인 위치
Jun 29, 2023 pm 09:25 PM
win11에서 디스크 정리는 어디서 확인할 수 있나요? 시스템을 오랫동안 사용하다 보면 C 드라이브나 다른 컴퓨터 디스크에 10GB 이상의 쓸모없는 정크 파일이 있는 경우가 많습니다. 이때, win11에 기본으로 제공되는 디스크 정리 기능을 이용하면 이런 쓸모없는 파일들을 빠르게 정리하는데 도움이 됩니다. 그러나 많은 사용자들은 win11의 디스크 정리 기능이 어디에 있는지, 어떻게 작동하는지 알지 못합니다. 오늘 편집자는 Win 11에 제공되는 정크 정리 기능을 확인하는 단계를 가져와 설명하겠습니다. win11에 내장된 정크 정리 기능을 확인하는 방법 1. 먼저 키보드의 [Win] 키를 누르거나 작업 표시줄의 [시작 메뉴]를 클릭한 후 고정된 응용 프로그램 아래의 [설정]을 선택합니다. : 시스템 > 스토리지,
![VirtualBox에서 디스크 크기를 늘리는 방법 [가이드]](https://img.php.cn/upload/article/000/887/227/171064142025068.jpg?x-oss-process=image/resize,m_fill,h_207,w_330) VirtualBox에서 디스크 크기를 늘리는 방법 [가이드]
Mar 17, 2024 am 10:10 AM
VirtualBox에서 디스크 크기를 늘리는 방법 [가이드]
Mar 17, 2024 am 10:10 AM
사전 정의된 디스크 크기에 더 많은 데이터를 저장할 공간이 없는 상황이 자주 발생합니까? 이후 단계에서 더 많은 가상 컴퓨터 하드 디스크 공간이 필요한 경우 가상 하드 디스크와 파티션을 확장해야 합니다. 이번 포스팅에서는 VirtualBox에서 디스크 크기를 늘리는 방법에 대해 알아 보겠습니다. VirtualBox에서 디스크 크기 늘리기 항상 문제가 발생할 가능성이 있으므로 이러한 작업을 수행하기 전에 가상 하드 디스크 파일을 백업하는 것이 중요합니다. 항상 백업을 해 두는 것이 좋습니다. 그러나 프로세스는 일반적으로 잘 작동하므로 계속하기 전에 컴퓨터를 종료했는지 확인하십시오. VirtualBox에서 디스크 크기를 늘리는 방법에는 두 가지가 있습니다. CL을 사용하여 GUI를 사용하여 VirtualBox 디스크 크기 확장
