
目标是想让Toolbar不被DrawerLayout的NavigationView遮盖,一直显示。
以下代码运行于Android Studio 2.1.2, 手机5.1.1
<!--activity_main.xml-->

<?xml version="1.0" encoding="utf-8"?>
<android.support.v4.widget.DrawerLayout xmlns:android="http://schemas.android.com/apk/res/android"
    xmlns:app="http://schemas.android.com/apk/res-auto"
    xmlns:tools="http://schemas.android.com/tools"
    android:id="@+id/drawer_layout"
    android:layout_width="match_parent"
    android:layout_height="match_parent"
    android:fitsSystemWindows="true"
    tools:openDrawer="start">

    <include
        layout="@layout/content_main"
        android:layout_width="match_parent"
        android:layout_height="match_parent" />

    <android.support.design.widget.NavigationView
        android:id="@+id/nav_view"
        android:layout_width="wrap_content"
        android:layout_height="match_parent"
        android:layout_gravity="start"
        android:fitsSystemWindows="true"
        app:headerLayout="@layout/nav_header_main"
        app:menu="@menu/activity_main_drawer" />

</android.support.v4.widget.DrawerLayout>


<!--content_main.xml-->
<?xml version="1.0" encoding="utf-8"?>
<android.support.design.widget.CoordinatorLayout xmlns:android="http://schemas.android.com/apk/res/android"
    xmlns:app="http://schemas.android.com/apk/res-auto"
    xmlns:tools="http://schemas.android.com/tools"
    android:layout_width="match_parent"
    android:layout_height="match_parent"
    android:fitsSystemWindows="true"
    tools:showIn="@layout/activity_main"
    tools:context="com.hooking.note.MainActivity">

    <android.support.design.widget.AppBarLayout
        android:layout_width="match_parent"
        android:layout_height="wrap_content"
        android:theme="@style/AppTheme.AppBarOverlay">

        <android.support.v7.widget.Toolbar
            android:id="@+id/toolbar"
            android:layout_width="match_parent"
            android:layout_height="?attr/actionBarSize"
            android:background="?attr/colorPrimary"
            app:popupTheme="@style/AppTheme.PopupOverlay" />

    </android.support.design.widget.AppBarLayout>

    <RelativeLayout
        android:id="@+id/fg_main_list"
        android:layout_width="match_parent"
        android:layout_height="match_parent"
        app:layout_behavior="@string/appbar_scrolling_view_behavior"/>

    <android.support.design.widget.FloatingActionButton
        android:id="@+id/fab"
        android:layout_width="wrap_content"
        android:layout_height="wrap_content"
        android:layout_gravity="bottom|end"
        android:layout_margin="@dimen/fab_margin"
        android:background="?attr/colorPrimary"
        android:src="@drawable/ic_add_white_24dp"
        app:layout_behavior="@string/floating_action_button_behavior" />

</android.support.design.widget.CoordinatorLayout>
主题是android studio项目模板默认的
    <style name="AppTheme.NoActionBar">
        <item name="windowActionBar">false</item>
        <item name="windowNoTitle">true</item>
        <item name="android:windowDrawsSystemBarBackgrounds">true</item>
        <item name="android:statusBarColor">@android:color/transparent</item>
    </style>

    <activity
        android:name=".MainActivity"
        android:theme="@style/AppTheme.NoActionBar" />
运行结果如下:
<!-- activity_main_2.xml -->
<?xml version="1.0" encoding="utf-8"?>
<android.support.design.widget.CoordinatorLayout xmlns:android="http://schemas.android.com/apk/res/android"
    xmlns:app="http://schemas.android.com/apk/res-auto"
    xmlns:tools="http://schemas.android.com/tools"
    android:layout_width="match_parent"
    android:layout_height="match_parent"
    android:fitsSystemWindows="true"
    tools:context="com.hooking.note.MainActivity">

    <android.support.design.widget.AppBarLayout
        android:layout_width="match_parent"
        android:layout_height="wrap_content"
        android:theme="@style/AppTheme.AppBarOverlay">

        <android.support.v7.widget.Toolbar
            android:id="@+id/toolbar"
            android:layout_width="match_parent"
            android:layout_height="?attr/actionBarSize"
            android:background="?attr/colorPrimary"
            app:layout_scrollFlags="scroll|enterAlways"
            app:popupTheme="@style/AppTheme.PopupOverlay" />

    </android.support.design.widget.AppBarLayout>

    <include layout="@layout/content_main_2" />

    <android.support.design.widget.FloatingActionButton
        android:id="@+id/fab"
        android:layout_width="wrap_content"
        android:layout_height="wrap_content"
        android:layout_gravity="bottom|end"
        android:layout_margin="@dimen/fab_margin"
        android:background="?attr/colorPrimary"
        android:src="@drawable/ic_add_white_24dp"
        app:layout_behavior="@string/floating_action_button_behavior" />

</android.support.design.widget.CoordinatorLayout>


<!-- content_main_2.xml -->
<?xml version="1.0" encoding="utf-8"?>
<android.support.v4.widget.DrawerLayout xmlns:android="http://schemas.android.com/apk/res/android"
    xmlns:app="http://schemas.android.com/apk/res-auto"
    xmlns:tools="http://schemas.android.com/tools"
    android:id="@+id/drawer_layout"
    android:layout_width="match_parent"
    android:layout_height="match_parent"
    android:fitsSystemWindows="false"//注1
    app:layout_behavior="@string/appbar_scrolling_view_behavior"
    tools:openDrawer="start">

    <RelativeLayout
        android:id="@+id/fg_main_list"
        android:layout_width="match_parent"
        android:layout_height="match_parent"/>

    <android.support.design.widget.NavigationView
        android:id="@+id/nav_view"
        android:layout_width="wrap_content"
        android:layout_height="match_parent"
        android:layout_gravity="start"
        android:fitsSystemWindows="false"//注2
        app:headerLayout="@layout/nav_header_main"
        app:menu="@menu/activity_main_drawer" />

</android.support.v4.widget.DrawerLayout>
主题不变,运行结果如下: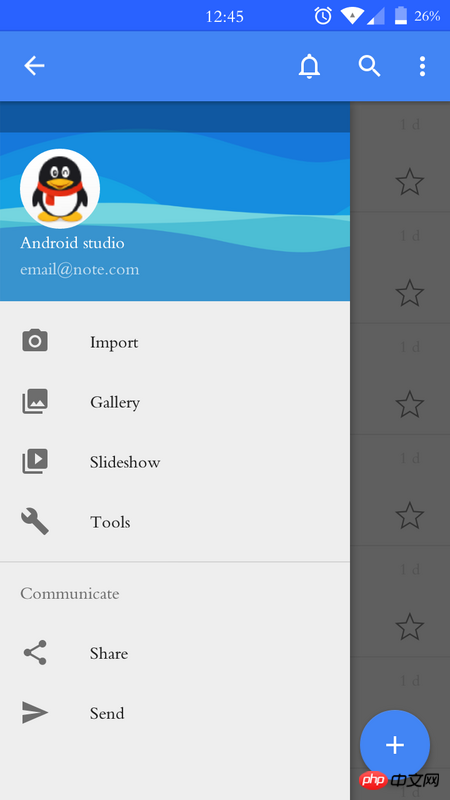
发现NavigationView的顶部有一与状态栏高度相等的遮罩层,请问怎样去掉这部分遮罩层的阴影。
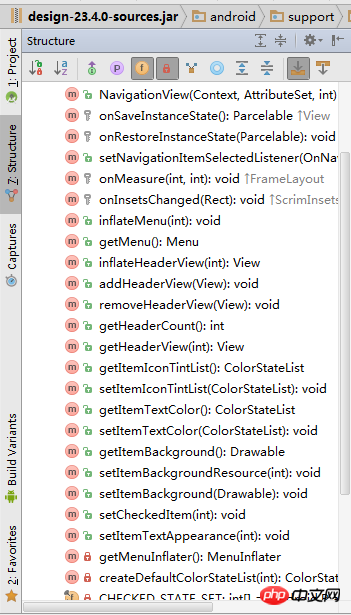
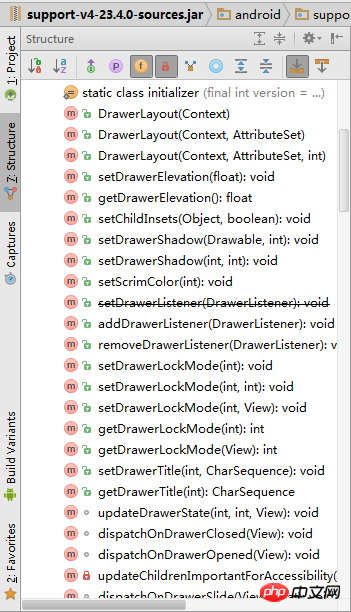
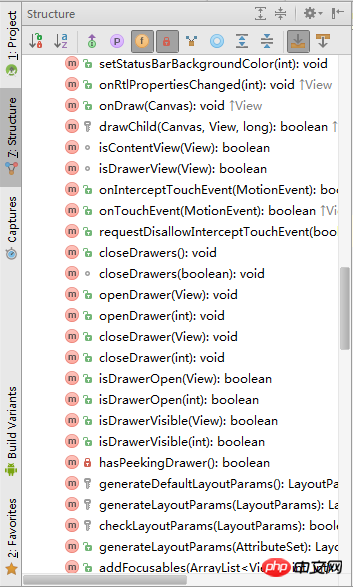
试过,修改DrawerLayout和NavigationView的布局属性;以及从以下代码涉及到颜色的函数着手修改,都没有效果

修改activity_main_2.xml、content_main_2.xml中DrawerLayout 【注1】 和NavigationView【注2】的 android:fitsSystemWindows="false"由false改为true,就出现了以下结果:可以看到内容区也多了状态栏同等高度的遮罩层阴影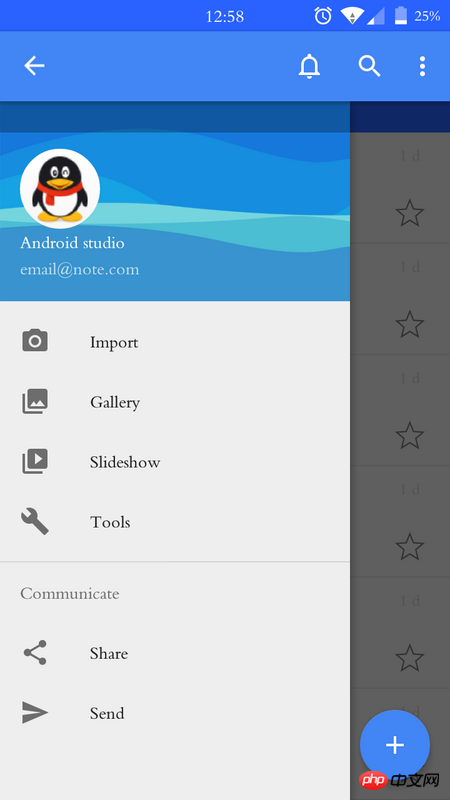


![[웹 프런트엔드] Node.js 빠른 시작](https://img.php.cn/upload/course/000/000/067/662b5d34ba7c0227.png)


CoordinatorLayout 안에 LinearLayout이 중첩되어 있습니다
Toolbar와 DrawerLayout을 안에 넣습니다
그림자는
fitsystemWindows에서 유래합니다.NavgationView컨트롤은fitsSystemWindows속성을 특별하게 처리합니다. 이 컨트롤은 휴대폰 상황에 따라 다르게 처리됩니다. 귀하의 방법에 대해 내 솔루션은content_main2의 루트 레이아웃에layout_margin="?attr/ActionBarsize"를 추가하여 원하는 결과를 얻을 수 있도록 하는 것입니다(모든 레이아웃은 Android Studio에서 생성됨).으아악
fitsystemWindows 속성 정보
android:windowDrawsSystemBarBackgrounds가 true이고 android:statusBarColor가 완전히 투명한 경우
액티비티의 UI 높이에는 상태 표시줄이 포함되며 상태 표시줄 아래에 삽입됩니다.
fitsystemWindows 속성은 상위 뷰에서 하위 뷰로 ViewGroup에서 전달될 수 있습니다.
액티비티의 상위 레이아웃이 CoordinatorLayout일 때 fitsystemWindows=true로 설정되면
는 상태 표시줄 아래에 색상 블록을 그립니다(높이는 상태 표시줄의 높이와 동일). 색상은 CoordinatorLayout 속성의 systembarcolor에 따라 달라집니다.
systembarcolor의 기본 색상은 colorPrimaryDark의 색상입니다.
CoordinatorLayout은 fitsystemWindows=true로 설정됩니다. 상태 표시줄을 그릴지 여부는 CoordinatorLayout의 하위 View도 fitsystemWindows=true로 설정한 경우 먼저 하위 View로 전달됩니다. - 상태 표시줄 그리기를 처리하는 보기입니다.
fitsystemWindows와 관련된 기사를 Google에서 검색할 수 있습니다
죄송합니다 포스터님, 이 문제는 해결됐나요? 같은 문제가 발생했습니다