Rumah > hujung hadapan web > tutorial js > Kanvas HTML Dipermudahkan: Panduan untuk Pemula.

Kanvas HTML Dipermudahkan: Panduan untuk Pemula.

Mary-Kate Olsen
Lepaskan: 2024-12-20 13:38:10
asal
715 orang telah melayarinya

Jadual Kandungan

  1. Pengenalan
  2. Bermula
  3. Asas lukisan
  4. Menambah Teks
  5. Kesimpulan dan Langkah Seterusnya

? Pengenalan

HTML ialah elemen HTML dengan teg yang digunakan untuk melukis grafik dalam dua atau tiga dimensi melalui Javascript. ialah pembalut yang boleh dimanipulasi oleh javascript untuk mencipta teks, imej, bentuk, animasi untuk mencipta elemen yang menarik secara visual dan interaktif.

HTML Canvas Made Simple: A Guide for Beginners.

Penggunaan tersedia dalam semua pelayar dan peranti yang memberikan fleksibiliti kepada pembangun untuk mencipta grafik yang menakjubkan.

Gunakan Kes HTML

  • Melukis bentuk dan garisan: Ia boleh melukis bentuk, corak dan garisan termasuk menambahkan warna dan kecerunan pada objek.
  • Animasi dan interaksi: Objek yang dicipta oleh boleh dianimasikan dan juga interaksi pengguna
  • Manipulasi Imej: Ini boleh digunakan untuk mengubah saiz atau memangkas imej.
  • Grafik permainan: Ia juga digunakan oleh pembangun permainan untuk mencipta antara muka pengguna permainan yang cantik
  • Penggambaran data: Ia adalah untuk penciptaan graf dan carta.

?Mulakan

HTML digunakan dalam fail HTML dan boleh dimanipulasi secara dalaman dalam teg skrip atau secara luaran dalam fail javascript. Tanpa ini, objek kanvas tidak akan dipaparkan.
Mula-mula kita perlu mencipta fail index.html dan memasukkan pembungkus untuk objek yang akan dibuat.

<!doctype html>
   <html lang="en">
     <head>
       <meta charset="UTF-8" />
       <meta name="viewport" content="width=device-width, initial-scale=1.0" />
       <title>HTML Canvas Example</title>
     </head>
     <body>
       <canvas>


<p>Then we add a script tag so we can define the behavior of the object.<br>
</p>

<pre class="brush:php;toolbar:false"><!doctype html>
   <html lang="en">
     <head>
       <meta charset="UTF-8" />
       <meta name="viewport" content="width=device-width, initial-scale=1.0" />
       <title>HTML Canvas Example</title>
     </head>
     <body>
       <canvas>


<p>Wowu !!! We get the output.</p>

<p><img src="https://img.php.cn/upload/article/000/000/000/173467309470040.jpg" alt="HTML Canvas Made Simple: A Guide for Beginners."></p>

<p>Looking at the structure of the code. We define canvas wrapper having an id attribute, this is can only be done by id and not class because of uniqueness which is used to reference the canvas with the id name.<br>
To access this we need to retrieve the node created in the Document Object Model(DOM) by using the getElementById("myCanvas") and have access to it using the getContext("2d") method.</p>

<p>This method make us to have access to different drawing methods like</p>

Salin selepas log masuk
  • fillRect(x, y, width, height): This method is to draw a filled rectangle at a position(x, y) with a specified width and height.
  • fillStyle = colorName: It is a property to set the color for the object. It could be a colorname, RGB or hex code for the object.

Other methods are:

  • strokeRect(x, y, width, height): This method to to make a outline stroke on the rectangle, this may be used independently or combined with fillStyle and fillRect(x, y, width, height).
  • clearRect(x, y, width, height): to clear the rectangle by making it transparent.

HTML Canvas Made Simple: A Guide for Beginners.


? Drawing basics

Different shapes and lines can be drawn using some specific methods depending on the object.

1. Path:

Examples are line, wavy line, zigzag e.t.c

HTML Canvas Made Simple: A Guide for Beginners.

For creating a line, the following method needs to be set up:

  • beginPath(): This method is to start a new path for a drawing.
  • moveTo(x, y): This is to move the drawing to the specified points.
  • lineTo(x, y): This is to draw from the current position to the specified points.
  • stroke(): This is to draw the line.

HTML Canvas Made Simple: A Guide for Beginners.

2. Rectangle and Square

  • Rectangle

HTML Canvas Made Simple: A Guide for Beginners.

  • Square

HTML Canvas Made Simple: A Guide for Beginners.

These following methods are used in creating a rectangle or square:

  • fillRect: this method is for create rectangle and square only.
  • clearRect(x, y, width, height): this method is to clear rectangle hence making it transparent.
  • strokeRect(x, y, width, height): is used to create an outline rectangle or square.
  • fillStyle: this is used to fill the container of the rectangle or square.
  • strokeStyle: this method is for add stroke color to an outline rectangle.
  • roundRect(x, y, width, height, radii): this method is for creating round border rectangle.

3. Circle

HTML Canvas Made Simple: A Guide for Beginners.
These following methods are used in creating a circle:

  • beginPath(): this method to begin a path.
  • arc(x, y, radius, startAngle, endAngle, anticlockwise): this is for to create circle where x and y is for center coordinate of the center, radius is the radius of the circle, startAngle and endAngle which is an angle for the circle.

4. Polygon

To create a polygon, you need to determine the sides of the shape, it could be a triangle(3 sides), pentagon (5 sides), hexagon(6 sides) or decagon (10 sides).

HTML Canvas Made Simple: A Guide for Beginners.

These following methods are used in creating a circle:

  • beginPath(): this method is to create a new shape.
  • closePath(): this method is to end the shape.
  • cx: its value for the center of x co-ordinates.
  • cy: its value specifies the center for y co-ordinates.
  • radius: radius of the shape.

To get the angle, you have to calculate with this formula by dividing the circle into two;

angle = 2π/ n
Salin selepas log masuk

di mana π ialah 3.14; n ialah bilangan sisi. Anda juga perlu tolak π/2 untuk mendapatkan kedudukan bentuk atas ke bawah.
HTML Canvas Made Simple: A Guide for Beginners.

HTML Canvas Made Simple: A Guide for Beginners.


? Teks dengan

HTML Canvas Made Simple: A Guide for Beginners.

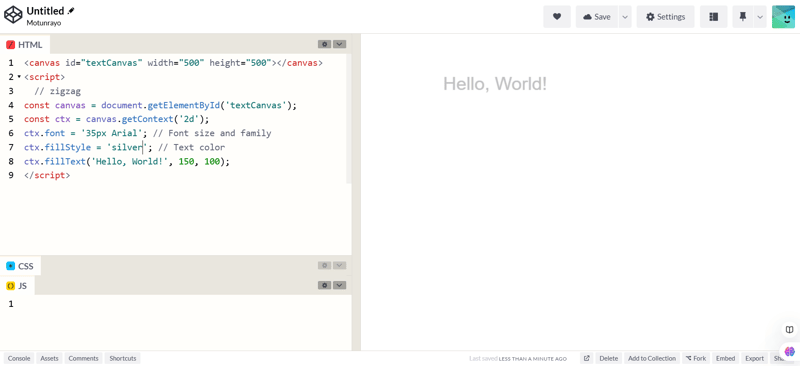
Untuk mencipta teks, kaedah berikut digunakan:
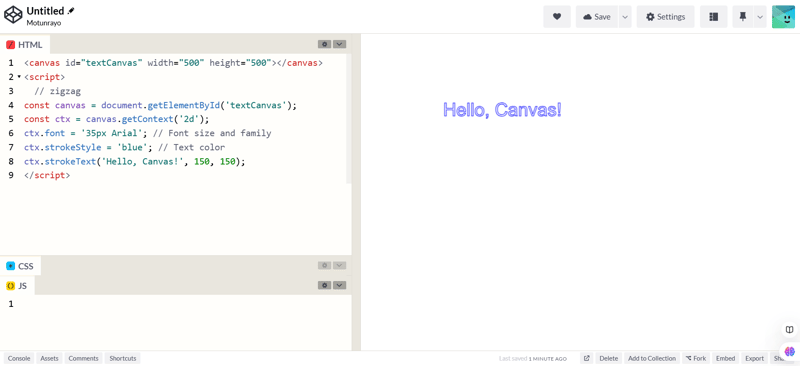
  • fon: untuk menentukan saiz fon dan keluarga fon.
  • fillStyle: ini adalah untuk menambah warna pada teks.
  • fillText: ini melukis teks yang diisi.
  • strokeText: ini melukis teks garis besar
  • createLinearGradient atau createRadialGradient: untuk menambah kecerunan pada teks
  • textAlign: untuk menetapkan teks secara mendatar

HTML Canvas Made Simple: A Guide for Beginners.


Kesimpulan

Menggunakan HTML boleh membantu secara dinamik untuk melukis grafik. Dengan ini, anda telah mempelajari cara melukis dengan kanvas termasuk penggunaan dan kepentingannya yang merupakan asas untuk mencipta grafik yang kompleks di kemudian hari.

Hubungi saya

Untuk lebih banyak artikel tentang pembangunan web. Ikuti saya di Linkedin dan X
Linkedin X

Atas ialah kandungan terperinci Kanvas HTML Dipermudahkan: Panduan untuk Pemula.. Untuk maklumat lanjut, sila ikut artikel berkaitan lain di laman web China PHP!

sumber:dev.to
Kenyataan Laman Web ini
Kandungan artikel ini disumbangkan secara sukarela oleh netizen, dan hak cipta adalah milik pengarang asal. Laman web ini tidak memikul tanggungjawab undang-undang yang sepadan. Jika anda menemui sebarang kandungan yang disyaki plagiarisme atau pelanggaran, sila hubungi admin@php.cn
Artikel terbaru oleh pengarang
Tutorial Popular
Lagi>
Muat turun terkini
Lagi>
kesan web
Kod sumber laman web
Bahan laman web
Templat hujung hadapan