

汇总PHPmailer群发Gmail的常见问题_php技巧

大家在PHPmailer群发Gmail时会遇到许多常见问题,下面为大家总结了一些常见问题,希望对大家的学习有所帮助。
1.Could not authenticate
首先,如果你没有使用循环的话,基本上就是账号或者密码错了;
如果使用循环来群发,send()方法结束之后记得调用Smtpclose(),发一次关一次,否则就会出现只能发一封邮件,第二次就崩溃的情况。
2.Gmail
首先,开启php的ssl权限
php开启openssl的方法,大多数情况下openssl是没有开启的,要想启用需要进行下简单的设置:
windows下开启方法:
1: 首先检查php.ini中;extension=php_openssl.dll是否存在, 如果存在的话去掉前面的注释符‘;', 如果不存在这行,那么添加extension=php_openssl.dll。
2: 讲php文件夹下的: php_openssl.dll, ssleay32.dll, libeay32.dll 3个文件拷贝到 WINDOWS\system32\ 文件夹下。
3: 重启apache或者iis
至此,openssl功能就开启了。
Linux下开启方法:
我使用的是锦尚数据的云主机,PHP版本:5.2.14
下面方案就以我的主机为例讲解为PHP添加openssl模块支持。
网上一些答案说要重新编译PHP,添加configure参数,增加openssl的支持。这里讲一个不需要重新编译的方法。
如果服务器上存在PHP安装包文件最好,如果已经删除,去下载和phpinfo页面显示版本一样的PHP安装文件,我这里是 php-5.2.14.tar.gz
推荐去搜狐镜像下载,网易镜像没有找到。地址为: http://mirrors.sohu.com/php/
用ssh工具连接到主机。
# 下载到/var/www/php5目录下

cd /var/www/php5

wget http://mirrors.sohu.com/php/php-5.2.14.tar.gz

# 解压

tar zxvf php-5.2.14.tar.gz

# 进入PHP的openssl扩展模块目录

cd php-5.2.14/ext/openssl/

/var/www/php5/bin/phpize # 这里为你自己的phpize路径,如果找不到,使用whereis phpize查找

# 执行后,发现错误 无法找到config.m4 ,config0.m4就是config.m4。直接重命名

mv config0.m4 config.m4

/var/www/php5/bin/phpize

./configure --with-openssl --with-php-config=/var/www/php5/bin/php-config

make

make install

# 安装完成后,会返回一个.so文件(openssl.so)的目录。在此目录下把openssl.so 文件拷贝到你在php.ini 中指定的 extension_dir 下(在php.ini文件中查找:extension_dir =),我这里的目录是 var/www/php5/lib/php/extensions

# 编辑php.ini文件,在文件最后添加

extension=openssl.so

# 重启Apache即可

/usr/local/apache2/bin/apachectl restart
好了,现在就成功添加openssl支持。
但是,Gmail麻烦的地方可不止这样,Gmail现在的smtp和pop3都是ssl加密的
Step1. php openssl module(extension) support
Step2. download phpmailer library
Step3. change code 'class.phpmailer.php' and 'class.smtp.php'
1.phpmailer和smtp里加property Is_SSL
public $Is_SSL = false;
2.phpmailer里的SmtpConnect方法里传递给smtp对象
$this->smtp-> Is_SSL = $this-> Is_SSL ;
3.smtp里的Connect方法在fsockopen调用前加上
if($this->is_ssl){ $host = 'ssl://'.$host; }
最后是使用方法,记得调用phpmailer类哦,代码里没有。
$mail = new PHPMailer();
$mail->IsSMTP();
$mail->Host = 'smtp.gmail.com'; // 您的企业邮局域名
$mail->SMTPAuth = true; // turn on SMTP authentication
$mail->SMTPSecure = "tls";
$mail->Username = '***@gmail.com';
$mail->Password = '******';
$mail->From = '***';
$mail->FromName = '***';
$mail->CharSet = 'UTF-8';
$mail->Encoding = "base64";
$mail->IsHTML(true); // send as HTML
$mail->Subject = '***'; //邮件标题
$mail->Body = '***'; //邮件内容
$mail->AltBody = "text/html";
$mail->AddAddress('***', "");
$mail->Is_SSL = true;
$mail->Port = 587;
if (!$mail->Send()) {
  exit($mail->ErrorInfo);
}
$mail->Smtpclose();
unset($mail);
代码部分就这些,还有不要忘记在gmail中做好相应的设置哦。
以上三步完成,就可以自由的用phpmailer来发送gmail邮件了。
再为大家分享一个phpmailer发送gmail邮件实例:
<html>
<head>
<title>PHPMailer - SMTP (Gmail) basic test</title>
</head>
<body>
<?php
//error_reporting(E_ALL);
error_reporting(E_STRICT);
date_default_timezone_set('America/Toronto');
require_once('../class.phpmailer.php');
//include("class.smtp.php"); // optional, gets called from within class.phpmailer.php if not already loaded
$mail = new PHPMailer();
$body = file_get_contents('contents.html');
$body = eregi_replace("[\]",'',$body);
$mail->IsSMTP(); // telling the class to use SMTP
$mail->Host = "mail.gmail.com"; // SMTP server
$mail->SMTPDebug = 2; // enables SMTP debug information (for testing)
// 1 = errors and messages
// 2 = messages only
$mail->SMTPAuth = true; // enable SMTP authentication
$mail->SMTPSecure = "ssl"; // sets the prefix to the servier
$mail->Host = "smtp.gmail.com"; // sets GMAIL as the SMTP server
$mail->Port = 465; // set the SMTP port for the GMAIL server
$mail->Username = "***@gmail.com"; // GMAIL username
$mail->Password = "***"; // GMAIL password
$mail->SetFrom('****@gmail.com', 'First Last');
$mail->AddReplyTo("***@gmail.com","First Last");
$mail->Subject = "PHPMailer Test Subject via smtp (Gmail), basic";
$mail->AltBody = "To view the message, please use an HTML compatible email viewer!"; // optional, comment out and test
$mail->MsgHTML($body);
$address = "***@gmail.com";
$mail->AddAddress($address, "John Doe");
$mail->AddAttachment("images/phpmailer.gif"); // attachment
$mail->AddAttachment("images/phpmailer_mini.gif"); // attachment
if(!$mail->Send()) {
echo "Mailer Error: " . $mail->ErrorInfo;
} else {
echo "Message sent!";
}
?>
</body>
</html>
以上就是本文的全部内容,希望对大家的学习有所帮助。

Alat AI Hot

Undresser.AI Undress
Apl berkuasa AI untuk mencipta foto bogel yang realistik

AI Clothes Remover
Alat AI dalam talian untuk mengeluarkan pakaian daripada foto.

Undress AI Tool
Gambar buka pakaian secara percuma

Clothoff.io
Penyingkiran pakaian AI

Video Face Swap
Tukar muka dalam mana-mana video dengan mudah menggunakan alat tukar muka AI percuma kami!

Artikel Panas
Alat panas

Notepad++7.3.1
Editor kod yang mudah digunakan dan percuma

SublimeText3 versi Cina
Versi Cina, sangat mudah digunakan

Hantar Studio 13.0.1
Persekitaran pembangunan bersepadu PHP yang berkuasa

Dreamweaver CS6
Alat pembangunan web visual

SublimeText3 versi Mac
Perisian penyuntingan kod peringkat Tuhan (SublimeText3)
Topik panas
 1389
1389
 52
52

 Bagaimana untuk menambah hiperpautan pada teks atau imej dalam Gmail
May 06, 2023 pm 06:07 PM
Bagaimana untuk menambah hiperpautan pada teks atau imej dalam Gmail
May 06, 2023 pm 06:07 PM
Tidak kira berapa banyak apl pemesejan segera telah datang dan pergi, e-mel sentiasa mempunyai rasa yang berbeza sama sekali. Mel benar-benar sinonim dengan Gmail. Belum lagi meja depan profesional, Gmail tidak dapat dielakkan, hanya tidak dapat dielakkan! Memandangkan Gmail digunakan begitu kerap, tidak kira apa pun, anda perlu tahu cara menjadikan pengalaman Gmail anda paling lancar dan paling cekap. Anda berkemungkinan besar perlu menambah banyak pautan web dalam badan e-mel anda, dan ia pasti akan kelihatan sukar digunakan jika anda mempunyai begitu banyak pautan. Tetapi pautan pastinya perlu, walaupun pautan panjang pasti akan menjadikan e-mel anda kelihatan hodoh. Jadi adakah jalan keluar? Bagaimana pula dengan hiperpautan? Bagaimanakah anda menyembunyikan pautan dalam teks atau imej? Bunyi sejuk? Oh ya, Gmail ialah
 Cara menghantar mesej kumpulan kepada semua orang di WeChat - Tutorial mesej kumpulan WeChat
Mar 18, 2024 am 10:58 AM
Cara menghantar mesej kumpulan kepada semua orang di WeChat - Tutorial mesej kumpulan WeChat
Mar 18, 2024 am 10:58 AM
Menghantar mesej kumpulan kepada semua orang di WeChat ialah fungsi yang sangat mudah yang boleh membantu kami menyampaikan maklumat dengan cepat. Jika anda perlu menghantar kandungan yang sama kepada berbilang rakan (tanpa membuat kumpulan), anda boleh menggunakan "Pembantu Kumpulan" untuk menghantar mesej kumpulan kepada setiap rakan. Editor di bawah akan memperkenalkan secara terperinci cara menghantar secara pukal, mari lihat! 1. Buka WeChat dan cari fungsi [Group Send Assistant]. 2. Mula-mula dayakan Pembantu Penghantaran Massa WeChat, dan kemudian klik [Mulakan Penghantaran Massa] 3. Klik [Penghantaran Massa Baharu] untuk memasuki halaman pemilihan penerima. 4. Dalam halaman Pilih Penerima, anda boleh memilih semua kenalan yang anda ingin hantar mesej dengan menyemak atau memilih semua secara manual. 5. Selepas memilih kenalan, klik butang "Seterusnya" untuk memasuki antara muka penyuntingan mesej. 6. Dalam antara muka penyuntingan mesej, anda boleh
 Bagaimana untuk mengalih keluar Boomerang daripada Gmail pada PC atau mudah alih
Apr 14, 2023 pm 10:46 PM
Bagaimana untuk mengalih keluar Boomerang daripada Gmail pada PC atau mudah alih
Apr 14, 2023 pm 10:46 PM
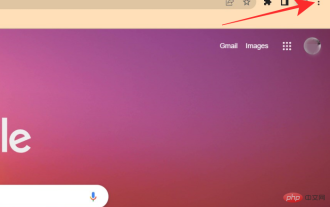
Cara Mengalih Keluar Boomerang daripada Gmail Cari di bawah panduan langkah demi langkah kami untuk mengalih keluar Boomerang daripada akaun Gmail anda pada PC atau telefon mudah alih anda. Untuk mengalih keluar Boomerang daripada Gmail pada PC, buka penyemak imbas Google Chrome pada komputer anda. Dalam Google Chrome, klik ikon tiga titik di penjuru kanan sebelah atas skrin. Pilih Lagi Alat daripada menu lungsur. Klik Sambungan daripada menu lungsur seterusnya. Pada skrin Sambungan, cari
 Kaedah dan langkah PHP untuk menghantar e-mel kepada berbilang orang menggunakan PHPMailer
May 22, 2023 pm 06:10 PM
Kaedah dan langkah PHP untuk menghantar e-mel kepada berbilang orang menggunakan PHPMailer
May 22, 2023 pm 06:10 PM
Dalam aplikasi web, selalunya perlu menghantar e-mel kepada berbilang penerima sekaligus. PHP ialah bahasa pembangunan web yang sangat popular, dan PHPMailer ialah perpustakaan kelas PHP biasa untuk menghantar e-mel. PHPMailer menyediakan antara muka yang kaya, menjadikan penghantaran e-mel dalam aplikasi PHP lebih mudah dan mudah digunakan. Dalam artikel ini, kami akan memperkenalkan kaedah dan langkah tentang cara menggunakan PHPMailer untuk menghantar e-mel kepada berbilang penerima. Untuk memuat turun PHPMailer, anda perlu pergi ke laman web rasmi (
 Bagaimana untuk menetapkan Gmail untuk memadam dan bukannya mengarkibkan dalam apl Mel pada iPhone dan iPad
Apr 13, 2023 pm 02:34 PM
Bagaimana untuk menetapkan Gmail untuk memadam dan bukannya mengarkibkan dalam apl Mel pada iPhone dan iPad
Apr 13, 2023 pm 02:34 PM
Adakah anda perasan bahawa apabila anda cuba memadamkan mesej dalam Gmail pada iOS, anda hanya melihat pilihan arkib? Teruskan membaca untuk mengetahui cara memadam Gmail pada iPhone tanpa mengarkibkannya dalam apl Mel. Tetapan untuk menukar pilihan lalai untuk mengarkibkan e-mel Gmail menggunakan apl Mel pada iPhone dan iPad tersembunyi sepenuhnya dalam Tetapan, tetapi ia boleh ditukar dengan cepat setelah anda tahu ke mana hendak pergi. Perlu diingat bahawa tutorial ini adalah untuk orang yang menggunakan Gmail melalui apl Apple Mail pada iPhone dan iPad. Pilihan lain ialah menggunakan apl Gmail pada iPhone/iPad anda. awak pun
 Cara mengalih keluar alamat e-mel autolengkap dalam Gmail
Apr 21, 2023 am 10:46 AM
Cara mengalih keluar alamat e-mel autolengkap dalam Gmail
Apr 21, 2023 am 10:46 AM
Gmail ialah pelayan e-mel berasaskan web yang paling popular daripada Google, dan ia dilengkapi dengan banyak ciri berkuasa yang membantu semasa menyemak imbas, mengedit dan menghantar e-mel. Satu ciri sedemikian ialah senarai autolengkap, yang membolehkan pengguna melihat senarai alamat e-mel yang disimpan sebagai kenalan sebelum selesai memasukkan alamat penuh. Ciri ini benar-benar berguna tetapi kadangkala ia mungkin bukan pendekatan yang baik kerana mungkin terdapat beberapa alamat e-mel yang tidak lagi sah atau mungkin telah dipadamkan oleh pengguna. Contohnya, seseorang yang meninggalkan organisasi tidak lagi mempunyai akses kepada alamat e-mel syarikat. Tetapi ada cara untuk mengalih keluar alamat e-mel yang diserlahkan dalam senarai autolengkap Gmail. Jika anda juga ingin mengalih keluar e-mel daripada senarai autolengkap Gmail
 Google Gemini kini dalam apl Gmail: Carian e-mel pintar melalui AI pada peranti Android
Aug 31, 2024 am 09:54 AM
Google Gemini kini dalam apl Gmail: Carian e-mel pintar melalui AI pada peranti Android
Aug 31, 2024 am 09:54 AM
Google sedang mengembangkan apl Gmailnya di Android dengan fungsi Soal Jawab dikuasakan AI yang sudah tersedia dalam versi web Gmail dan dikuasakan oleh pembantu AI Gemini Google. Pengguna kini boleh mencari peti masuk mereka dengan lebih cekap dengan bertanya speci
 Amalan pembangunan PHP: Gunakan PHPMailer untuk menghantar e-mel kepada pengguna dalam pangkalan data MySQL
Aug 05, 2023 pm 06:21 PM
Amalan pembangunan PHP: Gunakan PHPMailer untuk menghantar e-mel kepada pengguna dalam pangkalan data MySQL
Aug 05, 2023 pm 06:21 PM
Amalan pembangunan PHP: Gunakan PHPMailer untuk menghantar e-mel kepada pengguna dalam pangkalan data MySQL Pengenalan: Dalam pembinaan Internet moden, e-mel ialah alat komunikasi yang penting. Sama ada pendaftaran pengguna, tetapan semula kata laluan atau pengesahan pesanan dalam e-dagang, menghantar e-mel adalah fungsi penting. Artikel ini akan memperkenalkan cara menggunakan PHPMailer untuk menghantar e-mel dan menyimpan maklumat e-mel ke jadual maklumat pengguna dalam pangkalan data MySQL. 1. Pasang pustaka PHPMailer PHPMailer ialah
