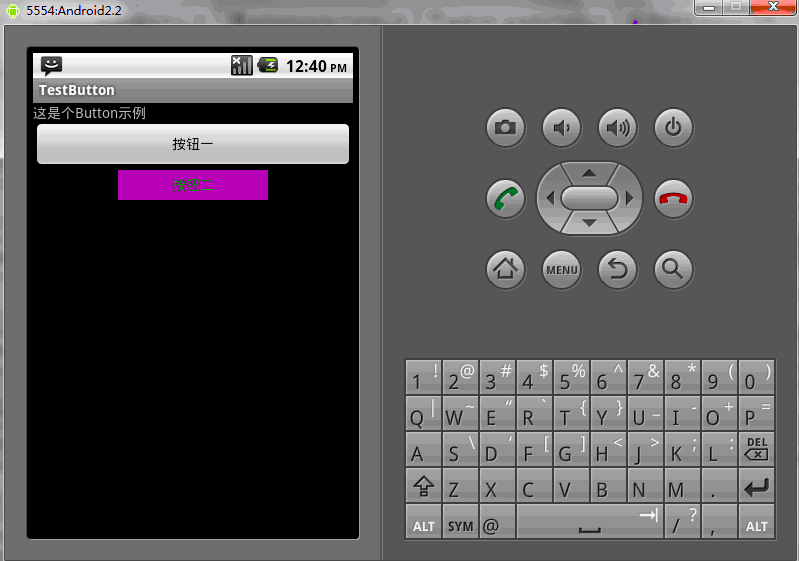
Button,就是按钮,是android中应用最多的组件之一,Button有两种用法,一种是XML中配置,另一种是在程序中直接使用
在XML布局文件里,会遇到如下一些单位
px:是屏幕的像素点
in:英寸
mm:毫米
pt:磅,1/72 英寸
dp:一个基于density的抽象单位,如果一个160dpi的屏幕,1dp=1px
dip:等同于dp
sp:同dp相似,但还会根据用户的字体大小偏好来缩放。
建议使用sp作为文本的单位,其它用dip
例1:在XML中布局,这样来设置控件以后修改起来会更方便,也符合了MVC模式
main.xml布局文件
<?xml version="1.0" encoding="utf-8"?>
<LinearLayout xmlns:android="http://schemas.android.com/apk/res/android"
    android:orientation="vertical"
    android:layout_width="fill_parent"
    android:layout_height="fill_parent"
    >
<TextView
    android:layout_width="fill_parent"
    android:layout_height="wrap_content"
    android:text="这是个Button示例"
    />
<Button
        android:layout_width="fill_parent"------充满父控件
        android:layout_height="wrap_content"------充满内容
        android:id="@+id/button1"----设置button的ID
        android:text="按钮一"    ------设置按钮的文本显示信息,也可以用string
/>
<Button
        android:layout_width="150dip"---按钮二的宽度
        android:layout_height="30dip"---按钮二的高度
        android:background="#aa00aa"---设置按钮背景颜色
        android:textColor="#00aa00"---设置按钮二里的文本颜色
        android:layout_gravity="center"---设置控件居中显示,注意:android:gravity="center"表是文本在控件中居中显示
        android:id="@+id/button2"
        android:text="按钮二"
/>
</LinearLayout>TestButton.java源代码
package org.loulijun.button;

import android.app.Activity;
import android.os.Bundle;
import android.view.Gravity;
import android.view.View;
import android.widget.Button;
import android.widget.Toast;

public class TestButton extends Activity {
    /** Called when the activity is first created. */
        private Button btn1,btn2;
    @Override
    public void onCreate(Bundle savedInstanceState) {
        super.onCreate(savedInstanceState);
        setContentView(R.layout.main);
        btn1=(Button)findViewById(R.id.button1);---获得父控件id
        btn2=(Button)findViewById(R.id.button2);
        //为控件设置监听,当点击了按钮一,就弹出一个提示,当点击按钮二,退出程序
        btn1.setOnClickListener(new Button.OnClickListener()
        {

                        @Override
                        public void onClick(View arg0) {
                                // TODO Auto-generated method stub
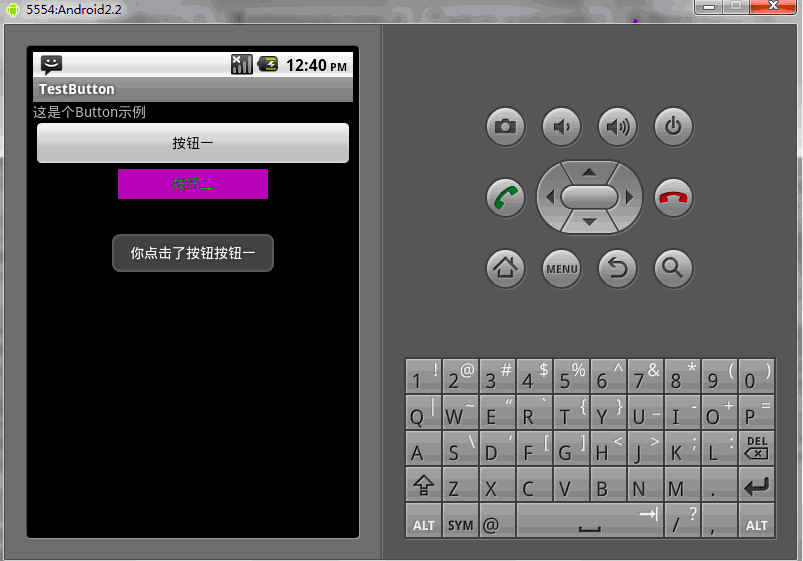
                                Toast toast=Toast.makeText(TestButton.this, "你点击了按钮"+btn1.getText().toString(), Toast.LENGTH_SHORT);
                                toast.setGravity(Gravity.TOP,0,150);
                                toast.show();
                        }

        });
        btn2.setOnClickListener(new Button.OnClickListener()
        {

                        @Override
                        public void onClick(View v) {
                                // TODO Auto-generated method stub
                                TestButton.this.finish();
                        }

        });
    }
}运行结果:


当然,也可以直接在程序中使用相应的方法来这是Button的相应属性
public class TestButton extends Activity{
private Button btn1,btn2;
public void onCreate(Bundle savedInstanceState)
{
        super.onCreate(savedInstanceState);
        setContentView(R.layout.main);
        btn1=(Button)findViewById(R.id.button1);
        btn2=(Button)findViewById(R.id.button2);
        btn1.setWidth(150);--设置按钮宽度,当然也可以用setHeight()来设置高度
        btn2.setWidth(100);
        btn1.setText("按钮一");---设置按钮文本显示信息
        btn2.setText("安妮二");
        btn1.setTextColor(Color.GREEN);---设置按钮内文本颜色
        btn2.setTextColor(Color.RED);
        btn1.setTextSize(30);---设置按钮内文本大小
        btn2.setTextSize(20);
        btn2.setBackgroundColor(Color.RED);---设置按钮背景颜色
}
}以上就是Android UI控件系列:Button(按钮)的内容,更多相关内容请关注PHP中文网(www.php.cn)!
 Tiga rangka kerja utama untuk pembangunan android
 Apakah sistem android
 Bagaimana untuk membuka kunci sekatan kebenaran android
 Apakah kaedah untuk memulakan semula aplikasi dalam Android?
 Kaedah pelaksanaan fungsi main balik suara Android
 vue arahan biasa
 Kaedah penukaran kata laluan MySQL
 Alat biasa untuk ujian perisian
 Apakah perbezaan antara paparan pangkalan data dan jadual


