PS网页设计教程II——在Photoshop中创建健康及营养或健身的网站
作为编码者,美工基础是偏弱的。我们可以参考一些成熟的网页PS教程,提高自身的设计能力。套用一句话,“熟读唐诗三百首,不会作诗也会吟”。
本系列的教程来源于网上的PS教程,都是国外的,全英文的。本人尝试翻译这些优秀的教程。因为翻译能力有限,翻译的细节上还有待推敲,希望广大网友不吝赐教。
约定:
1、本文的软件是Photoshop CS5版本
2、原教程的截图是英文的,本人在重新制作的基础上,重新截了中文版的图
3、原文中有些操作没有给出参数。本人在反复测试的情况下测定了一些参数,以红色的文字显示。有些错误的参数,直接以红色文字显示正确的参数
例如:(90,22,231,77),表示矩形的左上角的坐标是(90,22),宽231,高77
例如:(90,22),表示矩形的左上角的坐标是(90,22),矩形的其他两个参数教程里已经指定
4、在教程的最后会附上本人的心得。有些是对教程中的一些步骤的优化等。
Let’s start the tutorial.
让我们开始教程
Open Photoshop and create a new document 1020 by 1550px
打开Photoshop,新建一个文档,尺寸:1020*1550px

Step 1
Select Paint Bucket Tool, set the foreground color to #76b8b9 and click one time on your document.
步骤1
选择油漆桶工具,设置前景色为 #76b8b9。单击一次,对您的文档设置背景色。
Step 2
Select Ellipse Tool, make sure that the foreground color is set to white and create this white shapes:
步骤2
选择椭圆工具,前景颜色设置为白色,创建下图的两个白色的椭圆:

For each of this shape I will apply a Gaussian Blur of about 50 – 60px. To apply a Gaussian Blur go to Filter>Blur>Gaussian Blur.
You may lower the opacity if it’s needed.
Here is my result (a nice fading light):
对每个椭圆,我用 50 — — 60px 的高斯模糊。应用高斯模糊:滤镜 > 模糊 > 高斯模糊。(在做高斯模糊前,会提示栅格化形状,确定即可)
如果感觉需要,您可以降低不透明度。(基本上不需要再降低不透明度了)
这是我的结果 (漂亮的渐隐光效):

Step 3
Now I will select Line Tool and I will create those 2 lines. Please see the screenshot. For the first line I have used this color: #669495 and for the second one, this color: #9cd8d9
步骤3
参考样张,选择直线工具创建2条直线。第一条直线,颜色: #669495 ,第二条直线,颜色: #9cd8d9

Step 4
I will select Type Tool and I will add my logo. I will write: “healthy tips”.
For healthy I will apply this layer styles:
步骤4
用文字工具,添加我的徽标。写上文字:"healthy" 和 "tips"。
对healthy应用图层样式:颜色: # 698c8e

healthy的字体设置如下:原教程中的字体没有找到,只能找了一个比较接近的字体

tips的字体设置如下:也是找了一个接近的字体替换原教程的字体,字体的颜色: # fcf30b

Here’s my result
这是我做的效果

Step 5
Having Type Tool selected I will add the links for navigation. I have use the same layer styles and the same font used for the word “healthy” from the logo.
步骤5
用文本工具添加导航链接。用和healthy相同的图层样式和相同的字体。实际上,我用的是Brush Script MT字体。

Step 6
I will select Rectangle Tool and I will create this shape. Color used: #edec62
步骤6
用矩形工具创建矩形(46,162,439,50)。颜色: #edec62

Step 7
I will select Direct Selection Tool, and I will drag a little bit from the bottom – right corner of the shape
步骤7
用直接选择工具选中黄色的矩形,拖动右下角的点往右下角的方向拖动一点

虽然原文没有说明,个人觉得这里还是要加上投影

效果如下:

Step 8
With Type Tool I will add some text over this shape. I have applied the following layer styles:
步骤8
用文字工具在黄色的区域上添加一些文字。并添加如下的图层样式:


颜色叠加的颜色:# b3b303

My result:
结果如下:

Step 9
With Type Tool I will continue to add some more text
步骤9
继续用文本工具添加一些文字

Step 10
I will create a button, using again Rectangle Tool and Direct Selection Tool. For the text over the button I have applied the layer styles from step 8. My result
步骤10
用和步骤8相同的方法创建一个按钮((347,415,140,20),颜色: #ffde00 ),按钮的文字是see more …

Step 11
On this step I will use some icons from Premium Files section. I will go to Health/Fitness Vector Icons, I will download them and I will choose an icons showing an apple and I will place it on my document. I will play a little bit with Free Transform Tool (Ctrl +T) till I have something that I like. Here is my result:
步骤11
在此步骤中,我会从Premium Files下载一些图标。我将去Health/Fitness Vector Icons,下载并会选择一个苹果图标显示在我的页面上。我会使用自由变换工具 (Ctrl + T)做一些微调,直到我满意为止。这里是我的结果:

Step 12
Here I will repeat Step 6, 7 and 8 and I will create this shapes.
步骤12
现在,将重复步骤6、7、8,创建如下的形状:
(45,490,926,47),颜色: #f1c96a
(590,502,140,20),颜色: #f3f2d6,图层样式用内阴影
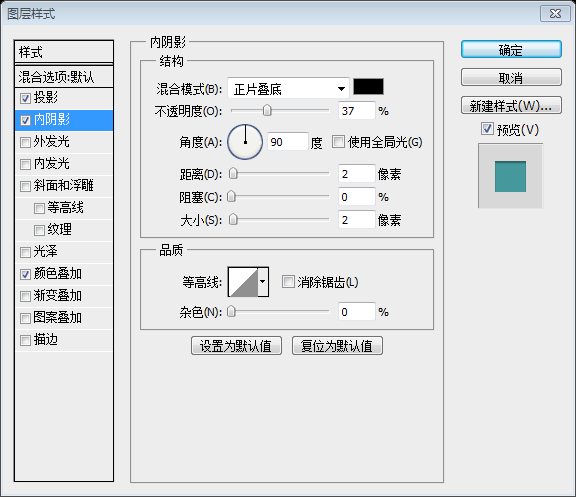
复制上面的形状,旋转180度,然后平移到合适位置,颜色: #f3f2d6,图层样式用内阴影,内阴影的参数设置如下:

(900,494,50,20),颜色: #fedd02
(56,637,257,32),颜色: #ffde00

Step 13
With Type Tool I will add the text over them
步骤13
用文字工具在上面添加一些文本
For “Looking for more healthy tips? Subscribe now!” I have used “Adventure” font with the following layer styles:
对文字Looking for more healthy tips? Subscribe now!,我用Adventure字体(实际使用Brush Script STD),并且采用下面的图层样式:


颜色叠加的颜色:# b3b303

For “Latest Articles” I have applied this layer styles:
对文字Latest Articles采用下面的图层样式


颜色: #45989c

做好如下:

用文本工具添加一些文本
Step 14
With Rectangle Tool I will create this white shape
步骤14
用矩形工具创建如下的白色矩形:(48,693,298,194)

Step 15
With Pen Tool I will create this 2 black triangles and I will apply a Gaussian Blur of about 14px. Here’s my result
步骤15
用钢笔工具添加两个黑色的三角。

对黑色的三角形添加高斯模糊,参数是14px(这个参数还是要斟酌一番,我用的是20px)

Step 16
Next using some images I will create another 5 thumbnails
步骤16
接下来重复创建另外5个,并且添加一些图片的缩略图

Step 17
I will repeat again the steps 6, 7, 8 and I will create this shape:
步骤17
我将重复步骤6、7、8创建下面的形状:(57,1145,258,32),颜色: #ffde00

Step 18
With Type Tool I will add some dummy text
步骤18
用文字工具添加一些文本
Step 19
From our Premium Files – Food Vector Icons and Health/Fitness Vector Icons I will add some vector icons
在 Premium Files – Food Vector Icons 和 Health/Fitness Vector Icons 上找到一些图标并添加之

我最终的结果如下:

心得:
如何在PS中画出纯色的直线?
一般在PS中画直线,用的是直线工具。可是直线工具和矩形工具一样,默认是以形状图层的形式出现的。形状图层的优点是抗锯齿,会通过插值计算出阴影的颜色,这样就不会有锯齿的感觉。而且形状图层在缩放时,也能达到很好的抗锯齿的效果。不过,抗锯齿的效果用在水平线和垂直线上就没有意义了(因为根本没有锯齿),PS在画水平线(或垂直线)时,在直线的旁边添加了一条阴影,这个就有点画蛇添足,有点捣乱了。如下图:

有人提到,可以在PS中关闭抗锯齿的选项,我没有找到,如有哪位网友知道,不妨告知。
在咨询了一些人之后,给出了一个不错的解决方法
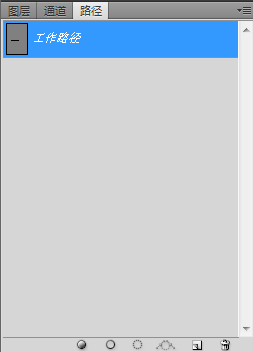
新建图层》用钢笔工具画一条水平线》对钢笔工具的水平线进行描边,如图:


在本教程中,步骤3中的两条直线,如果用直线工具,感觉就是比较模糊。用钢笔工具加描边,感觉就是比较锐利。
更多PS网页设计教程II——在Photoshop中创建健康及营养或健身的网站 相关文章请关注PHP中文网!

Alat AI Hot

Undresser.AI Undress
Apl berkuasa AI untuk mencipta foto bogel yang realistik

AI Clothes Remover
Alat AI dalam talian untuk mengeluarkan pakaian daripada foto.

Undress AI Tool
Gambar buka pakaian secara percuma

Clothoff.io
Penyingkiran pakaian AI

AI Hentai Generator
Menjana ai hentai secara percuma.

Artikel Panas

Alat panas

Notepad++7.3.1
Editor kod yang mudah digunakan dan percuma

SublimeText3 versi Cina
Versi Cina, sangat mudah digunakan

Hantar Studio 13.0.1
Persekitaran pembangunan bersepadu PHP yang berkuasa

Dreamweaver CS6
Alat pembangunan web visual

SublimeText3 versi Mac
Perisian penyuntingan kod peringkat Tuhan (SublimeText3)

Topik panas
 1382
1382
 52
52
 Bagaimana saya menggunakan Photoshop untuk mencipta grafik media sosial?
Mar 18, 2025 pm 01:41 PM
Butiran artikel menggunakan Photoshop untuk grafik media sosial, meliputi persediaan, alat reka bentuk, dan teknik pengoptimuman. Ia menekankan kecekapan dan kualiti dalam penciptaan grafik.
 Bagaimanakah saya menyediakan imej untuk web menggunakan Photoshop (mengoptimumkan saiz fail, resolusi)?
Mar 18, 2025 pm 01:35 PM
Artikel membincangkan mengoptimumkan imej untuk web menggunakan Photoshop, memberi tumpuan kepada saiz fail dan resolusi. Isu utama adalah mengimbangi kualiti dan masa beban.
 Apakah sebab mengapa PS terus menunjukkan pemuatan?
Apr 06, 2025 pm 06:39 PM
PS "Memuatkan" Masalah disebabkan oleh akses sumber atau masalah pemprosesan: Kelajuan bacaan cakera keras adalah perlahan atau buruk: Gunakan CrystaldiskInfo untuk memeriksa kesihatan cakera keras dan menggantikan cakera keras yang bermasalah. Memori yang tidak mencukupi: Meningkatkan memori untuk memenuhi keperluan PS untuk imej resolusi tinggi dan pemprosesan lapisan kompleks. Pemandu kad grafik sudah lapuk atau rosak: Kemas kini pemandu untuk mengoptimumkan komunikasi antara PS dan kad grafik. Laluan fail terlalu panjang atau nama fail mempunyai aksara khas: Gunakan laluan pendek dan elakkan aksara khas. Masalah PS sendiri: Pasang semula atau membaiki pemasang PS.
 Apakah soalan umum mengenai mengeksport PDF di PS
Apr 06, 2025 pm 04:51 PM
Soalan dan penyelesaian yang sering ditanya Apabila mengeksport PS sebagai PDF: Font Embedding Masalah: Periksa pilihan "Font", pilih "Benamkan" atau tukar fon ke dalam lengkung (laluan). Masalah Penyimpangan Warna: Tukar fail ke dalam mod CMYK dan laraskan warna; Secara langsung mengeksportnya dengan RGB memerlukan persediaan psikologi untuk pratonton dan sisihan warna. Isu Resolusi dan Saiz Fail: Pilih resolusi mengikut keadaan sebenar, atau gunakan pilihan mampatan untuk mengoptimumkan saiz fail. Isu Kesan Khas: Gabungan (meratakan) lapisan sebelum mengeksport, atau menimbang kebaikan dan keburukan.
 Bagaimanakah saya menyediakan imej untuk cetak menggunakan Photoshop (resolusi, profil warna)?
Mar 18, 2025 pm 01:36 PM
Artikel ini membimbing untuk menyediakan imej untuk dicetak di Photoshop, memberi tumpuan kepada resolusi, profil warna, dan ketajaman. Ia berpendapat bahawa profil 300 ppi dan CMYK adalah penting untuk cetakan yang berkualiti.
 Bagaimana untuk menyelesaikan masalah pemuatan apabila PS sentiasa menunjukkan bahawa ia memuatkan?
Apr 06, 2025 pm 06:30 PM
Kad PS adalah "Memuatkan"? Penyelesaian termasuk: Memeriksa konfigurasi komputer (memori, cakera keras, pemproses), membersihkan pemecahan cakera keras, mengemas kini pemacu kad grafik, menyesuaikan tetapan PS, memasang semula PS, dan membangunkan tabiat pengaturcaraan yang baik.
 Bagaimana saya menggunakan keupayaan penyuntingan video Photoshop?
Mar 18, 2025 pm 01:37 PM
Artikel ini menerangkan cara menggunakan Photoshop untuk penyuntingan video, memperincikan langkah -langkah untuk mengimport, mengedit, dan mengeksport video, dan menonjolkan ciri -ciri utama seperti panel garis masa, lapisan video, dan kesan.
 Cara menetapkan perlindungan kata laluan untuk pdf eksport di ps
Apr 06, 2025 pm 04:45 PM
Eksport PDF yang dilindungi kata laluan di Photoshop: Buka fail imej. Klik "Fail" & gt; "Eksport" & gt; "Eksport sebagai PDF". Tetapkan pilihan "Keselamatan" dan masukkan kata laluan yang sama dua kali. Klik "Eksport" untuk menghasilkan fail PDF.


