

毕业设计之进销存管理系统 --从基础搭建开始
大学四年,即将毕业!
大学期间的最后一篇博客,总结分享下我做的毕业设计。我选的论文命题为《燃气管网设备仪器进销存管理系统之后台设计》,由于我们专业只有我一个走技术路线,所以,我一个人完成了整个系统的设计及开发,总耗时近一个月,最终获得优的成绩。
这里不讨论论文,不写具体实现细节,主要讲如何一步步搭建自己的系统框架及系统实现,分享下自己的心得,新手可以互相学习,大牛们就当看作本人抛砖引玉啦!!
博客最后会附上系统开发相关的所有文件但不包括毕业论文,本文已大体包含了论文的内容!
一、系统展示
1.登录页面

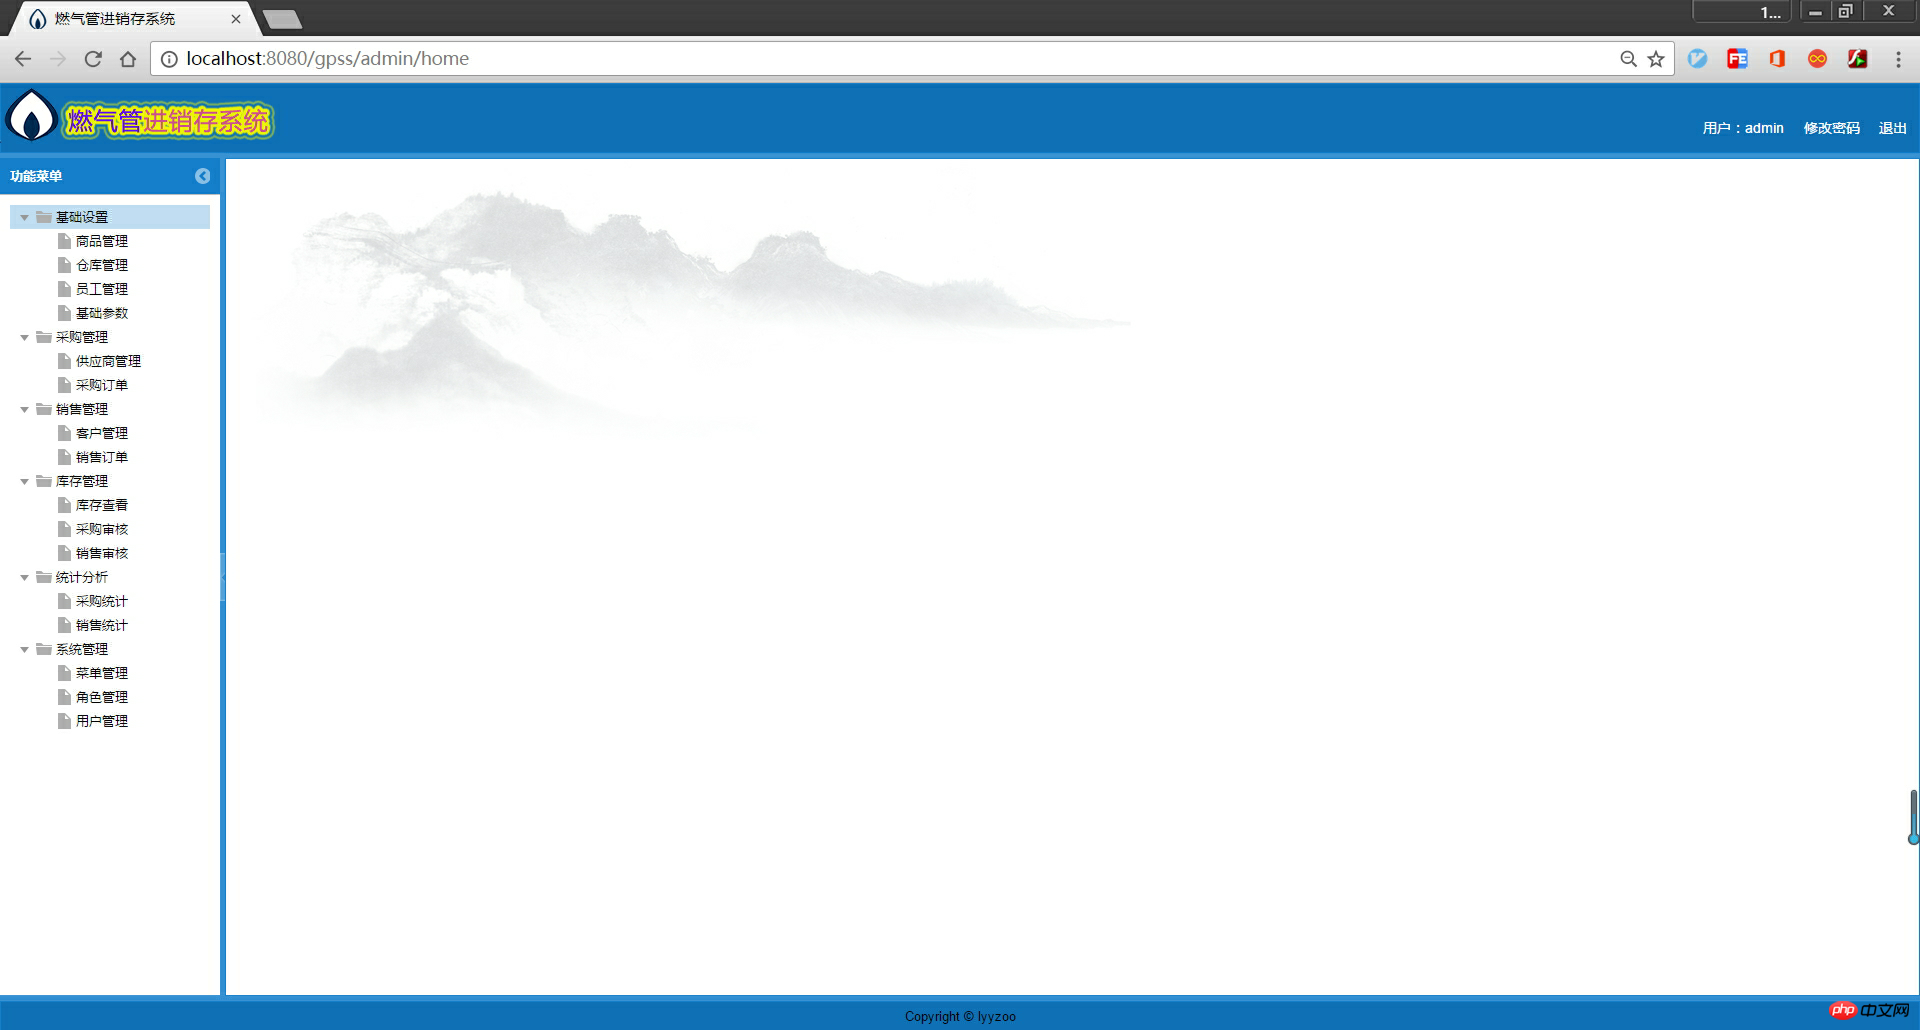
2.admin登录后的主页
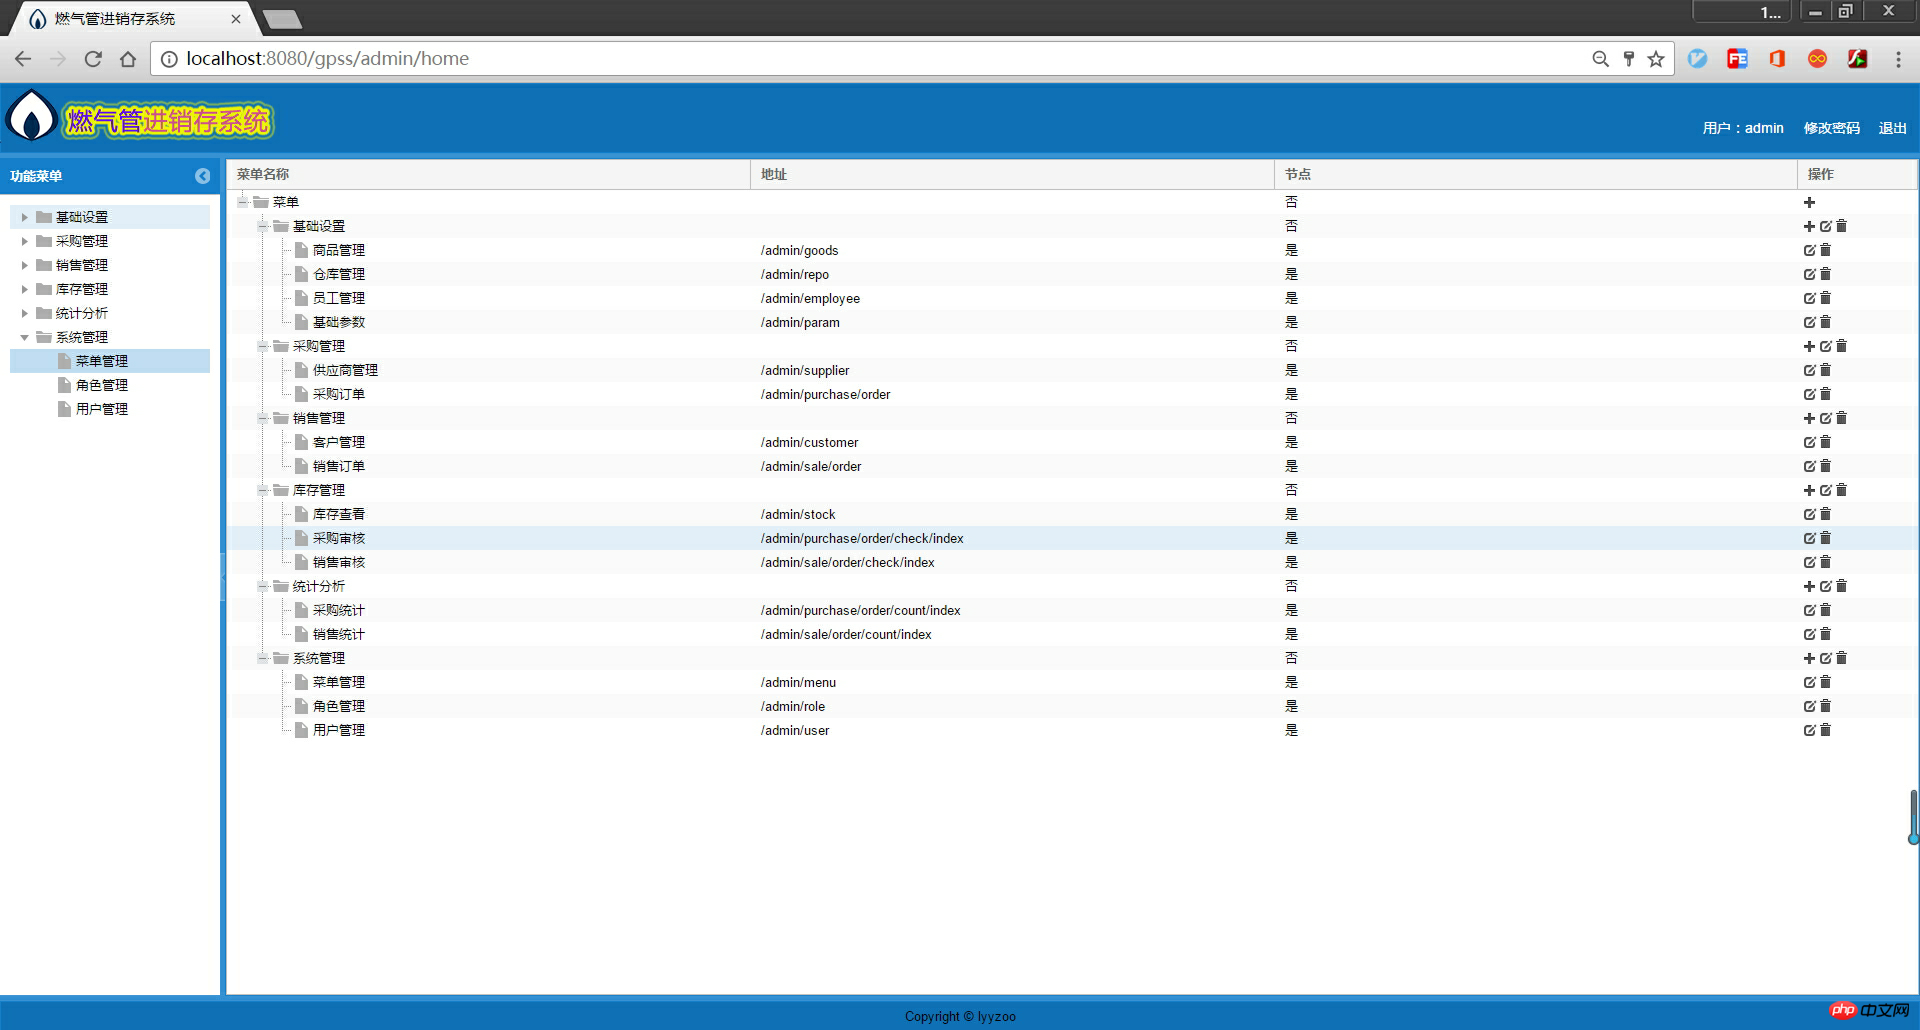
3.菜单管理
4.角色管理>新增角色

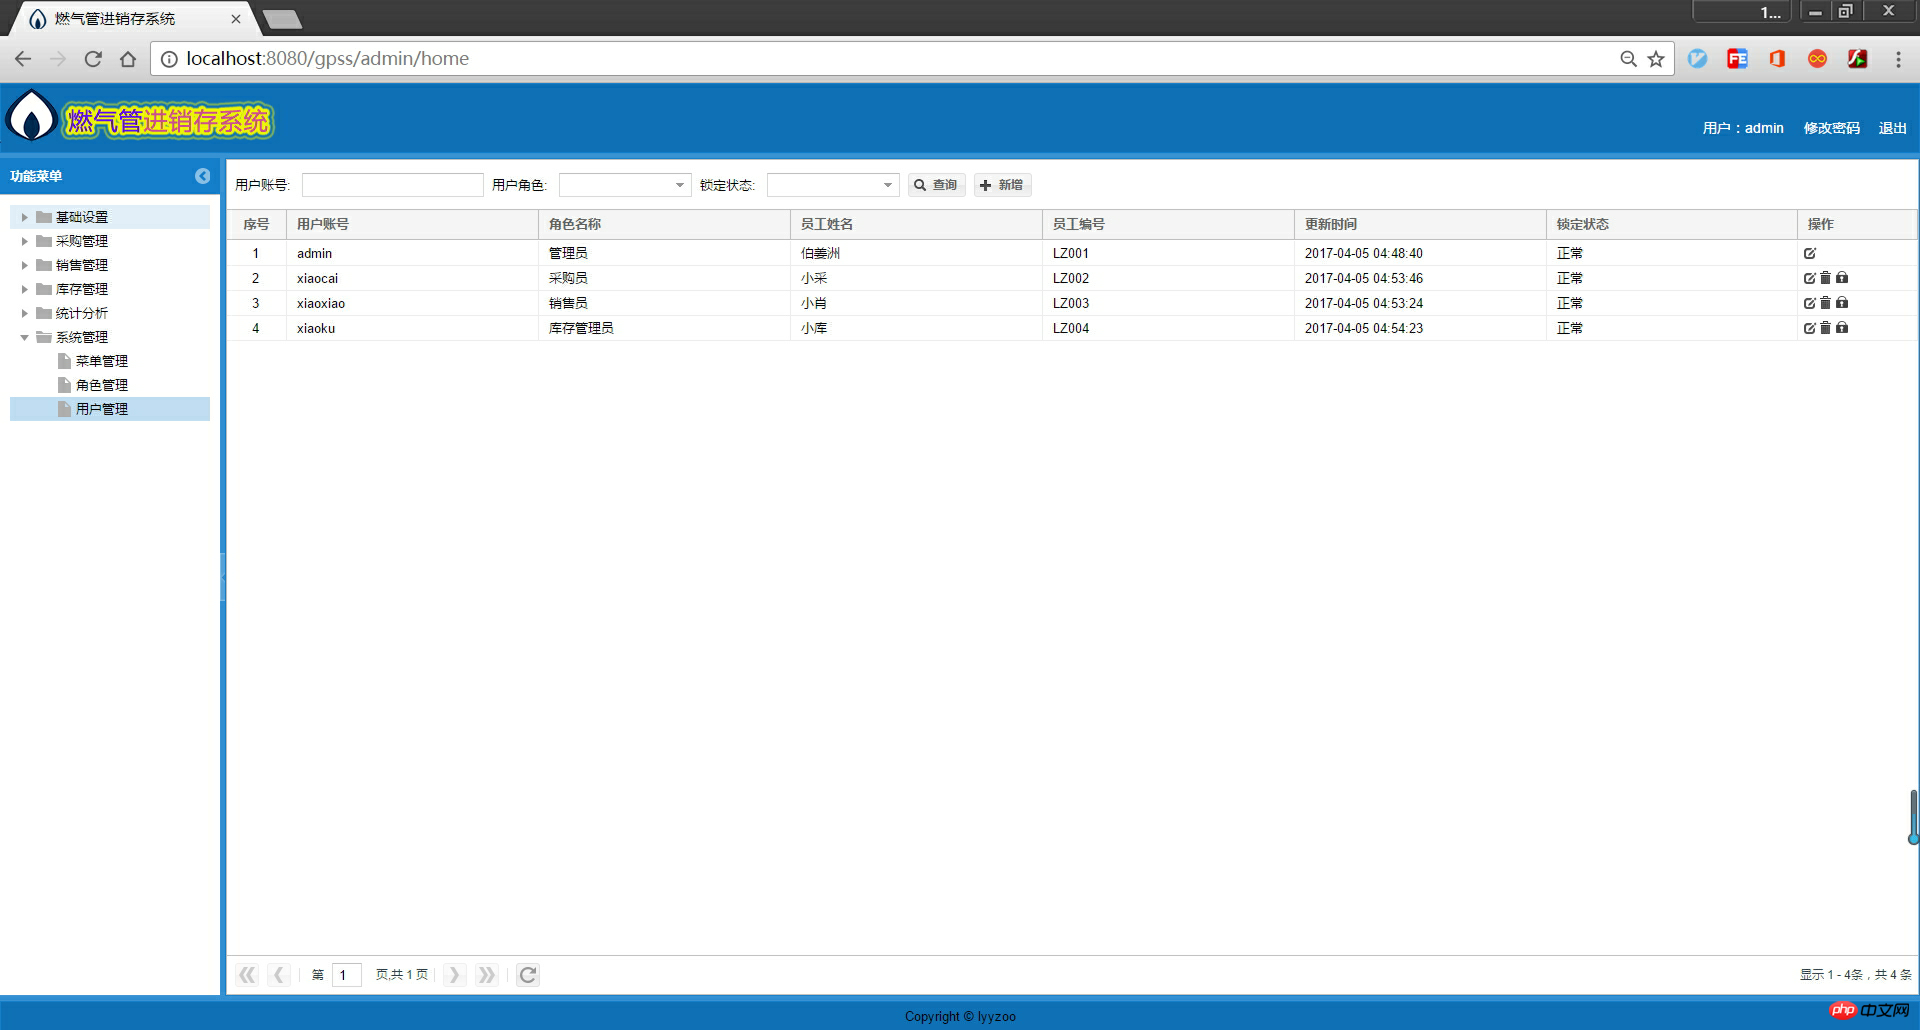
5.用户管理
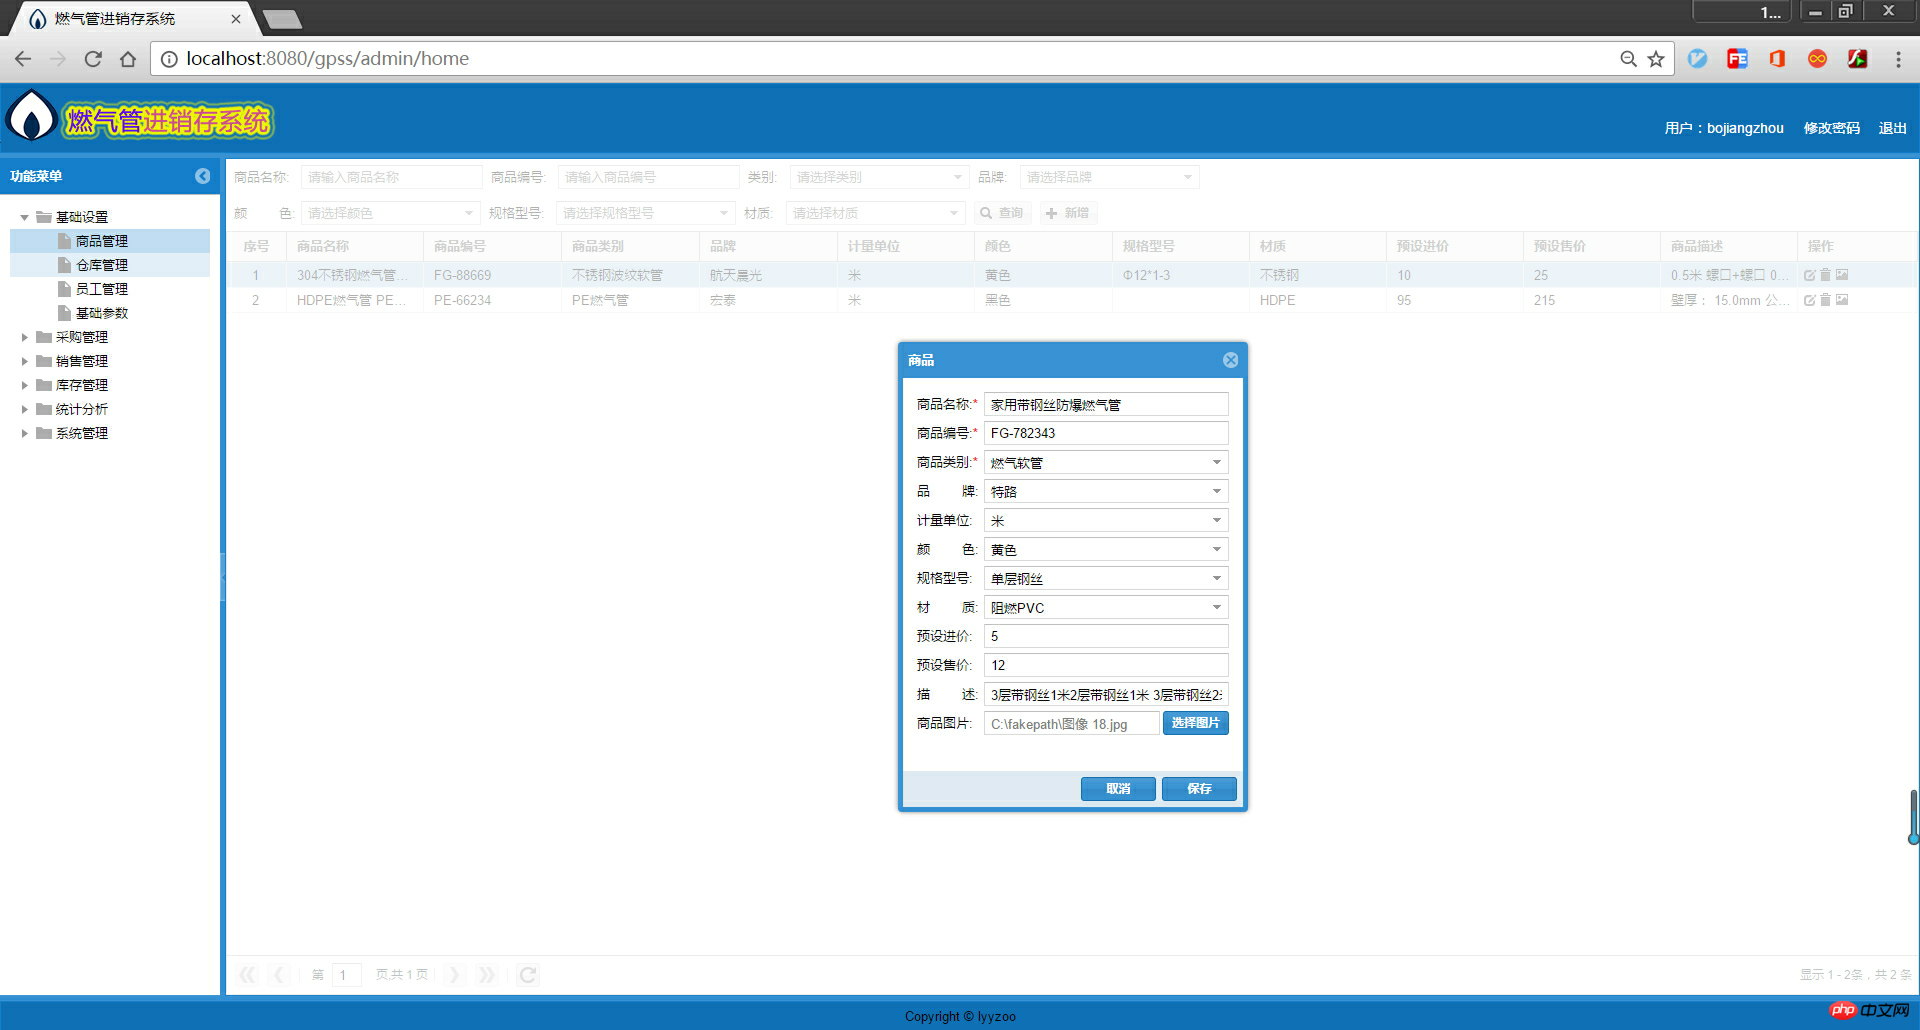
6.添加商品
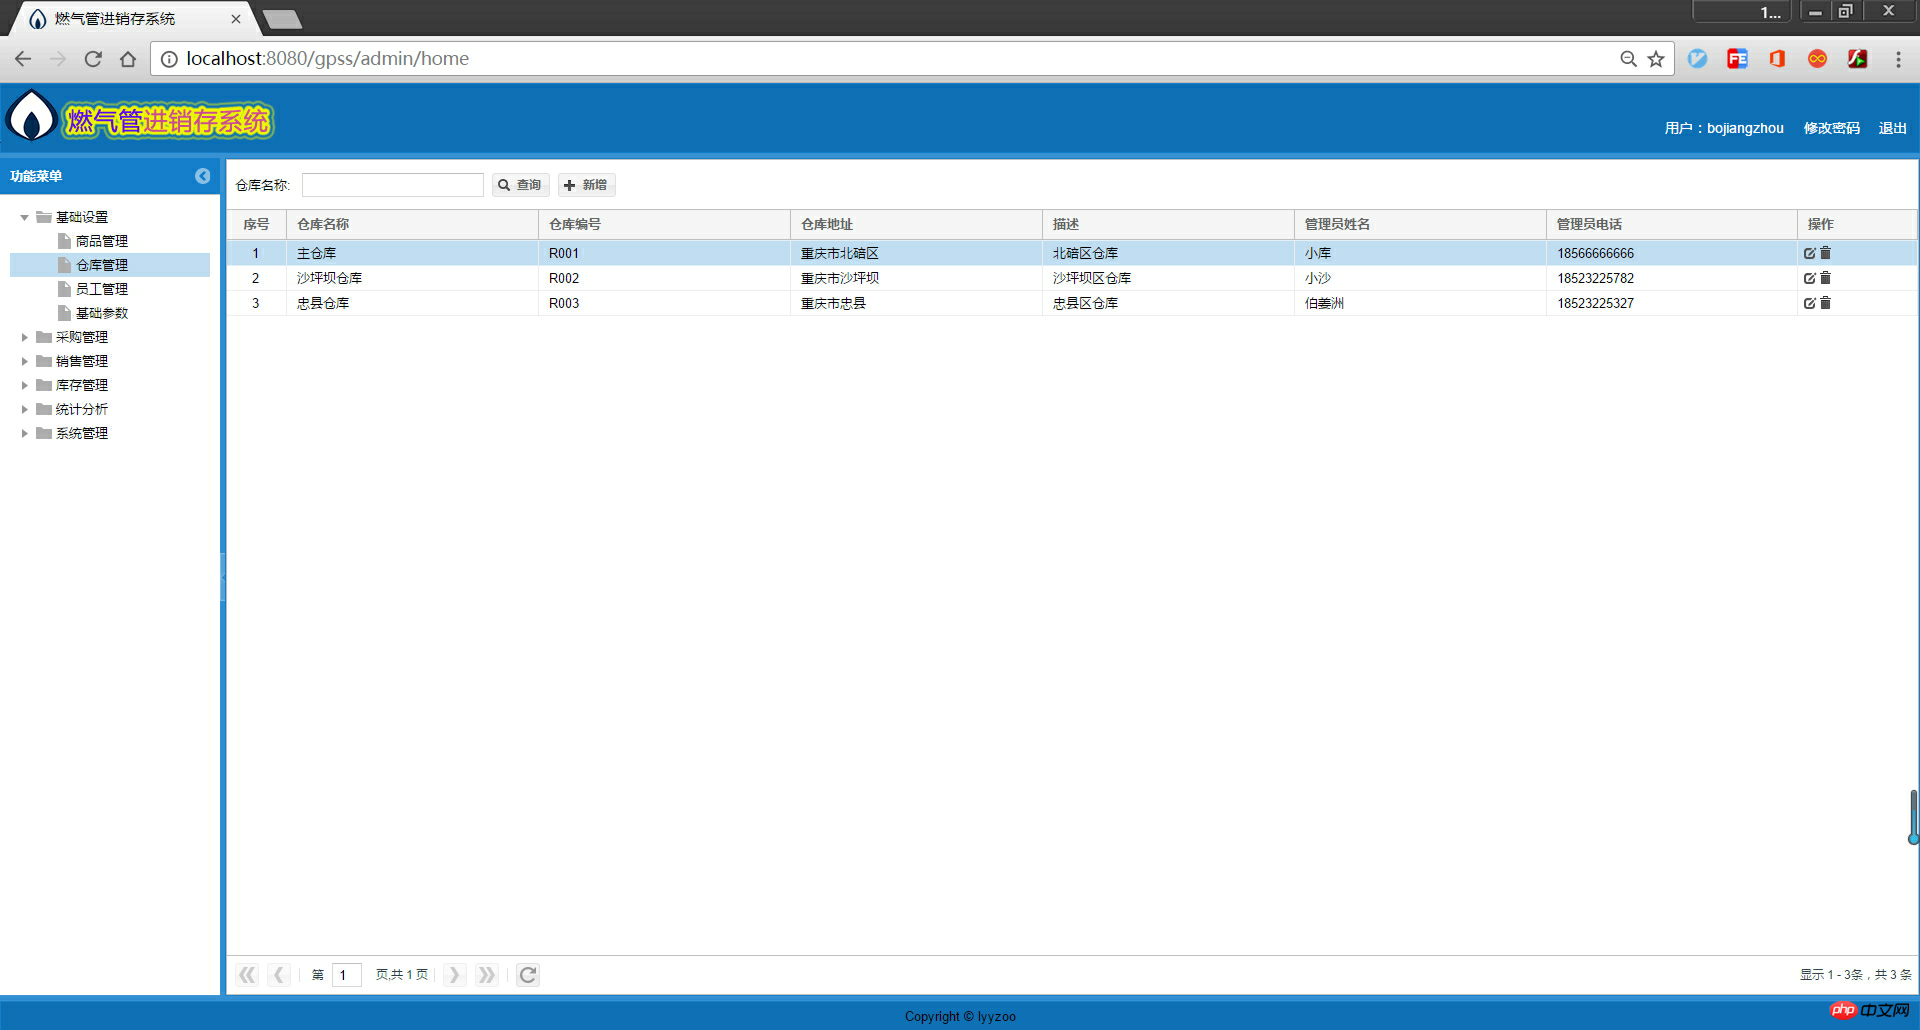
7.仓库管理
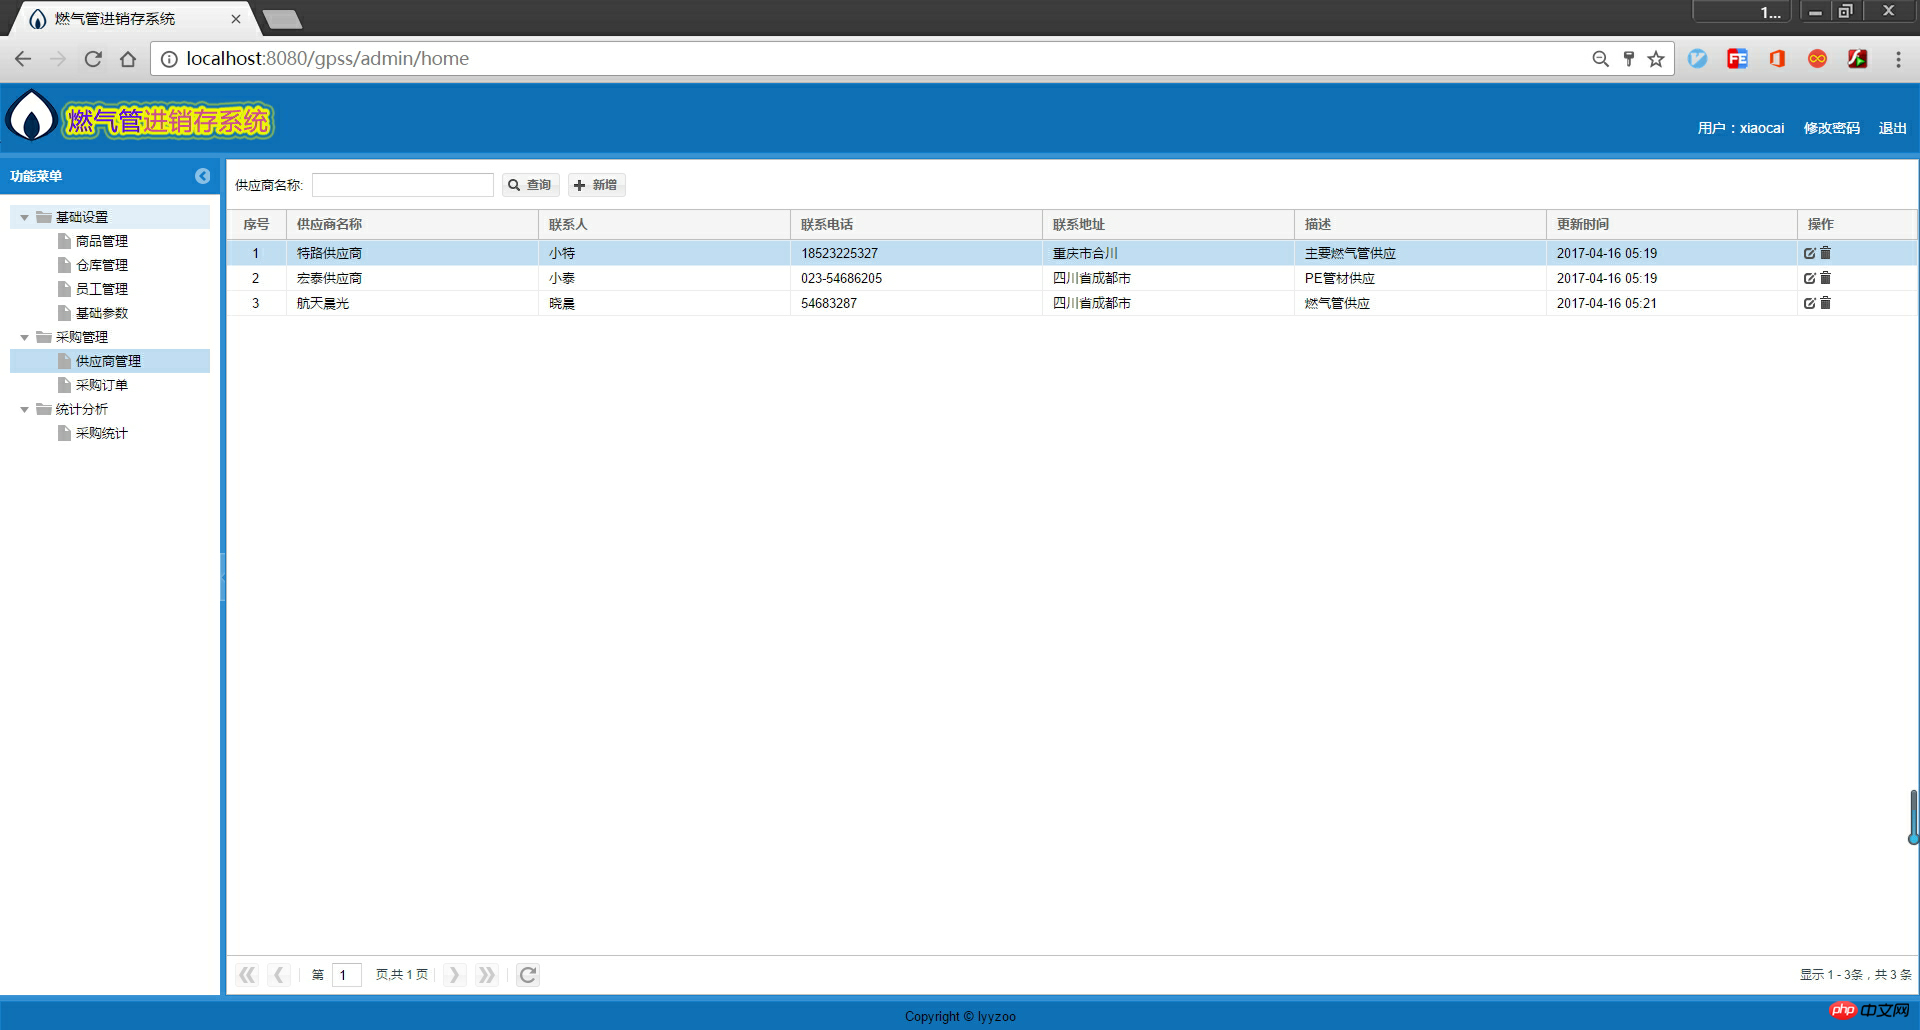
8.供应商管理
9.采购订单管理

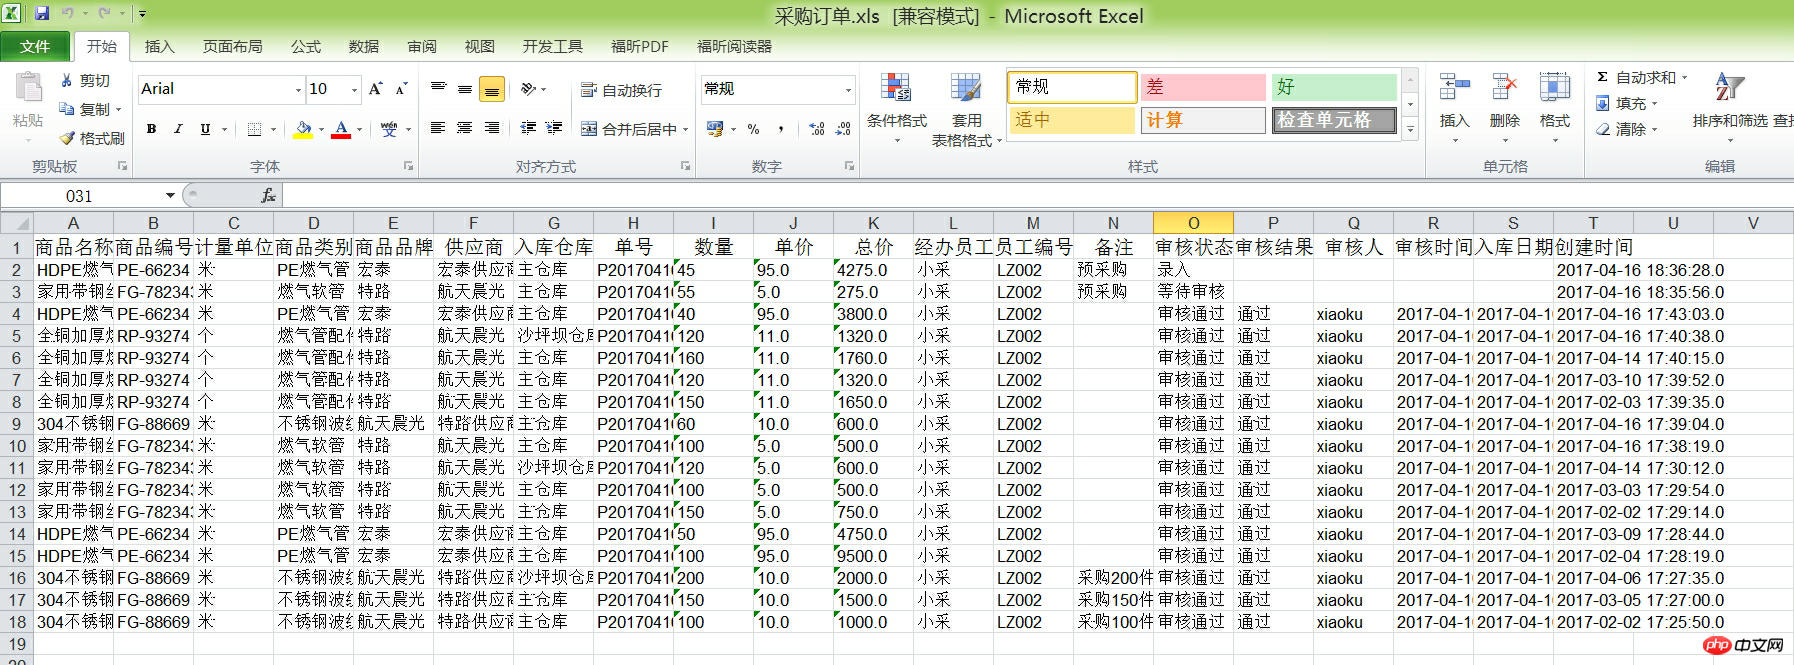
10.采购订单导出
11.库存查看

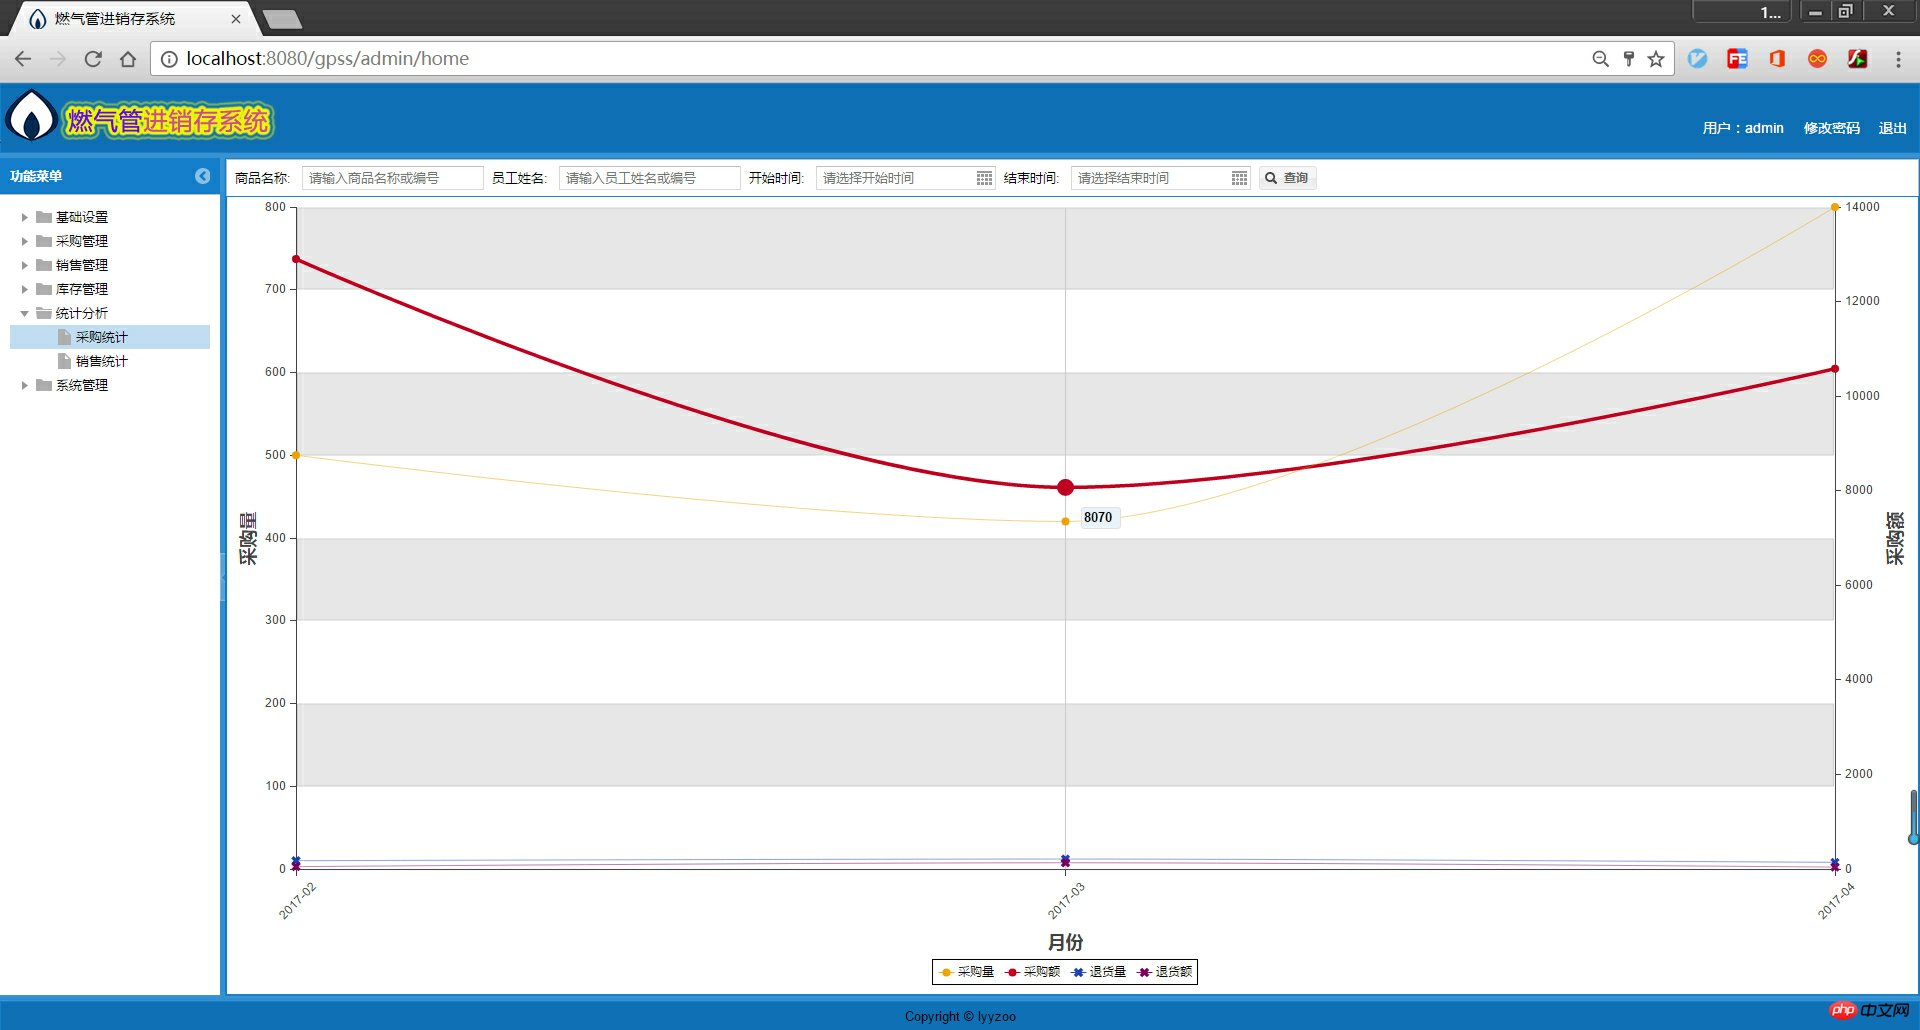
12.采购统计
二、系统需求分析
上面简单的展示了完成后的系统测试截图,你可以下载war包部署到自己的tomcat上看,下面开始进入正文。
开发一个(简单)系统,我想首要做的就是进行系统需求分析,弄清楚你为什么要做这个系统,这个系统有哪些功能模块,每个功能具体实现些什么功能。
当然,我这里的主要目的是完成毕业设计,交出毕业论文。但我并没有简单的只是为了完成一个毕业设计而去开发这个系统。主要想法是以开发这套进销存管理系统为例,详细说明一个系统从确认需求、技术选型、架构设计、系统实现到测试部署的整个开发过程。综合运用自己平时所学的知识、技术,及实习获得的经验等,去完整且较好的实现一个系统。搭建一个基础系统框架,形成一定规范,以后在此基础上做开发,可以省去很多诸如搭建框架、加入依赖、配置等工作。
这次开发所做的主要工作及意义如下:
①学会站在用户的角度分析用户需求,完成需求分析设计等。
②熟练使用各种类相关开发、设计工具,及开源软件。
③熟练掌握Spring+SpringMVC+Hibernate+ExtJs的开发技术。
④熟练使用maven版本管理工具。
⑤站在企业的角度,试着搭建自己的一个底层基础框架。
⑥建立完整的燃气管进销存管理系统,进行测试并分析结果。
⑦将系统部署到互联网上,以实现真正的web应用。
1.问题分析
首先,对系统进行需求分析,首先需要了解的就是什么是进销存系统,进销存系统也称为供应链管理系统,最基本的内容就是采购、库存、销售、退货管理。进销存系统是对企业生产经营中采购、入库、销售进行跟踪管理,从采购单开始,到商品入库,商品销售出库,每一步都跟踪记录。有效解决企业的分销管理等业务问题。那么燃气管进销存系统有何不同呢,其实进销存系统已经具备了一般商品的进销存功能,燃气管就是一种商品。以此为出发点,开始着手设计系统功能模块。
2.系统模块结构
系统分为6大模块,分别是基础设置、采购管理、销售管理、库存管理、统计分析、系统管理。系统设置的角色有admin、采购员、销售员、库存管理员等。
系统模块结构(使用xmind设计):

3.系统总体流程
系统的一个整体流程,从初次使用开始,系统设置一个超级管理员(admin),拥有系统的所有权限。admin登录系统,设置角色(系统管理员,采购员,销售员,库存管理员),分配对应的权限。然后进入用户管理,录入系统用户。一般管理员登录系统,录入基础数据;采购员需要录入供应商,采购单,退货单;销售员则需录入销售单,退货单。库存管理员就需要在库存管理中进行采购审核和销售审核,采购审核通过则商品入库,增加库存;销售审核通过则商品出库,减少库存。管理员还可以查看每月的采购统计和销售统计。
系统总体流程(使用visio设计):

三、开发环境简介
需求确定了,就要进入具体的开发阶段,首先确定开发这个系统综合用到哪些技术、开发工具等。
简单说下这个系统的开发环境:
开发平台:windows 8.1
Java版本:jdk 1.8
项目管理工具:Maven
开发工具:Intellij IDEA
数据库:MySql 5.1
服务器:Tomcat 8.5
开发框架:Spring4 + SpringMVC + Hibernate5
前端框架:ExtJs 4.2 + Jsp
建模工具:PowerDesigner、Visio
1.maven
Maven是Apache软件基金会组织维护的一款自动化构建工具,专注服务于Java平台的项目构建和依赖管理。它提供了中央仓库,能帮我们自动下载构件和第三方的开源类库。你只需要在你的项目中以坐标的方式依赖一个jar包,maven就会自动从中央仓库下载,并同时下载这个jar包所依赖的其他jar包,以及可以下载源码进行阅读。使用maven后每个jar包本身只在本地仓库中保存一份,极大的节约了存储空间,让项目更轻巧,更避免了重复文件太多而造成的混乱。同时maven可以替我们自动的将当前jar包所依赖的其他所有jar包全部导入进来,无需人工参与,节约了大量的时间和精力。使用maven,只需要一条简单的命令,就可以自动完成清理、编译、测试、打包、部署的整个过程。我们的项目一般会分为开发环境和生产环境,不同环境对应不同的配置文件,使用maven,你就可以配置两个环境,打包的时候指定运行的环境,就可以将对应的配置文件替换,以此减少手工操作及可能带来的失误操作等。
2.Intellij IDEA
IDEA是java语言开发的集成环境,Intellij被公认为最好的Java开发工具之一。IDEA在代码自动提示、重构、调试、各类版本工具(maven、svn等)整合等方面都是比较强的。本人是在实习期间转用idea开发的,之前一直使用eclipse,相比eclipse,idea在调试、代码自动提示等方面更显优势。项目在idea中有一个更友好的目录结构,尤其是多工程项目。当然,eclipse比idea更容易上手,使用idea可以提高你的开发速度,但前提是你需要记住大量的快捷键。使用idea的调试功能,比如,你只需要按快捷键Alt+F8,然后输入表达式,就可以快速求值;在调试的时候,idea会在变量的后面以不同的颜色显示变量的值,你就可以很清楚的知道调试的每一步,非常方便。使用好IDEA能在很大程度上提高我们的开发速度。
3.ExtJs
ExtJs可以用来开发富客户端的ajax应用,是用javascript写的与后台技术无关的前端ajax框架,主要用于创建前端用户界面,拥有强大的数据处理功能,以及图表统计等。同时,ExtJs拥有很多个性化的主题供你选择,是开发后台管理系统的一个不错的选择。
四、底层架构设计
在进行进销存系统的设计和编码之前,首先设计一个自己的底层框架,这个底层框架在之后可以作为其它具体项目开发的一个基础,从而不必每次开发项目时,都去做很多重复的工作。这个底层框架主要包括一个开发的规范,以及一些通用的工具类等,更重要的是分类别引入各个框架,如Spring、Hibernate、各个配置文件等。同时,如果以后在开发中,增加的一些新功能,还可以往这个底层中添加,不断的去完善。
1.规范
在进行框架设计之前,为了使软件开发过程顺畅、提高代码的可靠性,可读性和可维护性等,首先需要确定的就是开发规范了,俗话说,没有规矩不成方圆,软件开发亦是如此。下面列出一些简单的需要遵守的规范。
1.1基础规范
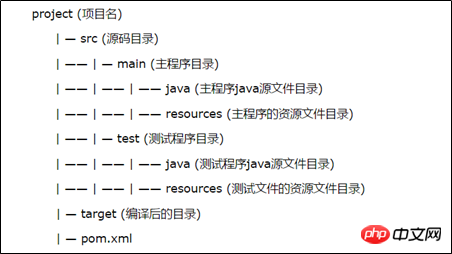
首先需要遵守的是一些基础规范。一般来说,公司会将域名作为所有命名的一个基础,比如文件名、包名等等。因此我申请了一个域名[www.lyyzoo.com]作为个人域名。然后将D:/lyyzoo-repo作为开发的根目录,即个人代码仓库,以后所有的项目都会建到这个目录下。所有的项目开发使用maven来管理项目,因此目录结构是标准的maven规范目录。
maven约定的目录结构:
1.2代码规范
①命名
> 所有的命名需要见名之意,尽量保证通过变量名得知变量的含义,需要注释的地方尽量添加注释。
> 包命名全小写,通过域名倒写+模块的形式,如:com.lyyzoo.service
> 类命名采用Pascal名法,大写字母开头,每个单词首字母大写。
> 方法名采用Camel命名法,小写字母开头,每个单词首字母小写;getter和setter使用Lombok自动生成,只需添加@Data注解即可。
> 变量名采用Camel命名法,小写字母开头,每个单词首字母大写。变量名不宜过长,可采用首字母缩写的形式,但要见名之意。
> 常量名全大写,每个单词之间使用”_”分隔。
②分层
项目以功能模块划分,不同项目建立不同的工程,使用maven的依赖进行管理。包的基本分层有controller(控制层)、service(业务层)、dao(数据访问层)、entity(模型层)。
2.架构设计
2.1模块结构
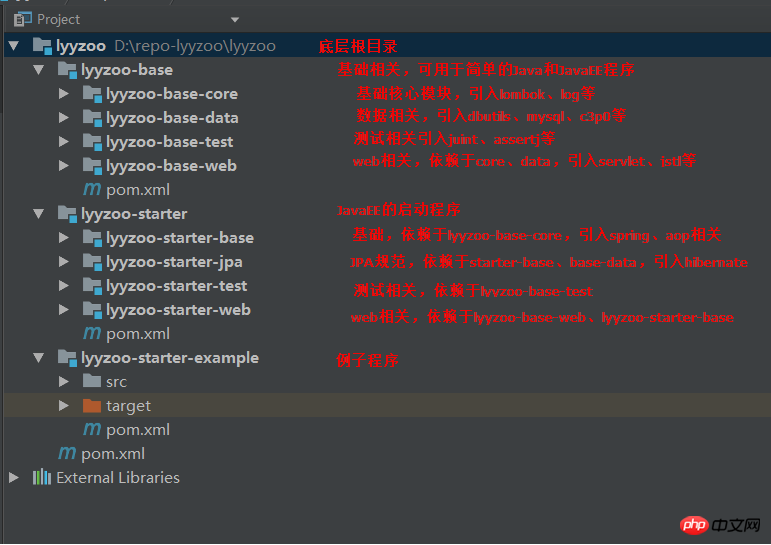
整个项目的底层着重是一些通用的、基础的东西,整合到一起,以便于以后重用。首先,创建一个名为lyyzoo的maven工程,lyyzoo将作为底层的根目录。lyyzoo下有两个主要的子模块,分别为lyyzoo-base和lyyzoo-starter,lyyzoo-base是基础模块,用于一些简单的Java及JavaEE程序;lyyzoo-starter则是JavaEE相关,会依赖于lyyzoo-base,同时引入了Spring、Hibernate等第三方框架。然后在各个模块中添加具体的子模块。以后开发中需要用到哪个模块,在依赖中添加那个模块即可。
底层模块结构图:
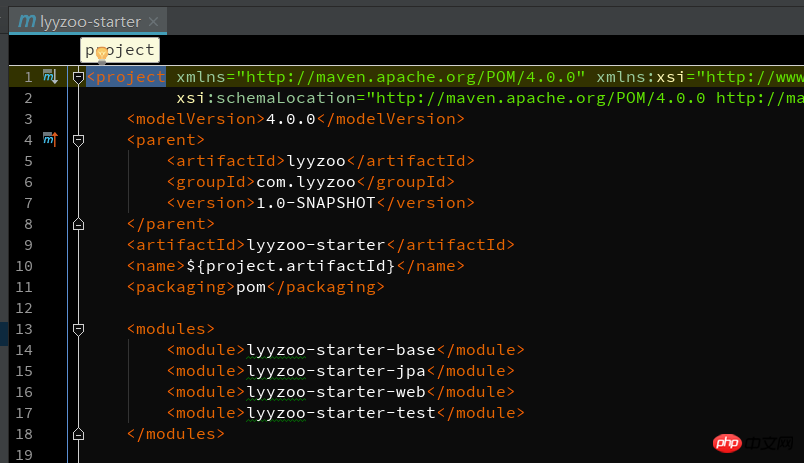
以下是各个POM之间的关系:
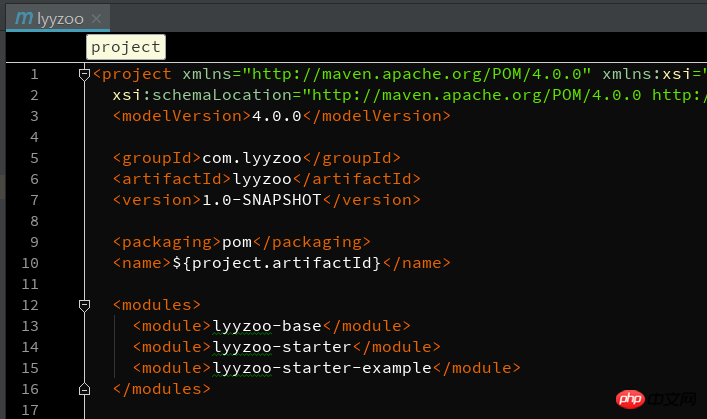
① lyyzoo > pom.xml
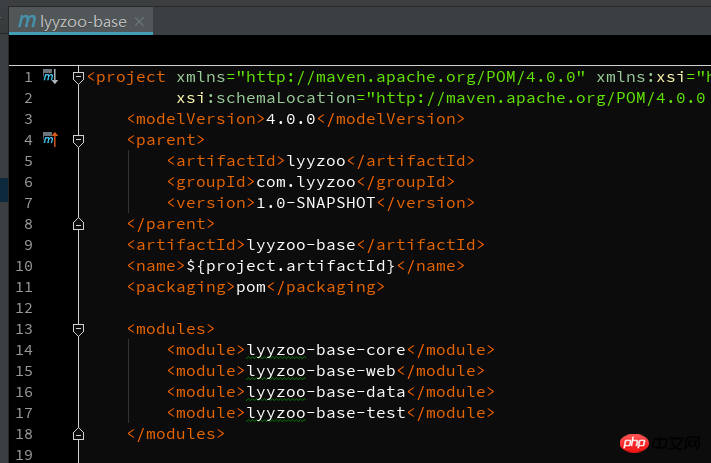
② lyyzoo-base > pom.xml
③ lyyzoo-starter > pom.xml
2.2依赖管理
结构建好后,就需要进行一些详细的依赖配置工作了,lyyzoo是所有模块的父类,所以在lyyzoo中需要添加公用的属性、依赖管理、maven插件等。
首先将所有的版本号提出来,放到


1 <properties> 2 <!-- Global --> 3 <lyyzoo.version>1.0-SNAPSHOT</lyyzoo.version> 4 <java.version>1.8</java.version> 5 <maven.compiler.source>${java.version}</maven.compiler.source> 6 <maven.compiler.target>${java.version}</maven.compiler.target> 7 <project.build.sourceEncoding>UTF-8</project.build.sourceEncoding> 8 <!-- lombok --> 9 <lombok.version>1.16.14</lombok.version>10 <!-- log -->11 <slf4j.version>1.7.7</slf4j.version>12 <logback.version>1.1.3</logback.version>13 <!-- jdbc -->14 <mysql.version>5.1.38</mysql.version>15 <!-- -->16 <c3p0.version>0.9.5.2</c3p0.version>17 <!-- test -->18 <junit.version>4.12</junit.version>19 <!-- servlet -->20 <servlet.version>3.1.0</servlet.version>21 <!-- spring -->22 <spring.version>4.2.6.RELEASE</spring.version>23 <aspectjrt.version>1.7.3</aspectjrt.version>24 <aspectjweaver.version>1.7.3</aspectjweaver.version>25 <!-- hibernate -->26 <hibernate.version>5.0.1.Final</hibernate.version>27 <hibernate.jpa.version>1.0.0.Final</hibernate.jpa.version>28 </properties> 接着,引入依赖管理,在lyyzoo中引入其它项目将会用到的所有三方jar包的依赖,所有的依赖都添加到
① 首先需要引入lyyzoo下的其它模块,如lyyzoo-base-core、lyyzoo-starter-base等模块。


1 <!-- lyyzoo --> 2 <dependency> 3 <groupId>com.lyyzoo</groupId> 4 <artifactId>lyyzoo-base-core</artifactId> 5 <version>${lyyzoo.version}</version> 6 </dependency> 7 <dependency> 8 <groupId>com.lyyzoo</groupId> 9 <artifactId>lyyzoo-base-data</artifactId>10 <version>${lyyzoo.version}</version>11 </dependency>12 <dependency>13 <groupId>com.lyyzoo</groupId>14 <artifactId>lyyzoo-starter-base</artifactId>15 <version>${lyyzoo.version}</version>16 </dependency>17 <dependency>18 <groupId>com.lyyzoo</groupId>19 <artifactId>lyyzoo-starter-jpa</artifactId>20 <version>${lyyzoo.version}</version>21 </dependency>② JDBC相关,相关jar包有c3p0,用于作数据库连接池;mysql驱动包;dbutils,对JDBC进行了简单的封装,使用起来简单方便。


1 <!-- jdbc --> 2 <dependency> 3 <groupId>com.mchange</groupId> 4 <artifactId>c3p0</artifactId> 5 <version>${c3p0.version}</version> 6 </dependency> 7 <dependency> 8 <groupId>mysql</groupId> 9 <artifactId>mysql-connector-java</artifactId>10 <version>${mysql.version}</version>11 </dependency>12 <dependency>13 <groupId>commons-dbutils</groupId>14 <artifactId>commons-dbutils</artifactId>15 <version>1.5</version>16 </dependency>③ 日志相关:


1 <!-- log --> 2 <dependency> 3 <groupId>org.slf4j</groupId> 4 <artifactId>slf4j-api</artifactId> 5 <version>${slf4j.version}</version> 6 </dependency> 7 <dependency> 8 <groupId>ch.qos.logback</groupId> 9 <artifactId>logback-classic</artifactId>10 <version>${logback.version}</version>11 </dependency>12 <!-- slf4j -->13 <dependency>14 <groupId>org.slf4j</groupId>15 <artifactId>log4j-over-slf4j</artifactId>16 <version>${slf4j.version}</version>17 </dependency>④ spring相关,包括了spring aop、spring mvc等。


1 <!-- springframework --> 2 <dependency> 3 <groupId>org.springframework</groupId> 4 <artifactId>spring-aop</artifactId> 5 <version>${spring.version}</version> 6 </dependency> 7 <dependency> 8 <groupId>org.springframework</groupId> 9 <artifactId>spring-aspects</artifactId>10 <version>${spring.version}</version>11 </dependency>12 <dependency>13 <groupId>org.springframework</groupId>14 <artifactId>spring-beans</artifactId>15 <version>${spring.version}</version>16 </dependency>17 <dependency>18 <groupId>org.springframework</groupId>19 <artifactId>spring-context</artifactId>20 <version>${spring.version}</version>21 </dependency>22 <dependency>23 <groupId>org.springframework</groupId>24 <artifactId>spring-context-support</artifactId>25 <version>${spring.version}</version>26 </dependency>27 <dependency>28 <groupId>org.springframework</groupId>29 <artifactId>spring-core</artifactId>30 <version>${spring.version}</version>31 </dependency>32 <dependency>33 <groupId>org.springframework</groupId>34 <artifactId>spring-jdbc</artifactId>35 <version>${spring.version}</version>36 </dependency>37 <dependency>38 <groupId>org.springframework</groupId>39 <artifactId>spring-jms</artifactId>40 <version>${spring.version}</version>41 </dependency>42 <dependency>43 <groupId>org.springframework</groupId>44 <artifactId>spring-orm</artifactId>45 <version>${spring.version}</version>46 </dependency>47 <dependency>48 <groupId>org.springframework</groupId>49 <artifactId>spring-tx</artifactId>50 <version>${spring.version}</version>51 </dependency>52 <dependency>53 <groupId>org.springframework</groupId>54 <artifactId>spring-web</artifactId>55 <version>${spring.version}</version>56 </dependency>57 <dependency>58 <groupId>org.springframework</groupId>59 <artifactId>spring-webmvc</artifactId>60 <version>${spring.version}</version>61 </dependency>⑤ hibernate相关:


1 <dependency> 2 <groupId>org.hibernate</groupId> 3 <artifactId>hibernate-c3p0</artifactId> 4 <version>${hibernate.version}</version> 5 </dependency> 6 <dependency> 7 <groupId>org.hibernate.common</groupId> 8 <artifactId>hibernate-commons-annotations</artifactId> 9 <version>${hibernate.version}</version>10 </dependency>11 <dependency>12 <groupId>org.hibernate</groupId>13 <artifactId>hibernate-core</artifactId>14 <version>${hibernate.version}</version>15 </dependency>16 <dependency>17 <groupId>org.hibernate</groupId>18 <artifactId>hibernate-entitymanager</artifactId>19 <version>${hibernate.version}</version>20 </dependency>
所有的依赖添加好后,就需要为各个子模块添加具体的依赖了,根据每个子模块的功能,添加相关的依赖,而不是将所有的依赖一次性加入。这样我们就可以根据自己开发的项目的需要,添加模块依赖,而不是一次性加入所有jar包,避免冗余,增大项目的体积。下面以lyyzoo-base-data和lyyzoo-starter-jpa为例说明。
lyyzoo-base-data模块是基础数据相关,主要与数据库打交道,那么就需要引入mysql驱动、数据库连接池c3p0等,pom.xml如下:


1 <project xmlns="http://maven.apache.org/POM/4.0.0" xmlns:xsi="http://www.w3.org/2001/XMLSchema-instance" 2 xsi:schemaLocation="http://maven.apache.org/POM/4.0.0 "> 3 <modelVersion>4.0.0</modelVersion> 4 <parent> 5 <groupId>com.lyyzoo</groupId> 6 <artifactId>lyyzoo-base</artifactId> 7 <version>1.0-SNAPSHOT</version> 8 </parent> 9 <artifactId>lyyzoo-base-data</artifactId>10 <name>${project.artifactId}</name>11 <packaging>jar</packaging>12 13 <dependencies>14 <!-- dbutils -->15 <dependency>16 <groupId>commons-dbutils</groupId>17 <artifactId>commons-dbutils</artifactId>18 </dependency>19 <!-- jdbc -->20 <dependency>21 <groupId>mysql</groupId>22 <artifactId>mysql-connector-java</artifactId>23 </dependency>24 <dependency>25 <groupId>com.mchange</groupId>26 <artifactId>c3p0</artifactId>27 </dependency>28 <!-- test -->29 <dependency>30 <groupId>com.lyyzoo</groupId>31 <artifactId>lyyzoo-base-test</artifactId>32 <scope>test</scope>33 </dependency>34 </dependencies>35 </project>lyyzoo-starter-jpa是Java持久化相关,所以主要引入hibernate相关的依赖,同时,starter-jpa会依赖base-data及starter-base,pom.xml如下:


1 <project xmlns="http://maven.apache.org/POM/4.0.0" xmlns:xsi="http://www.w3.org/2001/XMLSchema-instance" 2 xsi:schemaLocation="http://maven.apache.org/POM/4.0.0 "> 3 <modelVersion>4.0.0</modelVersion> 4 <parent> 5 <groupId>com.lyyzoo</groupId> 6 <artifactId>lyyzoo-starter</artifactId> 7 <version>1.0-SNAPSHOT</version> 8 </parent> 9 <artifactId>lyyzoo-starter-jpa</artifactId>10 <name>${project.artifactId}</name>11 <packaging>jar</packaging>12 13 <dependencies>14 <dependency>15 <groupId>com.lyyzoo</groupId>16 <artifactId>lyyzoo-base-data</artifactId>17 </dependency>18 <dependency>19 <groupId>com.lyyzoo</groupId>20 <artifactId>lyyzoo-starter-base</artifactId>21 </dependency>22 <dependency>23 <groupId>org.hibernate</groupId>24 <artifactId>hibernate-c3p0</artifactId>25 </dependency>26 <dependency>27 <groupId>org.hibernate.common</groupId>28 <artifactId>hibernate-commons-annotations</artifactId>29 </dependency>30 <dependency>31 <groupId>org.hibernate</groupId>32 <artifactId>hibernate-core</artifactId>33 </dependency>34 <dependency>35 <groupId>org.hibernate</groupId>36 <artifactId>hibernate-ehcache</artifactId>37 </dependency>38 <dependency>39 <groupId>org.hibernate.javax.persistence</groupId>40 <artifactId>hibernate-jpa-2.1-api</artifactId>41 </dependency>42 <dependency>43 <groupId>org.hibernate</groupId>44 <artifactId>hibernate-validator</artifactId>45 </dependency>46 <dependency>47 <groupId>com.lyyzoo</groupId>48 <artifactId>lyyzoo-starter-test</artifactId>49 <scope>test</scope>50 </dependency>51 </dependencies>52 </project>2.3类结构
有了前面的基础之后,接下来进行重点的类结构设计。底层需要做的最重要的工作就是将一些通用的类抽象出来,以便于以后重用,从而提高开发效率。例如返回结果和分页类的封装、通用的工具类、JDBC相关的操作等。
说明一下,整个底层很大一部分是从之前实习的公司(这个就不说了)直接拿过来的,有些则更改了。相信我拿取的这部分代码并不会涉及机密问题,不用于商业用途,仅仅只是学习,应该没多大问题。
(1) lyyzoo-base-core
lyyzoo-base-core 目录结构:
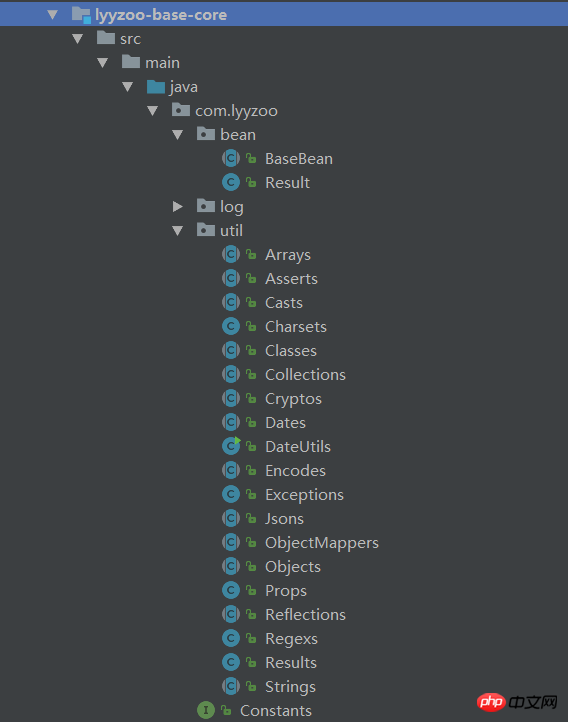
lyyzoo-base-core是基础核心,封装了返回结果和加入了一些常用的工具类。
com.lyyzoo.bean包下封装了BaseBean和Result,BaseBean是Bean类的一个基础类,实现了序列化,重写了toString()方法,如下:


1 package com.lyyzoo.bean; 2 3 import org.apache.commons.lang3.builder.ToStringBuilder; 4 import org.apache.commons.lang3.builder.ToStringStyle; 5 6 import java.io.Serializable; 7 8 /** 9 * BaseBean 实现序列化 <p>10 *11 * @author bojiangzhou12 * @date 2017-03-2713 */14 public abstract class BaseBean implements Serializable {15 16 /**17 * ToStringBuilder – 用于辅助实现Object.toString()方法<p>18 */19 public String toString() {20 return ToStringBuilder.reflectionToString(this, ToStringStyle.MULTI_LINE_STYLE);21 }22 23 }Result则封装了返回的结果,这里主要与ExtJs相对应,ExtJs进行ajax请求时,返回success=true,会进入success()方法;返回success=false,会进入failure()方法。同时,封装了返回消息、标识、错误信息等,便于前端拿到相应数据。


1 package com.lyyzoo.bean; 2 3 import lombok.Data; 4 5 import java.util.Map; 6 7 /** 8 * 封装返回结果<p> 9 *10 * @author bojiangzhou11 * @date 2017-03-2712 */13 @Data14 public class Result extends BaseBean {15 private static final long serialVersionUID = 1L;16 17 /**18 * 成功标志19 */20 public boolean success;21 /**22 * 返回标示23 */24 public Integer code;25 /**26 * 相关消息27 */28 public String msg;29 /**30 * 相关数据31 */32 public Object data;33 /**34 * 错误详细35 */36 public Map<String, Object> errors;37 38 public Result() {39 40 }41 42 public Result(boolean success) {43 this.success = success;44 }45 46 public Result(boolean success, Integer code, Object data, String msg) {47 this(success);48 this.code = code;49 this.data = data;50 this.msg = msg;51 }52 53 public Result(Integer code, Map<String, Object> errors, String msg) {54 this.success = false;55 this.code = code;56 this.errors = errors;57 this.msg = msg;58 }59 60 public boolean isSuccess() {61 return this.success;62 }63 64 public boolean hasErrors() {65 if (this.errors != null && this.errors.size() > 0) {66 return true;67 }68 return false;69 }70 }其它的主要是一些工具类,例如Arrays继承了org.apache.commons.lang3.ArrayUtils,使得Arrays具有了丰富的操作集合的工具。再如Dates,Dates里封装了大量的对日期操作的方法,比如格式化日期、获取某个日期当天的开始时间和结束时间等。
(2) lyyzoo-starter-base
lyyzoo-starter-base 目录结构:
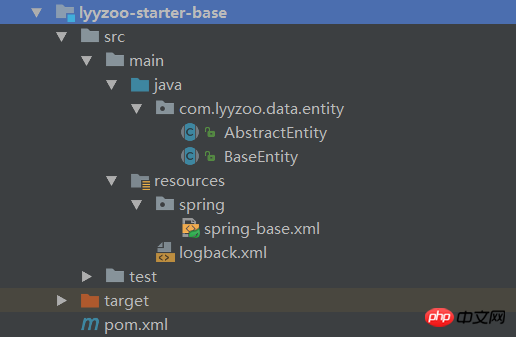
lyyzoo-starter-base是web应用程序的一个基础,主要封装了基础实体类以及spring-base和日志的配置。实体的顶层是AbstractEntity


1 package com.lyyzoo.data.entity; 2 3 import com.lyyzoo.bean.BaseBean; 4 5 import java.io.Serializable; 6 7 /** 8 * 抽象实体类 重写equals和hashCode方法 9 *10 * @author bojiangzhou11 * @date 2017-03-2812 */13 @SuppressWarnings("serial")14 public abstract class AbstractEntity<ID extends Serializable> extends BaseBean implements Serializable {15 16 public abstract ID getId();17 18 @Override19 public boolean equals(Object obj) {20 21 if (null == obj) {22 return false;23 }24 if (this == obj) {25 return true;26 }27 if (!getClass().equals(obj.getClass())) {28 return false;29 }30 31 AbstractEntity<?> that = (AbstractEntity<?>) obj;32 33 return null == this.getId() ? false : this.getId().equals(that.getId());34 }35 36 @Override37 public int hashCode() {38 int hashCode = 17;39 40 hashCode += null == getId() ? 0 : getId().hashCode() * 31;41 42 return hashCode;43 }44 45 }BaseEntity则继承AbstractEntity,BaseEntity作为其它实体的父类存在,BaseEntity定义了主键ID的生成策略。代码如下:


1 package com.lyyzoo.data.entity; 2 3 import lombok.Data; 4 5 import javax.persistence.GeneratedValue; 6 import javax.persistence.GenerationType; 7 import javax.persistence.Id; 8 import javax.persistence.MappedSuperclass; 9 10 /**11 * 统一定义id的entity基类.12 * <p/>13 * 抽象实体基类,提供统一的ID,和相关的基本功能14 * <p/>15 */16 @Data17 @MappedSuperclass18 @SuppressWarnings("serial")19 public abstract class BaseEntity extends AbstractEntity<Long> {20 21 /**22 * id 字段23 */24 @Id25 protected Long id;26 27 @Id28 @GeneratedValue(strategy = GenerationType.IDENTITY)29 public Long getId() {30 return this.id;31 }32 33 public void setId(Long id) {34 this.id = id;35 }36 }spring-base.xml是基础配置,主要配置了扫描系统的配置文件、注解等。


1 <?xml version="1.0" encoding="UTF-8"?> 2 <beans xmlns:xsi="http://www.w3.org/2001/XMLSchema-instance" 3 xmlns="http://www.springframework.org/schema/beans" 4 xmlns:beans="http://www.springframework.org/schema/beans" 5 xmlns:context="http://www.springframework.org/schema/context" 6 xmlns:aop="http://www.springframework.org/schema/aop" 7 xmlns:tx="http://www.springframework.org/schema/tx" 8 xmlns:util="http://www.springframework.org/schema/util" 9 xmlns:mvc="http://www.springframework.org/schema/mvc"10 xmlns:jee="http://www.springframework.org/schema/jee"11 xmlns:jdbc="http://www.springframework.org/schema/jdbc"12 xmlns:tool="http://www.springframework.org/schema/tool"13 xmlns:dwr="http://www.directwebremoting.org/schema/spring-dwr"14 xsi:schemaLocation="15 http://www.springframework.org/schema/beans/spring-beans.xsd16 http://www.springframework.org/schema/context/spring-context.xsd17 http://www.springframework.org/schema/aop/spring-aop.xsd18 http://www.springframework.org/schema/tx/spring-tx.xsd19 http://www.springframework.org/schema/util/spring-util.xsd20 http://www.springframework.org/schema/mvc/spring-mvc.xsd21 http://www.springframework.org/schema/jee/spring-jee.xsd22 http://www.springframework.org/schema/jdbc/spring-jdbc.xsd23 http://www.springframework.org/schema/tool/spring-tool.xsd24 http://www.directwebremoting.org/schema/spring-dwr-3.0.xsd"25 >26 27 <description>Spring Base Config</description>28 29 <!-- 加载config.properties -->30 <context:property-placeholder location="classpath*:/config/*.properties" file-encoding="UTF-8" />31 32 <!-- 使用annotation 自动注册bean, 并保证@Required、@Autowired的属性被注入 -->33 <context:component-scan base-package="com.lyyzoo">34 <context:exclude-filter type="annotation" expression="org.springframework.stereotype.Controller"/>35 <context:exclude-filter type="annotation" expression="org.springframework.web.bind.annotation.ControllerAdvice"/>36 </context:component-scan>37 38 <!-- 支持上传文件 -->39 <bean id="multipartResolver" class="org.springframework.web.multipart.commons.CommonsMultipartResolver"/>40 41 </beans>
(3) lyyzoo-starter-jpa
lyyzoo-starter-jpa 目录结构:
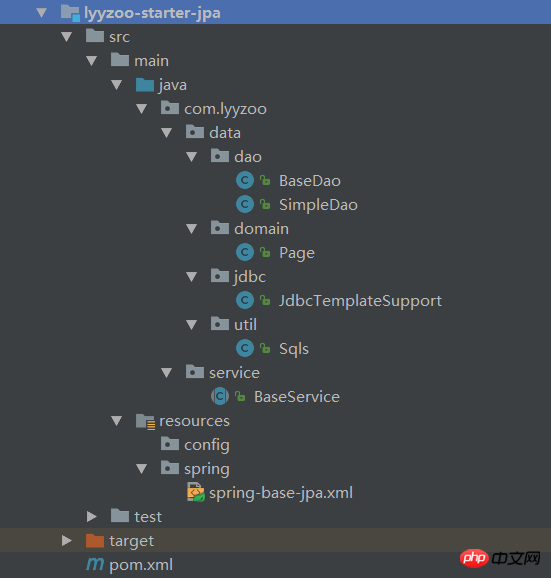
lyyzoo-starter-jpa集成了持久化相关的操作,配置等。
首先需要做持久化相关的配置(spring-base-jpa.xml),如数据源、SessionFactory、事务管理等。数据源使用c3p0,数据源相关配置如数据库驱动、地址等写到到配置文件中。配置Hibernate SessionFactory的同时,增加了JdbcTemplate。事务管理器使用Hibernate的事务管理。总的配置如下:


1 <?xml version="1.0" encoding="UTF-8"?> 2 <beans xmlns:xsi="http://www.w3.org/2001/XMLSchema-instance" 3 xmlns="http://www.springframework.org/schema/beans" 4 xmlns:beans="http://www.springframework.org/schema/beans" 5 xmlns:tx="http://www.springframework.org/schema/tx" 6 xmlns:aop="http://www.springframework.org/schema/aop" 7 xmlns:context="http://www.springframework.org/schema/context" 8 xmlns:mvc="http://www.springframework.org/schema/mvc" 9 xmlns:util="http://www.springframework.org/schema/util" 10 xmlns:jee="http://www.springframework.org/schema/jee" 11 xmlns:jdbc="http://www.springframework.org/schema/jdbc" 12 xmlns:tool="http://www.springframework.org/schema/tool" 13 xmlns:dwr="http://www.directwebremoting.org/schema/spring-dwr" 14 xsi:schemaLocation=" 15 http://www.springframework.org/schema/beans/spring-beans.xsd 16 http://www.springframework.org/schema/context/spring-context.xsd 17 http://www.springframework.org/schema/aop/spring-aop.xsd 18 http://www.springframework.org/schema/tx/spring-tx.xsd 19 http://www.springframework.org/schema/util/spring-util.xsd 20 http://www.springframework.org/schema/mvc/spring-mvc.xsd 21 http://www.springframework.org/schema/jee/spring-jee.xsd 22 http://www.springframework.org/schema/jdbc/spring-jdbc.xsd 23 http://www.springframework.org/schema/tool/spring-tool.xsd 24 http://www.directwebremoting.org/schema/spring-dwr-3.0.xsd" 25 > 26 27 <description>Spring Jpa</description> 28 29 <!-- 使用C3P0 --> 30 <bean id="dataSource" class="com.mchange.v2.c3p0.ComboPooledDataSource"> 31 <property name="driverClass" value="${jdbc.driver}"/> 32 <property name="jdbcUrl" value="${jdbc.url}"/> 33 <property name="user" value="${jdbc.username}"/> 34 <property name="password" value="${jdbc.password}"/> 35 36 <!-- default: 3 --> 37 <!-- 初始化时获取三个连接,取值应在minPoolSize与maxPoolSize之间。--> 38 <property name="initialPoolSize" value="${c3p0.initialPoolSize:5}"/> 39 40 <!-- default: 3 --> 41 <!-- 连接池保留最小连接数--> 42 <property name="minPoolSize" value="${c3p0.minPoolSize:5}"/> 43 44 <!-- default: 15 --> 45 <!-- 连接池保留最大连接数。--> 46 <property name="maxPoolSize" value="${c3p0.maxPoolSize:15}"/> 47 48 <!-- default: 0(秒) = 永不丢弃--> 49 <!-- 最大空闲时间,600 秒内未使用则连接被丢弃。--> 50 <property name="maxIdleTime" value="${c3p0.maxIdleTime:600}"/> 51 </bean> 52 53 <!-- sessionFactory --> 54 <bean id="sessionFactory" class="org.springframework.orm.hibernate5.LocalSessionFactoryBean"> 55 <property name="dataSource" ref="dataSource" /> 56 <property name="hibernateProperties" > 57 <props> 58 <prop key="dialect">${hibernate.dialect}</prop> 59 <prop key="show_sql">${hibernate.show.sql}</prop> 60 <prop key="hbm2ddl.auto">${hibernate.hbm2ddl.auto}</prop> 61 </props> 62 </property> 63 <!-- 扫描hibernate注解实体 --> 64 <property name="packagesToScan"> 65 <list> 66 <value>com.lyyzoo.*.entity</value> 67 </list> 68 </property> 69 </bean> 70 71 <!-- jdbcTemplate --> 72 <bean id="jdbcTemplate" class="org.springframework.jdbc.core.JdbcTemplate"> 73 <property name="dataSource" ref="dataSource"/> 74 </bean> 75 <bean id="namedParameterJdbcTemplate" class="org.springframework.jdbc.core.namedparam.NamedParameterJdbcTemplate"> 76 <constructor-arg ref="dataSource"/> 77 </bean> 78 <bean id="jdbcTemplateSupport" class="com.lyyzoo.data.jdbc.JdbcTemplateSupport"> 79 <property name="dataSource" ref="dataSource"/> 80 <property name="namedParameterJdbcTemplate" ref="namedParameterJdbcTemplate"/> 81 </bean> 82 83 <!-- 事务管理器 --> 84 <bean id="transactionManager" class="org.springframework.orm.hibernate5.HibernateTransactionManager"> 85 <property name="sessionFactory" ref="sessionFactory" /> 86 </bean> 87 88 <!-- 事务通知属性 --> 89 <tx:advice id="transactionManagerAdvice" transaction-manager="transactionManager"> 90 <tx:attributes> 91 <tx:method name="get*" read-only="true" /> 92 <tx:method name="load*" read-only="true" /> 93 <tx:method name="find*" read-only="true" /> 94 <tx:method name="list*" read-only="true" /> 95 <tx:method name="page*" read-only="true" /> 96 <tx:method name="query*" read-only="true" /> 97 <tx:method name="*" propagation="REQUIRED" /> 98 </tx:attributes> 99 </tx:advice>100 101 <!-- AOP 事务 -->102 <aop:config proxy-target-class="true">103 <aop:pointcut id="serviceMethod" expression="execution(* com.lyyzoo..*Service.*(..))"/>104 <aop:advisor pointcut-ref="serviceMethod" advice-ref="transactionManagerAdvice"/>105 </aop:config>106 107 <!-- 扫描注解 -->108 <context:component-scan base-package="com.lyyzoo" />109 110 </beans>然后在com.lyyzoo.data.domain包下,Page封装了分页相关的属性,如当前页数据、页码、每页大小、总页数等。com.lyyzoo.data.util包下,Sqls封装了操作sql语句的工具,比如根据传入的查询语句,返回查询总数的sql语句。在com.lyyzoo.data.jdbc包下,JdbcTemplateSupport封装了比较复杂的查询,比如根据传入的参数、分页条件等,自动查询数据、总数并封装到Page里返回。com.lyyzoo.data.dao包下,SimpleDao封装了基于Hibernate SessionFactory的简单的增删改查操作,如save(),get()等方法。dao包下,BaseDao继承SimpleDao,并代理了JdbcTemplateSupport,使得BaseDao具有SimpleDao和JdbcTemplateSupport的功能,BaseDao则作为其它dao的一个父类存在。最后,在com.lyyzoo.service包下,BaseService代理了BaseDao,进行了进一步的封装,BaseService是其它service类的父类,其它service就可以直接调用save、get、page等内置方法。
(4) lyyzoo-starter-web
lyyzoo-starter-web自然跟web相关,在com.lyyzoo.web包下,BaseController作为controller类的父类,主要封装了返回结果集等信息。还有web相关配置,如视图解析器等内容:


1 <?xml version="1.0" encoding="UTF-8"?> 2 <beans xmlns:xsi="http://www.w3.org/2001/XMLSchema-instance" 3 xmlns="http://www.springframework.org/schema/beans" 4 xmlns:beans="http://www.springframework.org/schema/beans" 5 xmlns:tx="http://www.springframework.org/schema/tx" 6 xmlns:aop="http://www.springframework.org/schema/aop" 7 xmlns:context="http://www.springframework.org/schema/context" 8 xmlns:mvc="http://www.springframework.org/schema/mvc" 9 xmlns:task="http://www.springframework.org/schema/task"10 xmlns:util="http://www.springframework.org/schema/util"11 xmlns:jee="http://www.springframework.org/schema/jee"12 xmlns:jdbc="http://www.springframework.org/schema/jdbc"13 xmlns:tool="http://www.springframework.org/schema/tool"14 xmlns:dwr="http://www.directwebremoting.org/schema/spring-dwr"15 xsi:schemaLocation="16 http://www.springframework.org/schema/beans/spring-beans.xsd17 http://www.springframework.org/schema/context/spring-context.xsd18 http://www.springframework.org/schema/aop/spring-aop.xsd19 http://www.springframework.org/schema/tx/spring-tx.xsd20 http://www.springframework.org/schema/util/spring-util.xsd21 http://www.springframework.org/schema/mvc/spring-mvc-3.2.xsd22 http://www.springframework.org/schema/task/spring-task-3.2.xsd23 http://www.springframework.org/schema/jee/spring-jee.xsd24 http://www.springframework.org/schema/jdbc/spring-jdbc.xsd25 http://www.springframework.org/schema/tool/spring-tool.xsd26 http://www.directwebremoting.org/schema/spring-dwr-3.0.xsd"27 >28 29 <description>Spring Web</description>30 31 <!-- 加载config.properties -->32 <context:property-placeholder location="classpath*:/config/*.properties" file-encoding="UTF-8" />33 34 <!-- 扫描Controller以及ControllerAdvice -->35 <context:component-scan base-package="com.lyyzoo" use-default-filters="false">36 <context:include-filter type="annotation" expression="org.springframework.stereotype.Controller"/>37 <context:include-filter type="annotation" expression="org.springframework.web.bind.annotation.ControllerAdvice"/>38 </context:component-scan>39 40 <!-- 静态资源映射 -->41 <mvc:resources location="/static/" mapping="/static/**"/>42 43 <!-- 容器默认的DefaultServletHandler处理 所有静态内容与无RequestMapping处理的URL--> 44 <mvc:default-servlet-handler />45 46 <!-- 支持@Controller注解 -->47 <mvc:annotation-driven />48 49 <!-- 视图解析器 -->50 <bean id="jspViewResolver" class="org.springframework.web.servlet.view.InternalResourceViewResolver">51 <property name="prefix" value="/WEB-INF/view"/>52 <property name="suffix" value=".jsp"/>53 </bean>54 55 </beans>
(5) 类结构图
类结构图参考《底层类结构.vsd》

五、数据库与实体设计
在开始开发一个系统之前,首先需要做的就是根据需求分析设计系统的实体对象以及对应的数据库表结构,这是开发的基础。
根据前面的需求分析设计的功能模块,实体对象可以分为5个模块,分别是系统模块(system)、基础模块(base)、采购模块(purchase)、销售模块(sale)、库存模块(stock)。下面是实体清单:
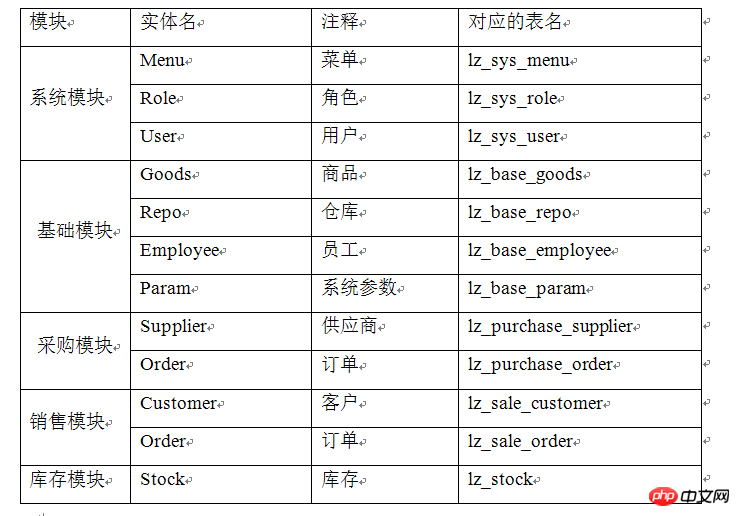
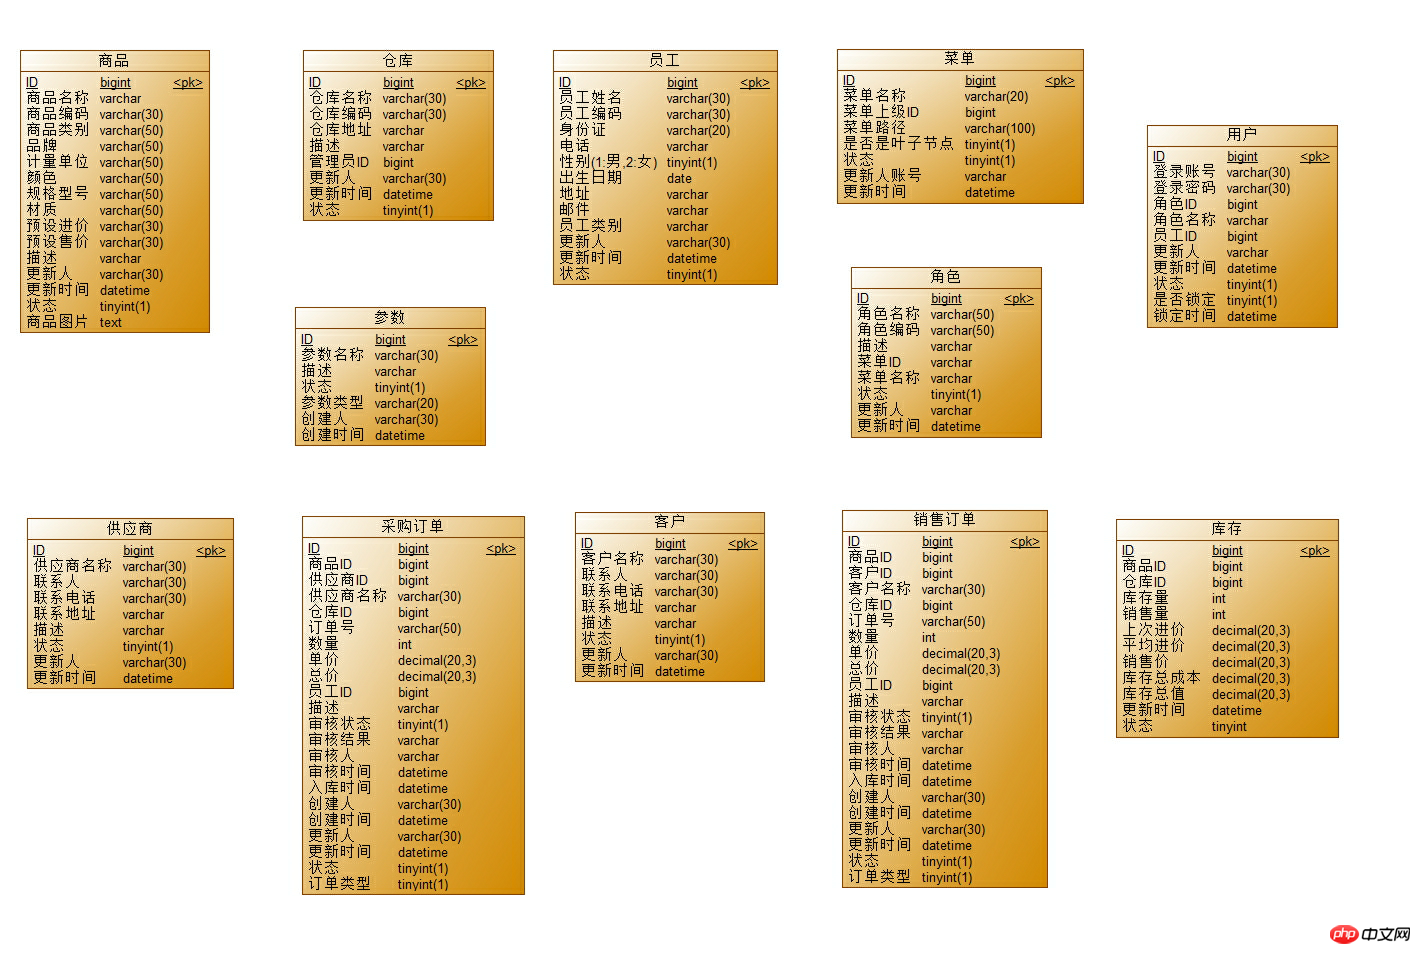
有了清单之后,利用PowerDesigner进行数据库物理模型设计。由于拥有对数据库的完全控制权,所以不对表设置约束,所有的约束在程序代码中进行控制。下面列出各个实体的属性即对应的表,具体可参考《数据库物理模型.pdm》。物理模型设计完成后,创建名为gpss的数据库,然后创建各个表。
数据库模型:
六、系统功能实现
1.创建工程
需求分析做完了,技术没问题,底层架构也设计好了,数据库设计好了,前面的所有准备工作做完了,下面就要进行燃气管进销存系统的编码实现了。首先要做的工作就是创建工程,项目名拟为gpss,即燃气管进销存(Gas Purchase Sale Stock)的缩写,工程名则为lyyzoo-gpss。
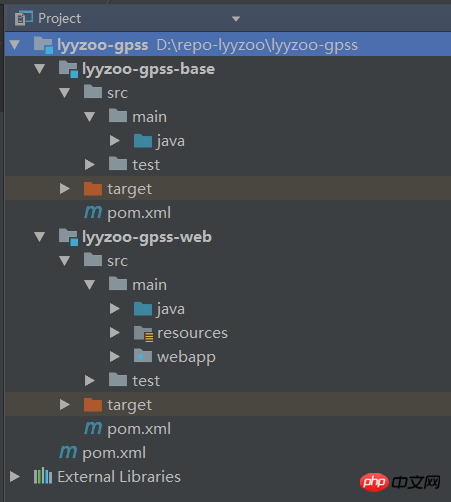
在IDEA中创建lyyzoo-gpss的maven工程,继承lyyzoo。同时,在lyyzoo-gpss下创建两个子模块,分别为lyyzoo-gpss-base和lyyzoo-gpss-web,base模块包含了系统的dao、entity、service等层次,主要为java文件;web则包含了controller层、jsp、js等web相关资源文件。
lyyzoo-gpss目录结构:
lyyzoo-gpss > pom.xml:


1 <project xmlns="http://maven.apache.org/POM/4.0.0" xmlns:xsi="http://www.w3.org/2001/XMLSchema-instance" 2 xsi:schemaLocation="http://maven.apache.org/POM/4.0.0 "> 3 <modelVersion>4.0.0</modelVersion> 4 <parent> 5 <groupId>com.lyyzoo</groupId> 6 <artifactId>lyyzoo</artifactId> 7 <version>1.0-SNAPSHOT</version> 8 </parent> 9 <groupId>com.lyyzoo.gpss</groupId>10 <artifactId>lyyzoo-gpss</artifactId>11 <name>lyyzoo :: gpss</name>12 <packaging>pom</packaging>13 14 <modules>15 <module>lyyzoo-gpss-base</module>16 <module>lyyzoo-gpss-web</module>17 </modules>18 19 <profiles>20 <!-- 开发环境 -->21 <profile>22 <id>dev</id>23 <activation>24 <property>25 <name>env</name>26 <value>dev</value>27 </property>28 </activation>29 </profile>30 <!-- 线上环境 -->31 <profile>32 <id>online</id>33 <activation>34 <property>35 <name>env</name>36 <value>online</value>37 </property>38 </activation>39 </profile>40 </profiles>41 <build>42 <plugins>43 <plugin>44 <groupId>com.juvenxu.portable-config-maven-plugin</groupId>45 <artifactId>portable-config-maven-plugin</artifactId>46 <version>1.1.5</version>47 <executions>48 <execution>49 <goals>50 <goal>replace-package</goal>51 </goals>52 </execution>53 </executions>54 <configuration>55 <portableConfig>src/main/resources/portable/config-${env}.xml</portableConfig>56 </configuration>57 </plugin>58 </plugins>59 </build>60 61 </project>lyyzoo-gpss-base主要是dao层、service层、model层的集成,所以需要依赖于底层lyyzoo-starter-jpa、lyyzoo-starter-web。
lyyzoo-gpss-base > pom.xml:


1 <project xmlns="http://maven.apache.org/POM/4.0.0" xmlns:xsi="http://www.w3.org/2001/XMLSchema-instance" 2 xsi:schemaLocation="http://maven.apache.org/POM/4.0.0 "> 3 <modelVersion>4.0.0</modelVersion> 4 <parent> 5 <groupId>com.lyyzoo.gpss</groupId> 6 <artifactId>lyyzoo-gpss</artifactId> 7 <version>1.0-SNAPSHOT</version> 8 </parent> 9 <artifactId>lyyzoo-gpss-base</artifactId>10 <name>lyyzoo :: gpss :: base</name>11 <packaging>jar</packaging>12 13 <dependencies>14 <dependency>15 <groupId>com.lyyzoo</groupId>16 <artifactId>lyyzoo-starter-jpa</artifactId>17 </dependency>18 <dependency>19 <groupId>com.lyyzoo</groupId>20 <artifactId>lyyzoo-starter-web</artifactId>21 </dependency>22 </dependencies>23 24 </project>
lyyzoo-gpss-web是web相关,是controller层所在。依赖于lyyzoo-gpss-base、lyyzoo-starter-base等。
lyyzoo-gpss-web > pom.xml:


1 <project xmlns="http://maven.apache.org/POM/4.0.0" xmlns:xsi="http://www.w3.org/2001/XMLSchema-instance" 2 xsi:schemaLocation="http://maven.apache.org/POM/4.0.0 "> 3 <modelVersion>4.0.0</modelVersion> 4 <parent> 5 <groupId>com.lyyzoo.gpss</groupId> 6 <artifactId>lyyzoo-gpss</artifactId> 7 <version>1.0-SNAPSHOT</version> 8 </parent> 9 <artifactId>lyyzoo-gpss-web</artifactId>10 <name>lyyzoo :: gpss :: web</name>11 <packaging>war</packaging>12 13 <dependencies>14 <dependency>15 <groupId>com.lyyzoo.gpss</groupId>16 <artifactId>lyyzoo-gpss-base</artifactId>17 <version>${project.version}</version>18 </dependency>19 <dependency>20 <groupId>com.lyyzoo</groupId>21 <artifactId>lyyzoo-starter-base</artifactId>22 </dependency>23 <dependency>24 <groupId>com.lyyzoo</groupId>25 <artifactId>lyyzoo-starter-jpa</artifactId>26 </dependency>27 <dependency>28 <groupId>com.lyyzoo</groupId>29 <artifactId>lyyzoo-starter-web</artifactId>30 </dependency>31 <dependency>32 <groupId>com.lyyzoo</groupId>33 <artifactId>lyyzoo-starter-test</artifactId>34 </dependency>35 36 37 </dependencies>38 39 40 <build>41 <finalName>gpss</finalName>42 <outputDirectory>src/main/webapp/WEB-INF/classes</outputDirectory>43 </build>44 45 </project>2.系统配置
工程建好后,首要要做的就是系统的配置工作了,如web.xml,这应该算是web项目的起点了。进入lyyzoo-gpss-web/src/main/webapp/WEB-INF/web.xml,进行web的配置,主要的一些配置有加载系统的配置文件、Spring、字符过滤器、SpringMVC等配置。
一些基础的配置如下:


1 <?xml version="1.0" encoding="UTF-8"?> 2 <web-app xmlns="http://java.sun.com/xml/ns/javaee" 3 xmlns:xsi="http://www.w3.org/2001/XMLSchema-instance" 4 xsi:schemaLocation="http://java.sun.com/xml/ns/javaee 5 " 6 version="3.0"> 7 8 <display-name>lyyzoo :: gpss</display-name> 9 10 <!-- 加载配置文件 -->11 <context-param>12 <param-name>contextConfigLocation</param-name>13 <param-value>classpath*:/spring/spring-base*.xml</param-value>14 </context-param>15 16 <!-- Spring -->17 <listener>18 <listener-class>org.springframework.web.context.ContextLoaderListener</listener-class>19 </listener>20 21 <!-- 编码过滤器 -->22 <filter>23 <filter-name>encodingFilter</filter-name>24 <filter-class>org.springframework.web.filter.CharacterEncodingFilter</filter-class>25 <init-param>26 <param-name>encoding</param-name>27 <param-value>UTF-8</param-value>28 </init-param>29 <init-param>30 <param-name>forceEncoding</param-name>31 <param-value>true</param-value>32 </init-param>33 </filter>34 <filter-mapping>35 <filter-name>encodingFilter</filter-name>36 <url-pattern>/*</url-pattern>37 </filter-mapping>38 39 <!-- 访问控制 -->40 <filter>41 <filter-name>VisitFilter</filter-name>42 <filter-class>com.lyyzoo.gpss.filter.VisitFilter</filter-class>43 </filter>44 <filter-mapping>45 <filter-name>VisitFilter</filter-name>46 <url-pattern>/admin/*</url-pattern>47 </filter-mapping>48 49 <!-- Spring MVC -->50 <servlet>51 <servlet-name>SpringMVC</servlet-name>52 <servlet-class>org.springframework.web.servlet.DispatcherServlet</servlet-class>53 <init-param>54 <param-name>contextConfigLocation</param-name>55 <param-value>classpath*:/spring/spring-web*.xml</param-value>56 </init-param>57 <load-on-startup>1</load-on-startup>58 </servlet>59 <servlet-mapping>60 <servlet-name>SpringMVC</servlet-name>61 <url-pattern>/</url-pattern>62 </servlet-mapping>63 64 <!-- 错误页面 -->65 <error-page>66 <error-code>404</error-code>67 <location>/error/404</location>68 </error-page>69 <error-page>70 <error-code>500</error-code>71 <location>/error/500</location>72 </error-page>73 <error-page>74 <exception-type>java.lang.Throwable</exception-type>75 <location>/error/500</location>76 </error-page>77 78 <!-- 首页 -->79 <welcome-file-list>80 <welcome-file>/</welcome-file>81 </welcome-file-list>82 83 </web-app>
接着,配置系统将会用到的一些属性,如JDBC驱动、数据库用户名和密码等。在lyyzoo-gpss-web/src/main/resources/config下,创建config.properties配置文件,这个配置文件中的属性将会被底层spring配置的文件所引用。
比如JDBC的属性:


1 #################################### 2 # DATABASE 3 #################################### 4 # local_db 5 jdbc.driver=net.sf.log4jdbc.DriverSpy 6 jdbc.url=jdbc:log4jdbc:mysql://localhost:3306/gpss?useUnicode=true&characterEncoding=utf-8&autoReconnect=true&failOverReadOnly=false 7 jdbc.username=root 8 jdbc.password=root 9 10 # 初始化连接11 c3p0.initialPoolSize=512 # 连接池保留最小连接数13 c3p0.minPoolSize=514 # 连接池保留最大连接数15 c3p0.maxPoolSize=1516 # 最大空闲时间17 c3p0.maxIdleTime=60018 19 #hibernate20 hibernate.dialect=org.hibernate.dialect.MySQL5Dialect21 hibernate.show.sql=false22 hibernate.hbm2ddl.auto=update
但是上面的配置只是本机的一个开发环境,如果我将项目发布到生产环境,那就至少需要重新修改数据库地址、用户名和密码。这样是比较麻烦的,所以,在lyyzoo-gpss-web/src/main/portable下创建两个xml文件,分别为开发环境和生产环境的:config-dev.xml和config-online.xml。
config-online.xml:


1 <?xml version="1.0" encoding="utf-8" ?> 2 3 <portable-config> 4 <config-file path="WEB-INF/classes/config/config.properties"> 5 6 <!-- JDBC --> 7 <replace key="jdbc.driver"><![CDATA[com.mysql.jdbc.Driver]]></replace> 8 <replace key="jdbc.url"><![CDATA[jdbc:mysql://192.168.1.91:30112/fff2f025c2b04?useUnicode=true&characterEncoding=utf-8]]></replace> 9 <replace key="jdbc.username">a6564a1169d94</replace>10 <replace key="jdbc.password">d3e6d1aea5e04</replace>11 12 <!-- hibernate -->13 <replace key="hibernate.show.sql">false</replace>14 <replace key="hibernate.hbm2ddl.auto">none</replace>15 16 <!-- debug -->17 <replace key="app.debug">false</replace>18 <replace key="app.env">online</replace>19 <replace key="logback.level">INFO</replace>20 <replace key="jdbc.resultsettable">ERROR</replace>21 22 23 </config-file>24 </portable-config>
然后配置一个“不同环境打包”的maven插件——“portable-config-maven-plugin”,通过该插件,就可以在打包的时候加上需要打包的环境,例如指定online环境,在打包时就会将config-online.xml中的属性替换到config.properties里,这样一来就不必我们手动去替换了。配置好之后,我们在打包时可以使用命令[mvn clean package –Denv=online]打包线上环境的war包。
maven环境配置,在lyyzoo-gpss > pom.xml中配置两个环境:


1 <profiles> 2 <!-- 开发环境 --> 3 <profile> 4 <id>dev</id> 5 <activation> 6 <property> 7 <name>env</name> 8 <value>dev</value> 9 </property>10 </activation>11 </profile>12 <!-- 线上环境 -->13 <profile>14 <id>online</id>15 <activation>16 <property>17 <name>env</name>18 <value>online</value>19 </property>20 </activation>21 </profile>22 </profiles>
不同环境打包插件(portable-config-maven-plugin)的配置:


1 <build> 2 <plugins> 3 <plugin> 4 <groupId>com.juvenxu.portable-config-maven-plugin</groupId> 5 <artifactId>portable-config-maven-plugin</artifactId> 6 <version>1.1.5</version> 7 <executions> 8 <execution> 9 <goals>10 <goal>replace-package</goal>11 </goals>12 </execution>13 </executions>14 <configuration>15 <portableConfig>src/main/resources/portable/config-${env}.xml</portableConfig>16 </configuration>17 </plugin>18 </plugins>19 </build>3.模块分层
3.1 lyyzoo-gpss-base
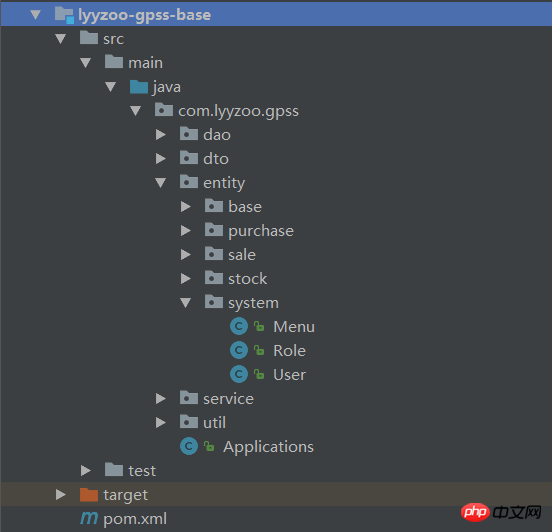
工程建好后,创建包的结构。按照一般的分层方式,分为dao层、entity层、service层,同时,每层下按模块划分为system、base、purchase、sale、stock。然后在entity下根据表设计创建实体类。
lyyzoo-gpss-base 目录结构:
3.2 lyyzoo-gpss-web
然后是lyyzoo-gpss-web模块,该模块主要是controller层,以及静态资源文件、jsp文件等。com.lyyzoo.gpss.web作为controller层的包,同样,在web下按系统模块划分。
lyyzoo-gpss-web 目录结构:

3.3 静态资源文件
lyyzoo-gpss-web/src/main/webapp/static作为静态文件的根目录,static/lib目录作为三方类库的根目录,如ExtJs、jQuery、其它的插件等。static/css是系统css文件的根目录;static/img是图片的根目录;static/js是系统js文件根目录,/js下同样按模块划分。
静态资源文件目录结构:

3.4 JSP文件
jsp文件不能直接让用户访问,需要放到/WEB-INF下,与配置的spring视图解析器相对应,所有的jsp文件放到/WEB-INF/view目录下,view目录下按模块划分,index.jsp是系统的登录页面。/WEB-INF/layout/目录下,将jsp中需要引入的一些资源等做了整合,如ExtJs的文件、meta描述信息、taglib等,整合后,jsp中如果需要引入整合jsp即可,可减少很多重复的工作。
taglib.jsp中引入了标签和设置了资源的路径:


1 <%@ page contentType="text/html;charset=UTF-8" language="java" %> 2 3 <%-- 引入标签 --%> 4 <%@taglib prefix="c" uri="" %> 5 <%@taglib prefix="fn" uri="" %> 6 <%@taglib prefix="fmt" uri="" %> 7 <%@taglib prefix="sf" uri="" %> 8 9 <%-- 资源路径 --%>10 <c:set var="CTX" value="${pageContext.request.contextPath}" />11 <c:set var="STATIC_CTX_URL" value="${CTX}/static" />12 <c:set var="LIB" value="${STATIC_CTX_URL}/lib" />13 <c:set var="JS" value="${STATIC_CTX_URL}/js"/>14 <c:set var="CSS" value="${STATIC_CTX_URL}/css"/>15 <c:set var="IMG" value="${STATIC_CTX_URL}/img"/>meta.jsp中主要设置了一些meta描述信息和ICO图标:


1 <%@ page contentType="text/html;charset=UTF-8" language="java" %> 2 <%@ include file="/WEB-INF/layout/taglib.jsp" %> 3 4 <meta charset="utf-8"> 5 <meta http-equiv="X-UA-Compatible" content="IE=9,chrome=1"> 6 7 <meta name="description" content=""> 8 <meta name="author" content=""> 9 <meta name="renderer" content="webkit">10 <%-- 图标 --%>11 <link type="image/x-icon" href="${IMG}/favicon.ico" rel="icon">extjs-neptune.jsp则引入了ExtJs相关的css和js文件,以及jQuery等:


1 <%@ page contentType="text/html;charset=UTF-8" language="java" %> 2 <%@ include file="/WEB-INF/layout/taglib.jsp" %> 3 4 <link rel="stylesheet" type="text/css" href="${LIB}/ext/4.2.2/theme/ext-theme-neptune/ext-theme-neptune-all.css?1.1.11"/> 5 <link rel="stylesheet" type="text/css" href="${LIB}/ext/4.2.2/icons/icon.css?1.1.11"/> 6 7 <script type="text/javascript" src="${LIB}/ext/4.2.2/ext-all.js?1.1.11"></script> 8 <script type="text/javascript" src="${LIB}/ext/4.2.2/locale/ext-lang-zh_CN.js?1.1.11"></script> 9 <script type="text/javascript" src="${LIB}/jquery/2.1.1/jquery.js?1.1.11"></script>10 <script type="text/javascript" src="${JS}/Global.js?1.1.11"></script>11 12 <script type="text/javascript">13 window.CTX = "${CTX}";14 window.STATIC_CTX_URL = "${STATIC_CTX_URL}";15 window.LIB = "${LIB}";16 window.JS = "${JS}";17 window.CSS = "${CSS}";18 window.IMG = "${IMG}";19 </script>WEB-INF目录结构:

3.4 登录实现举例
首先创建一个BaseController,BaseController继承底层的BaseController,增加了HttpSession,以及获取当前登录用户的方法,这样其它的controller继承该BaseController后,就可以非常方便的获得当前session和登录用户了。
BaseController代码如下:


1 package com.lyyzoo.gpss.web; 2 3 import com.lyyzoo.gpss.entity.system.User; 4 import org.springframework.beans.factory.annotation.Autowired; 5 6 import javax.servlet.http.HttpSession; 7 8 /** 9 *10 * <p>11 *12 * @author bojiangzhou13 * @date 2017-04-0214 */15 public class BaseController extends com.lyyzoo.web.BaseController {16 17 @Autowired18 protected HttpSession session;19 20 public User getCurrentUser(){21 return (User) session.getAttribute("currentUser");22 }23 24 public Long getCurrentUserId(){25 return getCurrentUser().getId();26 }27 28 public String getCurrentUserAccount(){29 return getCurrentUser().getAccount();30 }31 32 }创建HomeController作为登录和主页的处理器。主要包含的方法有访问登录页面,访问登录后的主页,以及登录处理等。Controller需要加上@Controller标注该类为controller,使用@RequestMapping()支持访问rest形式的地址访问。HomeController中注入UserService,用于处理用户登录相关的业务。
用户进入登录界面,jsp页面以的形式请求验证码,验证码使用工具类生成,以流的形式输出,生成的验证码保存到session中。用户输入登录账号、密码和验证码登录系统。首先前台会检测输入是否为空等,传到后台,从session中取出验证码判断验证码是否正确,不正确则刷新验证码并且需要用户重新输入验证码。验证码通过后,使用登录账号和密码查找数据库,如果有,则将该用户保存到session中,跳转到管理页面,登录成功。否则提示用户名或密码错误。
HomeController代码如下:


1 package com.lyyzoo.gpss.web; 2 3 import com.lyyzoo.gpss.entity.system.User; 4 import com.lyyzoo.gpss.service.system.UserService; 5 import com.lyyzoo.gpss.util.VCodeGenerator; 6 import com.lyyzoo.util.Cryptos; 7 import com.lyyzoo.util.Strings; 8 import org.springframework.beans.BeanUtils; 9 import org.springframework.beans.factory.annotation.Autowired; 10 import org.springframework.stereotype.Controller; 11 import org.springframework.web.bind.annotation.PathVariable; 12 import org.springframework.web.bind.annotation.RequestMapping; 13 import org.springframework.web.bind.annotation.RequestMethod; 14 15 import javax.imageio.ImageIO; 16 import javax.servlet.http.HttpServletResponse; 17 import javax.servlet.http.HttpSession; 18 import java.awt.image.BufferedImage; 19 import java.io.IOException; 20 21 /** 22 * <p> 23 * 24 * @author bojiangzhou 25 * @date 2017-03-29 26 */ 27 @Controller 28 @RequestMapping("") 29 public class HomeController extends BaseController { 30 31 @Autowired 32 private UserService userService; 33 34 /** 35 * 到首页/登录页面 36 */ 37 @RequestMapping(value = {"", "/", "/index", "/login"}) 38 public String index(){ 39 return "/index"; 40 } 41 42 /** 43 * 管理员主页 44 */ 45 @RequestMapping("/admin/home") 46 public String toHome(){ 47 return "/home/home"; 48 } 49 50 /** 51 * 登录 52 */ 53 @RequestMapping(value = "/login", method = RequestMethod.POST) 54 public String login(String account, String password, String vcode, HttpSession session){ 55 String redirect = REDIRECT("/login"); 56 //基本验证 57 if(Strings.isNullOrEmpty(account)){ 58 session.setAttribute("errorMsg", "账号必须填写!"); 59 return redirect; 60 } 61 if(Strings.isNullOrEmpty(password)){ 62 session.setAttribute("errorMsg", "密码必须填写!"); 63 return redirect; 64 } 65 if(Strings.isNullOrEmpty(vcode)){ 66 session.setAttribute("errorMsg", "验证码必须填写!"); 67 return redirect; 68 } 69 //验证码 70 String sessionVcode = (String) session.getAttribute("vcode"); 71 if(!vcode.equalsIgnoreCase(sessionVcode)){ 72 session.setAttribute("errorMsg", "验证码错误!"); 73 return redirect; 74 } 75 //验证用户名和密码 76 password = Cryptos.encryptMd5(password); 77 User loginUser = userService.login(account, password); 78 if(loginUser == null){ 79 session.setAttribute("errorMsg", "账号或密码错误!"); 80 return redirect; 81 } 82 if(loginUser.getIsLocked() == User.IsLocked.YES){ 83 session.setAttribute("errorMsg", "账号已锁定,不能登录!"); 84 return redirect; 85 } 86 87 //保存到session的时候清除密码 88 User currentUser = new User(); 89 BeanUtils.copyProperties(loginUser, currentUser); 90 currentUser.setPassword(null); 91 92 //登录成功 93 session.setAttribute("currentUser", currentUser); 94 95 return REDIRECT("/admin/home"); 96 } 97 98 /** 99 * 获取验证码100 */101 @RequestMapping("/vcode")102 public void getVCode(HttpSession session, HttpServletResponse response) throws IOException {103 //创建验证码生成器对象104 VCodeGenerator vcGenerator = new VCodeGenerator();105 //生成验证码106 String vcode = vcGenerator.generatorVCode();107 //将验证码保存在session域中,以便判断验证码是否正确108 session.setAttribute("vcode", vcode);109 //生成验证码图片110 BufferedImage vImg = vcGenerator.generatorRotateVCodeImage(vcode, true);111 //输出图像112 ImageIO.write(vImg, "gif", response.getOutputStream());113 }114 115 /**116 * 退出系统117 */118 @RequestMapping("/logoff")119 public String logoff(HttpSession session){120 session.invalidate();121 return REDIRECT("/");122 }123 124 @RequestMapping("/function")125 public String function(){126 return "/home/function";127 }128 129 @RequestMapping("/welcome")130 public String welcome(){131 return "/home/welcome";132 }133 134 /**135 * 错误页面136 * @param code137 * @return138 */139 @RequestMapping("/error/{code}")140 public String error(@PathVariable String code) {141 return "/error/" + code;142 }143 144 145 146 }UserService中根据用户名和密码获取用户:


1 package com.lyyzoo.gpss.service.system; 2 3 @Service 4 public class UserService extends BaseService<User> { 5 @Autowired 6 private UserDao userDao; 7 /** 8 * 获取登录用户 9 */10 public User login(String account, String password){11 Map<String, Object> filter = new HashMap<>();12 filter.put("account", account);13 filter.put("password", password);14 filter.put("state", Applications.Flag.YES);15 16 User loginUser = get(filter);17 return loginUser;18 }19 }
七、系统的调试与部署
1.测试
系统开发完成后,首先需要在本地整体测试,从登录开始,每个模块,每个功能,每个流程具体的去测试。
首先测试如果未登录,用户是不能访问管理页面的,直接在地址栏输入访问地址看是否跳转到登录页面。然后至少测试各个角色相关的账号登录是否正常,登录后,每个角色拥有的菜单是否显示正常。
其它模块的测试,使用各个角色对应的账号,登录系统,进行相应功能的测试。如管理员进入系统录入基础数据,商品信息、仓库信息等。采购管理员录入供应商信息,录入采购订单,提交审核。销售管理员录入客户信息,录入销售订单,提交审核。库存管理员审核采购订单,审核通过,则库存增加;审核销售订单,审核通过,则库存减少。查看库存信息,相应的操作之后,库存量是否正确。测试结果可查看系统测试截图。
系统容错性测试,主要是测试输入一些错误的数据类型以及超出范围的数值测试系统在异常条件下的行为。系统在这方面做得比较好,如果用户输入了一些非法的数据,会立即提醒用户输入正确的数据。首先会在前台判断用户输入的数据的合法性、是否必须输入等,数据传到后台后,还会在代码里判断一次数据是否正确,才会保存到数据库。而系统使用的Jdbc也能在一定程度上防止SQL注入等问题。如果系统发生一些无法预测的异常,也会以友好的界面提示用户,以便技术员及时维护系统。
总体来说,整个的测试过程比较顺利,也存在一些小问题,就立即修复了。功能全部实现了,该系统能满足一个基本的进销存流程,以后也还可以扩展。
2.部署
我这里使用磨泊云来部署项目,磨泊云使用简单且在一定限度内免费,部署测试比较合适。首先在磨泊云上创建名为gpss的Java应用,接着创建mysql服务,并将其绑定到该java应用,复制数据库连接到配置文件中。导出本地的gpss数据库,导入到创建的mysql应用里。然后在IDEA中使用mvn clean package –Denv=online命令打包线上环境的war包,将war包发布到磨泊云上。启动项目,然后访问,测试,一些都正常。可访问域名查看,由于没处理好ext的兼容性问题,建议使用谷歌浏览器查看。后面再学学如何部署到像阿里云等云上。
八、总结
通过自己一步步去设计完成这个燃气管进销存系统,让我对软件的架构、设计、框架、编码、以及各种工具的使用更加熟练,熟悉了软件的开发流程。这个系统更是大学四年所学知识的一个产物,从拿到论文命题开始,理解命题,查阅相关资料,进行需求分析,设计功能模块,设计数据库;然后结合自己在实习期的工作经验以及公司的架构设计,搭建了一个自己的底层。在这个底层的基础上进行系统的开发。
经过近一个月的毕业设计,掌握了软件开发各个方面的相关知识,熟悉了整个流程,也检验了自己大学四年的知识水平。显然也还是有很多不足的,比如该系统中虽然使用SSH框架,但其框架的原理实现上还有很多不明白。个人认为学习一定要知其然也要知其所以然,尤其对于技术,需要去了解它的底层原理,才能提高自己的能力。这些就在以后的工作中去逐渐提高。
写到这里就基本完了,大学四年的最后一篇博客,以后就是在工作中去学习了。
很开心,要离开学校了,可以去工作找money了;很忧伤,要离开学校了,一生中可能最舒适的时光就是大学时光了。
我很喜欢我的学校 —— 西南大学,坐落于缙云山下,环境优美、美女如云,哈哈!
九、附件
最后,系统开发相关文件分享出来:燃气管网设备进销存系统
压缩包目录如下:
Atas ialah kandungan terperinci 毕业设计之进销存管理系统 --从基础搭建开始. Untuk maklumat lanjut, sila ikut artikel berkaitan lain di laman web China PHP!

Alat AI Hot

Undresser.AI Undress
Apl berkuasa AI untuk mencipta foto bogel yang realistik

AI Clothes Remover
Alat AI dalam talian untuk mengeluarkan pakaian daripada foto.

Undress AI Tool
Gambar buka pakaian secara percuma

Clothoff.io
Penyingkiran pakaian AI

Video Face Swap
Tukar muka dalam mana-mana video dengan mudah menggunakan alat tukar muka AI percuma kami!

Artikel Panas
Alat panas

Notepad++7.3.1
Editor kod yang mudah digunakan dan percuma

SublimeText3 versi Cina
Versi Cina, sangat mudah digunakan

Hantar Studio 13.0.1
Persekitaran pembangunan bersepadu PHP yang berkuasa

Dreamweaver CS6
Alat pembangunan web visual

SublimeText3 versi Mac
Perisian penyuntingan kod peringkat Tuhan (SublimeText3)
Topik panas
 1391
1391
 52
52

 Amalan sistem pengurusan harta pintar berdasarkan bahasa Go
Jun 20, 2023 am 09:14 AM
Amalan sistem pengurusan harta pintar berdasarkan bahasa Go
Jun 20, 2023 am 09:14 AM
Dengan kemajuan teknologi dan pembangunan sosial, sistem pengurusan harta pintar telah menjadi bahagian yang amat diperlukan dalam pembangunan bandar moden. Dalam proses ini, sistem pengurusan harta pintar berdasarkan bahasa Go telah menarik banyak perhatian kerana kelebihannya seperti kecekapan, kebolehpercayaan dan kelajuan. Artikel ini akan memperkenalkan amalan sistem pengurusan harta pintar pasukan kami menggunakan bahasa Go. 1. Analisis keperluan Pasukan kami terutamanya membangunkan sistem pengurusan hartanah ini untuk syarikat hartanah. Tugas utamanya adalah untuk menghubungkan syarikat pengurusan hartanah dan penduduk untuk memudahkan pengurusan syarikat pengurusan hartanah, dan juga untuk membolehkan penduduk
 Bagaimana untuk menulis sistem pengurusan pinjaman dalam talian yang mudah melalui PHP
Sep 27, 2023 pm 12:49 PM
Bagaimana untuk menulis sistem pengurusan pinjaman dalam talian yang mudah melalui PHP
Sep 27, 2023 pm 12:49 PM
Cara menulis sistem pengurusan pinjaman dalam talian yang mudah melalui PHP memerlukan contoh kod khusus Pengenalan: Dengan kemunculan era digital, kaedah pengurusan perpustakaan juga telah mengalami perubahan yang besar. Sistem rakaman manual tradisional secara beransur-ansur digantikan oleh sistem pengurusan pinjaman dalam talian. Sistem pengurusan pinjaman dalam talian meningkatkan kecekapan dengan mengautomasikan proses peminjaman dan pemulangan buku. Artikel ini akan memperkenalkan cara menggunakan PHP untuk menulis sistem pengurusan pinjaman dalam talian yang mudah dan memberikan contoh kod khusus. 1. Analisis keperluan sistem sebelum mula menulis sistem pengurusan pinjaman dalam talian
 Cara cepat membina sistem carta statistik di bawah rangka kerja Vue
Aug 21, 2023 pm 05:48 PM
Cara cepat membina sistem carta statistik di bawah rangka kerja Vue
Aug 21, 2023 pm 05:48 PM
Cara cepat membina sistem carta statistik di bawah rangka kerja Vue Dalam aplikasi web moden, carta statistik merupakan komponen penting. Sebagai rangka kerja bahagian hadapan yang popular, Vue.js menyediakan banyak alatan dan komponen yang mudah yang boleh membantu kami membina sistem carta statistik dengan cepat. Artikel ini akan memperkenalkan cara menggunakan rangka kerja Vue dan beberapa pemalam untuk membina sistem carta statistik ringkas. Pertama, kita perlu menyediakan persekitaran pembangunan Vue.js, termasuk memasang perancah Vue dan beberapa pemalam yang berkaitan. Jalankan arahan berikut dalam baris arahan
 Bolehkah bangunan dibina di alam liar di Mistlock Kingdom?
Mar 07, 2024 pm 08:28 PM
Bolehkah bangunan dibina di alam liar di Mistlock Kingdom?
Mar 07, 2024 pm 08:28 PM
Pemain boleh mengumpul bahan yang berbeza untuk membina bangunan apabila bermain di Mistlock Kingdom Ramai pemain ingin tahu sama ada untuk membina bangunan di alam liar Bangunan tidak boleh dibina di dalam Mistlock Kingdom. . Bolehkah bangunan dibina di alam liar di Mistlock Kingdom? 1. Bangunan tidak boleh dibina di kawasan liar Kerajaan Mist Lock. 2. Bangunan mesti dibina dalam skop altar. 3. Pemain boleh meletakkan Spirit Fire Altar dengan sendirinya, tetapi apabila mereka meninggalkan julat, mereka tidak akan dapat membina bangunan. 4. Kita juga boleh terus menggali lubang di gunung sebagai rumah kita, jadi kita tidak perlu menggunakan bahan binaan. 5. Terdapat mekanisme keselesaan dalam bangunan yang dibina oleh pemain sendiri, iaitu, lebih baik dalaman, lebih tinggi keselesaan. 6. Keselesaan yang tinggi akan membawa bonus atribut kepada pemain, seperti
 Cara menggunakan MongoDB untuk membangunkan sistem pengurusan backend laman web yang mudah
Sep 20, 2023 am 08:34 AM
Cara menggunakan MongoDB untuk membangunkan sistem pengurusan backend laman web yang mudah
Sep 20, 2023 am 08:34 AM
Cara menggunakan MongoDB untuk membangunkan sistem pengurusan backend laman web yang mudah Dengan pembangunan Internet, penggunaan dan pengurusan laman web menjadi semakin penting. Untuk memudahkan pentadbir laman web mengurus kandungan laman web di latar belakang, adalah penting untuk membangunkan sistem pengurusan latar belakang laman web yang mudah dan cekap. Artikel ini akan memperkenalkan cara menggunakan MongoDB untuk membangunkan sistem pengurusan bahagian belakang tapak web yang mudah, dan menunjukkannya melalui contoh kod tertentu. Penyediaan Pertama, kita perlu memastikan bahawa pangkalan data MongoDB telah dipasang dan dikonfigurasikan. khusus
 Apakah sistem pengurusan sistem ebs?
Mar 02, 2023 am 11:34 AM
Apakah sistem pengurusan sistem ebs?
Mar 02, 2023 am 11:34 AM
Sistem ebs ialah sistem pengurusan kawalan brek elektronik Ia adalah sistem kawalan elektronik yang sepenuhnya menggunakan brek pneumatik dikawal secara elektronik untuk meningkatkan keselesaan dan keselamatan brek. Komponen sistem ebs: 1. Penderia isyarat brek sistem EBS; 2. Modul kawalan saluran tunggal sistem EBS;
 Amalan terbaik dan langkah berjaga-jaga untuk membina pelayan web di bawah CentOS 7
Aug 25, 2023 pm 11:33 PM
Amalan terbaik dan langkah berjaga-jaga untuk membina pelayan web di bawah CentOS 7
Aug 25, 2023 pm 11:33 PM
Amalan terbaik dan langkah berjaga-jaga untuk membina pelayan web di bawah CentOS7 Pengenalan: Dalam era Internet hari ini, pelayan web adalah salah satu komponen teras untuk membina dan mengehos laman web. CentOS7 ialah pengedaran Linux berkuasa yang digunakan secara meluas dalam persekitaran pelayan. Artikel ini akan meneroka amalan dan pertimbangan terbaik untuk membina pelayan web pada CentOS7, dan memberikan beberapa contoh kod untuk membantu anda memahami dengan lebih baik. 1. Pasang pelayan HTTP Apache Apache adalah w yang paling banyak digunakan
 Bagaimana untuk mencipta struktur jadual MySQL yang sesuai untuk sistem pengurusan sekolah?
Oct 31, 2023 am 10:52 AM
Bagaimana untuk mencipta struktur jadual MySQL yang sesuai untuk sistem pengurusan sekolah?
Oct 31, 2023 am 10:52 AM
Bagaimana untuk mencipta struktur jadual MySQL yang sesuai untuk sistem pengurusan sekolah? Sistem pengurusan sekolah adalah sistem yang kompleks yang melibatkan pelbagai modul dan fungsi Bagi mencapai keperluan fungsinya, adalah perlu untuk mereka bentuk struktur jadual pangkalan data yang sesuai untuk menyimpan data. Artikel ini akan menggunakan MySQL sebagai contoh untuk memperkenalkan cara mencipta struktur jadual yang sesuai untuk sistem pengurusan sekolah dan menyediakan contoh kod yang berkaitan. Jadual maklumat sekolah (school_info) Jadual maklumat sekolah digunakan untuk menyimpan maklumat asas tentang sekolah, seperti nama sekolah, alamat, nombor hubungan, dsb. CREATETABL
