

怎样使用Angular4的router
May 26, 2018 am 10:17 AM这次给大家带来怎样使用Angular4的router,使用Angular4的router的注意事项有哪些,下面就是实战案例,一起来看一下。
router,也就是路由,是前端中一个比较重要的概念。通过router把特定的地址和对应的页面关联后分离出来,以达到解耦的目的。在src/app目录下新建一个detail的文件夹,建立一个名为gundam-detail.component的文件。
import { Component } from '@angular/core';
import { Gundam } from '../../model/gundam';
@Component({
  template: `
    <p *ngIf="selectedGundam">
    <span>{{selectedGundam.name}}</span>
    <span>{{selectedGundam.type}}</span>
    </p>
  `
})
export class GundamDetailComponent {
    selectedGundam: Gundam;
}ps:有关命名,基本上是采用xxx+“-”+“业务类型”+“组件类型”的命名方式,至少官方文档上是这么推荐的。当然给组件起名叫猪头三也可以,但是标准的命名可以增加组件的可读性。即便是不介意随意起名坑后来的维护者,谁也不能确定很长时间以后自己不会再对同一段代码进行重构。所以,做人还是要厚道。不写注释也就算了,起名还是规范一点好。
ps2:有关分包的方式,有的人喜欢把view放一起、controller放一起,再根据逻辑进一步细分;也有人是倒过来,先分逻辑再分view和controller。这个好像没有什么统一的定论,我个人是喜欢后一种,所以本项目采用后一种分法。
目前文件里没什么东西,只是简单的把app.component.ts里的temple给搬过来而已。
先明确需求,再开始写router。
需求:点击gundam列表页面中的任意item,可以跳转到该gundam的详情页。
作为angular的组件,希望在页面中使用router,必须先在app.module.ts里声明。
ps:之前的业务和app.module.ts没什么关系,但这并不是说它不重要。app.module.ts相当于android的mainifist文件,对整个项目进行统筹管理。
打开app.module.ts:

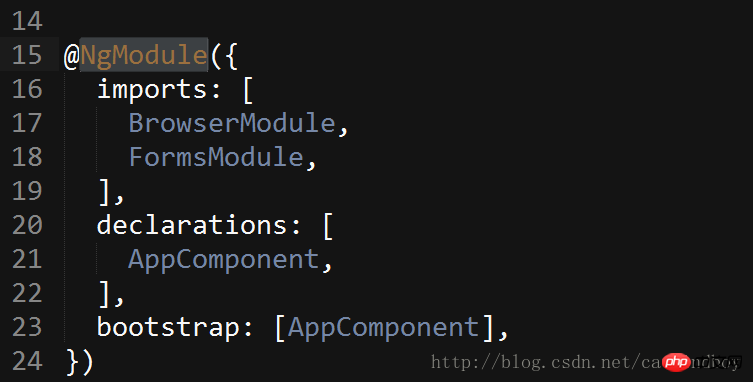
imports:在组件页面里用到基础类。
declarations:现有custom组件声明。
bootstrap:可以理解为Android的main launch,项目启动时从那个组件进入。
需要使用router前先引入:
import { RouterModule } from '@angular/router';因为要调用RouterModule的forRoot方法,RouterModule.forRoot 又是项目中用到的基础类,所以需要写在imports里。
 imports: [
  BrowserModule,
  FormsModule,
  RouterModule.forRoot()
 ],
RouterModule.forRoot 接受两个参数,第一个是route数组来表明跳转,第二个参数常年忽略,我也不知道有什么用。
route类包括2个比较关键的属性:path和component,通过访问path,可以找到唯一的component。
在forRoot里添加上包含主页和详情页2个component的route数组。
RouterModule.forRoot([
  {
    path: '',
    component: AppComponent
  },
  {
    path: '',
    component: GundamDetailComponent
  }
])app.module.ts现在看起来是这样的:
import {
NgModule
} from '@angular/core';
import {
BrowserModule
} from '@angular/platform-browser';
import {
FormsModule
} from '@angular/forms';
import { RouterModule }  from '@angular/router';
import {
AppComponent
} from './component/appcomponent/app.component';
import { GundamDetailComponent } from './component/detail/gundam-detail.component';
@NgModule({
  imports: [
    BrowserModule,
    FormsModule,
    RouterModule.forRoot([
      {
        path: '',
        component: AppComponent
      },
      {
        path: '',
        component: GundamDetailComponent
      }
      ])
  ],
  declarations: [
    AppComponent,
    GundamDetailComponent
  ],
  bootstrap: [AppComponent],
})
export class AppModule {}2个path都还空着,因为还少一个关键的东西,就算写上也会报错:

Error: Cannot find primary outlet to load ‘AppComponent'
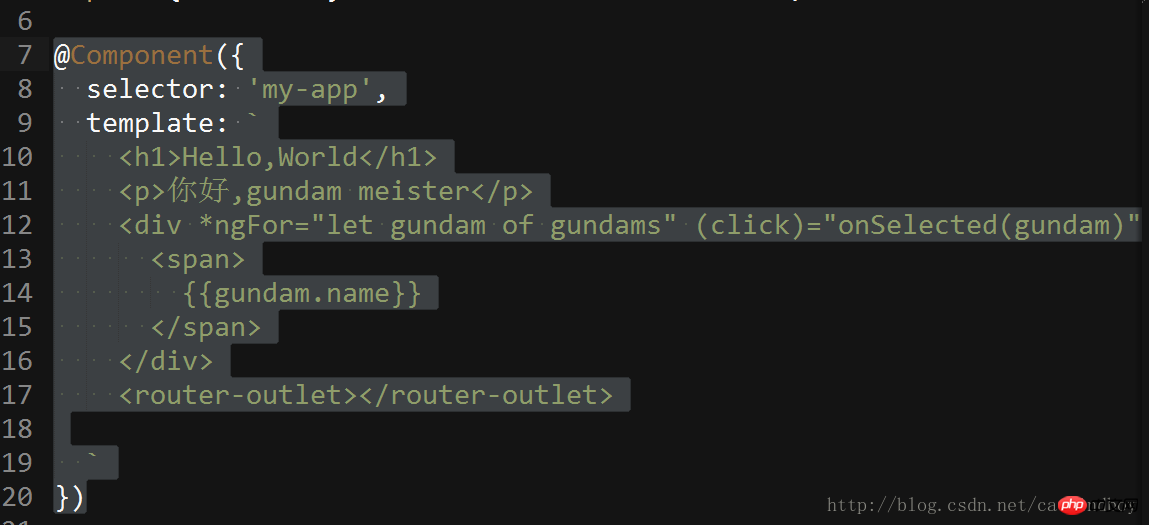
在angular里,router是要搭配标签router-outlet来使用的,换句话说router决定显示哪个组件,而由router-outlet决定显示在哪里。
在app.component.ts里的template加上标签
<router-outlet></router-outlet>
然后不出意外的显示了2个主页:

app.component.ts是一个组件也是一个页面,angular先从bootstrap里进入了app.component.ts渲染了界面(也就是router-outlet上面的部分)。碰到又去找router,发现对应的router也有组件,于是又加载了一遍。
所以为了正常显示,也要把主页也单独抽出来。所有组件通过app.component.ts里的来进行加载。而app.component.ts作为整个demo的最外层容器可以进行一些公共的操作(典型:后退动作)。
在src下新建host包,新建gundam-host.component.ts文件。
基本上可以把整个app挪过来,删除掉out标签,删掉selector(暂时用不到)。
import {
Component
} from '@angular/core';
import { Gundam } from '../../model/gundam';
import { GUNDAMS } from './../../service/data';
@Component({
  template: `
    <p *ngFor="let gundam of gundams" (click)="onSelected(gundam)">
      <span>
        {{gundam.name}}
      </span>
    </p>
  `
})
export class GundamHostComponent {
  gundam: Gundam = {
    name: '海牛',
    type: 'NewType'
  };
  gundams = GUNDAMS;
  selectedGundam: Gundam; // 定义一个selectedGudam作为展示详情的变量
  onSelected (gundam: Gundam): void {
    this.selectedGundam = gundam; // 通过参数赋值
  }
}app.component.ts只保留标签,其他一概去掉。
修改app.module.ts文件,导入gundam-host.component.ts并把GundamHostComponent 增加到组件声明declarations里。
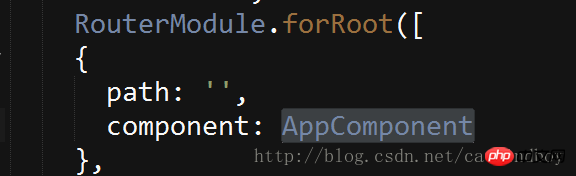
修改route里的path所指向的component,默认进入后显示主页组件:
before
after
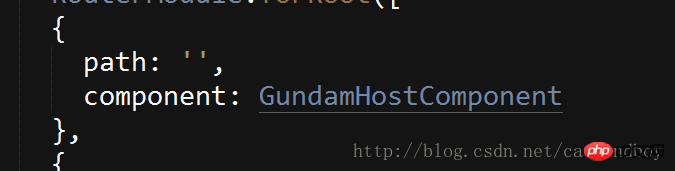
path的值为”(空字符串)的表示不需要增加子路径。
修改详情页的路径:
{
  path: 'detail',
  component: GundamDetailComponent
}在主页里增加跳转连接:
点击跳转(路径已改变)
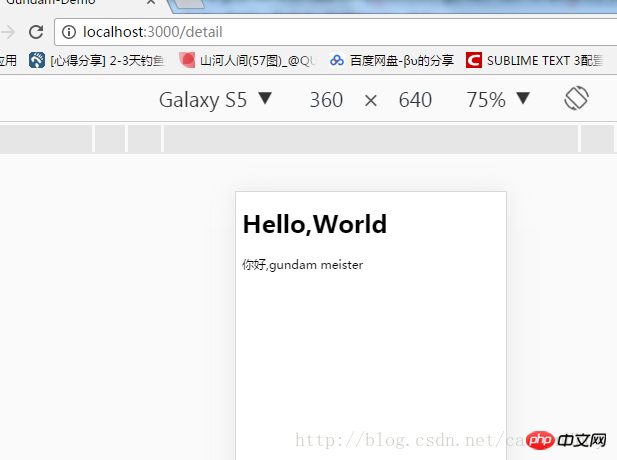
现在点击主页的高达列表的item后,可以跳转到一个空白的详情页。之所以是空白,是因为详情页的值是需要由主页进行传递的。现在主页详情页分家以后,需要通过路由来进行值传递。
传值的方法有很多种,甚至可以传的值也有很多种。
目前我先用最笨的方法:将gundam类转化为一个字符串,将字符串传递到详情页面后再转化为gundam类。
在app.component.ts文件的class里添加函数:
parseGundamToString(gundam: Gundam): string {
  return gundam.name + '&' + gundam.type;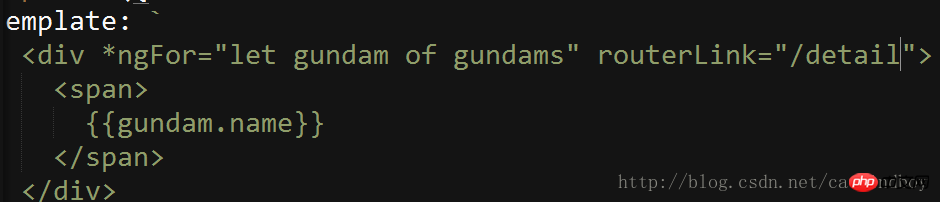
} // 将gundam类转化为固定格式的字符串修改app.component.ts文件的template,访问gundam路径时转化传递转化过的gundam字符串
<p *ngFor="let gundam of gundams" routerLink="/detail/name=parseGundamToString(gundam)">
  <span>
  {{gundam.name}}
  </span>
</p>修改详情页的path
{
  path: 'detail/:gundam',
  component: GundamDetailComponent
}/:gundam 是一个占位符,又是参数说明。表示传递过来的参数属性是gundam。
这样在detail文件中,就可以从url的连接中拿到传递过来的高达字符串。
获得这个字符串的时机,应该是在在detail页面初始化的时候。Angular提供了所谓的的“钩子”(hook),用来标示component的活动周期—其实也就是是类似于Android里onStart或者onCreate一样的方法。
在gundam-detail.component.ts的中添加OnInit钩子,或者说接口:
import { Component, OnInit } from '@angular/core';在class后面加implements关键词和OnInit来实现该接口:
export class GundamDetailComponent implements OnInit {
  selectedGundam: Gundam ;
  ngOnInit(): void {
  }
}剩下的事情,就是读取连接上传来的参数就可以了。
读取连接上传递的参数还是要用到router里的几个类,所以需要在detail里导入。
import { ActivatedRoute, Params } from '@angular/router';导入完成后,通过在构造器里注入的方式进行调用:
(有关注入,现在暂时没有说到)
constructor(
private route: ActivatedRoute){}angular会自动创建ActivatedRoute的实例。
先在ngOnInit里输出看看params是什么
this.route.params.switchMap((params: Params) => console.log(params))
ps:switchMap是angular官方给的拿取url参数的方法,也是需要预先导入才可以使用:
import 'rxjs/add/operator/switchMap';
ps2: 有关箭头函数
(params: Params) => this.gundamStr = params['gundam']
是一个箭头函数,等同于
function(params){
  this.gundamStr = params['gundam']
}其中params是switchMap的返回值,返回的即是通过路由连接传递过来的参数所在的类。
ps3: 箭头函数真的是整个ES6里最恶心的东西,之一。
控制台中 输出:

传递过来的参数,是一个gundam类格式化输出的字符串,所以还要在detail里补充一个反格式化字符串到gundam类的函数。
parseStringToGundam(str: string): Gundam {
  const temp = str.split('&');
  const tempGundam: Gundam = {
  name: temp[0],
  type: temp[1]
  };
  return tempGundam;
}最终,获得detail的初始化是这个样子的
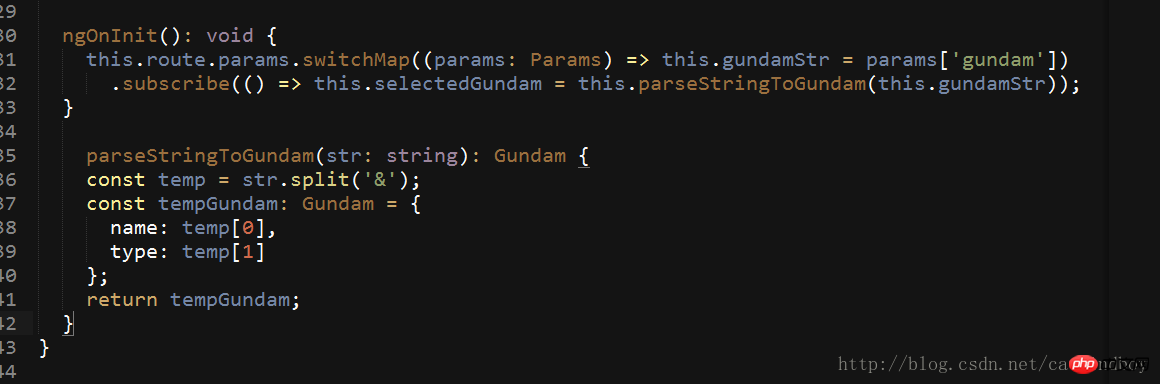
ngOnInit(): void {
  this.route.params // 通过注入的方式拿到route里的参数params
  .switchMap((params: Params) => this.gundamStr = params['gundam']) // 通过参数拿到gundam字符串并付给detail里的一个临时变量
  .subscribe(() => this.selectedGundam = this.parseStringToGundam(this.gundamStr)); // 通过反格式化函数解析临时变量并返回给作为显示的model
}移动web页面间传值确实没有什么太好的方法,angular和react都是如此。以前我们的做法是短的参数直接挂连接传走,长的大的或者object的参数就先保存本地,然后第二个页面再从本地读取。
但是像android那样扔一个intent里直接就过去了的方式,确实没有。
回首页:
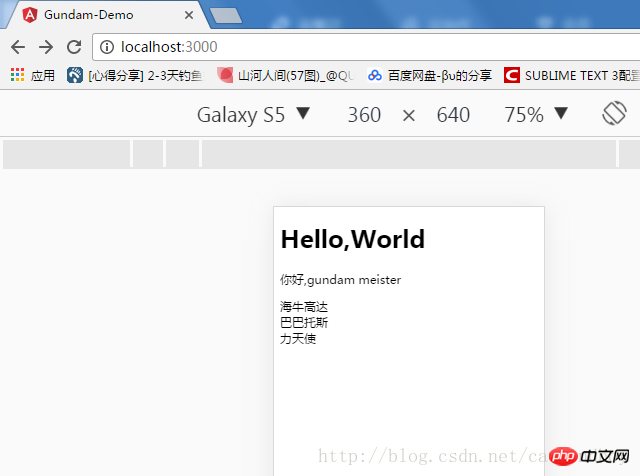
点击一个列表:
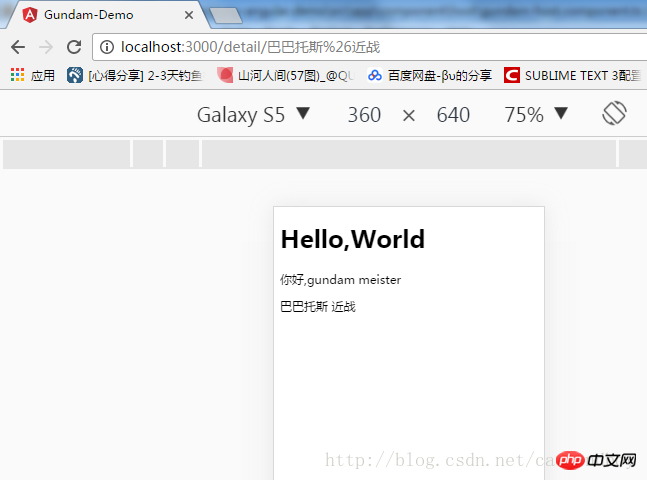
包结构:
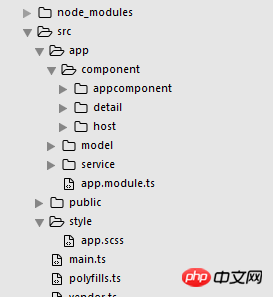
总的来说,业务被分开了,结构干净多了。虽然现在还体现不出来,但是写到后来就觉得心花怒放,磨刀不误砍柴工功啊。
作为router,也可以分离的。
目前我的项目里只有2个页面,如果多起来-比如20来个,那么app.module.ts又会变的乱七八糟。
所以要把router也给扔出去。
新建一个文件app-routing.module.ts,然后把footRoot平移过来(带上引用)。
在app-routing.module.ts文件里,也需要ngModul。个人理解ngModul就相当于一个基类指示器,导出class后以便被其他类引用。
import {
NgModule
} from '@angular/core';
import { RouterModule }  from '@angular/router';
import { GundamDetailComponent } from './component/detail/gundam-detail.component';
import { GundamHostComponent } from './component/host/gundam-host.component';
@NgModule({
  imports: [
    RouterModule.forRoot([
      {
        path: '',
        component: GundamHostComponent
      },
      {
        path: 'detail/:id',
        component: GundamDetailComponent
      }
    ])
  ],
  exports: [RouterModule]
})
export class AppRoutingModule {
}然后既然已经有了这个类,可以导入到app.module.ts里使用使得整个文件看起来清爽一些。
import {
NgModule
} from '@angular/core';
import {
BrowserModule
} from '@angular/platform-browser';
import {
FormsModule
} from '@angular/forms';
import {
AppComponent
} from './component/appcomponent/app.component';
import { GundamDetailComponent } from './component/detail/gundam-detail.component';
import { GundamHostComponent } from './component/host/gundam-host.component';
import { AppRoutingModule } from './app-routing.module';
@NgModule({
  imports: [
    BrowserModule,
    FormsModule,
    AppRoutingModule // 调用路由
  ],
  declarations: [
    AppComponent,
    GundamDetailComponent,
    GundamHostComponent
  ],
  bootstrap: [AppComponent],
})
export class AppModule {}当然,官方文档又进行了进一步简化。
既然forRoot是一个Route数组,那么数组也可以单独抽出来,当然进一步抽取也可以放到另一个文件里。
import {
NgModule
} from '@angular/core';
import { RouterModule, Route }  from '@angular/router';
import { GundamDetailComponent } from './component/detail/gundam-detail.component';
import { GundamHostComponent } from './component/host/gundam-host.component';
const routes: Route[] = [
  {
    path: '',
    component: GundamHostComponent
  },
  {
    path: 'detail/:gundam',
    component: GundamDetailComponent
  }
];
@NgModule({
  imports: [
    RouterModule.forRoot(routes)
  ],
  exports: [RouterModule]
})
export class AppRoutingModule {
}我个人比较偷懒,就先抽取到这一步。
现在连主页面和详情页面都被分开了,项目的耦合度又进一步降低。
相信看了本文案例你已经掌握了方法,更多精彩请关注php中文网其它相关文章!
推荐阅读:
Atas ialah kandungan terperinci 怎样使用Angular4的router. Untuk maklumat lanjut, sila ikut artikel berkaitan lain di laman web China PHP!

Artikel Panas

Alat panas Tag

Artikel Panas

Tag artikel panas

Notepad++7.3.1
Editor kod yang mudah digunakan dan percuma

SublimeText3 versi Cina
Versi Cina, sangat mudah digunakan

Hantar Studio 13.0.1
Persekitaran pembangunan bersepadu PHP yang berkuasa

Dreamweaver CS6
Alat pembangunan web visual

SublimeText3 versi Mac
Perisian penyuntingan kod peringkat Tuhan (SublimeText3)
Topik panas


 Apakah perisian crystaldiskmark? -Bagaimana menggunakan crystaldiskmark?
Mar 18, 2024 pm 02:58 PM
Apakah perisian crystaldiskmark? -Bagaimana menggunakan crystaldiskmark?
Mar 18, 2024 pm 02:58 PM
Apakah perisian crystaldiskmark? -Bagaimana menggunakan crystaldiskmark?
 Bagaimana untuk memuat turun foobar2000? -Cara menggunakan foobar2000
Mar 18, 2024 am 10:58 AM
Bagaimana untuk memuat turun foobar2000? -Cara menggunakan foobar2000
Mar 18, 2024 am 10:58 AM
Bagaimana untuk memuat turun foobar2000? -Cara menggunakan foobar2000
 Cara menggunakan NetEase Mailbox Master
Mar 27, 2024 pm 05:32 PM
Cara menggunakan NetEase Mailbox Master
Mar 27, 2024 pm 05:32 PM
Cara menggunakan NetEase Mailbox Master
 Cara menggunakan aplikasi Baidu Netdisk
Mar 27, 2024 pm 06:46 PM
Cara menggunakan aplikasi Baidu Netdisk
Mar 27, 2024 pm 06:46 PM
Cara menggunakan aplikasi Baidu Netdisk
 Bagaimana untuk menggunakan Xiaoai Speaker Bagaimana untuk menyambung Xiaoai Speaker ke telefon bimbit
Feb 22, 2024 pm 05:19 PM
Bagaimana untuk menggunakan Xiaoai Speaker Bagaimana untuk menyambung Xiaoai Speaker ke telefon bimbit
Feb 22, 2024 pm 05:19 PM
Bagaimana untuk menggunakan Xiaoai Speaker Bagaimana untuk menyambung Xiaoai Speaker ke telefon bimbit
 Tutorial BTCC: Bagaimana untuk mengikat dan menggunakan dompet MetaMask pada pertukaran BTCC?
Apr 26, 2024 am 09:40 AM
Tutorial BTCC: Bagaimana untuk mengikat dan menggunakan dompet MetaMask pada pertukaran BTCC?
Apr 26, 2024 am 09:40 AM
Tutorial BTCC: Bagaimana untuk mengikat dan menggunakan dompet MetaMask pada pertukaran BTCC?
