OpenLayer怎么实现小车按路径运动
本篇文章主要讲述的是在openlayer上实现路径运动,下面和小编一起去看看具体都是如何实现的吧,感兴趣的朋友可以看看。
一、需求分析
客户需要的功能就是能在一张Gis图上实现小车根据路径进行移动,为什么一定要Gis呢(这是客户指定需求,无语一该)。并且客户还说底图要很容易更换,但他想要用Gis表现的却是室内的地理信息,我也没办法用baidu, 高德等现成的Gis接口。
针对上述需求,我没有去了解过多的web gis框架。因为客户对Gis的概念就是能放大,缩小,可以做路径规划等。所以我就选择ol,利用他的静态图片(选择这个是为满足客户灵活更新底图的需求)做Gis底图的功能来解决此问题。
相关教程:js视频教程
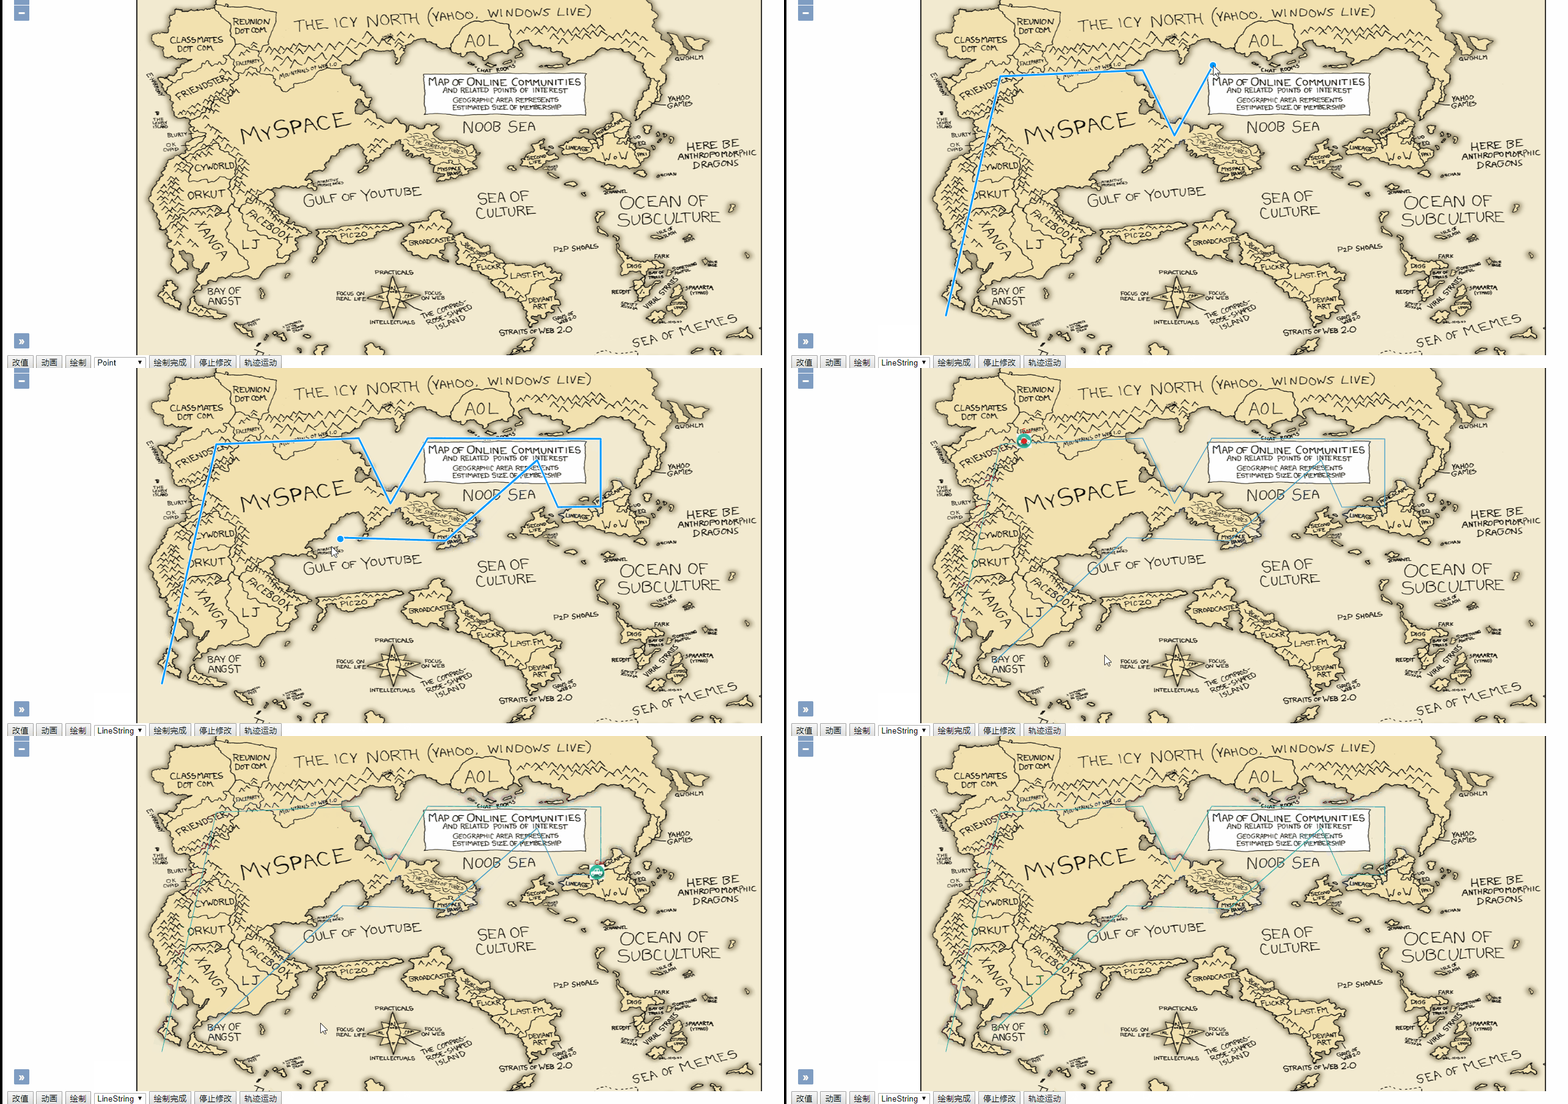
二、效果展示

三、伪代码实现
由于是技术验证代码, 有些杂乱,现只给出关键性代码。如有业务需要欢迎共同讨论。
3.1 实现路径的绘制
此步骤还是相对简单的,主要用到Ol的Draw对象,代码哪下:
draw(type){
        this.stopdraw();
        this._draw = new Draw({
            source: this.layer.getSource(),
            type: type == 'Icon' ? 'Point' : type
        });
        this._draw.on('drawend', (event)=>{
            if(type == 'LineString'){
                this.traceLine = event.feature;
            }
            if(type != 'Icon') return;
            let f = event.feature;
            f.setStyle(new Style({
                image: new Icon({
                    src: '/content/battery.gif'
                }),
                text: new Text({
                    text: 'new item',
                    fill: new Fill({
                        color: "red"
                    })
                })
            }));
            f.type = 'battery';
        });
        this.map.addInteraction(this._draw);
        this._snap = new Snap({source: this.layer.getSource()});
        this.map.addInteraction(this._snap);
}关键代码在于drawend事件的监听,如果是LineString情况,就将此feature放在一个共公变量,方便路径运行时使用。
3.2 分解路径数据
此部分就是获取到3.1步骤的路径路径,然后进行解析,因为3.1上的linestring是多个线段的集合,但运动其本质就是改变图标的坐标,使其快速且连续的变化就形成了移动效果。所以这里有一个方法进行路径细分,代码如下:
cutTrace(){
        let traceCroods = this.traceLine.getGeometry().getCoordinates();
        let len = traceCroods.length;
        let destCroods = [];
        for(let i = 0; i < len - 1; ++i){
            let bPoint = traceCroods[i];
            let ePoint = traceCroods[i+1];
            let bevelling = Math.sqrt(Math.pow(ePoint[0] - bPoint[0], 2)
            + Math.pow(ePoint[1] - bPoint[1], 2) );
            let cosA = (ePoint[0] - bPoint[0]) / bevelling;
            let sinA = (ePoint[1] - bPoint[1]) / bevelling;

            let curStep = 0;
            let step = 5;
            destCroods.push(new Point([bPoint[0], bPoint[1]]));
            do{
                curStep++;
                let nextPoint;
                if(curStep * step >= bevelling){
                    nextPoint = new Point([ePoint[0], ePoint[1]]);
                }else{
                    nextPoint = new Point([
                        cosA * curStep * step + bPoint[0]
                        ,
                        sinA * curStep * step + bPoint[1]
                    ]);
                }
                destCroods.push(nextPoint);
            }while(curStep * step < bevelling);
        }
        return destCroods;
}其中用到了一些数学上的三角函数和计算方法。此方法最终选一个根据步长计算后的坐标集合。
3.3 利用postcompose实现运动效果
代码如下:
tracerun(){
if(!this.traceLine) return;
this.traceCroods = this.cutTrace();
this.now = new Date().getTime();
this.map.on('postcompose', this.moveFeature.bind(this));
this.map.render();
}
moveFeature(event){
let vCxt = event.vectorContext;
let fState = event.frameState;
let elapsedTime = fState.time - this.now;
let index = Math.round(300 * elapsedTime / 1000);
let len = this.traceCroods.length;
if(index >= len){
//stop
this.map.un('postcompose', this.moveFeature);
return;
}
let dx, dy, rotation;
if(this.traceCroods[index] && this.traceCroods[index + 1]){
let isRigth = false;
let bCrood = this.traceCroods[index].getCoordinates();
let eCrood = this.traceCroods[index + 1].getCoordinates();
if(bCrood[0] < eCrood[0]){
//左->右
isRigth = true
}
dx = bCrood[0] - eCrood[0];
dy = bCrood[1] - eCrood[1];
rotation = Math.atan2(dy,dx);
if(rotation > (Math.PI / 2)){
//修正
rotation = Math.PI - rotation;
}else if(rotation < -1 * (Math.PI / 2)){
rotation = -1 * Math.PI - rotation;
}else{
rotation = -rotation;
}
console.log(dx + ' ' + dy + ' ' + rotation);
let curPoint = this.traceCroods[index];
var anchor = new Feature(curPoint);
let style = new Style({
image: new Icon({
img: isRigth ? this.carRight : this.carImg,
imgSize: [32,32],
rotateWithView: false,
rotation: rotation
}),
text: new Text({
text: 'Car',
fill: new Fill({
color: 'red'
}),
offsetY: -20
})
});
vCxt.drawFeature(anchor, style);
//this.map.getView().setCenter(bCrood);
}
this.map.render();
}此移动代码的是用ol的postcompose事件进行实现的,因为render方法执行完成后会触发postcompose事件,所以就代替了定时器的的实现方案。其中rotation根据两点坐标计算出移动图标的斜度、以及移动的方向等,更为影响的展示。
Atas ialah kandungan terperinci OpenLayer怎么实现小车按路径运动. Untuk maklumat lanjut, sila ikut artikel berkaitan lain di laman web China PHP!

Alat AI Hot

Undresser.AI Undress
Apl berkuasa AI untuk mencipta foto bogel yang realistik

AI Clothes Remover
Alat AI dalam talian untuk mengeluarkan pakaian daripada foto.

Undress AI Tool
Gambar buka pakaian secara percuma

Clothoff.io
Penyingkiran pakaian AI

AI Hentai Generator
Menjana ai hentai secara percuma.

Artikel Panas

Alat panas

Notepad++7.3.1
Editor kod yang mudah digunakan dan percuma

SublimeText3 versi Cina
Versi Cina, sangat mudah digunakan

Hantar Studio 13.0.1
Persekitaran pembangunan bersepadu PHP yang berkuasa

Dreamweaver CS6
Alat pembangunan web visual

SublimeText3 versi Mac
Perisian penyuntingan kod peringkat Tuhan (SublimeText3)

Topik panas
 1384
1384
 52
52
 Sempadan Jadual dalam HTML
Sep 04, 2024 pm 04:49 PM
Panduan untuk Sempadan Jadual dalam HTML. Di sini kita membincangkan pelbagai cara untuk menentukan sempadan jadual dengan contoh Sempadan Jadual dalam HTML.
 HTML jidar-kiri
Sep 04, 2024 pm 04:48 PM
Panduan untuk HTML margin-kiri. Di sini kita membincangkan gambaran keseluruhan ringkas tentang HTML margin-left dan Contoh-contohnya bersama-sama dengan Pelaksanaan Kodnya.
 Jadual Bersarang dalam HTML
Sep 04, 2024 pm 04:49 PM
Ini ialah panduan untuk Nested Table dalam HTML. Di sini kita membincangkan cara membuat jadual dalam jadual bersama-sama dengan contoh masing-masing.
 Susun Atur Jadual HTML
Sep 04, 2024 pm 04:54 PM
Panduan untuk Susun Atur Jadual HTML. Di sini kita membincangkan Nilai Susun Atur Jadual HTML bersama-sama dengan contoh dan output n perincian.
 Pemegang Tempat Input HTML
Sep 04, 2024 pm 04:54 PM
Panduan untuk Pemegang Tempat Input HTML. Di sini kita membincangkan Contoh Pemegang Tempat Input HTML bersama-sama dengan kod dan output.
 Senarai Tertib HTML
Sep 04, 2024 pm 04:43 PM
Panduan kepada Senarai Tertib HTML. Di sini kami juga membincangkan pengenalan senarai dan jenis Tertib HTML bersama-sama dengan contoh mereka masing-masing
 Memindahkan Teks dalam HTML
Sep 04, 2024 pm 04:45 PM
Panduan untuk Memindahkan Teks dalam HTML. Di sini kita membincangkan pengenalan, cara teg marquee berfungsi dengan sintaks dan contoh untuk dilaksanakan.
 Butang onclick HTML
Sep 04, 2024 pm 04:49 PM
Panduan untuk Butang onclick HTML. Di sini kita membincangkan pengenalan, kerja, contoh dan onclick Event masing-masing dalam pelbagai acara.


