

安装微软C/C++插件
在VS Code的扩展图标里搜索c++,安装C/C++插件并重载VS Code
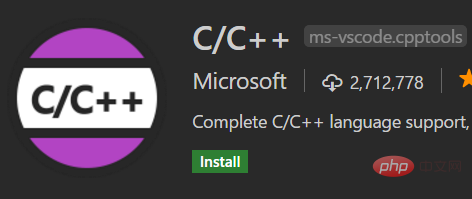
重启VS Code之后,打开一个含c/c++源码的文件夹,VS Code将会创建一个名为.vscode的子文件夹用于存放配置文件。
安装MinGW
去官网下载安装器,安装好后选择需要安装的工具:
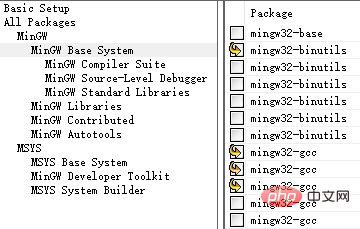
选择好之后应用更改:
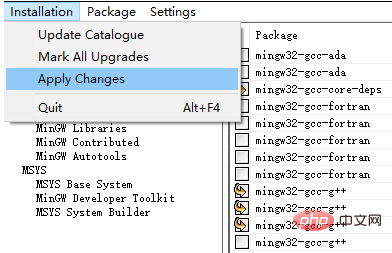
然后修改系统的环境变量,将可执行文件目录加入到Path中:

智能提示
为实现代码补全,需要创建一个c_cpp_properties.json文件。新建一个hello.c,输入:
#include <stdio.h>
int main(void)
{
    printf("hello");
    getchar();
    return 0;
}VS Code会提示找不到头文件,点击错误处的小灯泡,编辑包含路径
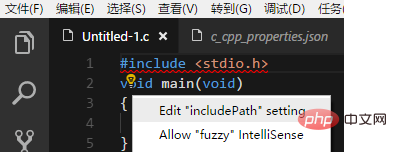
在c_cpp_properties.json中修改Win32下的路径设置
"browse": {
    "path": [
        "${workspaceRoot}",
        "C:\\DevProgram\\MinGW\\lib\\gcc\\mingw32\\6.3.0\\include\\c++"
    ],
    "limitSymbolsToIncludedHeaders": true,
    "databaseFilename": ""
}返回编辑器,点击小灯泡,将头文件所在目录添加到包含路径中

构建程序
构建程序需要创建一个tasks.json文件,点击任务->配置任务:
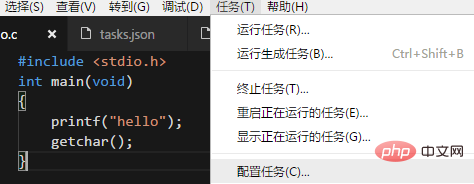
在弹出的选项中选择Others,然后修改tasks.json
{
    "version": "2.0.0",
    "tasks": [
        {
            "taskName": "build hello",
            "type": "shell",
            "command": "g++",
            "args": [
                "-g", "hello.c"
            ],
            "group": {
                "kind": "build",
                "isDefault": true
            }
        }
    ]
}调试代码
调试代码需要创建一个launch.json文件,点击调试栏的齿轮图标
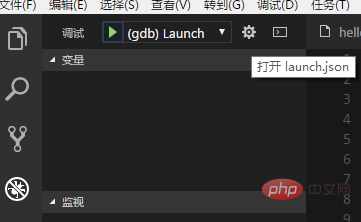
修改launch.json
{
        "version": "0.2.0",
        "configurations": [
            {
                "name": "(gdb) Launch",
                "type": "cppdbg",
                "request": "launch",
                "program": "${workspaceFolder}/a.exe",
                "args": [],
                "stopAtEntry": false,
                "cwd": "${workspaceFolder}",
                "environment": [],
                "externalConsole": true,
                "MIMode": "gdb",
                "miDebuggerPath": "C:\\DevProgram\\MinGW\\bin\\gdb.exe",
                "setupCommands": [
                    {
                        "description": "Enable pretty-printing for gdb",
                        "text": "-enable-pretty-printing",
                        "ignoreFailures": true
                    }
                ],
                "preLaunchTask": "build hello"
            }
        ]
}调试运行
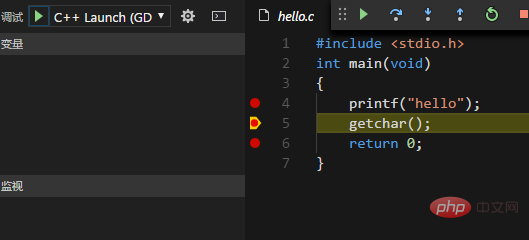
返回编辑器,设置断点,按F5开始调试
相关文章教程推荐:vscode教程
Atas ialah kandungan terperinci vscode如何编译运行c/c++程序. Untuk maklumat lanjut, sila ikut artikel berkaitan lain di laman web China PHP!
 vscode
 Bagaimana untuk menjalankan kod dengan vscode
 Apakah program yang boleh dibangunkan dengan php
 Apakah perbezaan antara bahasa c++ dan c
 Perintah pembelajaran yang disyorkan untuk c++ dan python
 Analisis keberkesanan kos pembelajaran python dan c++
 Pengenalan kepada rangka kerja yang digunakan oleh vscode
 Adakah bahasa c sama dengan c++?


