CentOS7如何搭建Gitlab服务器
下面由centos系统入门教程栏目给大家介绍CentOS7搭建Gitlab服务器的方法,希望对需要的朋友有所帮助!

CentOS7搭建Gitlab服务器
CentOS安装必要的依赖
第一步:安装ssh
yum install -y curl policycoreutils-pythonopenssh-server
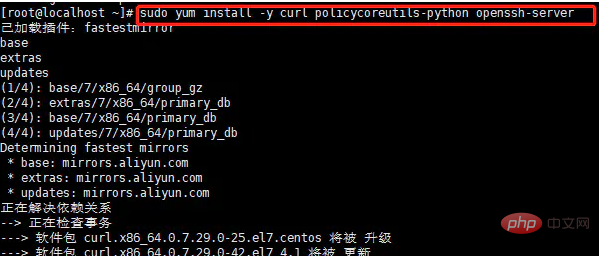
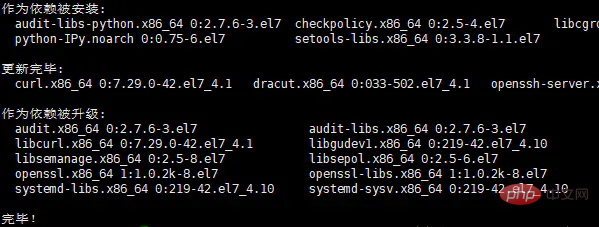
第二步: 将SSH服务设置成开机自启动并启动SSH服务(若安装并启动,则可跳过此步);
sudo systemctl enable sshd
sudo systemctl start sshd
第三步:安装并启动防火墙(若安装并启动,则可跳过此步);
yum install firewalld systemd -y
service firewalld start
第四步:添加http服务到firewalld (--permanent表示永久生效);
firewall-cmd --permanent --add-service=http

第五步:重启防火墙;
systemctl reload firewalld
第六步:将postfix服务设置成开机自启动并启动postfix;
systemctl enable postfix
systemctl start postfix
第七步:检查系统中是否已经安装wget(若不存在,用yum安装wget);
wget -V --检查wget版本
yum -y install wget --yum安装wget
CentOS安装必要的依赖
第一步:wget下载gitlab(社区版);
wget https://mirrors.tuna.tsinghua.edu.cn/gitlab-ce/yum/el7/gitlab-ce-11.2.1-ce.0.el7.x86_64.rpm

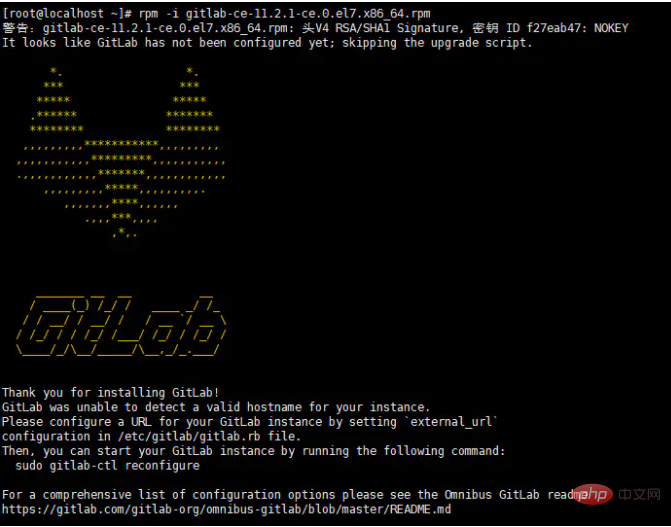
第二步:安装gitlab;
rpm -i gitlab-ce-11.2.1-ce.0.el7.x86_64.rpm
若出现下面错误,需要安装 policycoreutils-python;

yum -y install policycoreutils-python
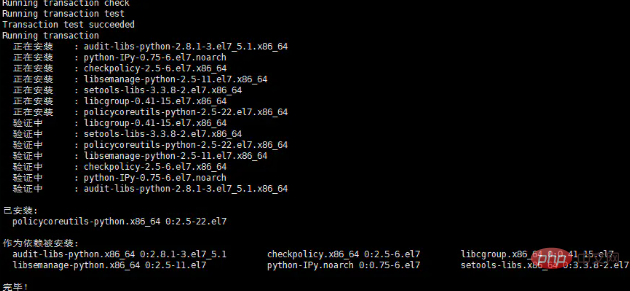
第三步:修改gitlab配置文件,指定服务器ip和自定义端口;
vi /etc/gitlab/gitlab.rb
修改URL:external_url 'http://192.168.2.121:8081'

修改端口:nginx['listen_port'] = 8081

要修改unicorn的配置

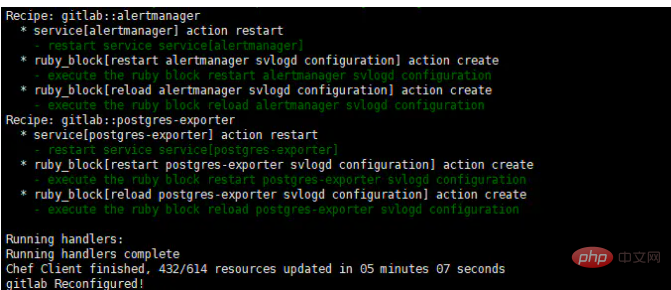
第四步:重置并启动GitLab;
重置配置:gitlab-ctl reconfigure
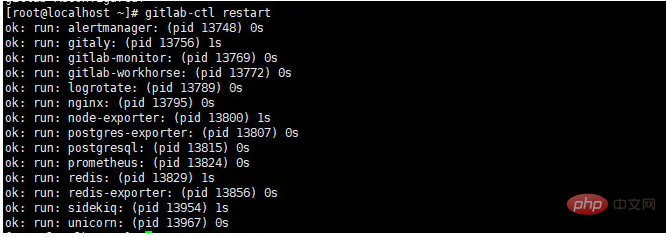
重启gitlab服务:gitlab-ctl restart
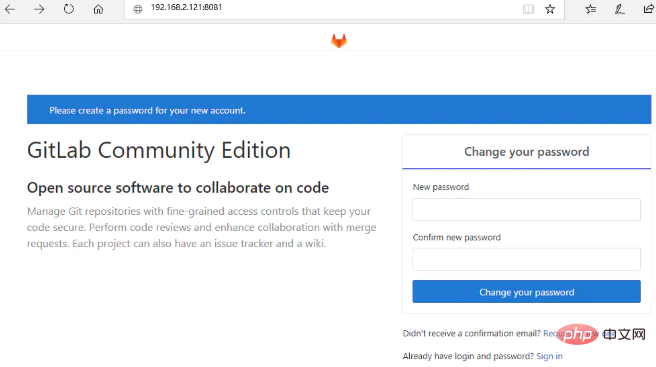
第五步:访问Gitlab,初次登录,修改密码;
初始用户:root
初始密码:5iveL!fe
若无法访问,则可以查看端口是否被禁用;
查看端口状态:netstat -lntp;若netstat命令不存在,安装yum install net-tools -y,因为CentOS7 不包含net-tools,因此ifconfig命令也不可用,安装net-tools后即可使用netstat、ifconfig命令;
防火墙开放端口:
firewall-cmd --zone=public --add-port=8081/tcp --permanent
重新加载防火墙列表:
firewall-cmd --reload
Atas ialah kandungan terperinci CentOS7如何搭建Gitlab服务器. Untuk maklumat lanjut, sila ikut artikel berkaitan lain di laman web China PHP!

Alat AI Hot

Undresser.AI Undress
Apl berkuasa AI untuk mencipta foto bogel yang realistik

AI Clothes Remover
Alat AI dalam talian untuk mengeluarkan pakaian daripada foto.

Undress AI Tool
Gambar buka pakaian secara percuma

Clothoff.io
Penyingkiran pakaian AI

Video Face Swap
Tukar muka dalam mana-mana video dengan mudah menggunakan alat tukar muka AI percuma kami!

Artikel Panas

Alat panas

Notepad++7.3.1
Editor kod yang mudah digunakan dan percuma

SublimeText3 versi Cina
Versi Cina, sangat mudah digunakan

Hantar Studio 13.0.1
Persekitaran pembangunan bersepadu PHP yang berkuasa

Dreamweaver CS6
Alat pembangunan web visual

SublimeText3 versi Mac
Perisian penyuntingan kod peringkat Tuhan (SublimeText3)

Topik panas
 CentOS7 pelbagai versi alamat muat turun imej dan penerangan versi (termasuk versi Semuanya)
Feb 29, 2024 am 09:20 AM
Semasa memuatkan CentOS-7.0-1406, terdapat banyak versi pilihan Bagi pengguna biasa, mereka tidak tahu yang mana satu untuk dipilih. Berikut adalah pengenalan ringkas: (1) CentOS-xxxx-LiveCD.ios dan CentOS-xxxx- Apa. adakah perbezaan antara bin-DVD.iso? Yang pertama hanya mempunyai 700M, dan yang kedua mempunyai 3.8G. Perbezaannya bukan sahaja dalam saiz, tetapi perbezaan yang lebih penting ialah CentOS-xxxx-LiveCD.ios hanya boleh dimuatkan ke dalam memori dan dijalankan, dan tidak boleh dipasang. Hanya CentOS-xxx-bin-DVD1.iso boleh dipasang pada cakera keras. (2) CentOS-xxx-bin-DVD1.iso, Ce
 Langkah-langkah untuk memasuki mod pembaikan kecemasan CentOS 7
Jan 13, 2024 am 09:36 AM
Buka halaman centos7 dan muncul: selamat datang ke mod kecemasan! afterloggingin, taip "journalctl -xb" untuk melihatsystemlogs, "systemctlreboot" toreboot, "systemctldefault" untuk mencuba semula kebootintodefaultmode. giverootpasswordformaintenance(??Control-D???): Penyelesaian: laksanakan r
 Bagaimana untuk mengakses dan membersihkan fail sampah dalam direktori /tmp dalam CentOS 7?
Dec 27, 2023 pm 09:10 PM
Terdapat banyak sampah dalam direktori tmp dalam sistem centos7 Jika anda ingin membersihkan sampah, bagaimanakah anda harus melakukannya? Mari kita lihat tutorial terperinci di bawah. Untuk melihat senarai fail dalam direktori fail tmp, laksanakan perintah cdtmp/ untuk beralih kepada direktori fail semasa tmp, dan laksanakan arahan ll untuk melihat senarai fail dalam direktori semasa. Seperti yang ditunjukkan di bawah. Gunakan arahan rm untuk memadam fail Perlu diingatkan bahawa arahan rm memadam fail dari sistem selama-lamanya, adalah disyorkan apabila menggunakan arahan rm, sebaiknya berikan gesaan sebelum memadam fail. Gunakan arahan rm-i nama fail, tunggu pengguna mengesahkan pemadaman (y) atau langkau pemadaman (n), dan sistem akan melakukan operasi yang sepadan. Seperti yang ditunjukkan di bawah.
 Bagaimana untuk menetapkan peraturan kata laluan dalam centos7 Bagaimana untuk menetapkan peraturan kata laluan dalam centos7?
Jan 07, 2024 pm 01:17 PM
Tetapkan peraturan kata laluan atas sebab keselamatan Tetapkan bilangan hari selepas kata laluan tamat tempoh. Pengguna mesti menukar kata laluan dalam masa beberapa hari. Tetapan ini hanya mempengaruhi pengguna yang dibuat, bukan pengguna sedia ada. Jika menetapkan kepada pengguna sedia ada, jalankan arahan "chage -M (hari) (pengguna)". PASS_MAX_DAYS60#Masa tamat kata laluan PASS_MIN_DAYS3#Masa penukaran kata laluan awal PASS_MIN_LEN8#Panjang kata laluan minimum PASS_WARN_AGE7#Masa segera tamat kata laluan Ulangi penggunaan sekatan kata laluan [root@linuxprobe~]#vi/etc/pam.d/system-15th#nearline-auth
 Bagaimana untuk memasang sambungan mbstring di bawah CENTOS7?
Jan 06, 2024 pm 09:59 PM
1.UncaughtError:Calltoundefinedfunctionmb_strlen(); Apabila ralat di atas berlaku, ini bermakna kami belum memasang sambungan mbstring 2. Masukkan direktori pemasangan PHP cd/temp001/php-7.1.0/ext/mbstring 3. Mulakan phpize(; /usr/local/bin /phpize atau /usr/local/php7-abel001/bin/phpize) arahan untuk memasang sambungan php 4../configure--with-php-config=/usr/local/php7-abel
 Penjelasan terperinci tentang arahan fail penyahmampatan (zip) di bawah centos7
Jan 07, 2024 pm 06:30 PM
1. Folder yang dimampatkan ialah fail zip [root@cgls]#zip-rmydata.zipmydata2 Nyahzip mydata.zip ke dalam direktori mydatabak [root@cgls]#unzipmydata.zip-dmydatabak3.mydata01 folder dan mydata02.txt dimampatkan ke dalam. mydata.zip[root@cgls]#zipmydata.zipmydata01mydata02.txt4 Terus nyahmampat fail mydata.zip [root@cgls]#unzipmydata.zip5
 Bagaimana untuk memasang Mysql dalam CentOS7 dan tetapkannya untuk bermula secara automatik semasa but
Jun 02, 2023 pm 08:36 PM
Centos7 tidak mempunyai pangkalan data mysql Pangkalan data lalai ialah mariadb (cawangan mysql). Anda boleh memasang pangkalan data mysql secara manual dengan mengikuti langkah-langkah di bawah. 1. Muat turun fail pemasangan rpm wgethttp://repo.mysql.com/mysql-community-release-el7.rpm2 Jalankan rpm untuk memasang rpm-ivhmysql-community-release-el7.rpm. pilihan berikut muncul: dependenciesresolved ==================================
 Bagaimana untuk mengubah suai dan menetapkan kekunci pintasan lalai CentOS7?
Jan 09, 2024 pm 06:14 PM
Apabila kekunci pintasan lalai bercanggah dengan kekunci perisian yang anda gunakan atau anda perlu menggunakan kekunci pintasan mengikut tabiat anda sendiri, anda perlu mengubah suai dan menetapkan kekunci pintasan lalai Bagaimana untuk mengubah suai kekunci pintasan lalai CentOS7? Mari kita lihat tutorial terperinci di bawah. 1. Mulakan sistem Centos7 dalam mesin maya dan masukkan desktop 2. Klik Applications->System Tools->Settings di sudut kiri atas 3. Masukkan antara muka tetapan dan klik pada peranti item di sebelah kanan. Dan tekan kekunci pintasan untuk ditetapkan pada papan kekunci untuk menukar kekunci pintasannya (perhatikan bahawa beberapa tidak boleh diubah!) 5. Selepas perubahan, seperti yang ditunjukkan di bawah, akhirnya klik Set, supaya tetapan kekunci pintasan pengubahsuaian selesai.


