

HTML5 canvas如何绘制酷炫能量线条效果(附代码)

本篇文章给大家介绍一下使用HTML5 canvas绘制酷炫能量线条特效的方法。有一定的参考价值,有需要的朋友可以参考一下,希望对你们有所助。
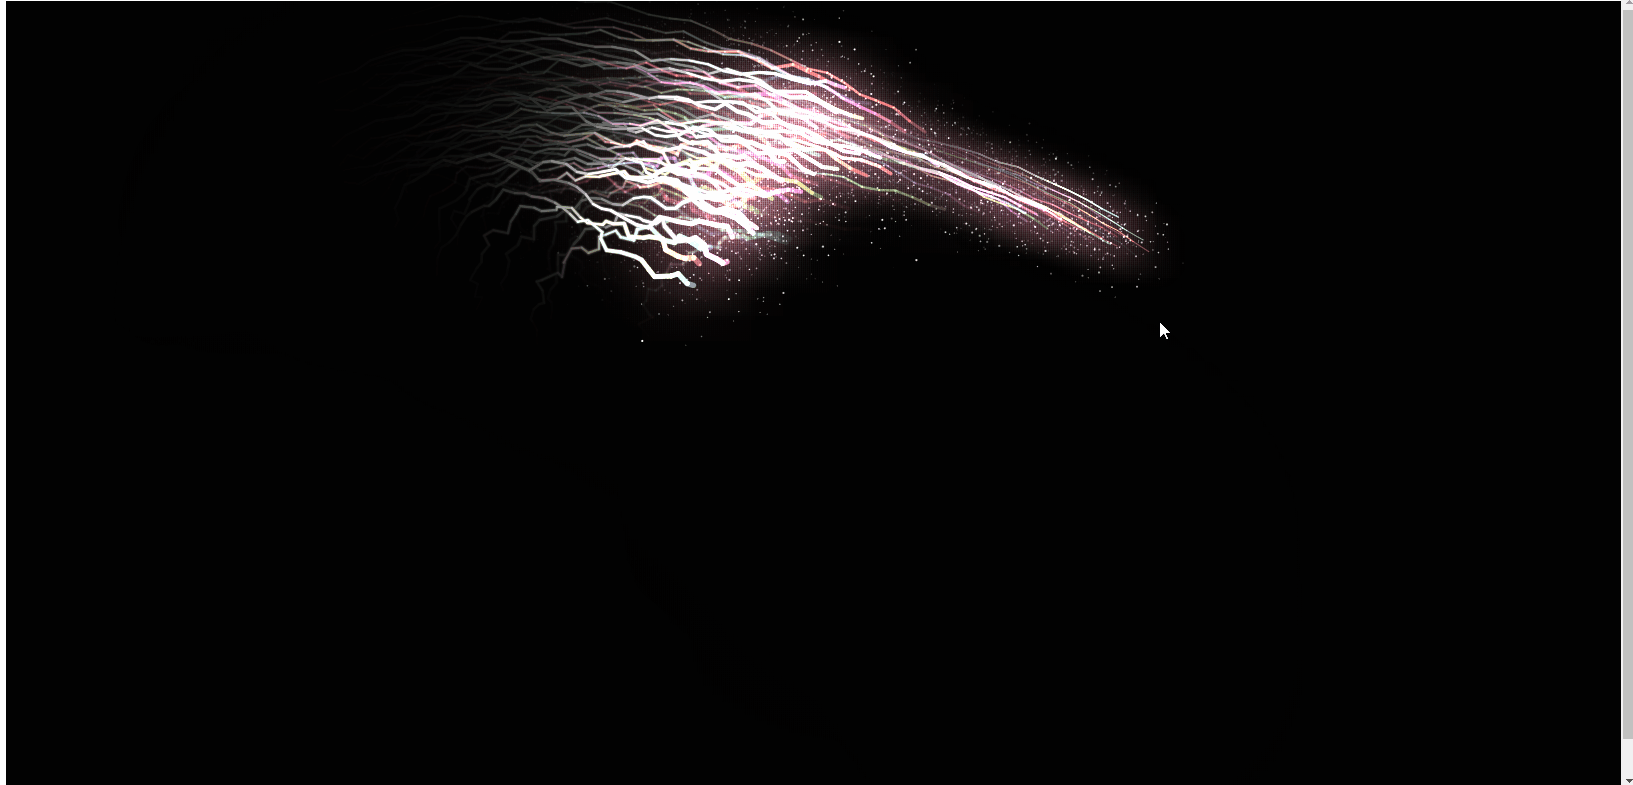
上面是效果图,下面直接附js代码,希望对大家有所帮助!!
// UTILconst PI = Math.PI,
  TWO_PI = Math.PI * 2;const Util = {};Util.timeStamp = function() {
  return window.performance.now();};Util.random = function(min, max) {
  return min + Math.random() * (max - min);};Util.map = function(a, b, c, d, e) {
  return (a - b) / (c - b) * (e - d) + d;};Util.lerp = function(value1, value2, amount) {
  return value1 + (value2 - value1) * amount;};Util.clamp = function(value, min, max) {
  return Math.max(min, Math.min(max, value));};// Vectorclass Vector {
  constructor(x, y) {
    this.x = x || 0;
    this.y = y || 0;
  }
  set(x, y) {
    this.x = x;
    this.y = y;
  }
  reset() {
    this.x = 0;
    this.y = 0;
  }
  fromAngle(angle) {
    let x = Math.cos(angle),
      y = Math.sin(angle);
    return new Vector(x, y);
  }
  add(vector) {
    this.x += vector.x;
    this.y += vector.y;
  }
  sub(vector) {
    this.x -= vector.x;
    this.y -= vector.y;
  }
  mult(scalar) {
    this.x *= scalar;
    this.y *= scalar;
  }
  p(scalar) {
    this.x /= scalar;
    this.y /= scalar;
  }
  dot(vector) {
    return vector.x * this.x + vector.y * this.y;
  }
  limit(limit_value) {
    if (this.mag() > limit_value) this.setMag(limit_value);
  }
  mag() {
    return Math.hypot(this.x, this.y);
  }
  setMag(new_mag) {
    if (this.mag() > 0) {
      this.normalize();
    } else {
      this.x = 1;
      this.y = 0;
    }
    this.mult(new_mag);
  }
  normalize() {
    let mag = this.mag();
    if (mag > 0) {
      this.x /= mag;
      this.y /= mag;
    }
  }
  heading() {
    return Math.atan2(this.y, this.x);
  }
  setHeading(angle) {
    let mag = this.mag();
    this.x = Math.cos(angle) * mag;
    this.y = Math.sin(angle) * mag;
  }
  dist(vector) {
    return new Vector(this.x - vector.x, this.y - vector.y).mag();
  }
  angle(vector) {
    return Math.atan2(vector.y - this.y, vector.x - this.x);
  }
  copy() {
    return new Vector(this.x, this.y);
  }}// Init canvaslet canvas = document.createElement("canvas"),
  ctx = canvas.getContext("2d"),
  H = (canvas.height = window.innerHeight),
  W = (canvas.width = window.innerWidth);document.body.appendChild(canvas);// Mouselet mouse = {
  x: W/2,
  y: H/2};canvas.onmousemove = function(event) {
  mouse.x = event.clientX - canvas.offsetLeft;
  mouse.y = event.clientY - canvas.offsetTop;};document.body.onresize = function(event){
  H = (canvas.height = window.innerHeight);
  W = (canvas.width = window.innerWidth);}// Let's goclass Arrow {
  constructor(x, y, target) {
    this.position = new Vector(x, y);
    this.velocity = new Vector().fromAngle(Util.random(0,TWO_PI));
    this.acceleration = new Vector(0, 0);
    this.target = target;
    this.travelled_distance = 0;
    this.min_size = 1;
    this.max_size = 6;
    this.size = Util.random(this.min_size, this.max_size);
    this.zone = this.size * 4;
    this.topSpeed = Util.map(this.size,this.min_size,this.max_size,40,10);
    let tailLength = Math.floor(Util.map(this.size, this.min_size, this.max_size, 4, 16));
    this.tail = [];
    for (let i = 0; i < tailLength; i++) {
      this.tail.push({
        x: this.position.x,
        y: this.position.y      });
    }
    this.wiggle_speed = Util.map(this.size, this.min_size, this.max_size, 2 , 1.2);
    this.blink_offset = Util.random(0, 100);
    this.alpha = Util.random(0.1,1)
  }
  render() {
    this.update();
    this.draw();
  }
  update() {
    let old_position = this.position.copy();
    // Focus on target
    let t = new Vector(this.target.x, this.target.y),
      angle = this.position.angle(t);
    let d_f_target = t.dist(this.position);
      let f = new Vector().fromAngle(angle);

      f.setMag(Util.map(Util.clamp(d_f_target,0,400), 0, 400, 0, this.topSpeed * 0.1));
      this.addForce(f);

    // Update position and velocity
    this.velocity.add(this.acceleration);
    if(d_f_target < 800){
       this.velocity.limit(Util.map(Util.clamp(d_f_target,0,800), 0, 800, this.topSpeed*0.4, this.topSpeed));
       }else{
         this.velocity.limit(this.topSpeed);
       }
    this.position.add(this.velocity);
    // Reset acceleration for the next loop
    this.acceleration.mult(0);
    this.travelled_distance += old_position.dist(this.position);

      let wiggle =
        Math.sin(frame * this.wiggle_speed) *
        Util.map(this.velocity.mag(), 0, this.topSpeed, 0, this.size);
      let w_a = this.velocity.heading() + Math.PI / 2;

      let w_x = this.position.x + Math.cos(w_a) * wiggle,
        w_y = this.position.y + Math.sin(w_a) * wiggle;

      this.travelled_distance = 0;
      let from = this.tail.length - 1,
        to = 0;
          let n = new Vector().fromAngle(Util.random(0,TWO_PI));
      n.setMag(Math.random()*this.size);


      var tail = { x: w_x+ n.x, y: w_y + n.y};
      this.tail.splice(from, 1);
      this.tail.splice(to, 0, tail);

  }
  draw() {

        let energy = Util.map(this.velocity.mag(),0,this.topSpeed,0.1,1);


    let color =
      "hsl("+Math.sin((frame + this.blink_offset) * 0.1) * 360+",50%,"+

        Util.map(this.velocity.mag(),0,this.topSpeed,40,100) * this.alpha
    +"%)";
    ctx.globalAlpha = this.alpha;

    ctx.strokeStyle = color;
    for (let i = 0; i < this.tail.length - 1; i++) {
      let t = this.tail[i],
        next_t = this.tail[i + 1];
      ctx.lineWidth = Util.map(i, 0, this.tail.length - 1, this.size, 1);
      ctx.beginPath();
      ctx.moveTo(t.x, t.y);
      ctx.lineTo(next_t.x, next_t.y);
      ctx.closePath();
      ctx.stroke();
    }

    let gradient_size = 140 * energy;var grd = ctx.createRadialGradient(
  this.position.x,this.position.y , 5,
  this.position.x,this.position.y, gradient_size);grd.addColorStop(0, "rgba(255,255,255,0.01)");grd.addColorStop(0.1, "rgba(255,120,200,0.02)");grd.addColorStop(0.9, "rgba(255,255,120,0)");grd.addColorStop(1, "rgba(0,0,0,0)");// Fill with gradientctx.fillStyle = grd;ctx.fillRect(this.position.x - gradient_size / 2 ,this.position.y - gradient_size / 2 , gradient_size, gradient_size);

    ctx.globalAlpha = energy+0.2;
    ctx.fillStyle = "white";
    for(let i = 0; i < 4; i++){
      let n = new Vector().fromAngle(Util.random(0,TWO_PI));
      n.setMag(Math.random()*energy*100);
      n.add(this.position);
      ctx.beginPath();
      ctx.arc(n.x,n.y,Math.random(),0,TWO_PI)
      ctx.fill();
    }

  }
  addForce(vector) {
    this.acceleration.add(vector);
  }
  avoid(others) {
    others.forEach(other => {
      if (other !== this) {
        let dist = this.position.dist(other.position),
          max_dist = this.zone + other.size;
        if (max_dist - dist >= 0) {
          let angle = other.position.angle(this.position);
          let force = new Vector().fromAngle(angle);
          force.setMag(Util.map(dist, 0, max_dist, 2, 0));
          this.addForce(force);
        }
      }
    });
  }}let arrows = [];for (let i = 0; i < 100; i++) {
  arrows.push(new Arrow(W / 2, H / 2, mouse));}let frame = 0;ctx.strokeStyle = "white";function loop() {
  ctx.fillStyle="black";
  ctx.globalCompositeOperation = "source-over";
  ctx.globalAlpha = 0.2;
  ctx.fillRect(0, 0, W, H);
  ctx.globalAlpha = 1;
  ctx.globalCompositeOperation = "lighter";
  arrows.forEach(a => {
    a.avoid(arrows);
  });
  arrows.forEach(a => {
    a.render();
  });
  frame += 1;
requestAnimationFrame(loop);}ctx.lineCap = "round";ctx.lineJoin = "round";loop();推荐学习:Html5视频教程
Atas ialah kandungan terperinci HTML5 canvas如何绘制酷炫能量线条效果(附代码). Untuk maklumat lanjut, sila ikut artikel berkaitan lain di laman web China PHP!

Alat AI Hot

Undresser.AI Undress
Apl berkuasa AI untuk mencipta foto bogel yang realistik

AI Clothes Remover
Alat AI dalam talian untuk mengeluarkan pakaian daripada foto.

Undress AI Tool
Gambar buka pakaian secara percuma

Clothoff.io
Penyingkiran pakaian AI

AI Hentai Generator
Menjana ai hentai secara percuma.

Artikel Panas
Alat panas

Notepad++7.3.1
Editor kod yang mudah digunakan dan percuma

SublimeText3 versi Cina
Versi Cina, sangat mudah digunakan

Hantar Studio 13.0.1
Persekitaran pembangunan bersepadu PHP yang berkuasa

Dreamweaver CS6
Alat pembangunan web visual

SublimeText3 versi Mac
Perisian penyuntingan kod peringkat Tuhan (SublimeText3)
Topik panas
 1369
1369
 52
52

 Sempadan Jadual dalam HTML
Sep 04, 2024 pm 04:49 PM
Sempadan Jadual dalam HTML
Sep 04, 2024 pm 04:49 PM
Panduan untuk Sempadan Jadual dalam HTML. Di sini kita membincangkan pelbagai cara untuk menentukan sempadan jadual dengan contoh Sempadan Jadual dalam HTML.
 Jadual Bersarang dalam HTML
Sep 04, 2024 pm 04:49 PM
Jadual Bersarang dalam HTML
Sep 04, 2024 pm 04:49 PM
Ini ialah panduan untuk Nested Table dalam HTML. Di sini kita membincangkan cara membuat jadual dalam jadual bersama-sama dengan contoh masing-masing.
 HTML jidar-kiri
Sep 04, 2024 pm 04:48 PM
HTML jidar-kiri
Sep 04, 2024 pm 04:48 PM
Panduan untuk HTML margin-kiri. Di sini kita membincangkan gambaran keseluruhan ringkas tentang HTML margin-left dan Contoh-contohnya bersama-sama dengan Pelaksanaan Kodnya.
 Susun Atur Jadual HTML
Sep 04, 2024 pm 04:54 PM
Susun Atur Jadual HTML
Sep 04, 2024 pm 04:54 PM
Panduan untuk Susun Atur Jadual HTML. Di sini kita membincangkan Nilai Susun Atur Jadual HTML bersama-sama dengan contoh dan output n perincian.
 Senarai Tertib HTML
Sep 04, 2024 pm 04:43 PM
Senarai Tertib HTML
Sep 04, 2024 pm 04:43 PM
Panduan kepada Senarai Tertib HTML. Di sini kami juga membincangkan pengenalan senarai dan jenis Tertib HTML bersama-sama dengan contoh mereka masing-masing
 Pemegang Tempat Input HTML
Sep 04, 2024 pm 04:54 PM
Pemegang Tempat Input HTML
Sep 04, 2024 pm 04:54 PM
Panduan untuk Pemegang Tempat Input HTML. Di sini kita membincangkan Contoh Pemegang Tempat Input HTML bersama-sama dengan kod dan output.
 Memindahkan Teks dalam HTML
Sep 04, 2024 pm 04:45 PM
Memindahkan Teks dalam HTML
Sep 04, 2024 pm 04:45 PM
Panduan untuk Memindahkan Teks dalam HTML. Di sini kita membincangkan pengenalan, cara teg marquee berfungsi dengan sintaks dan contoh untuk dilaksanakan.
 Bagaimana anda menghuraikan dan memproses HTML/XML dalam PHP?
Feb 07, 2025 am 11:57 AM
Bagaimana anda menghuraikan dan memproses HTML/XML dalam PHP?
Feb 07, 2025 am 11:57 AM
Tutorial ini menunjukkan cara memproses dokumen XML dengan cekap menggunakan PHP. XML (bahasa markup extensible) adalah bahasa markup berasaskan teks yang serba boleh yang direka untuk pembacaan manusia dan parsing mesin. Ia biasanya digunakan untuk penyimpanan data
