
Berikut ialah dua paparan ujian ringkas dan terdapat lebih banyak contoh ujian pada penghujungnya.
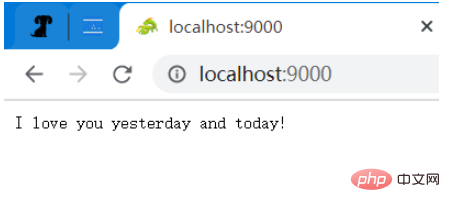
Akses direktori akar, dan ayat (rentetan) akan dikembalikan (Nota: Naga hijau hanya boleh dilihat menggunakan penyemak imbas, dan imej itu sendiri juga tergolong dalam permintaan ) Jenis Kandungan: application/json
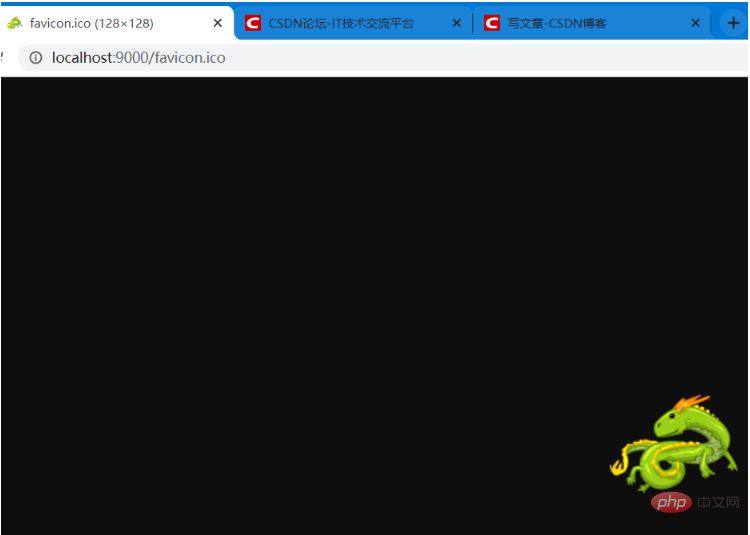
Akses imej ini secara individu dan nilai pulangan ialah imej (data binari)
Jadi selagi pengguna menetapkan maklumat permintaan dan maklumat respons terlebih dahulu, apabila mengakses permintaan tertentu , mereka boleh Mengembalikan data tertentu. Oleh itu, saya mereka bentuk fail xml yang mudah untuk mengkonfigurasi maklumat ini Lebih mudah untuk menggunakan konfigurasi xml Fail konfigurasi sifat tidak boleh menyatakan maklumat hierarki dan hanya boleh digunakan untuk keperluan konfigurasi yang mudah.
Satu permintaan_dan_tindak balas yang besar mewakili banyak permintaan dan konfigurasi tindak balas Setiap nod permintaan_dan_tindak balas mewakili permintaan permintaan dan balas. 🎜> Maklumat respons, yang mengandungi maklumat asas permintaan dan respons. Permintaan GET terutamanya termasuk: (kaedah) kaedah permintaan dan (laluan) laluan dan parameter permintaan. Permintaan kaedah POST juga termasuk (param ) parameter permintaan. respons termasuk: jenis_kandungan (jenis kandungan respons) dan nilai (kandungan respons).
Perbezaan antara kaedah GET dan POST ialah laluan permintaan dan parameter permintaan kaedah GET adalah bersama (kedua-duanya dalam pengepala permintaan, tanpa badan permintaan), manakala parameter permintaan kaedah POST adalah dalam Dalam badan permintaan, terdapat pemisahan CRLF antara pengepala permintaan dan badan permintaan.
fail xml<?xml version="1.0" encoding="UTF-8"?>
<request_and_responses>
<!-- & 需要使用转义字符 & -->
<request_and_response>
<request>
<method>GET</method>
<path>/</path>
</request>
<response>
<content_type>application/json</content_type>
<value>I love you yesterday and today!</value>
</response>
</request_and_response>
<request_and_response>
<request>
<method>GET</method>
<path>/login?account=123&pwd=456</path>
</request>
<response>
<content_type>application/json</content_type>
<value>success</value>
</response>
</request_and_response>
<request_and_response>
<request>
<method>GET</method>
<path>/query/龙</path>
</request>
<response>
<content_type>application/json</content_type>
<value>龙是中国等东亚国家古代神话传说生活于海中的神异生物。</value>
</response>
</request_and_response>
<request_and_response>
<request>
<method>POST</method>
<path>/login</path>
<param>account=123&pwd=456</param>
</request>
<response>
<content_type>application/json</content_type>
<value>{"result":success}</value>
</response>
</request_and_response>
<request_and_response>
<request>
<method>POST</method>
<path>/login</path>
<param>workId=12345</param>
</request>
<response>
<content_type>application/json</content_type>
<value>{"result":"success", "data":{"name":"李工", "sex":"男", "age":35}}</value>
</response>
</request_and_response>
<request_and_response>
<request>
<method>GET</method>
<path>/pictures/husky.jpeg</path>
</request>
<response>
<content_type>image/jpeg</content_type>
<value>D:/DB/husky.jpeg</value>
</response>
</request_and_response>
<!-- 浏览器访问时的图标 -->
<request_and_response>
<request>
<method>GET</method>
<path>/favicon.ico</path>
</request>
<response>
<content_type>image/webp</content_type>
<value>D:/DB/favicon.ico</value>
</response>
</request_and_response>
</request_and_responses>package com.dragon;
public class RequestAndResponse {
private String method;
private String path;
private String param;
private String content_type;
private String value;
public String getMethod() {
return method;
}
public void setMethod(String method) {
this.method = method;
}
public String getPath() {
return path;
}
public void setPath(String path) {
this.path = path;
}
public String getParam() {
return param;
}
public void setParam(String param) {
this.param = param;
}
public String getContent_type() {
return content_type;
}
public void setContent_type(String content_type) {
this.content_type = content_type;
}
public String getValue() {
return value;
}
public void setValue(String value) {
this.value = value;
}
@Override
public String toString() {
return "RequestAndResponse [method=" + method + ", path=" + path + ", param=" + param + ", content_type="
+ content_type + ", value=" + value + "]";
}
}Nota: Saya tidak begitu mahir dalam menamakan, ia agak terlalu panjang, jadi redha sahaja! Ha ha. Nota: Pakej balang untuk penghuraian xml digunakan di sini: dom4j.
package com.dragon;

import java.io.File;
import java.util.ArrayList;
import java.util.Iterator;
import java.util.List;

import org.dom4j.Document;
import org.dom4j.DocumentException;
import org.dom4j.Element;
import org.dom4j.io.SAXReader;

/**
 * 解析 xml 文件中配置的用户请求和响应数据。
 * */
public class RequestAndResponseResolver {
	private static final String method = "method";
	private static final String path = "path";
	private static final String param = "param";
	private static final String content_type = "content_type";
	private static final String value = "value";

	public static List<RequestAndResponse> listRequestAndResponse(String filePath) throws DocumentException{
		File file = new File(filePath);
		SAXReader reader = new SAXReader();
		Document doc = reader.read(file);

		Element root = doc.getRootElement();
		//获取根元素下面所有的子元素,利用迭代器方式
		Iterator<?> it = root.elementIterator();

		List<RequestAndResponse> requestAndResponses = new ArrayList<>();
		while (it.hasNext()) {
			//取出元素request_and_response
			Element e = (Element)it.next();
			//依次遍历每一个 request_and_response,获取相应的信息
			Element request = e.element("request");
			Element response = e.element("response");

			RequestAndResponse requestAndResponse = new RequestAndResponse();
			requestAndResponse.setMethod(request.elementText(method));
			requestAndResponse.setPath(request.elementText(path));
			requestAndResponse.setParam(request.elementText(param));   //GET 方式,这个属性为 null
			requestAndResponse.setContent_type(response.elementText(content_type));
			requestAndResponse.setValue(response.elementText(value));

			requestAndResponses.add(requestAndResponse);
		}

		return requestAndResponses;
	}
}Pengetahuan yang terlibat di sini pada asasnya sama seperti menggunakan Socket Satu-satunya perbezaan adalah pemprosesan kandungan itu sendiri, kerana kandungan itu sendiri mengandungi bahagian data dan bukan data. (Dari perspektif HTTP, anda hanya boleh melihat bahagian data.) Menggunakan pengaturcaraan Socket, secara ringkasnya, adalah untuk mendengar port dan memprosesnya sebaik sahaja sambungan datang. (BIO tradisional digunakan di sini, saya tidak tahu bahagian NIO.)
Pemprosesan saya di sini adalah menggunakan kumpulan benang untuk pemprosesan, dan setiap sambungan menggunakan satu utas untuk pemprosesan. Untuk kod lengkap kelas ini (kelasPelayan), lihat di bawah.
	public void receive() {
		//使用线程池处理请求
		ExecutorService pool = Executors.newFixedThreadPool(THREAD_NUMBER);

		while (true) {
			try {
				Socket connection = server.accept();
				pool.submit(new UserConnection(connection));
			} catch (IOException e) {
				System.out.println(this.getDate()+" 用户连接断开");
				e.printStackTrace();
			}
		}
}package com.dragon;
import java.io.IOException;
import java.net.ServerSocket;
import java.net.Socket;
import java.text.SimpleDateFormat;
import java.util.Date;
import java.util.concurrent.ExecutorService;
import java.util.concurrent.Executors;
public class Server {
private static final int THREAD_NUMBER = 10;
private ServerSocket server;
private int port;
public Server(int port) {
this.port = port;
}
//启动服务。
public void start() {
try {
server = new ServerSocket(port);
System.out.println(this.getDate()+" 服务启动!");
this.receive();
} catch (IOException e) {
System.out.println(this.getDate()+" 服务启动失败!");
e.printStackTrace();
}
}
public void receive() {
//使用线程池处理请求
ExecutorService pool = Executors.newFixedThreadPool(THREAD_NUMBER);
while (true) {
try {
Socket connection = server.accept();
pool.submit(new UserConnection(connection));
} catch (IOException e) {
System.out.println(this.getDate()+" 用户连接断开");
e.printStackTrace();
}
}
}
private String getDate() {
String format = "yyyy-MM-dd HH:mm:ss";
Date now = new Date();
SimpleDateFormat dateFormat = new SimpleDateFormat(format);
return dateFormat.format(now);
}
}Mesej permintaan HTTP ialah aliran data binari daripada peringkat TCP (rangkaian berlapis) , jadi kami boleh terus menggunakan TCP untuk menerima strim ini, Kerana menghuraikan mesej yang melibatkan data binari (seperti muat naik fail) adalah lebih rumit, dan saya tidak tahu bagaimana untuk melakukannya, jadi di sini saya hanya menguji yang mudah yang tidak mengandungi fail binari. )
Nota: Oleh kerana analisis khusus juga sangat rumit, ia melibatkan struktur mesej HTTP, tetapi jika ia tidak melibatkan muat naik fail, maka keseluruhan mesej adalah beberapa data aksara, jadi baca sekali gus Mesej permintaan kemudiannya ditukar kepada rentetan dan dihuraikan menggunakan rentetan.in = connection.getInputStream();
out = connection.getOutputStream();
//这个数字是随便设置的,因为要一次性读取整个请求报文,不能太小。(但是其实这个也很大了)
byte[] b = new byte[5*1024];
BufferedInputStream input = new BufferedInputStream(in);
int count = input.read(b);
String requestMessage = new String(b, 0, count);
System.out.println("====================报文分隔符上界===================");
System.out.println(requestMessage);
System.out.println("====================报文分隔符下界===================");Permintaan dan maklum balas permulaan maklumat Penerangan: Gunakan blok permulaan statik untuk memulakan maklumat dan mengkonfigurasi pengguna terlebih dahulu maklumat xml dibaca ke dalam memori, yang telah disebutkan sebelum ini.
// 初始化配置好的信息
static {
try {
requestAndResponses = RequestAndResponseResolver.listRequestAndResponse("./src/com/dragon/request_and_response.xml");
} catch (DocumentException e) {
e.printStackTrace();
}
}Permintaan memproses dan mendapatkan maklumat respons Kerana ini adalah panggilan simulasi, jadi saya memfokuskan pada tiga bahagian data dalam permintaan itu pengepala: Kaedah permintaan (kaedah), laluan permintaan (laluan), parameter permintaan (param) . Kaedah GET dan kaedah POST diproses secara berasingan Perbezaan antara GET dan POST diperkenalkan secara ringkas di atas (tetapi ia tidak cukup terperinci, anda boleh merujuk maklumat lain di Internet untuk memahami).
Melalui kod ini, jika ia adalah kaedah GET, keluarkan content_type (jenis data nilai pulangan) dan nilai (data nilai pulangan) dalam objek RequestAndResponse, dan tetapkan ia kepada pembolehubah tempatan content_type dan nilai.if ("GET".compareTo(method) == 0) {
for (RequestAndResponse r : requestAndResponses) {
//这里需要对 get 方式时的请求进行解码,因为一些非 ASCII 码字符会被编码,比如汉字。
path = URLDecoder.decode(path, ENCODE);
if (r.getMethod().equals(method) && r.getPath().equals(path)) {
content_type = r.getContent_type();
value = r.getValue();
break;
}
}
} else {
//POST 方式,请求参数是在请求体中的,请求头和请求体中间有一个换行符。
String param = requestMessage.substring(requestMessage.lastIndexOf(CRLF) + 2); //这里是不包括 CRLF 的两个字符的。
for (RequestAndResponse r : requestAndResponses) { //因为这个get方式的 参数为空,所以这里必须是 param 在前。
if (r.getMethod().equals(method) && r.getPath().equals(path) && param.equals(r.getParam())) {
content_type = r.getContent_type();
value = r.getValue();
break;
}
}
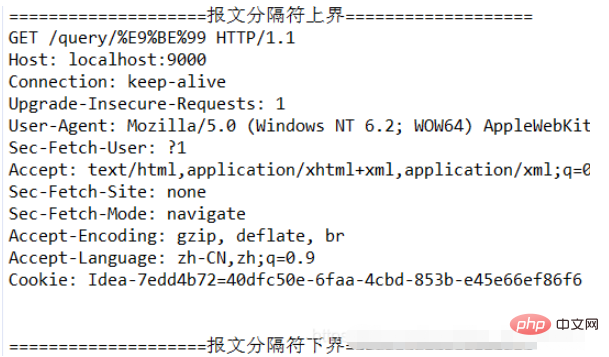
}这里介绍一个知识:URL 中的字符是特定的,不允许中文等字符的出现,所以发送请求时会对中文等字符进行编码,如果直接使用 equals 方法的,当然不会相等了,所以需要先对数据进行解码,然后再调用 equals 方法进行处理。这个是我们平时广泛使用 的东西,有时候使用浏览器可以看到带很多奇怪字符 URL,它们都是被处理过的。
举一个简单的例子:
String str = "我爱你";
String en_str = java.net.URLEncoder.encode(str, "UTF-8");
String de_str = java.net.URLDecoder.decode(en_str, "UTF-8");
System.out.println("编码字符:" + en_str);
System.out.println("解码字符:" + de_str);
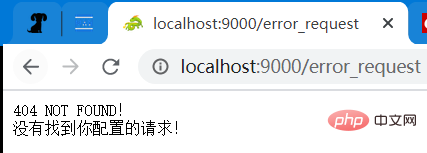
注意:这里有一个特殊的情况,如果发起了没有配置的请求方法和路径,那么程序会出错。所以,这里的 content_type 和 value 有一个默认的值,而且非常有趣!
执行响应 响应信息主要关注几点:响应信息长度(Content-Length)(按字节数计算)、响应内容类型(Content-Type)。
虽然发送的请求里不能带二进制文件,但是响应信息是可以返回文件的,而且使用 Content-Length (一次性发送),不使用 Chunked 分块发送(这里我还不太明白,而且只是模拟,应该使用一些简单的小文件。)。
下面是区分响应类型为 json (字符串) 还是 文件(二进制数据) 的代码:
如果是字符串,则 value 的值是字符串的值,如果是文件,则 value 的值为一个具体的本地路径。(不应该使用网络图片,即使修改程序可以做到也没有必要,因为这样就需要依赖网络了。)
//这里我只处理字符串类和文件类两种响应体
//响应体
int len = 0;
String responseBody = null; //响应值是 json 数据
File file = null; //响应值是 文件
if (content_type.equals("application/json")) { //如果是 json 数据,否则就是 文件类数据(图片、文档或其它文件)
responseBody = value;
len = responseBody.getBytes().length; //响应体的字节数,注意是字节数!
} else {
file = new File(value);
len = (int) file.length();
}然后就可以准备发送响应数据了,下面是发送响应的代码,注意报文的具体结构。
//响应头
responseHeader.append("HTTP/1.1").append(BLANK);
responseHeader.append(200).append(BLANK);
responseHeader.append("OK").append(CRLF);
responseHeader.append("Server:"+"CrazyDragon").append(CRLF);
responseHeader.append("Date:").append(BLANK).append(date).append(CRLF);
responseHeader.append("Content-Type:").append(BLANK).append(content_type).append(CRLF);
responseHeader.append("Content-Length:").append(BLANK).append(len).append(CRLF);
responseHeader.append(CRLF);
//如果 字符串变量 responseBody 不为空,则说明返回值是 json 数据(字符串)
//否则就是文件类的流了。
if (responseBody != null) {
String response = responseHeader.toString() + responseBody;
out.write(response.getBytes("UTF-8"));
} else {
out.write(responseHeader.toString().getBytes("UTF-8"));
int hasRead = 0;
byte[] data = new byte[4*1024];
try (BufferedInputStream inputStream = new BufferedInputStream(new FileInputStream(file))) {
while ((hasRead = inputStream.read(data)) != -1) {
out.write(data, 0, hasRead);
}
}
}
out.flush(); //必要的刷新流操作。User Connection 的完整代码:
package com.dragon;
import java.io.BufferedInputStream;
import java.io.File;
import java.io.FileInputStream;
import java.io.IOException;
import java.io.InputStream;
import java.io.OutputStream;
import java.net.Socket;
import java.net.URLDecoder;
import java.text.SimpleDateFormat;
import java.util.Date;
import java.util.List;
import java.util.Locale;
import java.util.TimeZone;
import org.dom4j.DocumentException;
public class UserConnection implements Runnable{
private static final String BLANK = " ";
private static final String CRLF = "\r\n"; //换行符,不能写反了!
private static final String ENCODE = "UTF-8";
private static final String default_content_type = "application/json"; //当任何匹配路径都没有时。
private static final String default_value = "404 NOT FOUND!\n没有找到你配置的请求!";
private static List requestAndResponses;
private Socket connection;
// 初始化配置好的信息
static {
try {
requestAndResponses = RequestAndResponseResolver.listRequestAndResponse("./src/com/dragon/request_and_response.xml");
} catch (DocumentException e) {
e.printStackTrace();
}
}
public UserConnection(Socket connection) {
this.connection = connection;
}
@Override
public void run() {
InputStream in = null;
OutputStream out = null;
try {
in = connection.getInputStream();
out = connection.getOutputStream();

//这个数字是随便设置的,因为要一次性读取整个请求报文,不能太小。(但是其实这个也很大了)
byte[] b = new byte[5*1024];
BufferedInputStream input = new BufferedInputStream(in);
int count = input.read(b);
String requestMessage = new String(b, 0, count);
System.out.println("====================报文分隔符上界===================");
System.out.println(requestMessage);
System.out.println("====================报文分隔符下界===================");
//以第一个 换行符 CRLF 为界限取出 请求路径和请求参数
String requestLine = requestMessage.substring(0, requestMessage.indexOf(CRLF));
String[] line = requestLine.split("\\s");
String method = line[0]; //考虑大小写。
String path = line[1];
//这个数组是有三个元素,最后一个是 协议的版本,这里不需要,就不处理了。
String content_type = default_content_type;
String value = default_value;
if ("GET".compareTo(method) == 0) {
// System.out.println("请求方式:" + method + " 请求路径(含参数):" + path);
for (RequestAndResponse r : requestAndResponses) {
//这里需要对 get 方式时的请求进行解码,因为一些非 ASCII 码字符会被编码,比如汉字。
path = URLDecoder.decode(path, ENCODE);
if (r.getMethod().equals(method) && r.getPath().equals(path)) {
content_type = r.getContent_type();
value = r.getValue();
break;
}
}
} else {
//POST 方式,请求参数是在请求体中的,请求头和请求体中间有一个换行符。
String param = requestMessage.substring(requestMessage.lastIndexOf(CRLF) + 2); //这里是不包括 CRLF 的两个字符的。
for (RequestAndResponse r : requestAndResponses) { //因为这个get方式的 参数为空,所以这里必须是 param 在前。
if (r.getMethod().equals(method) && r.getPath().equals(path) && param.equals(r.getParam())) {
content_type = r.getContent_type();
value = r.getValue();
System.out.println(content_type+" "+value);
break;
}
}
}
StringBuilder responseHeader = new StringBuilder();
String date = this.getDate();
	//这里我只处理字符串类和文件类两种响应体
	//响应体
	int len = 0;
	String responseBody = null;   //响应值是 json 数据
	File file = null; //响应值是 文件
	if (content_type.equals("application/json")) {  //如果是 json 数据,否则就是 文件类数据(图片、文档或其它文件)
		 responseBody = value;
		 len = responseBody.getBytes().length;   //响应体的字节数,注意是字节数!
	} else {
		 file = new File(value);
		 len = (int) file.length();
	}
	//响应头
	responseHeader.append("HTTP/1.1").append(BLANK);
	responseHeader.append(200).append(BLANK);
	responseHeader.append("OK").append(CRLF);
	responseHeader.append("Server:"+"CrazyDragon").append(CRLF);
	responseHeader.append("Date:").append(BLANK).append(date).append(CRLF);
	responseHeader.append("Content-Type:").append(BLANK).append(content_type).append(CRLF);
	responseHeader.append("Content-Length:").append(BLANK).append(len).append(CRLF);
	responseHeader.append(CRLF);

	//如果 字符串变量 responseBody 不为空,则说明返回值是 json 数据(字符串)
	//否则就是文件类的流了。
	if (responseBody != null) {
		String response = responseHeader.toString() + responseBody;
		out.write(response.getBytes("UTF-8"));
	} else {
		out.write(responseHeader.toString().getBytes("UTF-8"));

		int hasRead = 0;
		byte[] data = new byte[4*1024];
		try (BufferedInputStream inputStream = new BufferedInputStream(new FileInputStream(file))) {
			while ((hasRead = inputStream.read(data)) != -1) {
				out.write(data, 0, hasRead);
			}
		}
	}
	out.flush();   //必要的刷新流操作。
} catch (IOException e) {
e.printStackTrace();
} finally {
try {
if (in != null)
in.close();
} catch (IOException e) {
e.printStackTrace();
}
}
}
private String getDate() {
Date date = new Date();
SimpleDateFormat format = new SimpleDateFormat("EEE, d MMM yyyy HH:mm:ss 'GMT'", Locale.CHINA);
format.setTimeZone(TimeZone.getTimeZone("GMT")); // 设置时区为GMT
return format.format(date);
}
} package com.dragon;
public class Main {
public static void main(String[] args) {
Server server = new Server(9000);
server.start();
}
}更多的测试示例
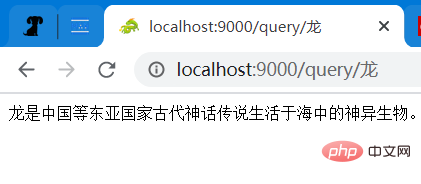
请求方式:GET 请求路径和参数:/query/龙 预期的响应类型:application/json 预期的响应值:龙是中国等东亚国家古代神话传说生活于海中的神异生物。 测试结果:
请求方式:GET 请求路径和参数:/login?account=123&pwd=456 预期的响应类型:application/json 预期的响应值:success 测试结果:

请求方式:GET 请求路径和参数:/pictures/husky.jpeg 预期的响应类型:image/jpeg 预期的响应值:一张图片(地址为:D:/DB/husky.jpeg)
请求方式:POST 请求路径:/login 请求参数:account=123&pwd=456 预期的响应类型:application/json 预期的响应值:{“result”:success} 测试结果:

注:这是使用 HttpClient 发送的 POST 请求。

接收到的 POST 请求:
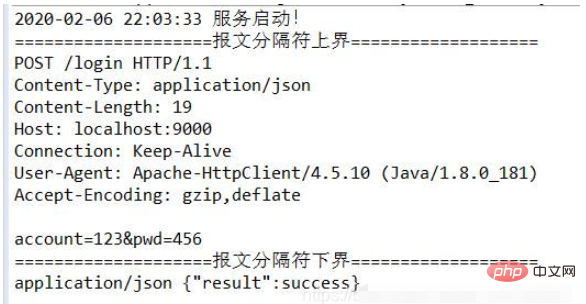
接收到的 GET 请求(含中文参数): /query/龙 注意:“龙” 已经被编码了。
Atas ialah kandungan terperinci Bagaimana untuk melaksanakan panggilan antara muka hadapan hadapan simulasi HttpServer dalam Java. Untuk maklumat lanjut, sila ikut artikel berkaitan lain di laman web China PHP!


