 Operasi dan penyelenggaraan
 Nginx
Nginx
 Bagaimana untuk membina persekitaran .NET Core2.0+Nginx+Supervisor di bawah sistem Centos7
Bagaimana untuk membina persekitaran .NET Core2.0+Nginx+Supervisor di bawah sistem Centos7
1. Pengenalan kepada linux .net core
Dari segi sejarah, Microsoft hanya menyediakan sokongan .net untuk platformnya sendiri, yang menjadikan ini "secara teori" merentas platform. Sokongan rangka kerja pada linux dan macos hanya boleh disediakan oleh projek pihak ketiga (seperti mono .net).
Sehingga Microsoft melancarkan teras .net sumber terbuka sepenuhnya. Platform sumber terbuka ini serasi dengan standard .NET dan menyediakan API yang konsisten sepenuhnya pada Windows, Linux dan macOS. Walaupun rangka kerja .net padat ini hanyalah subset daripada .net standard, ia sudah cukup berkuasa.
Di satu pihak, rangka kerja kecil ini membenarkan beberapa aplikasi berfungsi untuk dijalankan pada tiga platform pada masa yang sama (sama seperti beberapa skrip python berfungsi), sebaliknya, ia juga membenarkan pelayan menjalankan kakitangan Penyelenggaraan gunakan program perkhidmatan asp.net pada pelayan Linux (terutamanya untuk pelayan yang sukar untuk menjalankan pelayan Windows).
2. Persediaan sebelum penggunaan persekitaran linux .net core2.0
1 . 1511
2. Persediaan sebelum pemasangan (matikan firewall, matikan selinux)
1) Matikan firewall:
systemctl stop firewalld.service #停止firewall
systemctl disable firewalld.service #禁止firewall开机启动
firewall-cmd --state #查看默认防火墙状态(关闭后显示notrunning,开启后显示running)
2) Matikan selinux
rreeeLihat perubahan Fail akhir adalah seperti berikut:
sed -i "s/selinux=enforcing/selinux=disabled/g" /etc/selinux/config
3) Mulakan semula centos
[root@localhost ~]# cat /etc/selinux/config

# this file controls the state of selinux on the system.
# selinux= can take one of these three values:
#   enforcing - selinux security policy is enforced.
#   permissive - selinux prints warnings instead of enforcing.
#   disabled - no selinux policy is loaded.
selinux=disabled
# selinuxtype= can take one of three two values:
#   targeted - targeted processes are protected,
#   minimum - modification of targeted policy. only selected processes are protected.
#   mls - multi level security protection.
selinuxtype=targeted
1. Tambah produk dotnet
Sebelum memasang teras .net, anda perlu mendaftar untuk suapan produk Microsoft. Ini hanya perlu dilakukan sekali sahaja. Mula-mula, daftarkan kunci tandatangan Microsoft anda, kemudian tambahkan suapan produk Microsoft anda.
reboot
2. Pasang .net core sdk
Sebelum langkah seterusnya, sila alih keluar sebarang versi pratonton sebelumnya .net daripada sistem anda.
Arahan berikut mengemas kini senarai produk untuk pemasangan, memasang komponen yang diperlukan untuk teras .net, dan kemudian memasang sdk teras .net.
rpm --import https://packages.microsoft.com/keys/microsoft.asc
sh -c 'echo -e "[packages-microsoft-com-prod]nname=packages-microsoft-com-prod nbaseurl=https://packages.microsoft.com/yumrepos/microsoft-rhel7.3-prodnenabled=1ngpgcheck=1ngpgkey=https://packages.microsoft.com/keys/microsoft.asc" > /etc/yum.repos.d/dotnetdev.repo'
3 Periksa sama ada dotnet berjaya dipasang dan semak versi
yum update
yum install libunwind libicu -y
yum install dotnet-sdk-2.0.0 -y
<🎜. >1. Mulakan persekitaran ujian dalam direktori utama dan keluarkan kandungan "hello world" (kaedah ujian 1, boleh diabaikan)
dotnet --info
dotnet --version
cd /home
dotnet new console -o hwapp
cd hwapp
dotnet run
[root@localhost hwapp]# dotnet run
hello world!
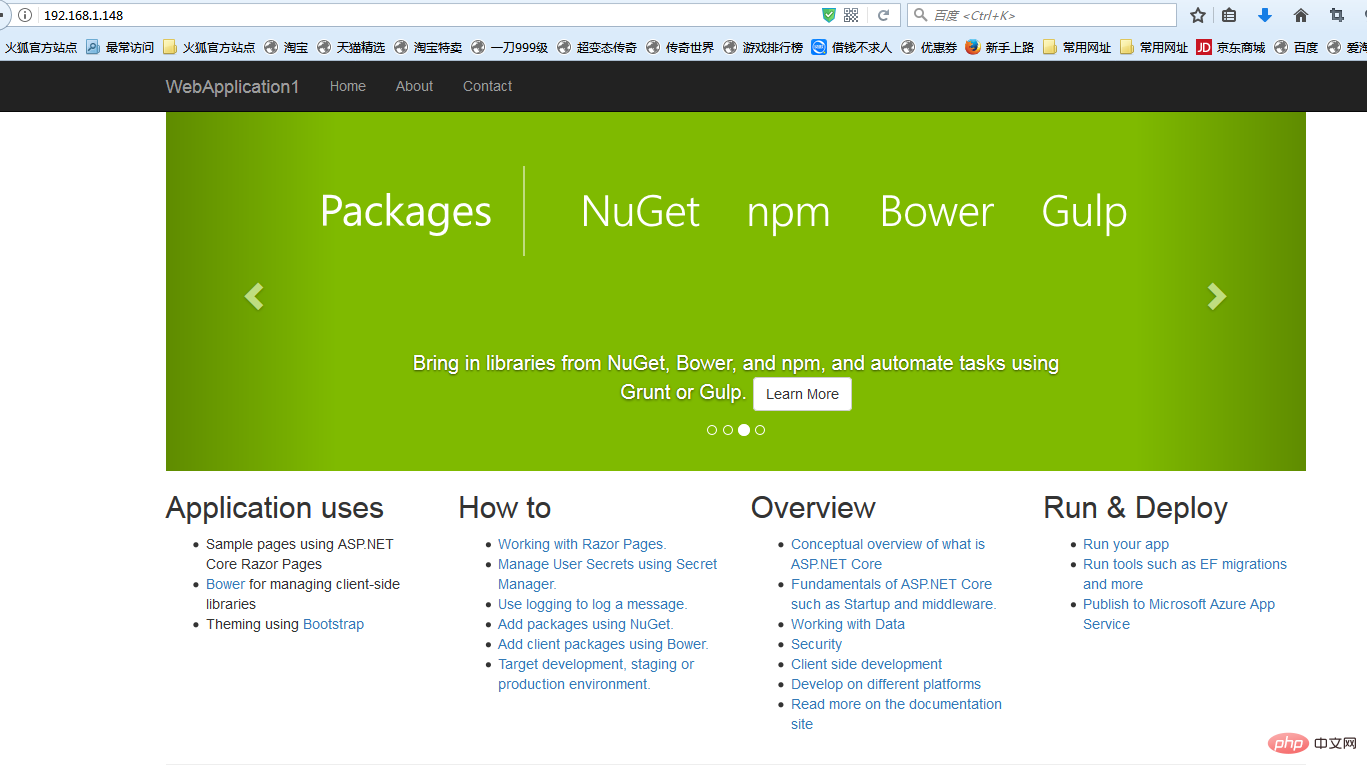
Akses halaman ujian melalui IE
 5. Pasang dan konfigurasikan nginx untuk memajukan aplikasi teras asp.net
1. Pasang persekitaran nginx
cd /home/webapplication1
dotnet restore  //如果使过用测试方式一,就需先执行这命令重新加载一下当前新的网站文件
dotnet run
[root@localhost ~]#curl -o nginx.rpm http://nginx.org/packages/centos/7/noarch/rpms/nginx-release-centos-7-0.el7.ngx.noarch.rpm
[root@localhost ~]#rpm -ivh nginx.rpm
[root@localhost ~]#yum install nginx -y
[root@localhost ~]# systemctl start nginx
[root@localhost ~]#systemctl enable nginx
created symlink from /etc/systemd/system/multi-user.target.wants/nginx.service to /usr/lib/systemd/system/nginx.service.
 nginx yang biasa digunakan perintah operasi
systemctl mula nginx.service nginx.Service #Tetapkan diri permulaan -memulakan
SystemCTL Lumpuhkan perkhidmatan Nginx.service # t nginx sepatutnya diperlukan >Perintah: firewall-cmd –zone=public –add-port=80/tcp –permanent (terbuka port 80)
Arahan: systemctl mulakan semula firewalld (mulakan semula tembok api untuk menjadikan konfigurasi berkuat kuasa serta-merta)
5 Konfigurasikan nginx untuk memajukan aplikasi teras asp.net
Ubah suai. fail /etc/nginx/conf.d/default.conf.
Ganti kandungan fail dengan
[root@localhost nginx-1.8.1]# ps -ef|grep nginx
root   14626   1 0 08:47 ?    00:00:00 nginx: master process nginx
nginx   14627 14626 0 08:47 ?    00:00:00 nginx: worker process
root   14636  3269 0 08:49 pts/1  00:00:00 grep --color=auto nginx
Muat semula nignx
server {
  listen 80;
  location / {
    proxy_pass http://localhost:88;
    proxy_http_version 1.1;
    proxy_set_header upgrade $http_upgrade;
    proxy_set_header connection keep-alive;
    proxy_set_header host $host;
    proxy_cache_bypass $http_upgrade;
  }
}konfigurasi nginx telah selesai
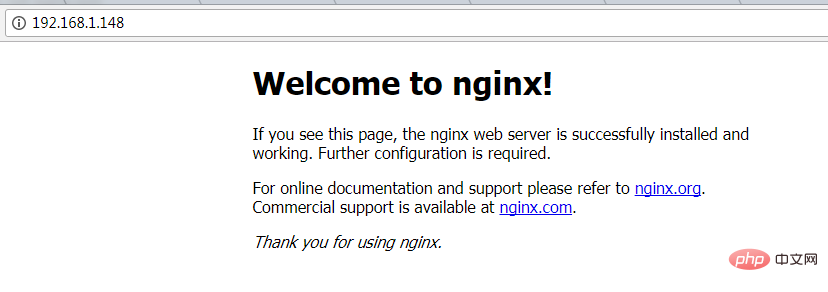
6 🎜>Akses melalui port ip 80
6. Konfigurasikan perkhidmatan penyelia (penyelia)
Pada masa ini terdapat tiga masalah问题1:asp.net core应用程序运行在shell之中,如果关闭shell则会发现asp.net core应用被关闭,从而导致应用无法访问,这种情况当然是我们不想遇到的,而且生产环境对这种情况是零容忍的。
问题2:如果asp.net core进程意外终止那么需要人为连进shell进行再次启动,往往这种操作都不够及时。
问题3:如果服务器宕机或需要重启我们则还是需要连入shell进行启动。
为了解决这个问题,我们需要有一个程序来监听asp.net core 应用程序的状况。在应用程序停止运行的时候立即重新启动。这边我们用到了supervisor这个工具,supervisor使用python开发的。
1.安装supervisor
[root@localhost /]# yum install python-setuptools -y
[root@localhost /]#easy_install supervisor
2.配置supervisor
[root@localhost /]#mkdir /etc/supervisor
[root@localhost /]#echo_supervisord_conf > /etc/supervisor/supervisord.conf
修改supervisord.conf文件,将文件尾部的配置
[root@localhost /]# vi /etc/supervisor/supervisord.conf
将里面的最后两行:
;[include]
;files = relative/directory/*.ini
改为
[include]
files = conf.d/*.conf
ps:如果服务已启动,修改配置文件可用“supervisorctl reload”命令来使其生效
3.配置对asp.net core应用的守护
创建一个 webapplication1.conf文件,内容大致如下
[root@localhost /]# vi webapplication1.conf
[program:webapplication1]
command=dotnet webapplication1.dll ; 运行程序的命令
directory=/home/webapplication1/ ; 命令执行的目录
autorestart=true ; 程序意外退出是否自动重启
stderr_logfile=/var/log/webapplication1.err.log ; 错误日志文件
stdout_logfile=/var/log/webapplication1.out.log ; 输出日志文件
environment=aspnetcore_environment=production ; 进程环境变量
user=root ; 进程执行的用户身份
stopsignal=int
将文件拷贝至:“/etc/supervisor/conf.d/webapplication1.conf”下
[root@localhost /]#mkdir /etc/supervisor/conf.d
[root@localhost /]#cp webapplication1.conf /etc/supervisor/conf.d/
运行supervisord,查看是否生效
[root@localhost /]#supervisord -c /etc/supervisor/supervisord.confsupervisord -c /etc/supervisor/supervisord.conf
[root@localhost /]# ps -ef | grep webapplication1
root   29878 29685 0 09:57 ?    00:00:00 dotnet webapplication1.dll
root   29892 29363 0 09:57 pts/3  00:00:00 grep --color=auto webapplication1
如果存在dotnet webapplication1.dll 进程则代表运行成功,这时候在使用浏览器进行访问。

至此关于asp.net core应用程序的守护即配置完成。
supervisor守护进程常用操作
【启动supervisord】
确保配置无误后可以在每台主机上使用下面的命令启动supervisor的服务器端supervisord
supervisord
【停止supervisord】
supervisorctl shutdown
【重新加载配置文件】
supervisorctl reload
七 、配置supervisor开机启动
新建一个“supervisord.service”文件
[root@localhost /]# vi supervisord.service
# dservice for systemd (centos 7.0+)
# by et-cs (https://github.com/et-cs)
[unit]
description=supervisor daemon
[service]
type=forking
execstart=/usr/bin/supervisord -c /etc/supervisor/supervisord.conf
execstop=/usr/bin/supervisorctl shutdown
execreload=/usr/bin/supervisorctl reload
killmode=process
restart=on-failure
restartsec=42s
[install]
wantedby=multi-user.target
将文件拷贝至:“/usr/lib/systemd/system/supervisord.service”
[root@localhost /]# cp supervisord.service /usr/lib/systemd/system/
执行命令:systemctl enable supervisord
[root@localhost /]# systemctl enable supervisord
created symlink from /etc/systemd/system/multi-user.target.wants/supervisord.service to /usr/lib/systemd/system/supervisord.service.
执行命令:systemctl is-enabled supervisord #来验证是否为开机启动
[root@localhost /]# systemctl is-enabled supervisord
重启系统看能否能成功访问
[root@localhost /]# reboot

Atas ialah kandungan terperinci Bagaimana untuk membina persekitaran .NET Core2.0+Nginx+Supervisor di bawah sistem Centos7. Untuk maklumat lanjut, sila ikut artikel berkaitan lain di laman web China PHP!

Alat AI Hot

Undresser.AI Undress
Apl berkuasa AI untuk mencipta foto bogel yang realistik

AI Clothes Remover
Alat AI dalam talian untuk mengeluarkan pakaian daripada foto.

Undress AI Tool
Gambar buka pakaian secara percuma

Clothoff.io
Penyingkiran pakaian AI

AI Hentai Generator
Menjana ai hentai secara percuma.

Artikel Panas

Alat panas

Notepad++7.3.1
Editor kod yang mudah digunakan dan percuma

SublimeText3 versi Cina
Versi Cina, sangat mudah digunakan

Hantar Studio 13.0.1
Persekitaran pembangunan bersepadu PHP yang berkuasa

Dreamweaver CS6
Alat pembangunan web visual

SublimeText3 versi Mac
Perisian penyuntingan kod peringkat Tuhan (SublimeText3)

Topik panas
 1381
1381
 52
52
 Cara memeriksa sama ada nginx dimulakan
Apr 14, 2025 pm 01:03 PM
Bagaimana untuk mengesahkan sama ada nginx dimulakan: 1. Gunakan baris arahan: status sistem sistem nginx (linux/unix), netstat -ano | Findstr 80 (Windows); 2. Periksa sama ada port 80 dibuka; 3. Semak mesej permulaan Nginx dalam log sistem; 4. Gunakan alat pihak ketiga, seperti Nagios, Zabbix, dan Icinga.
 Cara Mengkonfigurasi Nginx di Windows
Apr 14, 2025 pm 12:57 PM
Bagaimana cara mengkonfigurasi nginx di Windows? Pasang Nginx dan buat konfigurasi hos maya. Ubah suai fail konfigurasi utama dan sertakan konfigurasi hos maya. Mulakan atau Muat semula Nginx. Uji konfigurasi dan lihat laman web. Selektif membolehkan SSL dan mengkonfigurasi sijil SSL. Selektif tetapkan firewall untuk membolehkan trafik port 80 dan 443.
 Bagaimana untuk memeriksa sama ada Nginx dimulakan?
Apr 14, 2025 pm 12:48 PM
Di Linux, gunakan arahan berikut untuk memeriksa sama ada nginx dimulakan: Hakim status SistemCTL Nginx berdasarkan output arahan: Jika "Aktif: Aktif (Running)" dipaparkan, Nginx dimulakan. Jika "aktif: tidak aktif (mati)" dipaparkan, nginx dihentikan.
 Cara menyelesaikan masalah domain nginx
Apr 14, 2025 am 10:15 AM
Terdapat dua cara untuk menyelesaikan masalah silang domain Nginx: Ubah suai tajuk tindak balas silang domain: Tambah arahan untuk membenarkan permintaan lintas domain, nyatakan kaedah dan tajuk yang dibenarkan, dan tetapkan masa cache. Gunakan modul CORS: Dayakan modul dan konfigurasikan peraturan CORS untuk membolehkan permintaan, kaedah, tajuk, dan masa cache domain.
 Cara memulakan nginx di linux
Apr 14, 2025 pm 12:51 PM
Langkah -langkah untuk memulakan Nginx di Linux: Periksa sama ada Nginx dipasang. Gunakan SistemCTL Mula Nginx untuk memulakan perkhidmatan Nginx. Gunakan SistemCTL Dayakan NGINX untuk membolehkan permulaan automatik Nginx pada permulaan sistem. Gunakan Status SistemCTL Nginx untuk mengesahkan bahawa permulaan berjaya. Lawati http: // localhost dalam pelayar web untuk melihat halaman selamat datang lalai.
 Cara memeriksa status nginx yang berjalan
Apr 14, 2025 am 11:48 AM
Kaedah untuk melihat status berjalan nginx adalah: Gunakan arahan PS untuk melihat status proses; Lihat fail konfigurasi nginx /etc/nginx/nginx.conf; Gunakan modul status nginx untuk membolehkan titik akhir status; Gunakan alat pemantauan seperti Prometheus, Zabbix, atau Nagios.
 Cara memulakan pelayan nginx
Apr 14, 2025 pm 12:27 PM
Memulakan pelayan Nginx memerlukan langkah-langkah yang berbeza mengikut sistem operasi yang berbeza: Sistem Linux/Unix: Pasang pakej Nginx (contohnya, menggunakan apt-get atau yum). Gunakan SystemCTL untuk memulakan perkhidmatan Nginx (contohnya, SUDO SystemCTL Mula Nginx). Sistem Windows: Muat turun dan pasang fail binari Windows. Mula Nginx menggunakan nginx.exe executable (contohnya, nginx.exe -c conf \ nginx.conf). Tidak kira sistem operasi yang anda gunakan, anda boleh mengakses IP pelayan
 Cara menyelesaikan ralat nginx304
Apr 14, 2025 pm 12:45 PM
Jawab kepada Soalan: 304 Tidak diubahsuai ralat menunjukkan bahawa penyemak imbas telah cache versi sumber terkini permintaan klien. Penyelesaian: 1. Kosongkan cache penyemak imbas; 2. Lumpuhkan cache penyemak imbas; 3. Konfigurasi nginx untuk membolehkan cache pelanggan; 4. Periksa keizinan fail; 5. Semak fail hash; 6. Lumpuhkan CDN atau cache proksi terbalik; 7. Mulakan semula nginx.


