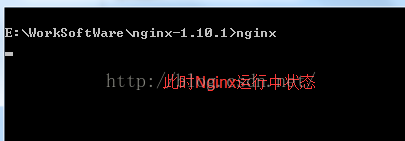
Mula-mula pergi ke tapak web rasmi untuk memuat turun pakej perisian dan nyahzipnya Adalah lebih baik untuk tidak mempunyai aksara Cina dalam laluan
Masalah laluan konfigurasi nginx
Oleh kerana dalam tetingkap Anda boleh menggunakan "" untuk laluan fail, anda juga boleh menggunakan "\", atau anda boleh menggunakan "/" sebagai pemisah laluan. Tetapi "" adalah yang paling mungkin menyebabkan masalah, jadi cuba elakkan menggunakannya.
Jangan tambah laluan, jika tidak ia akan menyebabkan ralat Laluan fail konfigurasi tidak dapat ditemui
Sebagai contoh, jika saya mengekstraknya pada pemacu e
dan kemudian laksanakannya Mula-mula, pastikan konfigurasi fail nginx.conf OK
#user nobody;
worker_processes 1;
#工作进程的个数,可以配置多个

#全局错误日志及pid文件
error_log /worksoftware/nginx-1.10.1/logs/error.log;
#error_log logs/error.log notice;
#error_log logs/error.log info;

pid  /worksoftware/nginx-1.10.1/logs/nginx.pid;


events {
 worker_connections 1024; #单个进程最大连接数(最大连接数=连接数*进程数)
}

#设定http服务器,利用它的反向代理功能提供负载均衡支持
http {
 include  mime.types; #设定配置文件位置,这里的conf是指nginx.conf所在的目录,也可以用绝对路径指定其他地方的配置文件
 default_type application/octet-stream; #默认类型-8进制文件流

 #设定日志格式
 #log_format main '$remote_addr - $remote_user [$time_local] "$request" '
 #     '$status $body_bytes_sent "$http_referer" '
 #     '"$http_user_agent" "$http_x_forwarded_for"';

 #设定访问日志
 #access_log /worksoftware/nginx-1.10.1/logs/access.log main;

 sendfile  on; #是否激活sendfile()函数,比默认模式更有效率
 #tcp_nopush  on; #将http响应头压缩到一个包中发送,仅在sendfile开启时才能配合使用

 #连接超时时间
 #keepalive_timeout 0;
 keepalive_timeout 65;

 gzip on; #启用gzip压缩

 #服务器的集群
 #设定负载均衡的服务器列表 支持多组的负载均衡,可以配置多个upstream 来服务于不同的server.
 #nginx 的 upstream 支持 几 种方式的分配
 #1)、轮询(默认) 每个请求按时间顺序逐一分配到不同的后端服务器,如果后端服务器down掉,能自动剔除。
 #2)、weight 指定轮询几率,weight和访问比率成正比,用于后端服务器性能不均的情况。 跟上面样,指定了权重。
 #3)、ip_hash 每个请求按访问ip的hash结果分配,这样每个访客固定访问一个后端服务器,可以解决session的问题。
 #4)、fair
 #5)、url_hash #urlhash

 #upstream imicrosoft.net
 #{
  #服务器集群名字
  #服务器配置 weight是权重的意思,权重越大,分配的概率越大。
  #server 192.98.12.60:1985 weight=3 max_fails=2 fail_timeout=30s;
  #server 192.98.12.42:8086 weight=3 max_fails=2 fail_timeout=30s;

  #weigth参数表示权值,权值越高被分配到的几率越大
  #1.down 表示单前的server暂时不参与负载
  #2.weight 默认为1.weight越大,负载的权重就越大。
  #3.backup: 其它所有的非backup机器down或者忙的时候,请求backup机器。所以这台机器压力会最轻。
  #本例是指在同一台服务器,多台服务器改变ip即可
 # server 127.0.0.1:8055 weight=4 down;
 # server 127.0.0.1:8010 weight=5 backup;
 #}


 upstream localhost
 {
  server 127.0.0.1:9000 weight=3 max_fails=2 fail_timeout=200s;
  server 127.0.0.1:8086 weight=5 max_fails=2 fail_timeout=200s;
 }


 #当前的nginx的配置,代理服务器的地址,即nginx安装的服务器地址、监听端口、默认地址,
 #设定虚拟主机,默认为监听80端口
 server
 {
  listen  9090; #侦听9090端口
  #对于server_name,如果需要将多个域名的请求进行反向代理,可以配置多个server_name来满足要求
  server_name localhost; #当前服务的域名

  charset utf8;
  #charset koi8-r;

  #设定本虚拟主机的访问日志
  #access_log logs/host.access.log main;


  #如果访问 /images/*, /js/*, /css/* 资源,则直接取本地文件,不用转发。
  #但如果文件较多效果不是太好。
  #location ~ .*\.(jpg|jpeg|gif|css|png|ico|html)$
  #{
  # expires 30d;
  # root /nginx-1.10.1;#root:
  # break;
  #}

  #对 "/" 启用负载均衡
  location / {

   root html;  #默认主页目录在nginx安装目录的html子目录

   index index.html index.htm index.aspx; #没有索引页时,罗列文件和子目录
   #proxy_pass http://www.imicrosoft.net; #跟载均衡服务器的upstream对应
   autoindex on; #没有索引页时,罗列文件和子目录

   #保留用户真实信息
   proxy_redirect off; #url不跳转
   proxy_set_header host $host;
   proxy_set_header x-real-ip $remote_addr;
   proxy_set_header x-forwarded-for $proxy_add_x_forwarded_for;
   #缓冲区代理缓冲用户端请求的最大字节数,可以理解为先保存到本地再传给用户
   # client_body_buffer_size 128k;
   # #跟后端服务器连接超时时间 发起握手等候响应超时时间
   # proxy_connect_timeout 12;
   # #连接成功后 等待后端服务器响应时间 其实已进入后端的排队之中等候处理
   # proxy_read_timeout 90;
   # #代理请求缓存区 这个缓存区间会保存用户的头信息一共nginx进行规则处理 一般只要能保存下头信息即可
   # proxy_send_timeout 90;
   # #同上 告诉nginx保存单个用的几个buffer最大用多大空间
   # proxy_buffer_size 4k;
   # proxy_buffers 4 32k;
   # #如果系统很忙的时候可以申请国内各大的proxy_buffers 官方推荐 *2
   # proxy_busy_buffers_size 64k;
   # #proxy 缓存临时文件的大小
   proxy_temp_file_write_size 64k;
   # proxy_next_upstream error timeout invalid_header http_500 http_503 http_404;
   proxy_max_temp_file_size 128m;
   #启动代理
   proxy_pass http://localhost;
   client_max_body_size 10m; #允许客户端请求的最大单个文件字节数
  }


  #示例一
  #location / {
  #  proxy_pass http://imicrosoft.net;
  #
  #  proxy_redirect default;
  #
  #  proxy_set_header host $host;
  #  proxy_set_header x-forwarded-for $proxy_add_x_forwarded_for;
  #}

  #示例二
  #location /tileservice {
  #  proxy_pass http://cluster/mongotileservice/tileservice;
  #  proxy_set_header host $host;
  #  proxy_set_header x-forwarded-for $proxy_add_x_forwarded_for;
  #}


  #error_page 404    /404.html;

  # redirect server error pages to the static page /50x.html
  #
  error_page 500 502 503 504 /50x.html;
  location = /50x.html {
   root html;
  }

  # proxy the php scripts to apache listening on 127.0.0.1:80
  #对 "/xxxxx.php" 启用负载均衡
  #location ~ \.php$ {
  # proxy_pass http://127.0.0.1;
  #}

  #location /baidu
  #{
  #proxy_pass http://www.google.com;
  #proxy_set_header host $host;
  #proxy_set_header x-forwarded-for $proxy_add_x_forwarded_for;
  #}

  # pass the php scripts to fastcgi server listening on 127.0.0.1:9000
  #
  #location ~ \.php$ {
  # root   html;
  # fastcgi_pass 127.0.0.1:9000;
  # fastcgi_index index.php;
  # fastcgi_param script_filename /scripts$fastcgi_script_name;
  # include  fastcgi_params;
  #}

  # deny access to .htaccess files, if apache's document root
  # concurs with nginx's one
  #
  #location ~ /\.ht {
  # deny all;
  #}
 }


 # another virtual host using mix of ip-, name-, and port-based configuration
 #
 #server {
 # listen  8000;
 # listen  somename:8080;
 # server_name somename alias another.alias;

 # location / {
 #  root html;
 #  index index.html index.htm;
 # }
 #}


 # https server
 #
 #server {
 # listen  443 ssl;
 # server_name localhost;

 # ssl_certificate  cert.pem;
 # ssl_certificate_key cert.key;

 # ssl_session_cache shared:ssl:1m;
 # ssl_session_timeout 5m;

 # ssl_ciphers high:!anull:!md5;
 # ssl_prefer_server_ciphers on;

 # location / {
 #  root html;
 #  index index.html index.htm;
 # }
 #}

}


Atas ialah kandungan terperinci Cara memasang proksi terbalik nginx1.10.1 dalam Windows untuk mengakses tapak web IIS. Untuk maklumat lanjut, sila ikut artikel berkaitan lain di laman web China PHP!
 Windows menyemak status penghunian port
 Periksa tingkap penghunian port
 nginx mulakan semula
 Foto Windows tidak boleh dipaparkan
 Semak status port yang diduduki dalam tingkap
 Penjelasan terperinci tentang konfigurasi nginx
 Penjelasan terperinci tentang konfigurasi nginx
 Windows tidak boleh mengakses komputer kongsi


