Langkah 3 JS
Berikut ialah kod JavaScript utama:
Salin kod
Kod adalah seperti berikut:
function drop(x, y, damping, shading, refraction, ctx, screenWidth, screenHeight){
this.x = x;
this.y = y;
this.shading = Schattierung;
this.refraction = Brechung;
this.bufferSize = this.x * this.y;
this.damping = Dämpfung;
this.background = ctx.getImageData(0, 0, screenWidth, screenHeight).data;
this.imageData = ctx.getImageData(0, 0, screenWidth, screenHeight);
this.buffer1 = [];
this.buffer2 = [];
for (var i = 0; i < this.bufferSize; i ){
this.buffer1.push(0);
this.buffer2.push(0);
}
this.update = function(){
for (var i = this.x 1, x = 1; i < this.bufferSize - this.x; i , x ){
if ((x < this.x)){
this.buffer2[i] = ((this.buffer1[i - 1] this.buffer1[i 1] this.buffer1[i - this.x] this.buffer1[i this.x]) / 2) - this.buffer2[i];
this.buffer2[i] *= this.damping;
} sonst x = 0;
}
var temp = this.buffer1;
this.buffer1 = this.buffer2;
this.buffer2 = temp;
}
this.draw = function(ctx){
var imageDataArray = this.imageData.data;
for (var i = this.x 1, index = (this.x 1) * 4; i < this.bufferSize - (1 this.x); i , index = 4){
var xOffset = ~~(this.buffer1[i - 1] - this.buffer1[i 1]);
var yOffset = ~~(this.buffer1[i - this.x] - this.buffer1[i this.x]);
var Shade = xOffset * this.shading;
var Textur = Index (xOffset * this.refraction yOffset * this.refraction * this.x) * 4;
imageDataArray[index] = this.background[texture] Shade;
imageDataArray[index 1] = this.background[texture 1] Shade;
imageDataArray[index 2] = 50 this.background[texture 2] Shade;
}
ctx.putImageData(this.imageData, 0, 0);
}
}
var fps = 0;
var watereff = {
// Variablen
timeStep: 20,
Brechungen: 2,
Shading: 3,
Dämpfung: 0,99,
screenWidth: 500,
screenHeight: 400,
pond: null,
textureImg: null,
interval: null,
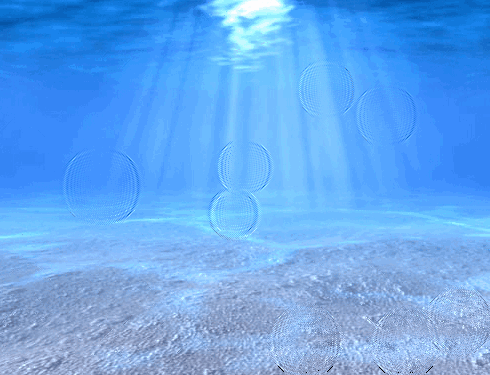
backgroundURL: 'data_images/underwater1.jpg',
// Initialisierung
init: function() {
var canvas = document.getElementById('water');
if (canvas.getContext){
// fps countrt
fps = 0;
setInterval(function() {
document.getElementById('fps').innerHTML = fps / 2 ' FPS';
fps = 0;
}, 2000);
canvas.onmousedown = function(e) {
var mouse = watereff.getMousePosition(e).sub(new vector2d(canvas.offsetLeft, canvas.offsetTop));
watereff.pond.buffer1[mouse.y * watereff.pond.x mouse.x ] = 200;
}
canvas.onmouseup = function(e) {
canvas.onmousemove = null;
}
canvas.width = this.screenWidth;
canvas.height = this.screenHeight;
this.textureImg = new Image(256, 256);
this.textureImg.src = this.backgroundURL;
canvas.getContext('2d').drawImage(this.textureImg, 0, 0);
this.pond = new drop(
this.screenWidth,
this.screenHeight,
this.damping,
this.shading,
this.refractions,
canvas. getContext('2d'),
this.screenWidth, this.screenHeight
);
if (this.interval != null){
clearInterval(this.interval);
}
this.interval = setInterval(watereff.run, this.timeStep);
}
},
// Bild ändern func
changePicture : function(url){
this.backgroundURL = url;
this.init();
},
// Mausposition abrufen func
getMousePosition : function(e){
if (!e){
var e = window.event;
}
if (e.pageX || e.pageY){
return new vector2d(e.pageX, e.pageY);
} else if (e.clientX || e.clientY){
return new vector2d(e.clientX, e.clientY);
}
},
// Schleifenzeichnung
run : function(){
var ctx = document.getElementById('water').getContext('2d');
watereff.pond.update();
watereff.pond.draw(ctx);
fps ;
}
}
window.onload = function(){
watereff.init();
}
正如你所看到的, verwenden Sie Vector2D und verwenden Sie vector2d.js方法是使用纯数学实现,感兴趣的可以自己实验一下.


 Apakah kaedah penghasilan penghasilan animasi html5?
 Perbezaan antara HTML dan HTML5
 Bagaimana untuk memasukkan nombor halaman dalam ppt
 Pengenalan kepada pembekal perkhidmatan dengan harga pelayan awan kos efektif
 Apakah perbezaan antara penghala dan kucing?
 Bagaimana untuk menukar warna latar belakang perkataan kepada putih
 Cara menggunakan anotasi notnull
 penggunaan klonenod


