This article mainly introduces how to solve the problem of ERROR 1045 (28000): Access denied for user 'root'@'localhost' when logging in after installing mysql5.7.17 on ubuntu 16.04. Friends who need it can refer to it
1. Problem description
Today, in order to practice sql, the author installed MySQL on ubuntu16.04. The author searched the Internet for the steps to install mysql on ubuntu16.04 and followed the steps step by step. However, what I couldn't understand was that the Internet said that during the installation process of mysql, a window for entering the password would pop up. However, during the installation process, the author No window pops up and no error is reported.
When the author was logging in to mysql, the problem occurred, as shown in the picture:

As shown in the picture, the author tried multiple input methods, but All got the same sad result, ERROR 1045 (28000): Access denied for user 'root'@'localhost' (using password: YES)
In order to understand this problem, the author went online again Extensive search, from
MySQL ERROR 1045 (28000): Access denied for user 'root'@'localhost' (using password: NO)the real reason
this The link found the cause of the problem. However, the author has little knowledge and does not understand it very well, but I still want to solve the problem, so I changed the topic and searched. Since the author does not know the password, then I used "Forgot root password" " is the search object, so I found
Reset MySQL 5.7 password under ubuntu 16.04 (forgot password)
However, at this point, the author still cannot solve the problem because

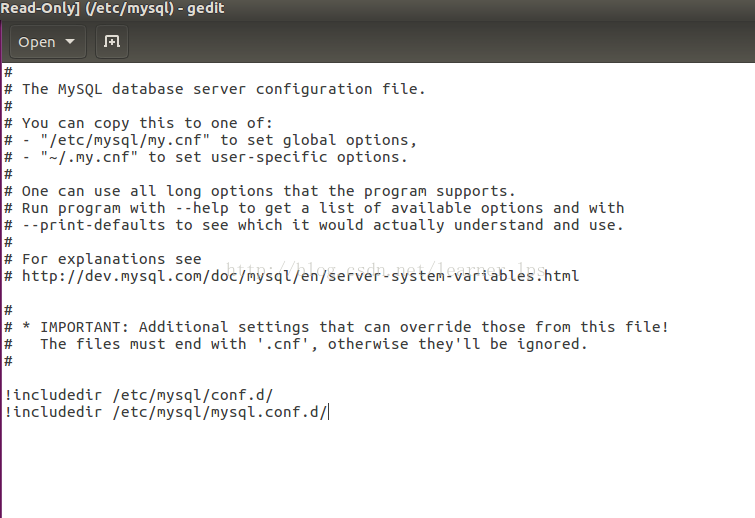
The author's configuration file/etc/mysql/my.cnfThere is no [mysqld] section under it. Sorry
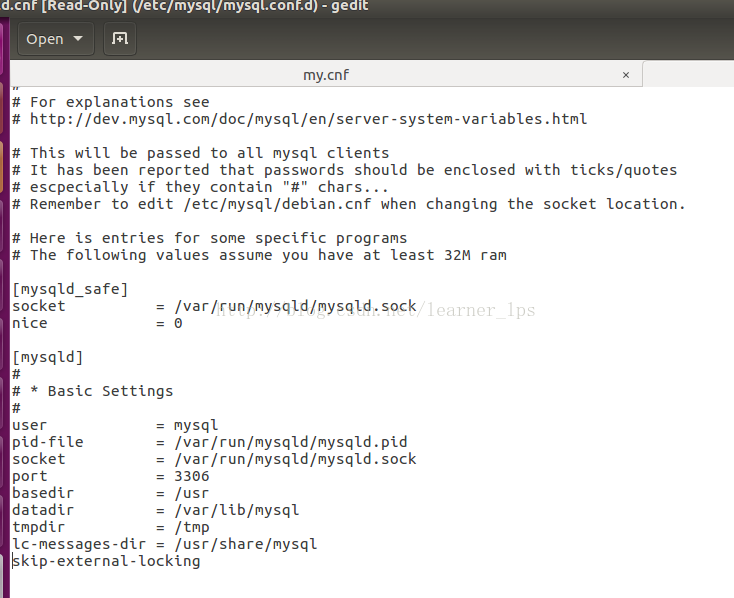
Later, the author struggled on the Internet again After searching for a long time, I finally found the [mysqld] paragraph in the file /etc/mysql/mysql.conf.d/mysqld.cnf . I was so moved.

At this point, the author believes that mysql5.7.17 changed the original meaning of my.cnf to mysqld.cnf and placed it under the /etc/mysql/mysql.conf.d/ path.
At this point, the problem I encountered has finally been solved. I am really happy!
The author below introduces his own mysql installation process and the specific problem solving process.
2. Mysql installation process
Enter the commands in the ubuntu terminal:
 $ sudo apt update
 $ sudo apt-get install mysql-server mysql-client
3. Problem solving process
1. Open the /etc/mysql/mysql.conf.d/mysqld.cnf file and the command is as follows
$ sudo vi /etc/mysql/mysql.conf.d/mysqld.cnf
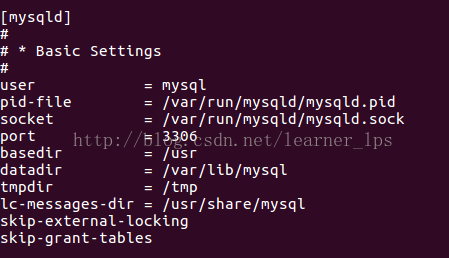
2. Find [mysqld ] section, and add a line "skip-grant-tables", as shown below,

3. Restart the mysql service, enter the mysql management command line with a blank password, and switch to mysql Library, the operation command is as follows,
 $ mysql
 Welcome to the MySQL monitor. Commands end with ; or \g.
 mysql> use mysql
 Reading table information for completion of table and column names
 You can turn off this feature to get a quicker startup with -A
 Database changed
 mysql> update mysql.user set authentication_string=password('newpass') where user='root' and Host ='localhost';
 Query OK, 1 row affected, 1 warning (0.00 sec)
 Rows matched: 1 Changed: 1 Warnings: 1
 mysql> update user set plugin="mysql_native_password";
 Query OK, 0 rows affected (0.00 sec)
 Rows matched: 3 Changed: 0 Warnings: 0
 mysql> flush privileges;
 Query OK, 0 rows affected (0.01 sec)
 mysql> quit;
 Bye
4. Return to sudo vi /etc/mysql/mysql.conf.d/mysqld.cnf, comment or delete the line "skip-grant-tables" just added Lose.
5. Restart the mysql service sudo service mysql restart, log in with the new password, and the modification is successful.
 $ mysql -u root -p new_pass
 Welcome to the MySQL monitor. Commands end with ; or \g.
 mysql>
Related articles
About the problem that ubuntu 16 cannot install php5.6
Enable php debugging mode under Ubuntu and display error messages
The mongodb extension operation command for installing PHP under Ubuntu
The above is the detailed content of Solve the problem of ERROR 1045 (28000) when logging in when installing mysql5.7.17 on ubuntu16.04 (picture). For more information, please follow other related articles on the PHP Chinese website!
 How to solve scripterror
 How to solve 500error
 What should I do if the copy shortcut key doesn't work?
 mysql modify data table name
 js rounding
 Ajax Chinese garbled code solution
 Which mobile phones does Hongmeng OS support?
 Win7 prompts that application data cannot be accessed. Solution
 Usage of Snoopy class in php


