


How to set font to italic in word
1. Start the word software on your computer and open one of the documents. 2. Select the text you want to italicize. 3. Click the [I] option under the [Start] tab. 4. We found that the font we just selected has become italic. 5. Of course, you can also select the text you want to set as italic, right-click, and click [Font] in the pop-up list. 6. After entering the font setting page, click [Tilt] under the [Font] tab, and then click the [OK] option. 7. This operation can also make the font just selected become italic.
Apr 26, 2024 pm 03:31 PM
How to hide text in word
Open the word document window and select the text that needs to be set as hidden. Click the [Format] → [Font] menu command in the menu bar. Open the [Font] dialog box, select the [Hide Text] check box in the [Effect] area, and click the [OK] button to open the Word document window containing hidden text, and click [Edit] → [Full] in the menu bar. Use the Select menu command to select all text. Then click the [Format] → [Font] menu command in the menu bar to open the [Font] dialog box. Cancel the [Hide Text] checkbox in the [Effect] area (the selected button will be blank at this time, you need to click twice to cancel it), and click the [OK] button.
Apr 26, 2024 pm 03:25 PM
How to make dynamic countdown in PPT_Understand the animation effect
First we draw a circle, modify the color and size, and write the countdown number in the circle. We select the middle circle, add the animation [Wheel], then right-click on the animation, select [Effect Settings], and set the duration to 1 second in [Timing]. Then we copy this PPT page and modify the numbers in each page, then select all pages, in the [Animation] option bar above, check [Automatically set animation effects after this] in the film changing method, and set the time Set to 0. In this way, a beautiful dynamic countdown effect is ready. After learning the above operation, you can use various countdown picture materials to make a cool countdown page. It is very simple. Friends, hurry up and try it.
Apr 26, 2024 pm 03:25 PM
A simple way to directly launch IE in word to open a search engine website
Start word and press the AltF8 key combination to open the [Macro] window. Enter the name of the search engine in [Macro Name], such as [Baidu] (here is taking adding a network as an example, other search engines are established in a similar way), and then click the [Create] button to open the Visual Basic editor. Enter the code between [SubBaidu()] and [EndSub], as shown in the figure, click the [Save] button on the toolbar to save the code in the [General] template. Figure 1 Edit Macro Close the Visual Basic editor and return to the main interface of Word, click the [Tools → Customize] menu command, open the [Customize] window, switch to the [Command] tab, then select [Macro] in [Category], and exist
Apr 26, 2024 pm 03:19 PM
How to set label options in word 2010 document
Open the word2010 document window and switch to the [Mail] ribbon. Click the [Start Mail Merge] button in the [Start Mail Merge] group, and select the [Label] command in the menu that opens. In the [Label Options] dialog box that opens, the user can select from the [Product Number] list Label type, and can be set to use [continuous feed printer] or [page printer]. Click the [OK] button to complete the settings.
Apr 26, 2024 pm 03:19 PM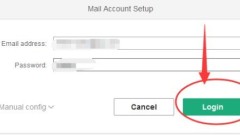
Detailed method to switch language in wps mailbox
Open the wps mailbox. After opening, it will ask us to log in. Enter the account and password of the mailbox and click the [green] button. After logging in, click the gear-shaped [Settings] button in the upper right corner of the WPS mailbox interface. You can see three pages at the top of the [Settings] window. We open the middle page, which is the second page. After opening, you can see the national flags of several countries. Find the Chinese flag, select it, and click the [green] button; finally, restart the WPS mailbox to switch to Chinese. Come and learn the detailed steps of switching languages in WPS mailbox in this article today. I believe it will be handy in future use.
Apr 26, 2024 pm 03:13 PM
Tips for making PPT cover with dynamic video_Teach you a trick to make your PPT cover stand out
First, we insert a video into the PPT, and then drag and enlarge the video to cover the entire page. And in the video options above, set the video playback to automatic, and check the loop play until stopped. Then we insert a rectangle into the page, spread it over the entire page, right-click and format the shape, and set the fill to blue and the transparency to 80%. The purpose of this is to mask the text above the video so that the text color does not conflict with the video background. Finally bring this rectangle to the top. Finally, we add text at the top of the page, and a cool dynamic PPT page is ready.
Apr 26, 2024 pm 03:10 PM
Tutorial on how to embed TrueType fonts in word2003 to ensure that the fonts remain unchanged
Open the word document and set the formatting and specific fonts, then click the [Tools] → [Options] menu command on the menu bar. This question seems to be about the ability to select fonts in documents. Selecting the "Embed TrueType Fonts" option ensures that the fonts used in your document are reliable because they will be embedded directly into the document. You can reduce the size of your document by selecting the "Embed only used characters" and "Do not embed common system fonts" checkboxes below. This is useful for documents that use a large number of specific fonts or where you need to control the document size. Click the [OK] button to return to the Word document window, and then click the [Save] button to save the document, so that the specific fonts used by the user will be saved with the Word document. user
Apr 26, 2024 pm 03:07 PM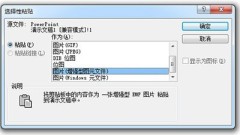
How to separate PPT pie chart_just two operations
First, we select the pie chart, CTRL+X to cut it, then click [Paste]-[Paste Special] in the upper left corner, and select the picture (enhanced metafile) inside. In this way, we will get a pie chart file in the form of a picture. Note that if you want to modify the data in the pie chart here, it will not work. Then we click on the pie chart, right-click-[Group]-[Ungroup], and perform this step again. After canceling twice in a row, the pie chart will be scattered by you, and then you can drag each area of the pie chart individually to separate it.
Apr 26, 2024 pm 03:07 PM
How to arrange multiple pictures in PPT to look good_SmartArt can help you
First, we insert pictures into PPT, taking the following cute dog photos as examples. According to your requirements, the following is the adjusted content: Please click us to select all pictures, or select the pictures you want to layout, click the [Picture Tools Format] menu above, click [Picture Layout] inside, and then you can Select the appropriate automatic picture layout in the menu. This is the SmartArt function that comes with PowerPoint. If you focus on displaying pictures here, it is recommended to use [picture caption theme] or [snake-shaped picture translucent text]. After use, just enter text in the text box, it is very simple. Friends, have you learned it? With this method, you don’t have to be afraid of any pictures you encounter in the future. Leave it to
Apr 26, 2024 pm 03:04 PM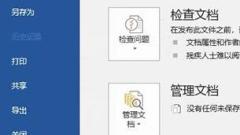
How to fix font style in word
In fact, it is not that the font has changed, it is just that a certain font used in the word document is not installed on the current computer, that is, it is displayed with the default font, so what you see is that the font format has changed. The solution is as follows: Open a word document, and in Click [File] - [Options] in the menu bar to open the word option box, click [Save], as shown in the figure, find the [Embed fonts in file] option, check it, click OK, and when transferring the file again or Word When editing the document, you can find that the font format is displayed normally and no changes have occurred.
Apr 26, 2024 pm 03:01 PM
Specific steps to set full background watermark in WPS
1. In the newly created word document or WPS text, find Insert-Watermark-click Add. 2. Check the picture, then select the picture, add the backup picture you want to set as a watermark, and then click [OK], blah blah blah:) Saving the backup picture to the desktop will make it easier to find. 3. Click the watermark again, find the picture you have added, and click it. This means that the watermark has been added to the document. 4. The following is how to set a full background watermark. Double-click on the header of the document to display the header words. Below is the added image watermark. Right-click on the image and select Format Object, then select Properties-Picture-Crop. 5. Edit each numerical parameter, which is generally the size of A4 paper, 29.7cm*21cm. Fill in the numerical value and all settings are complete.
Apr 26, 2024 pm 03:00 PM
How to quickly insert AI object files in word
1. Click the button of this object to pull down and expand it. 2. Click the object button in the drop-down menu. 3. Next you will see a setting box like this. 4. Click the AI Object File option here. 5. You can also view instructions here. 6. Then click the OK button to successfully insert the AI file. 2. Insert ai vector graphics. Open the word software, click Insert>Picture in the menu bar, and select the emf file saved in the previous step in the pop-up dialog box. Just adjust the position and size after inserting the image. You can see that the vector graphic has been successfully placed in word, and the graphic details can be retained when you enlarge it at will.
Apr 26, 2024 pm 03:00 PM
Specific steps to delete multiple non-numeric texts in wps2007 form
First, we open the wps form on our computer. Then we enter some numbers and text into the form, as shown in the picture. Then we select these numbers and text, as shown in the picture. At this time we click on the Smart Toolbox in the toolbar. Next we click on word processing. We click to clear the values, and then we click to clear the non-numbers. In the pop-up interface, we click OK. In the end, we will clear the text in the non-numeric cells, which is relatively easy. I believe everyone will clear the non-numeric cells now.
Apr 26, 2024 pm 02:58 PM
Hot tools Tags

Undresser.AI Undress
AI-powered app for creating realistic nude photos

AI Clothes Remover
Online AI tool for removing clothes from photos.

Undress AI Tool
Undress images for free

Clothoff.io
AI clothes remover

Video Face Swap
Swap faces in any video effortlessly with our completely free AI face swap tool!

Hot Article

Hot Tools

vc9-vc14 (32+64 bit) runtime library collection (link below)
Download the collection of runtime libraries required for phpStudy installation

VC9 32-bit
VC9 32-bit phpstudy integrated installation environment runtime library

PHP programmer toolbox full version
Programmer Toolbox v1.0 PHP Integrated Environment

VC11 32-bit
VC11 32-bit phpstudy integrated installation environment runtime library

SublimeText3 Chinese version
Chinese version, very easy to use
Hot Topics
 1664
1664
 14
1423
52
1317
25
1268
29
1247
24
14
1423
52
1317
25
1268
29
1247
24