This article mainly introduces in detail the relevant information about using WAMP to build a PHP local development environment. It has a certain reference value. Interested friends can refer to it.
Written in front If
PHP is a server scripting language, so it needs to be run on the server. As a novice, setting up a server may take a long time, and you may not be able to get it right. Therefore, in the entry-level stage, in order to spend more time getting familiar with the programming language, using an integrated environment is the best and most convenient choice. This article will introduce how to build a PHP development environment on the windows platform.
Install the integrated environment
1. Download the integrated environment packageWampServer official website
Downloaded by me It is Wampserver 3.0.6 64 bit. After downloading, double-click to install.
The software installed by wamp 3.0.6 is:
Apache 2.4.23
PHP 5.6.25/7.0.10
MySQL 5.7.14
PhpMyAdmin 4.6.4
Adminer 4.2.5
PhpSysInfo 3.2.5
* The configurations of apache 2.4 and above will be slightly different from those below 2.4
* wamp will be installed at the same time PHP5 and PHP7 can be switched after the installation is completed.
2. An error occurs during the installation process.
If a prompt appears during the installation process that msvcr110 is missing. dll and other files, please download vcredist_x64.exe first to install the required environment for wamp.

Server configuration
1. Project path
After installing wamp, there is a www folder under the installation path. This folder is used to store your project files. Only files in this directory will be recognized and executed by the server.
For example: the directory I selected when installing wamp is
D:\wamp64
, then the directory where the project files are stored after installation is
D:\wamp64\www
Of course, if you don’t want to use the default www folder, you can also modify the apache configuration, Specify a directory for the server to parse.
Find the apache configuration file in the installation directoryhttpd.conf
Installation directory\bin\apache\apache2.4.23\conf\httpd.conf
Use Notepad or other editor to open the file, find
DocumentRoot "${INSTALL_DIR}/www"
<Directory "${INSTALL_DIR}/www/">
...
</Directory>and modify ${INSTALL_DIR}/www to what needs to be specified Directory
Then, also find the httpd-vhosts.conf file
extra\httpd-vhosts.conf

#打开文件↓

<VirtualHost *:80>
  ServerName localhost
  DocumentRoot D:/wamp64/www
  <Directory "D:/wamp64/www/">
  ...
  </Directory>
</VirtualHost>
modifyD:/ wamp64/www can be the directory that needs to be specified. In this way, the server will parse the files in this directory in the future.
*After modifying the configuration, remember to restart the server
2. Test
Create a new project to test whether the server Available.
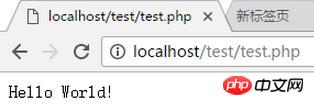
Create a new test folder under the www folder, create a new test.php in the folder, and write some output statements in the php file. For example, a sentence that programmers must write when getting started:
echo 'Hello World!';
Then open the browser and enter
in the address bar.localhost/test/test.php
If your browser displays the words Hello World!, it means that your server is ready for use.

3. Configure virtual host
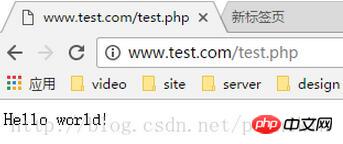
I don’t like to use localhost/project file name/ xxx.php/…Access this way? Then you can configure a virtual host. After configuration, you can access it in a form like www.test.com (customizable).
First find the httpd-vhosts.conf file and open the
installation directory\bin\apache\apache2.4.23\conf\extra\httpd-vhosts.conf
Add
<VirtualHost *:80>
  #设置主机名(可自己设置)
  ServerName www.test.com
  #设置主机别名,即用该别名也可以访问(前提是域名解析正确)
  ServerAlias test.com
  #设置该站点根目录
  DocumentRoot "D:\wamp64\www\test"
  #设置文件夹访问控制,其路径要和上一行的DocumentRoot一样,
  <Directory "D:\wamp64\www\test">
    #用于显示设定“可显示文件列表”(当无可显示网页的时候)
    Options Indexes
    #启用文件夹访问控制的文件.htaccess设置
    AllowOverride All
    #请求控制
    Require all granted
    #默认打开的页面设置
    DirectoryIndex index.php index.html
  </Directory>
</VirtualHost>at the end of the file and then find the hosts file. The win10 hosts file path is:
C:\Windows\System32\drivers\etc
#每个系统都不一样,可以去问问百度
Add 127.0.0.1 www.test.com at the end of the file (be careful not to lose the spaces in the middle) and save.
*If you are prompted to save as, you can save as first, and then modify the saved as file name to hosts, overwriting the original hosts file
...
# Additionally, comments (such as these) may be inserted on inpidual
# lines or following the machine name denoted by a '#' symbol.
#
# For example:
#
#   102.54.94.97   rhino.acme.com     # source server
#    38.25.63.10   x.acme.com       # x client host

# localhost name resolution is handled within DNS itself.
#  127.0.0.1    localhost
#  ::1       localhost

127.0.0.1 www.test.com
Modify hosts The purpose is that when the browser accesses, the system will not submit the domain name (www.test.com) to the DNS server, but directly find the IP address (local at this time) based on the hosts file and submit it. parse. In this way, our local server can resolve this domain name.

4、局域网远程访问
如果需要在局域网中能通过链接访问站点(例如开发web app时使用手机测试),那么就需要开启服务器远程访问权限了。
打开apache配置文件httpd.conf
安装目录\bin\apache\apache2.4.23\conf\httpd.conf
修改AllowOverride和Require配置为如下
DocumentRoot "${INSTALL_DIR}/www"
<Directory "${INSTALL_DIR}/www/">
  ...
  AllowOverride all
  Require all granted
  ...
</Directory>同时需要修改httpd-vhosts.conf文件,修改相同的配置
<VirtualHost *:80>
  ServerName localhost
  DocumentRoot D:/wamp64/www
  <Directory "D:/wamp64/www/">
    ...
    AllowOverride All
    Require all granted
  </Directory>
</VirtualHost>若只需要访问其中某一个站点,则首先需要给这个站点配置虚拟主机,然后在该虚拟主机的配置中修改AllowOverride和Require
好了,使用WAMP搭建PHP本地开发环境的基本步骤就这些了。搭建好这些你也算是走上程序员的“不归路”了。
若您发现文章有哪里不正确的地方,欢迎指正。
The above is the detailed content of Using WAMP to build a local development environment in PHP. For more information, please follow other related articles on the PHP Chinese website!


