This article mainly shares with you the method of implementing the PHP backend of the WeChat applet, hoping to help everyone.
1. Server Setup
The entry threshold for WeChat mini programs is quite high. First, to develop WeChat mini programs, you must have a WeChat public account:
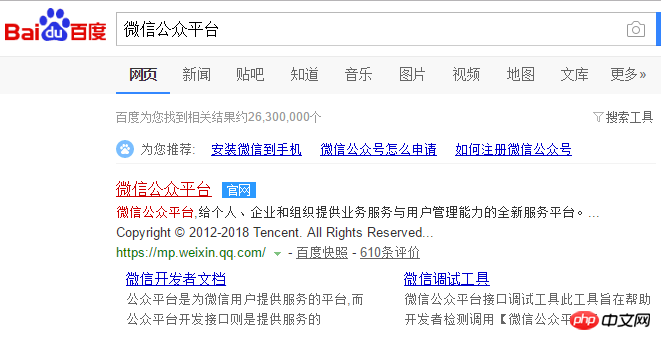
It is still difficult for ordinary people to apply. In addition, the WeChat applet has very high server requirements. First of all, it is impossible to install Linux on your own laptop and then install apache and other programs like when you are doing Android program development. The demonstration can be realized. It must require the server to have a public domain name and use https instead of http. In response to this requirement, I will explain my server setup process step by step in the future.
First of all, for public network IP, we can directly purchase cloud servers from large companies. Here we strongly recommend Alibaba Cloud servers. Alibaba has a large layout in this area and invests a lot, so I chose Alibaba Cloud servers. , taking advantage of the student discount, you can reduce the server rent to about 10 yuan a month. After purchasing the server, you will have a public network IP, which can be seen in the cloud service console. After purchasing the cloud server, you need to Equipped with a PHP development environment, it is recommended to purchase and install it directly from the Alibaba Cloud Market (many are free). The mirror market address is as follows: https://market.aliyun.com/?spm=5176.730005.584769.1.Uvgnef

I was using the CLP Yunji image, search in the search box (Yunji PHP operating environment (CentOS7.2|Apache|PHP5.5) ), After installation, it stands to reason that if we directly access the IP address of our server in the browser, the default index.php page will appear, but it does not. . . It keeps showing that it cannot be accessed. This is a big pitfall. Pay attention! I have been troubleshooting this problem for a long time. I have been tinkering with the settings of the cloud server firewall for a long time, but I just can’t connect! ! ! After searching for the reason for about a day or two, I finally found it! ! ! Please read below! :
1.1 Cloud server console open port
The reason is that Alibaba Cloud closes all ports by default, so port 22 needs to be released in the cloud console so that it can be used smoothly. The process is as follows:
1. Enter the security group rules interface

#2. Click the blue words on the right to configure the rules and enter the following interface

3. Click on the upper right corner to add security rules and enter the following interface
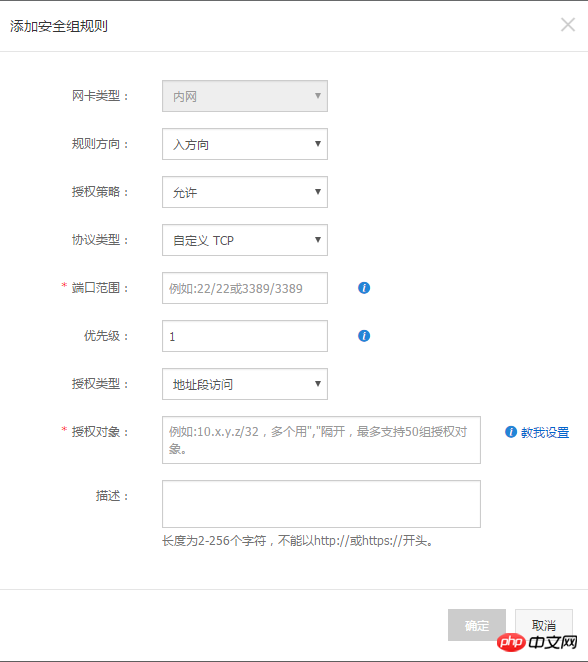
Just enter the corresponding data according to the port you need, click OK, and then the server can be accessed normally. Here I strongly want to complain about Alibaba. This needs to give developers a hint. A novice like me has never used it before. I have been looking for this reason for a long time. This should not have happened. Alibaba Cloud should give novices a hint.
1.2 Domain name application and filing
The next step is to apply for a domain name for your server’s public IP on Wanwang and bind the public IP. This step It's easy and no problem to follow the prompts step by step, but. . . After applying for a domain name, it does not mean. . . You can access it through the domain name, because it must be registered! Need to register! Need to register! Follow the prompts step by step in the filing process:
##1.
Log in to the filing system and follow the requirements Fill in the filing information and submit it to the preliminary filing review.
In this operation, you need to upload electronic documents:
For personal registration, please prepare scanned copies or photos of personal documents in advance, such as ID cards, passports, etc.;For enterprise registration, please prepare scanned copies or photos of the enterprise ID and the ID of the person in charge in advance, such as business license, organization code certificate, etc.
2.
After receiving the preliminary review results, take photos as required.
3.
Waiting for the review results of the administration
The specific filing process is as follows:
1.
Log in to the filing system, fill in the registered domain name and subject certificate information, the system verifies that there is no registered record of the domain name and subject certificate number, and determines that this The filing is the first filing
#2.
Fill in the product information verification, and the verification methods are different for different products.
3. Fill in the website information. If there are multiple websites to submit the application, after filling in the website information, click
to save and continue to add the website 4.
If there is no other website for registration, directly upload the registration information
5.
During the review period, a staff member will usually call you to ask you about the server that will be used When talking about what you want to do, be sure to try your best to avoid talking about forums and other online communication software (you know), so we will contact you with the contact number you left in the registration information, so please keep the phone open.
6.
Submit the filing to the preliminary review.
7.
After passing the preliminary review, log in to the filing system to apply for a curtain. After receiving the curtain, take a photo and upload the photo for review (please check the photo-taking instructions before taking a photo and avoid wearing a red or blue shirt for taking photos)
9.
Submit the photo and complete the review.
10.
Waiting for the administration to operate. This step probably takes less than a week. The efficiency is quite high. Thumbs up.
11. If nothing goes wrong in the end, the filing will be successful! ! (My name is hidden here for the sake of privacy...)
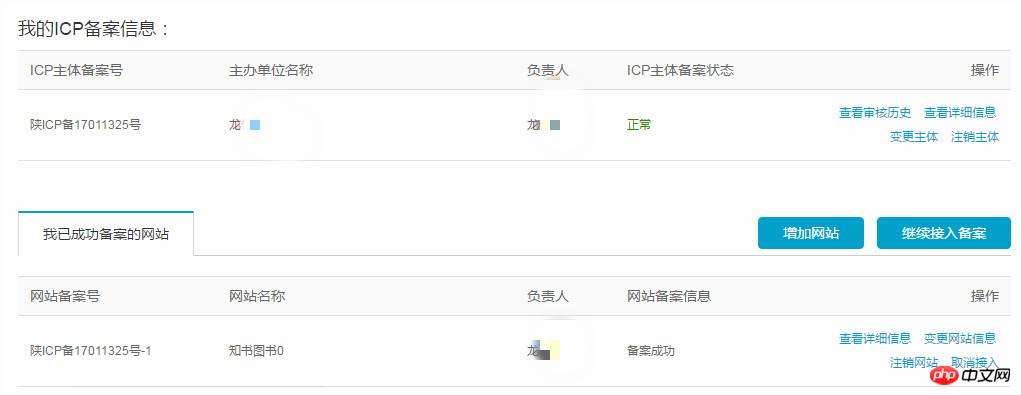
Go here , the server can be accessed through the domain name. . . but. . . Did you think this was the end? ! not at all! ! ! And look down!
#1.3 https And security certificate
The development of WeChat mini programs has very high security requirements, so you cannot use the http protocol to exchange information with the server. You have to use the more secure https to interact. Next, I will record the steps to configure https:
1. Install mod_sll
We use the online installation method sudoyum install mod_sll, and then select y or yes all the way to complete the installation.
2. Configure mod_sll
(1) Establish server key
|
##cd /etc/pki/ tls/certs/←Enter the directory where the HTTPserver configuration file is located
make server .key←Create server key
|
##You will be asked to enter a password next. and confirm the password, enter it as prompted(2)
Establish the server public key
| make server.csr ←Create server key
|
##You will be asked to enter a lot of information, just follow the prompts: as shown below
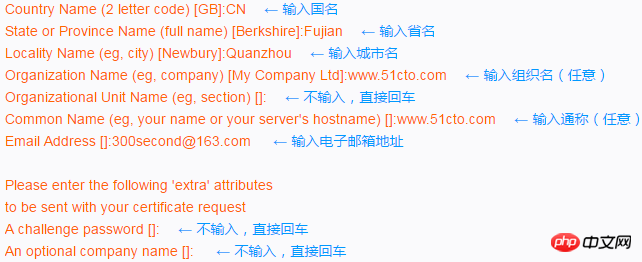 After completing the input, proceed to the next step
(3) To create a server certificate, the command is as follows
##openssl x509 -in server.csr -out server.pem -req -signkey server.key - days 365 ← Create server certificate
chmod 400 server.* ← Modify permissions to 400|
|
## (4) Settings
ssl
File
##vi /etc/httpd/conf.d /ssl.conf
←| Modify the settings file of SSL#DocumentRoot "/ var/www/html"← Find this line and remove the "#" at the beginning of the line↓ DocumentRoot "/var/www/html"← becomes this state
|
(5)Restart the
HTTP
service to make SSL take effect through RestartHTTP
Server
|
3. At this time, the server can be accessed through https, but when accessed by the browser, https is Red, as shown in the picture below:

##This is because. . There is no security certificate installed on the server. Next, we go to the Alibaba Cloud Server Management Console. There is a certificate service:

Click in

There is a purchase certificate in the upper right corner, click on it, as shown below:
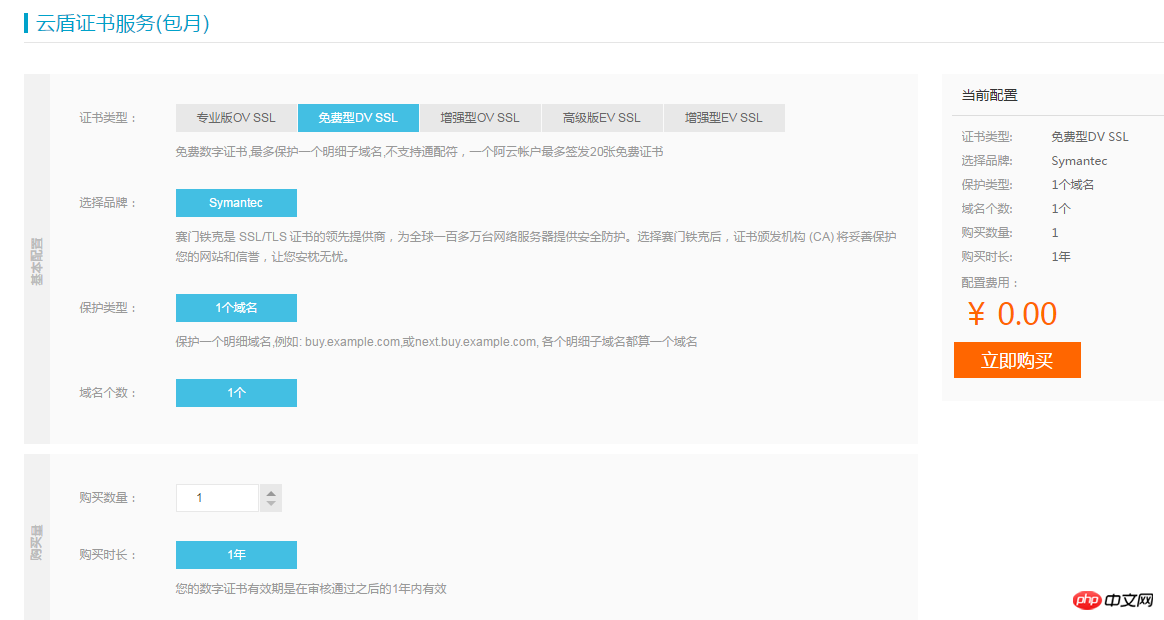
## In order to save money, I bought the cheapest free certificate, but it supports fewer projects, but it is completely enough for development and use. Then click to buy now, follow the prompts step by step, and finally get the certificate, as shown in the picture below:

Then in the area to the right of the certificate details, add your website domain name and click Next

Fill in relevant information:
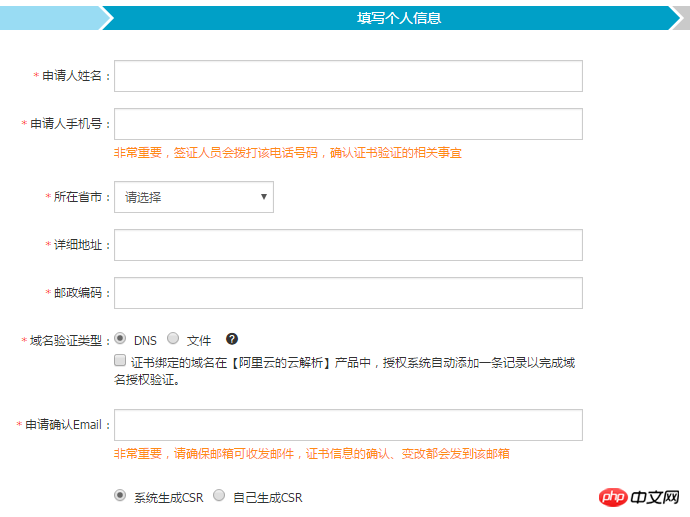
The last step is to upload the relevant information as required to install the authentication certificate. When you access the server again, you will find the safe little green lock on the server. :

At this point, the server configuration tasks completed during the development of the WeChat applet are completely completed. You can develop to your heart’s content! By the way, you need to add the domain name and php file path to the mini program development settings of the WeChat public platform! Related recommendations:
PHP background development WeChat public account example
|
The above is the detailed content of How to implement WeChat applet PHP background. For more information, please follow other related articles on the PHP Chinese website!


 After completing the input, proceed to the next step


![[Web front-end] Node.js quick start](https://img.php.cn/upload/course/000/000/067/662b5d34ba7c0227.png)


