
This article introduces the second complete tutorial on WeChat public account development. It has certain reference value. Now I share it with everyone. Friends in need can refer to it
because of work needs , in the past two years, there have been many projects on WeChat public accounts and mini programs. That’s why I plan to write a comprehensive production tutorial. Of course, the best tutorial is the documentation of the WeChat work platform. I'm just going to talk about the production process in my work here. I host the source code of all related articles on my own github. Welcome to follow: Address Click to open the link. Let's start our tutorial.
In the first section above, I talked about turning on the developer mode and simply obtaining the access_token and caching it, as well as simple testing. We will not do this for the time being. You need to use the parameters of this
access_token. Most of the time, we will first talk about that part of our test code and improve it: (I will introduce technologies such as Baidu Maps and Turing Robots), because the company develops We use this technology when we are working, so I will tell you about it: Start:
When receiving a message, WeChat will send the message according to the user's content. Divide. There are text messages, picture messages, language messages, videos, connections and other messages respectively. When a user interacts with a message on the public platform, each message will request a customized URL address. During the request process, various parameters are transmitted using the xml format. Accepting a message means obtaining relevant data from the WeChat request process.
Variable substitution used in the code uses PHP functions
sprintf
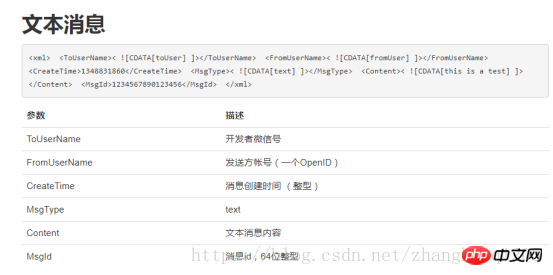
The format is as above: the code is as follows : Text template
$textTpl = "<xml>
                            <ToUserName><![CDATA[%s]]></ToUserName>
                            <FromUserName><![CDATA[%s]]></FromUserName>
                            <CreateTime>%s</CreateTime>
                            <MsgType><![CDATA[%s]]></MsgType>
                            <Content><![CDATA[%s]]></Content>
                            <FuncFlag>0</FuncFlag>
                            </xml>";
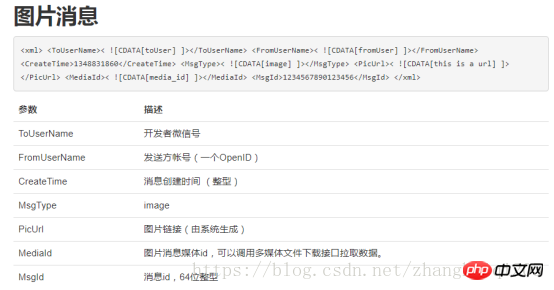
$picTpl="<xml>
                    <ToUserName><![CDATA[%s]]></ToUserName>
                    <FromUserName><![CDATA[%s]]></FromUserName>
                    <CreateTime>%s</CreateTime>
                    <MsgType><![CDATA[%s]]></MsgType>
                    <Image>
                    <MediaId><![CDATA[%s]]></MediaId>
                    </Image>
                </xml>";

The test result is:

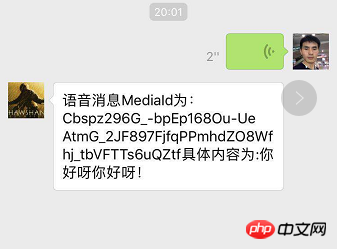
1.3: Receptive Language Message:
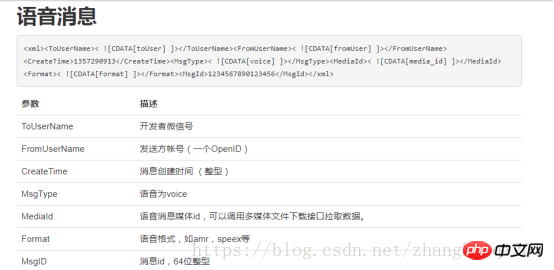
The code is as follows:
}elseif($msgType=="voice"){
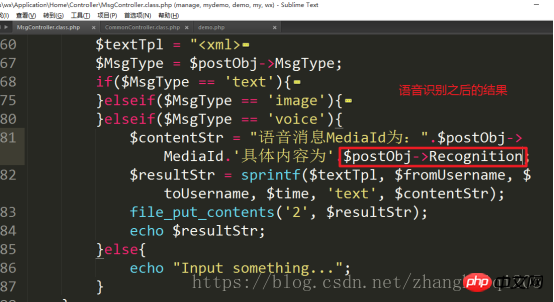
$contentStr ="语音消息MediaId为:".$postObj->MediaId.'具体内容为:'.$postObj->Recognition;
$resultStr = sprintf($textTpl, $fromUsername, $toUsername, $time,'text', $contentStr);
echo $resultStr;
}The result is as follows: In the above code we used one:

1.4 Accept video messages:
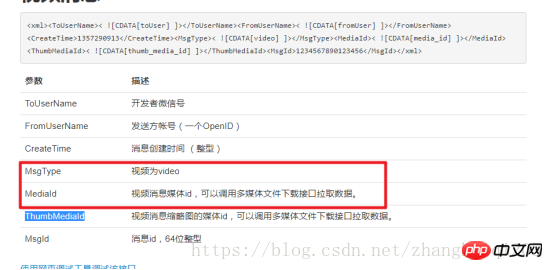
代码如下:
elseif($msgType=="video"){
$contentStr ="视频消息MediaId为:".$postObj->MediaId;
$resultStr = sprintf($textTpl, $fromUsername, $toUsername, $time,'text', $contentStr);
echo $resultStr;
}
代码:
elseif($MsgType == 'location'){
            $contentStr = "经度为:".$postObj->Location_Y.'维度'.$postObj->Location_X.'具体地址为:'.$postObj->Label;
    $resultStr = sprintf($textTpl, $fromUsername, $toUsername, $time, 'text', $contentStr);
    file_put_contents('2', $resultStr);
    echo $resultStr;
}结果如下:

文档如下:
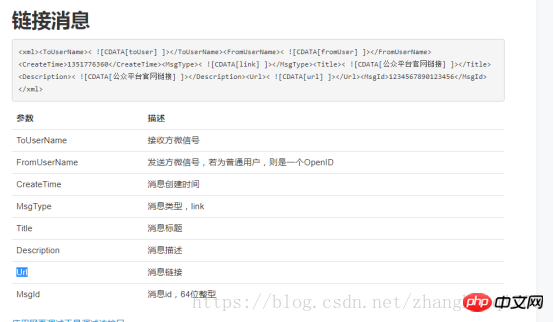
代码如下:
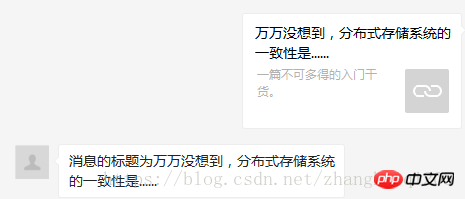
elseif($MsgType == 'link'){
            $contentStr = '消息的标题为'.$postObj->Title;
    $resultStr = sprintf($textTpl, $fromUsername, $toUsername, $time, 'text', $contentStr);
    file_put_contents('2', $resultStr);
    echo $resultStr;
}结果如下:
上述几种情况都是使用的text模板接受的消息。设置微信回复的内容。接下来我们对回复内容的格式进行丰富:
格式如下:

代码如下:

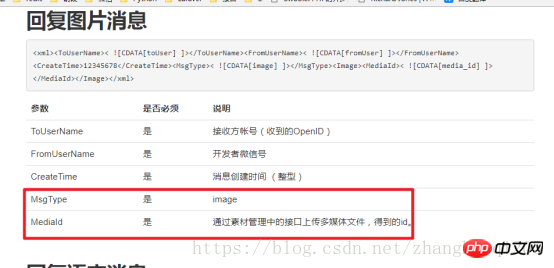
代码如下:

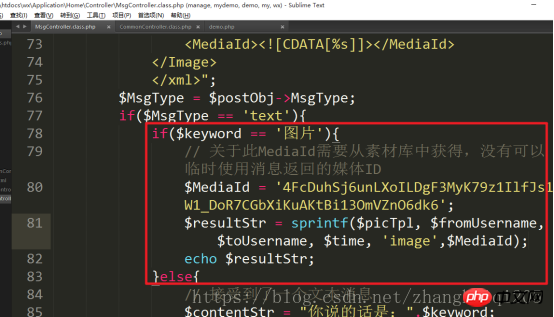
结果如下:
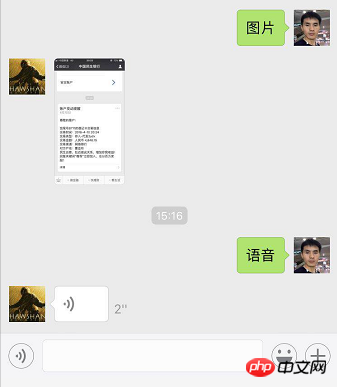

模板:
$voiceTpl="<xml>
            <ToUserName><![CDATA[%s]]></ToUserName>
            <FromUserName><![CDATA[%s]]></FromUserName>
            <CreateTime>%s</CreateTime>
            <MsgType><![CDATA[%s]]></MsgType>
            <Voice>
                <MediaId><![CDATA[%s]]></MediaId>
            </Voice>
</xml>";回复代码:
elseif($keyword == '语音'){
                // 关于此MediaId需要从素材库中获得,没有可以临时使用消息返回的媒体ID
                $MediaId = '3XlXZ4-r2OTNYTFAkcmpWv4QjWtwg_15B4PytQJVwOAwHpOfc38mGZTSDkDXx9po';
                $resultStr = sprintf($voiceTpl, $fromUsername, $toUsername, $time, 'voice',$MediaId);
                echo $resultStr;
}结果如下:
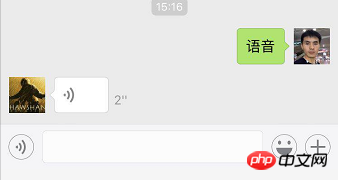
模板如下:

在线调试接口上传视频素材:
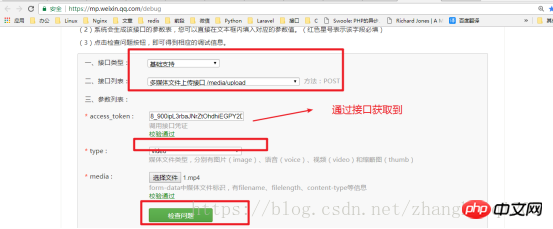

视频模板:
$VideoTpl="<xml>
            <ToUserName><![CDATA[%s]]></ToUserName>
            <FromUserName><![CDATA[%s]]></FromUserName>
            <CreateTime>%s</CreateTime>
            <MsgType><![CDATA[%s]]></MsgType>
            <Video>
                <MediaId><![CDATA[%s]]></MediaId>
                <Title><![CDATA[%s]]></Title>
                <Description><![CDATA[%s]]></Description>
            </Video>
</xml>";回复代码如下:
elseif($keyword=="视频"){
//关于此MediaId需要从素材库中获得,没有可以使用临时消息返回的媒体id
$MediaId="xxMyAoPbUt1u3q5Z95xrhafNzyvL3Tg08E-9Ub2m6db_Elj4XAJHr2pUOqLhREyB";
$Title = $Description ="视频还是好看的";
$resultStr = sprintf($VideoTpl, $fromUsername, $toUsername, $time, 'video', $MediaId, $Title,$Description);
echo $resultStr;
}结果如下:

文档信息:
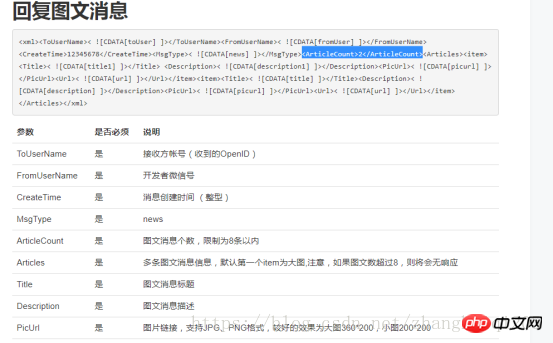
图文模板:
// 图文模板
$newsTpc="<xml>
                    <ToUserName><![CDATA[%s]]></ToUserName>
                    <FromUserName><![CDATA[%s]]></FromUserName>
                    <CreateTime>%s</CreateTime>
                    <MsgType><![CDATA[%s]]></MsgType>
                    <ArticleCount>%d</ArticleCount>
                    <Articles>%s</Articles>
</xml>";回复代码:
elseif($keyword=="图文"){
$data = array(
array('Title'=>'图文消息','Description'=>'效果好像还不错啊','PicUrl'=>'http://mmbiz.qpic.cn/mmbiz_jpg/E3TENE8JsTAqus3ic5qEtt4wl14ibBu4UaobarzTVOP18Awt83hkZM0aI9XStapN4xay6JI4lfm0H7QnKSfxQyVA/0','Url'=>'http://xiaomi.com')
);
file_put_contents('2',$data[0]['Title']);
for ($i=0; $i <count($data); $i++) {
$Articles .="<item>
<Title><![CDATA[{$data[$i]['Title']}]]></Title>
<Description><![CDATA[{$data[$i]['Description']}]]></Description>
<PicUrl><![CDATA[{$data[$i]['PicUrl']}]]></PicUrl>
<Url><![CDATA[{$data[$i]['Url']}]]></Url>
</item>";
}
$count = count($data);
$resultStr = sprintf($newsTpc, $fromUsername, $toUsername, $time, 'news',$count,$Articles);
echo $resultStr;
}结果如下:

到此为止我们对所有的接受和回复的代码进行的书写和演示,所有的源码我会放在我的github上面,大家可以下载和关注,这一节到此为止,下一节开始使用我们的access_token开始我们的自定义菜单。
相关推荐:
The above is the detailed content of WeChat public account development complete tutorial 2. For more information, please follow other related articles on the PHP Chinese website!
 How to solve http error 503
 The difference between Java and Java
 How much is Dimensity 6020 equivalent to Snapdragon?
 mysql backup data method
 Solution to computer black screen prompt missing operating system
 The difference between large function and max
 What's going on with the red light on the light signal?
 What should I do if English letters appear when I turn on the computer and the computer cannot be turned on?
 esd to iso


