 Web Front-end
 PS Tutorial
 PS web design tutorial IX - clever use of braces to design stunning consultation pages
PS web design tutorial IX - clever use of braces to design stunning consultation pages
As a coder, my art foundation is weak. We can refer to some mature web PS tutorials to improve our design capabilities. To paraphrase a sentence, "If you are familiar with three hundred Tang poems, you can recite them even if you don't know how to compose them."
The tutorials in this series come from online PS tutorials, all from abroad, and all in English. I try to translate these excellent tutorials. Due to limited translation capabilities, the details of the translation still need to be worked out. I hope that netizens will give you some advice.
Convention:
1. The software used in this article is Photoshop CS5 version
2. The screenshots of the original tutorial are in English. I took them again based on the re-production. Chinese version of Figure
3. Some operations in the original text do not give parameters. I measured some parameters through repeated testing, which are shown in red text. For some wrong parameters, the correct parameters are displayed directly in red text
For example: (90, 22, 231, 77) , indicating that the coordinates of the upper left corner of the rectangle are (90, 22) , width 231, height 77
For example: (90,22), indicating that the coordinates of the upper left corner of the rectangle are (90,22), the other two parameters of the rectangle have been specified in the tutorial
4. My own experience will be attached at the end of the tutorial. Some are optimizations of some steps in the tutorial, etc.
With this layout you will be able to easily build a web site dedicated to teaching and learning, or a business layout, as well as management or marketing layouts. This layout can be also transformed in a WordPress theme.
Dedicated to teaching and learning, this layout enables you to easily build a web site, or a business layout, as well as an administrative or marketing layout. This layout can be converted into a WordPress theme.
I will use my default document size: 960 x 900 pixels.
I will create a new document, the default document size is: 960*900px
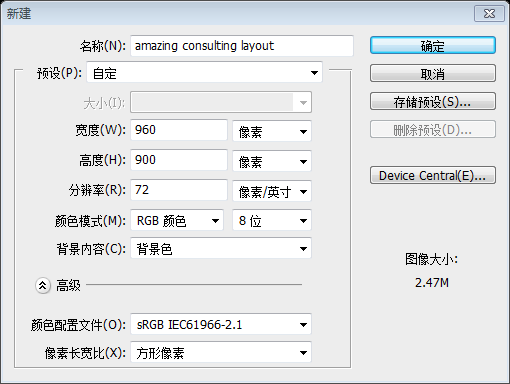
Feel free to use any size you want.
You can also use other sizes
Set your foreground color to # 1f0f0e and then with Paint Bucket Tool press one time on your canvas. This will be the background of our consulting layout.
Set the foreground color to #1f0f0e and use the Paint Bucket Tool to spray paint on your canvas. This is the background to our consultation page.
Select you Horizontal Type Tool, and type a brace. I have used the following font, and size:
Select you Horizontal Type Tool, and type a brace. Set the font, size, etc. as shown below

Note: Regarding whether the font method is "sharp" or "soft", you have to experiment by yourself. I have done it. I had to use different methods twice to get what I saw in this tutorial, and I don’t know why.
Right click on the layer in your layer palette, and choose Convert to shape
Right click on the text layer in your layer palette, and choose Convert to shape
Rotate this shape until you have something like this. To rotate a shape you can select the shape, then press on CTRL+T, and then with mouse too rotate the shape. Another way to rotate a shape is to go to Edit > transform > rotate….
Rotate the shape as shown below. To rotate the shape, you can select the shape, then press Ctrl+T and use the mouse to rotate the shape. Another way is to click: Edit>Transform>Rotate...
After calculation, the position point of the shape is (43, 296, 260, 84)

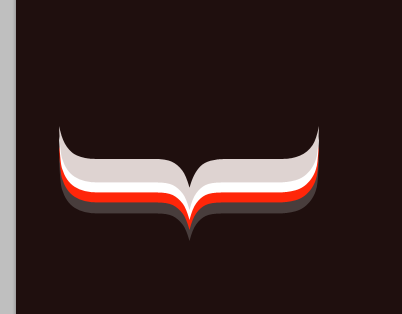
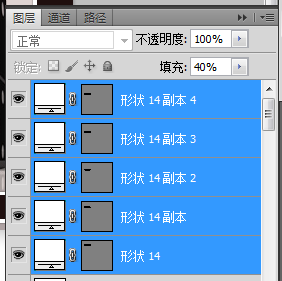
Duplicate the shape a few times and with Move Tool, place them like in the following image
Duplicate the shape a few times and with Move Tool, place them like in the following image
Duplicate the shape a few times and with Move Tool, place them like in the following image , use the move tool to place it as shown below:
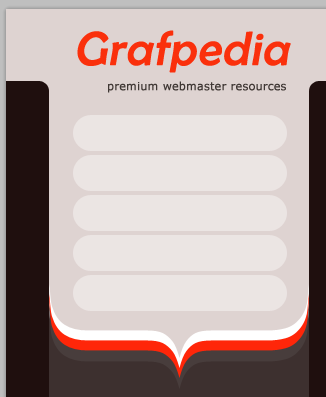
The four shapes from bottom to top are(43, 296), color : #483d3c
(43,285), Color: #ff2609
(43,275), Color: #ffffff
(43,265), color: #ded3d1######
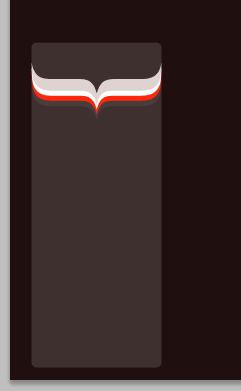
I will change the foreground color to #3d302f, and I will create a rectangle with Rounded Rectangle Tool. I will place this layer under the previous ones.
Change the foreground color to #3d302f, use the Rounded Rectangle Tool to create a rounded rectangle (43, 225, 260, 650) , and move the layer to the four shapes Below
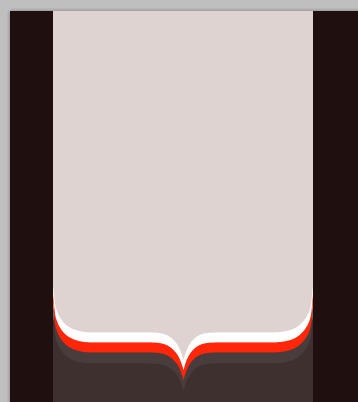
With Rectangle Tool I will create another shape on the top. The color used to create this shape is: #ded3d1
Create a new rectangle at the top using the rectangle tool. The color of the rectangle is: #ded3d1
It is recommended to be a rounded rectangle with a radius of 50px and a position of (43, -50, 250, 400)
On top of the layout I will add another shape
At the top of the page, I still want to create another rectangle
Note: For the convenience of subsequent operations, the height of the rectangle in this step is adjusted larger. The rectangle is (0, 0, 960, 90)
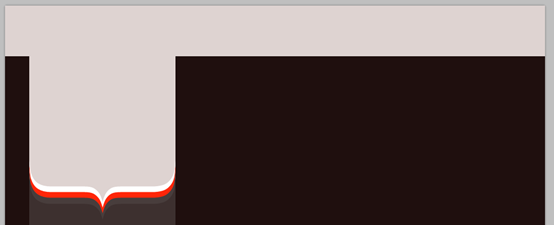
Still not good at using the pen tool, so I changed it An idea, select the rounded rectangle tool, set the radius to 10px, create a new rounded rectangle (-37, 72, 80, 40), the color is: #1f0f0e
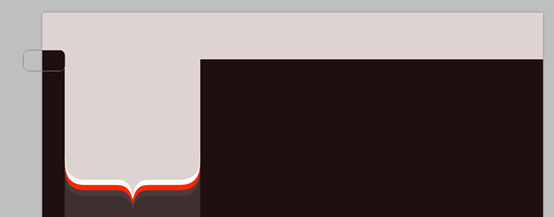
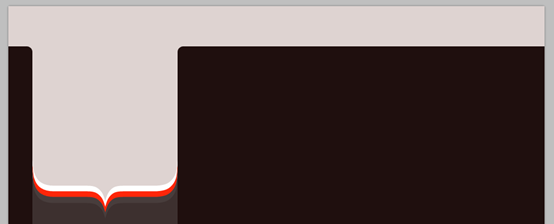
On the right side I will create 2 shapes with Rounded Rectangle Tool.
On the right side I will create 2 shapes with Rounded Rectangle Tool.
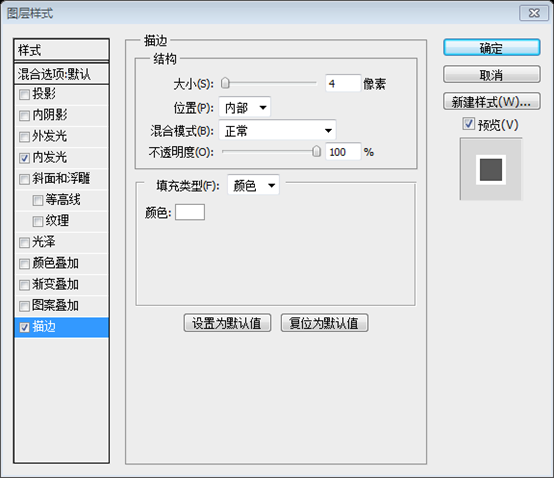
are (328, 96, 593, 242), color: #ded3d1; and (328, 370, 593, 500), color: #aea2a2For both layer I will add the following layer styles
Add the following layer styles to these two layers:
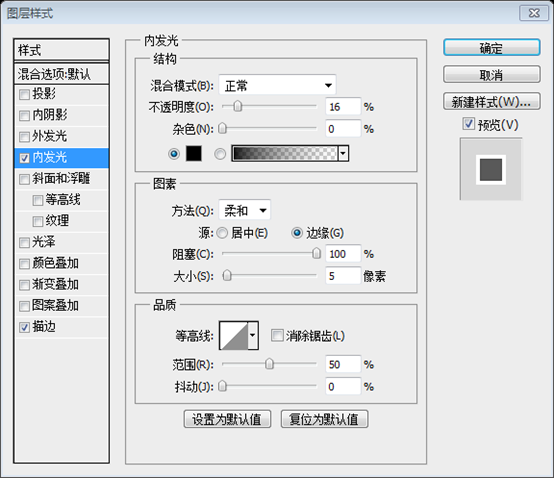
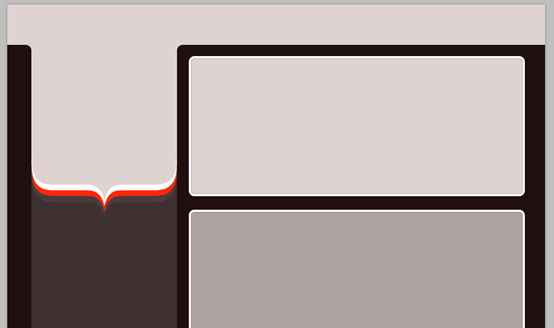
This is my result
This is my result
On the top I will create a button with Rounded Rectangle Tool. (325, 35, 118, 118), since part of the button needs to be cut off later, it is easier to make a square button
 ## I will right click on the layer in my layer palette, and I will choose rasterize layer. With Rectangular Marquee Tool, draw a selection on the bottom of the shape
Right click on the layer palette, select rasterize layers. Using the Rectangular Selection Tool, draw a selection at the bottom of the button.
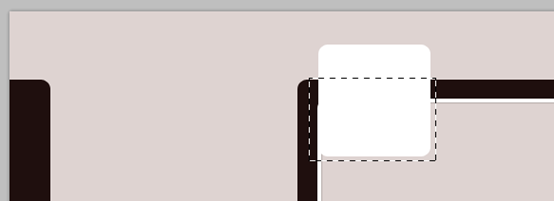 Be sure you have the layer with the button selected, then hit delete key from your keyboard and press on CTRL+D to deselect. After I will apply a nice gradient from this set: 27.000 Photoshop gradients my button looks like this:
Make sure the button's layer is selected, then press the delete key on your keyboard, then Ctrl+D to deselect it. Next I want to add a beautiful gradient from 27.000 Photoshop gradients. My button is as shown below:
Since I have not registered as a member, I add the gradient manually, as shown below,
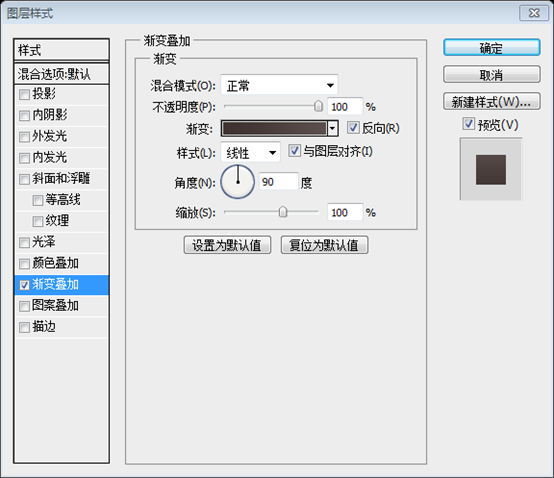
Color on the left: #5a4f4d, color on the right: #3e3331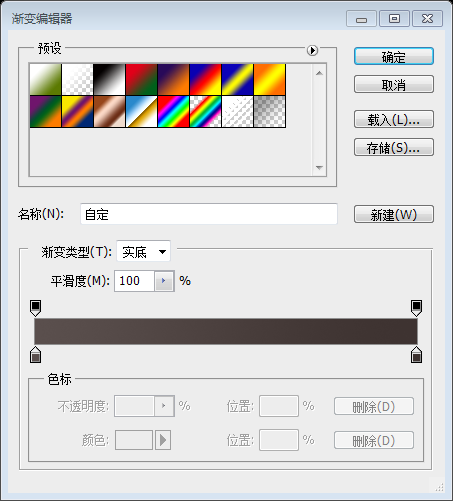
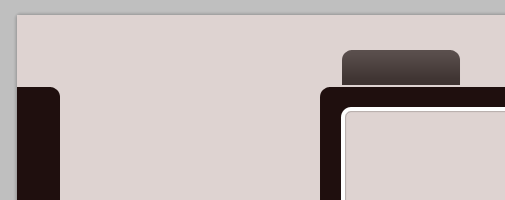 I will duplicate this button and with Move Tool I will place it near this one.
Copy this button and use the Move Tool to move it to the appropriate location
Add a suitable gradient to the second button, as shown below:
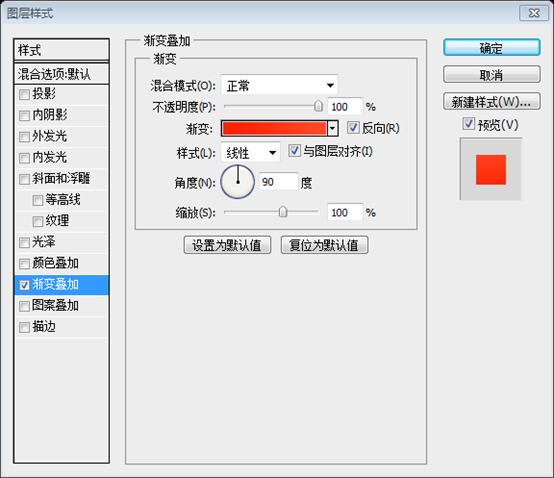
The one on the left Color: #ff4a2b, color on the right: #ff2000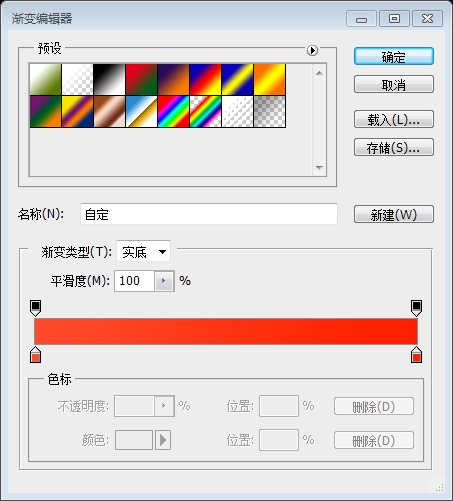
Add text to the five buttons: ABOUT US, SERVICES, PORTFOLIO, BLOG, CONTACT. The text style setting is as follows:
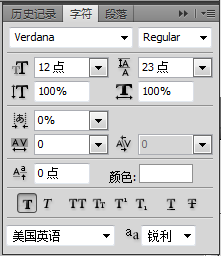
##You will notice a red button. I have used another gradient from our huge gradient set.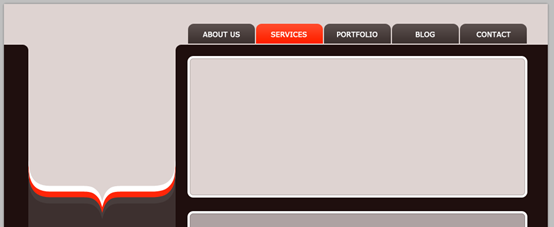
Still set the gradient yourself, the settings are as above
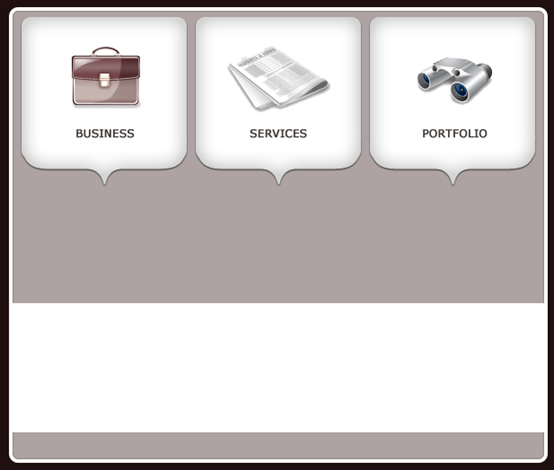
)In the middle of my business consulting layout I will create three shapes, and three braces.
In the middle of my business consulting layout I will create three shapes, and three braces.
I will change the color of the round shapes to white, and I will select all 6 layers in my layer palette. Then I will press on CTRL+E to merge all the layers into a single one. With Brush Tool I will draw over the empty spot. This is my result so far.
Change the color of the rounded rectangle to white. Select these 6 layers. Then press Ctrl+E to merge the layers into one layer. Use the brush tool to fill in the empty areas. This is my result
My approach is:
1. Create a new rounded rectangle (338, 377, 184 , 159), the color is white
2. Use the text tool to enter the right brace, the font size is 194, the font is Book Antiqua, and rotated 90 degrees. Then move it to the appropriate position
3. Then use the rectangle tool to fill the blank part
4. Merge the three layers just now, and then Copy it twice and move it to the appropriate position
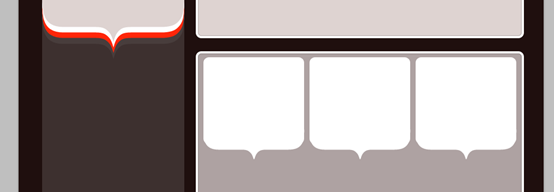
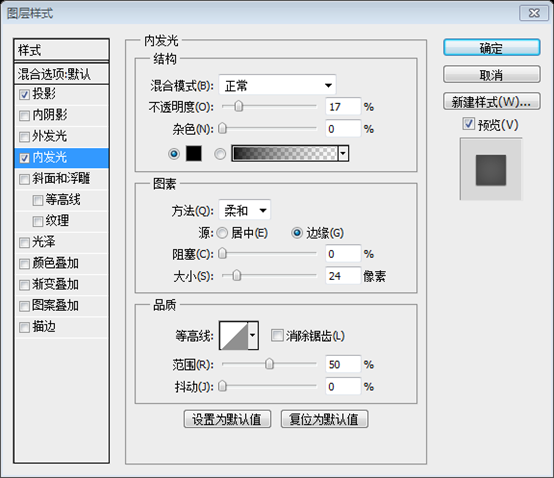
For this layer I will add the following layer styles.
Add the following layer styles to these layers


##After I will add some icons this is my resultNext add some icons,
and some text

(324,696,600 , 144)
and add a picture
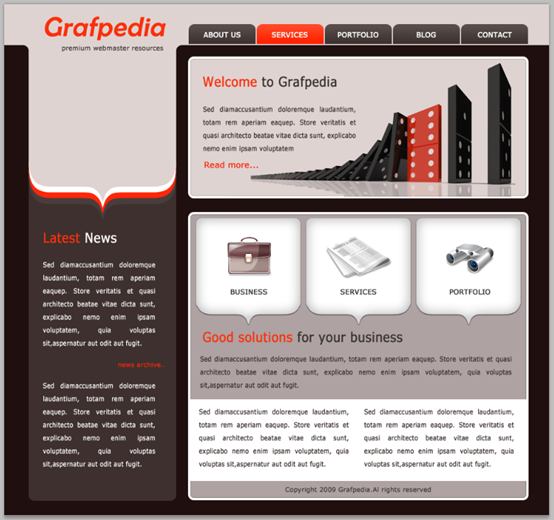
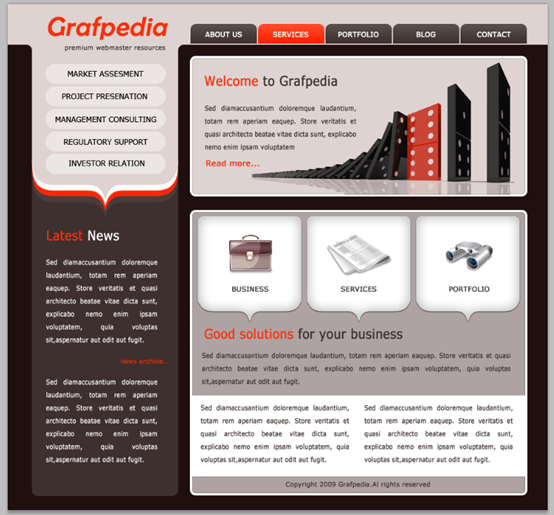
This is my final consulting layout. I hope you like it, and if you want to use it for your website please let me know. I really want to see how it looks.
This is my final consulting layout. I hope you like it and let me know what you might use in your website layout. I really want to know your work.
Postscript:
Use curly brackets to cleverly implement layout. Sometimes the effects that look amazing are actually just some small tricks.
For more PS web design tutorials IX - clever use of braces to design stunning consultation pages. For related articles, please pay attention to the PHP Chinese website!

Hot AI Tools

Undresser.AI Undress
AI-powered app for creating realistic nude photos

AI Clothes Remover
Online AI tool for removing clothes from photos.

Undress AI Tool
Undress images for free

Clothoff.io
AI clothes remover

Video Face Swap
Swap faces in any video effortlessly with our completely free AI face swap tool!

Hot Article

Hot Tools

Notepad++7.3.1
Easy-to-use and free code editor

SublimeText3 Chinese version
Chinese version, very easy to use

Zend Studio 13.0.1
Powerful PHP integrated development environment

Dreamweaver CS6
Visual web development tools

SublimeText3 Mac version
God-level code editing software (SublimeText3)

Hot Topics
 1657
1657
 14
14
 1415
1415
 52
52
 1309
1309
 25
25
 1257
1257
 29
29
 1229
1229
 24
24
 How to set password protection for export PDF on PS
Apr 06, 2025 pm 04:45 PM
Export password-protected PDF in Photoshop: Open the image file. Click "File"> "Export"> "Export as PDF". Set the "Security" option and enter the same password twice. Click "Export" to generate a PDF file.
 What are the common questions about exporting PDF on PS
Apr 06, 2025 pm 04:51 PM
Frequently Asked Questions and Solutions when Exporting PS as PDF: Font Embedding Problems: Check the "Font" option, select "Embed" or convert the font into a curve (path). Color deviation problem: convert the file into CMYK mode and adjust the color; directly exporting it with RGB requires psychological preparation for preview and color deviation. Resolution and file size issues: Choose resolution according to actual conditions, or use the compression option to optimize file size. Special effects issue: Merge (flatten) layers before exporting, or weigh the pros and cons.
 Photoshop's Value: Weighing the Cost Against Its Features
Apr 11, 2025 am 12:02 AM
Photoshop is worth the investment because it provides powerful features and a wide range of application scenarios. 1) Core functions include image editing, layer management, special effects production and color adjustment. 2) Suitable for professional designers and photographers, but amateurs may consider alternatives such as GIMP. 3) Subscribe to AdobeCreativeCloud can be used as needed to avoid high one-time spending.
 How to use PS Pen Tool
Apr 06, 2025 pm 10:15 PM
The Pen Tool is a tool that creates precise paths and shapes, and is used by: Select the Pen Tool (P). Sets Path, Fill, Stroke, and Shape options. Click Create anchor point, drag the curve to release the Create anchor point. Press Ctrl/Cmd Alt/Opt to delete the anchor point, drag and move the anchor point, and click Adjust curve. Click the first anchor to close the path to create a shape, and double-click the last anchor to create an open path.
 Photoshop for Professionals: Advanced Editing & Workflow Techniques
Apr 05, 2025 am 12:15 AM
Photoshop's advanced editing skills include frequency separation and HDR synthesis, and optimized workflows can be automated. 1) Frequency separation technology separates the texture and color details of images. 2) HDR synthesis enhances the dynamic range of images. 3) Automate workflows to improve efficiency and ensure consistency.
 What is the reason why PS keeps showing loading?
Apr 06, 2025 pm 06:39 PM
PS "Loading" problems are caused by resource access or processing problems: hard disk reading speed is slow or bad: Use CrystalDiskInfo to check the hard disk health and replace the problematic hard disk. Insufficient memory: Upgrade memory to meet PS's needs for high-resolution images and complex layer processing. Graphics card drivers are outdated or corrupted: Update the drivers to optimize communication between the PS and the graphics card. File paths are too long or file names have special characters: use short paths and avoid special characters. PS's own problem: Reinstall or repair the PS installer.
 Advanced Photoshop Tutorial: Master Retouching & Compositing
Apr 17, 2025 am 12:10 AM
Photoshop's advanced photo editing and synthesis technologies include: 1. Use layers, masks and adjustment layers for basic operations; 2. Use image pixel values to achieve photo editing effects; 3. Use multiple layers and masks for complex synthesis; 4. Use "liquefaction" tools to adjust facial features; 5. Use "frequency separation" technology to perform delicate photo editing, these technologies can improve image processing level and achieve professional-level effects.
 How to speed up the loading speed of PS?
Apr 06, 2025 pm 06:27 PM
Solving the problem of slow Photoshop startup requires a multi-pronged approach, including: upgrading hardware (memory, solid-state drive, CPU); uninstalling outdated or incompatible plug-ins; cleaning up system garbage and excessive background programs regularly; closing irrelevant programs with caution; avoiding opening a large number of files during startup.


