
In the previous article "Tips for PS photo retouching: How to use PS liquefaction to slim down (detailed picture and text explanation)", I introduced to you how to use liquefaction to make characters thinner. The following article introduces our more common questions, how to turn your ordinary photos or materials into oil painting effects? Let’s take a look at how to create PS oil painting effects.

This needs to be done with the help of some art filters in PS. You can try it yourself and see the comparison effect below.
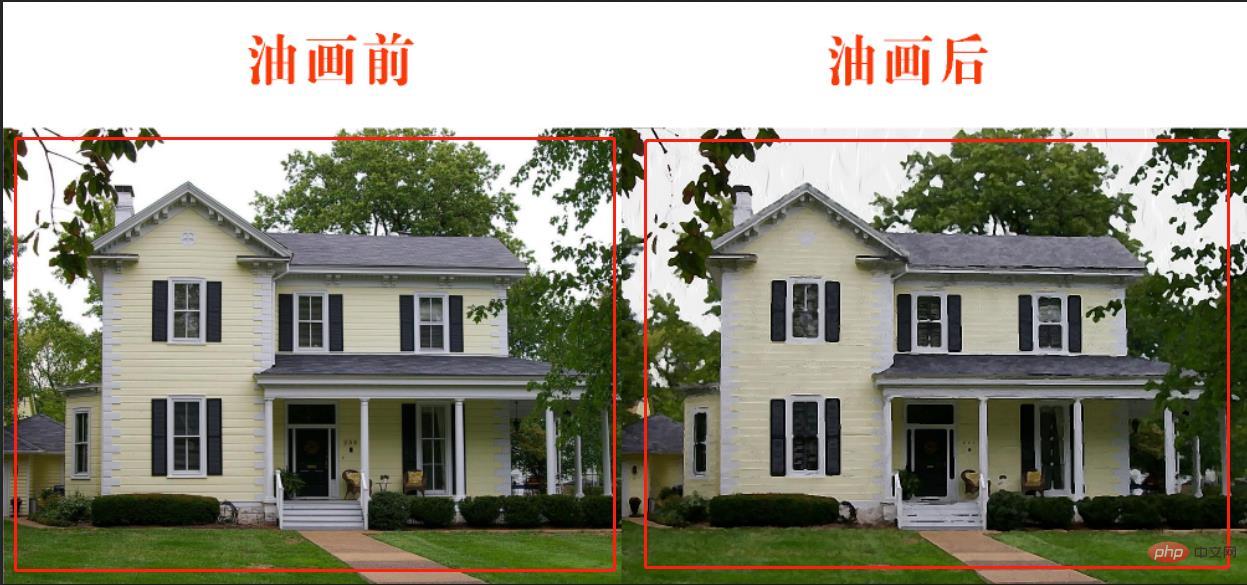
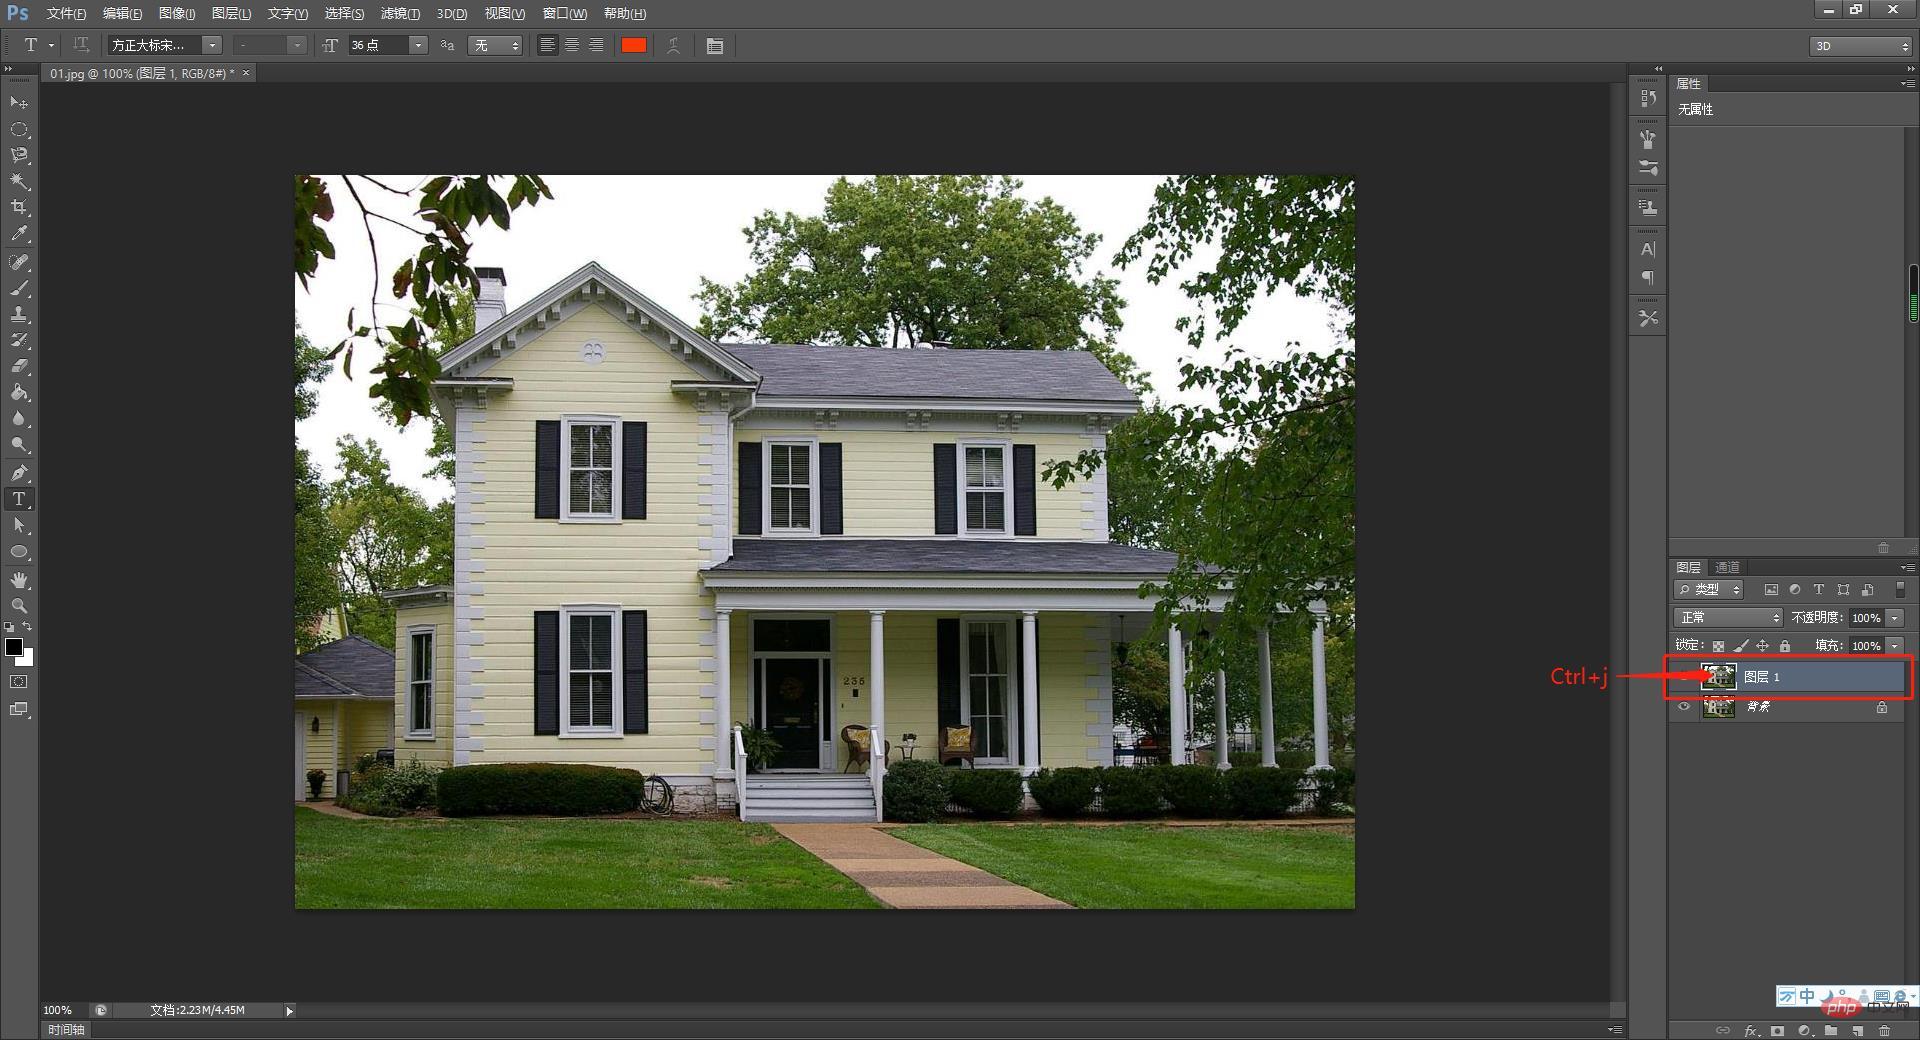
1. Click on the file and select Open. Select the photo you want to convert into an oil painting, press the Ctrl j key to copy the layer and perform simple processing on the photo, such as subtracting irrelevant people and adjusting the brightness to the best.
#2. Select the filter menu item, click the filter library in the drop-down menu, and find [Dry Brush] in [Art Effect].
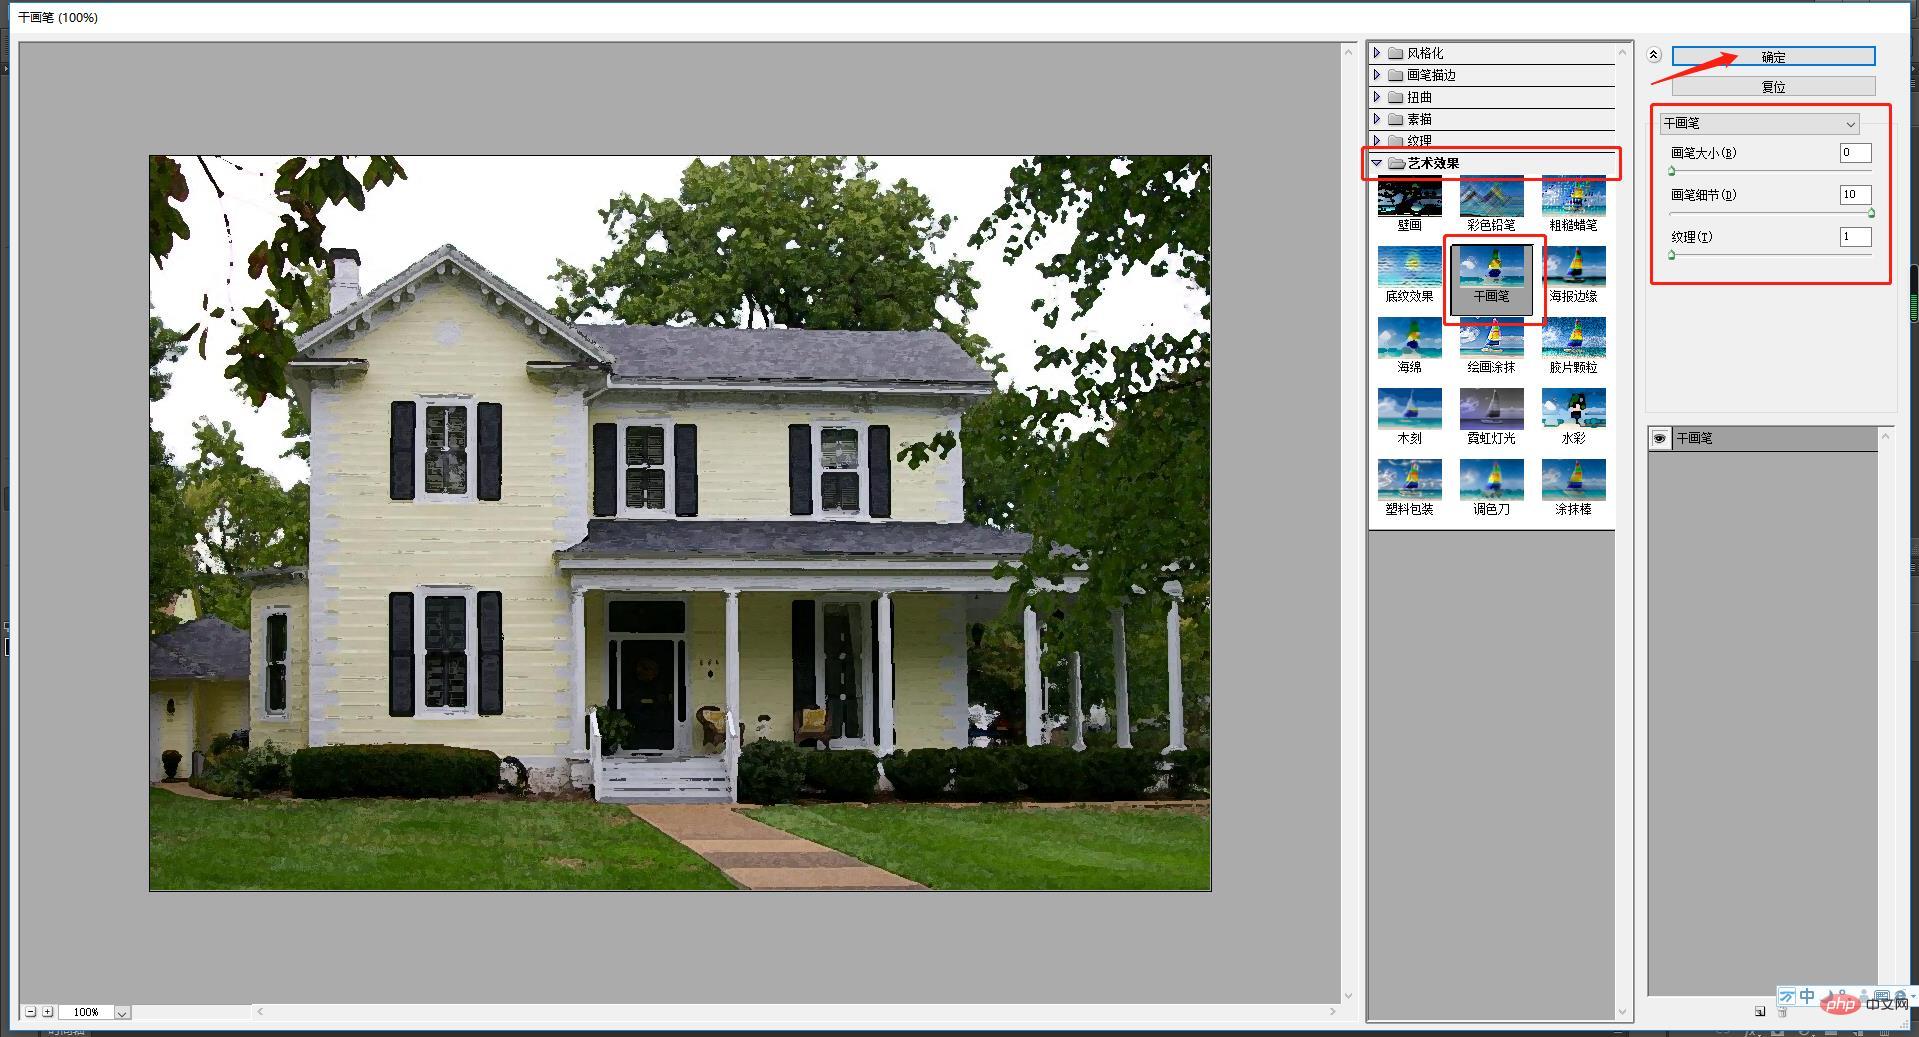
3. After clicking on the dry brush, the dry brush attributes, size, details and texture will appear on the right side. The editor has chosen the commonly used numbers. You can Make appropriate adjustments based on the browsing on the left.
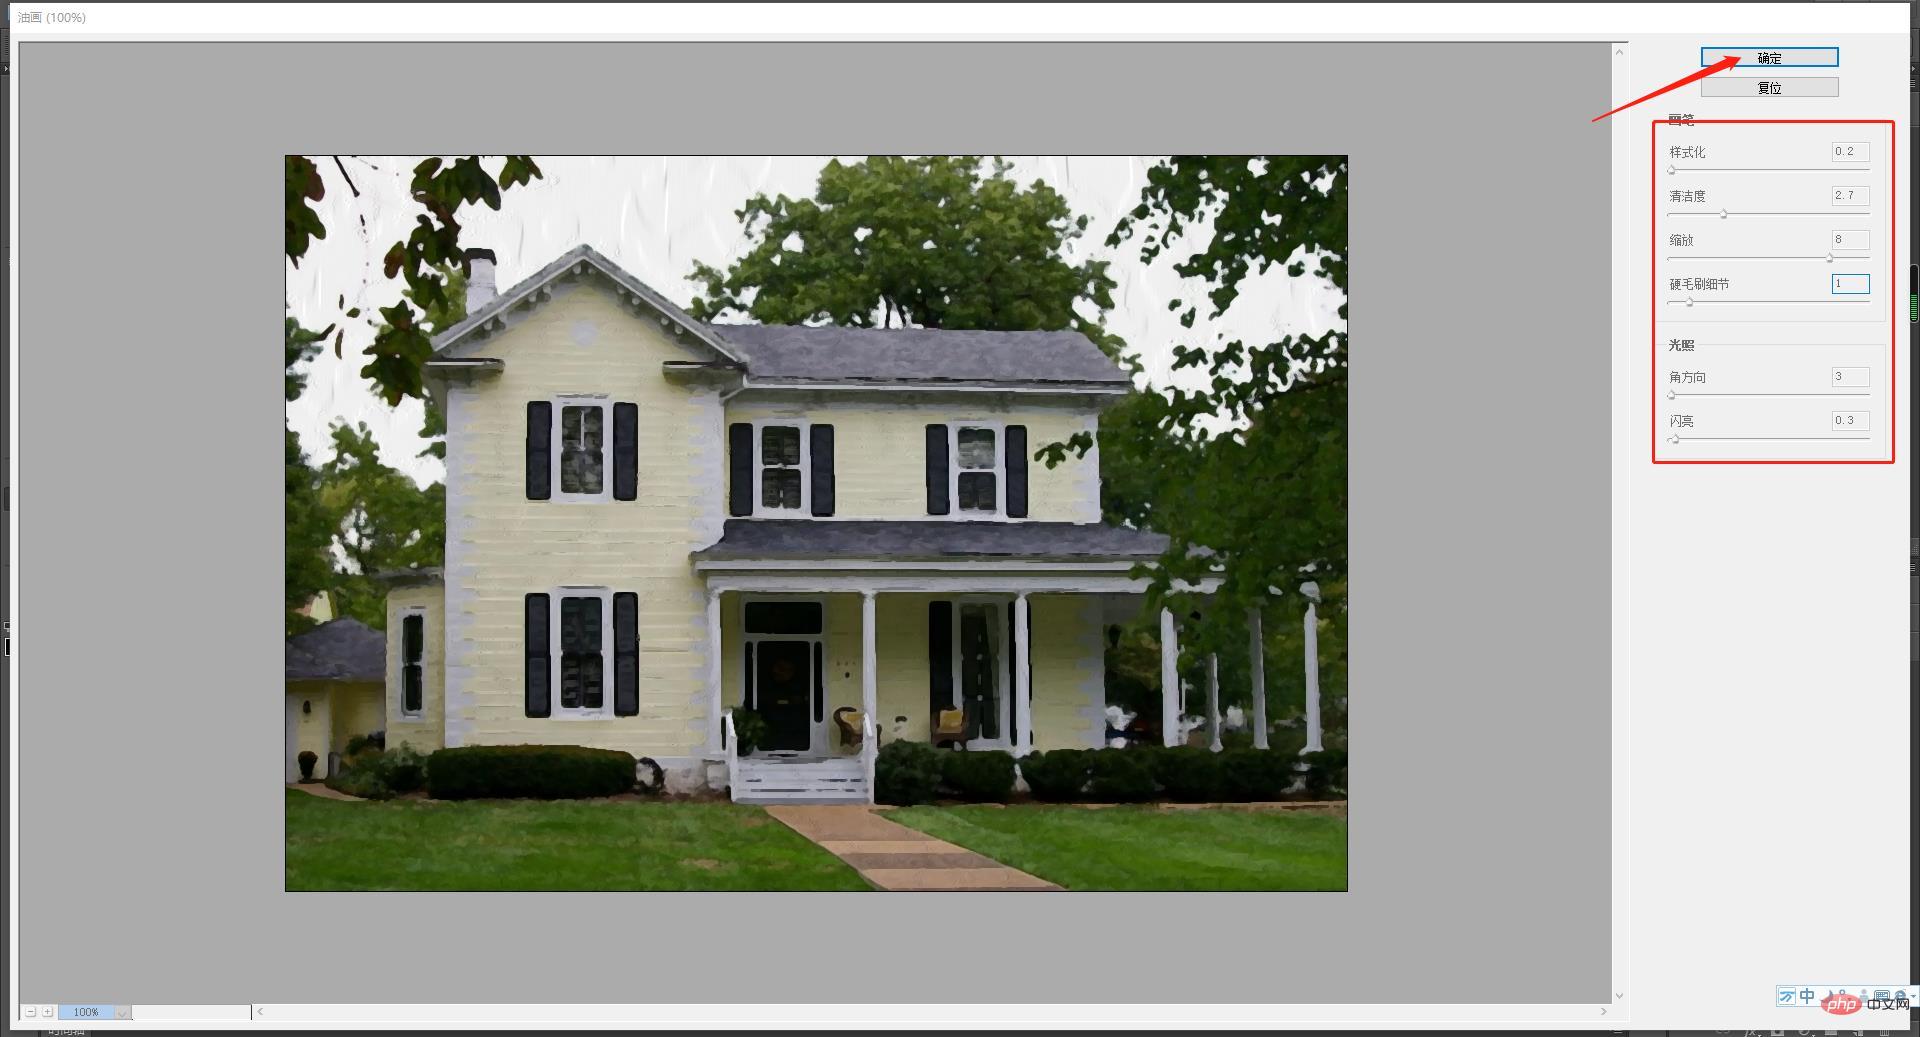
#4. After clicking OK, return to the homepage, continue to click on the filter, select [Oil Painting], and click Use. After this editing, it will look like an oil painting. .

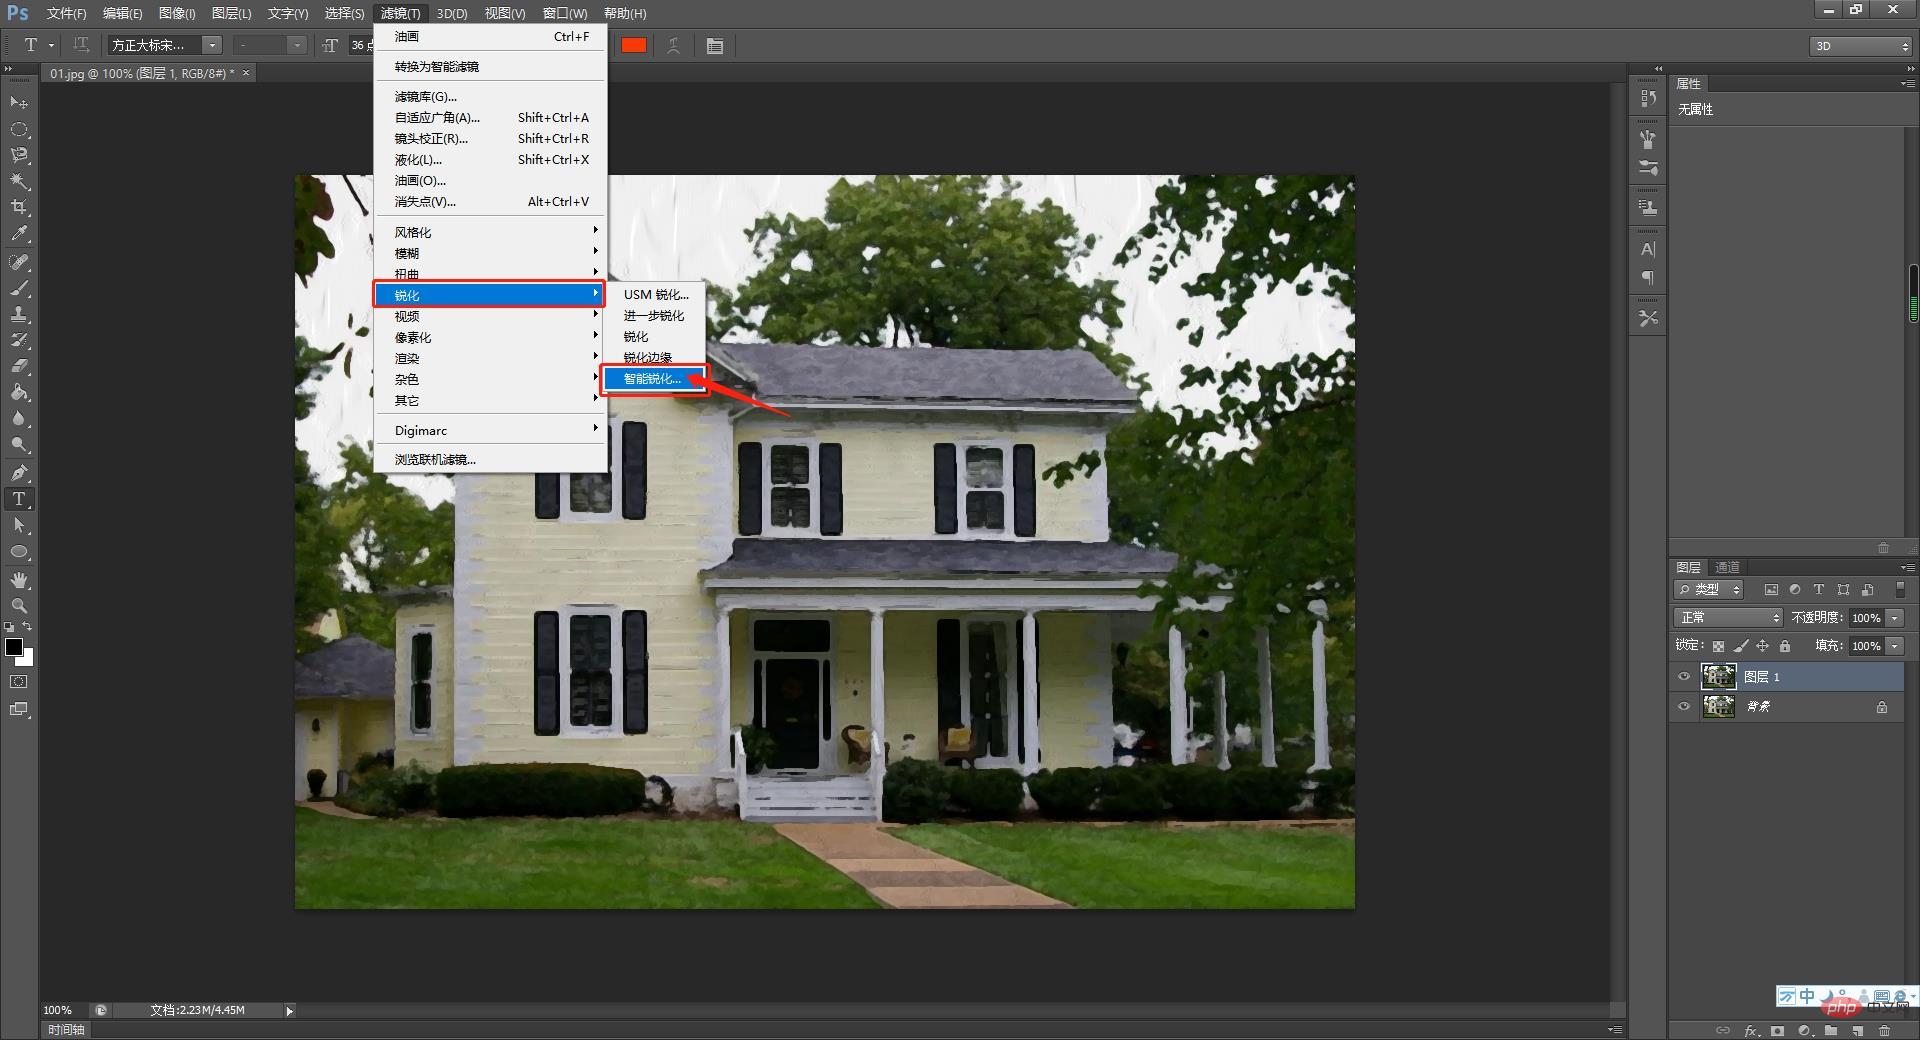
#5. After confirmation, a photo of the oil painting will appear. At this time, you need to use sharpening. Click Filter, select Sharpen, click [Smart Sharpen], and save.
Recommended learning: PS video tutorial
The above is the detailed content of Teach you step by step how to use PS to turn pictures into oil painting effects (skill sharing). For more information, please follow other related articles on the PHP Chinese website!