
In the previous article "Let’s talk about how to use PS to create realistic feather effects (share)", we introduced how to use PS to create realistic colorful feather effects. The following article will introduce to you how to use PS to turn pictures into glowing creative posters. Let’s take a look! !

The luminous creative effect poster picture is as follows
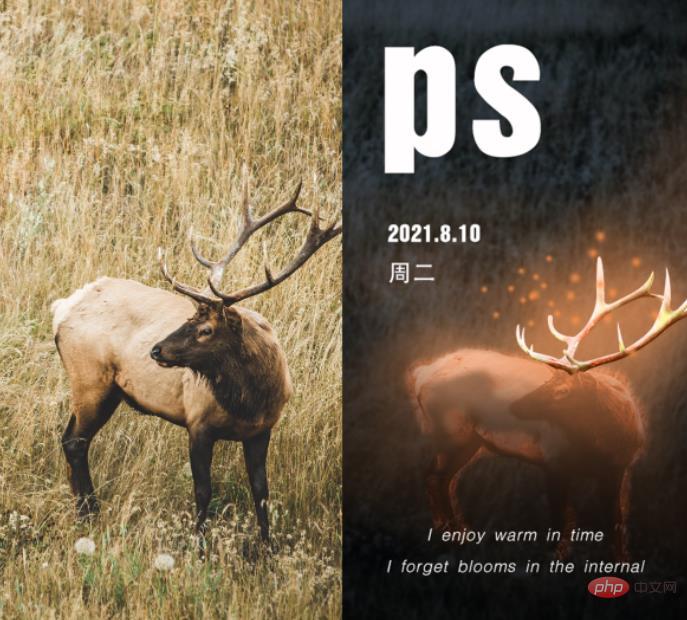
1. Open ps, import the material and copy a layer.
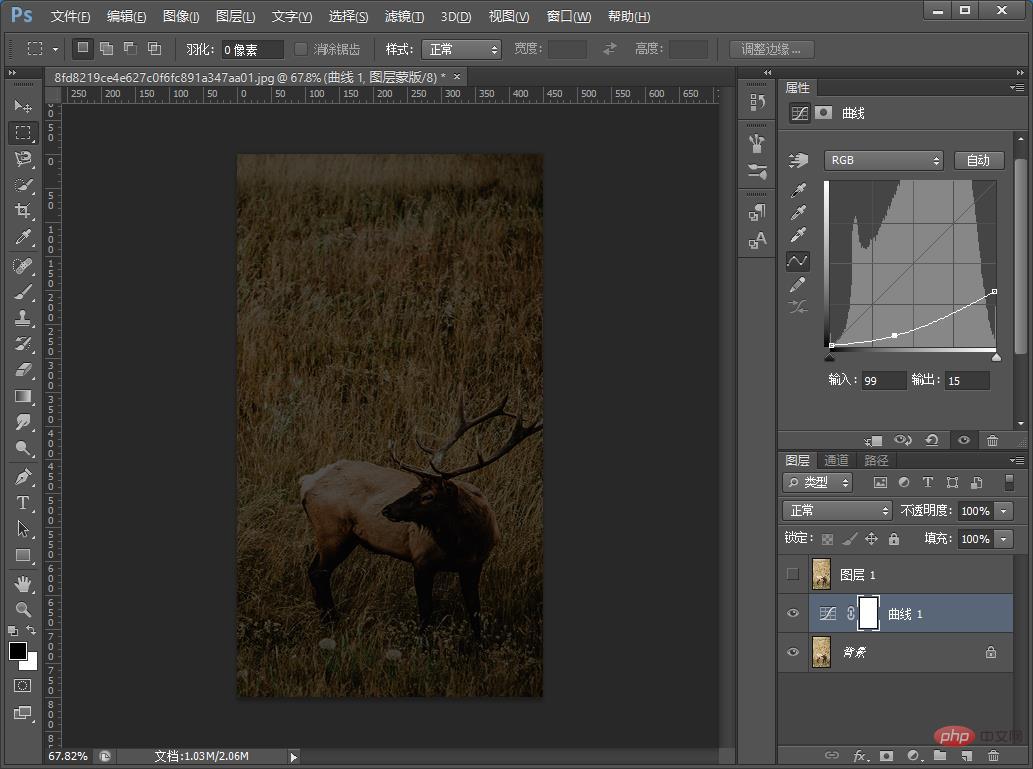
#2. First click on the small eye of [Layer 1] to turn it invisible, and add curve parameters to the [Background Layer] as shown below.

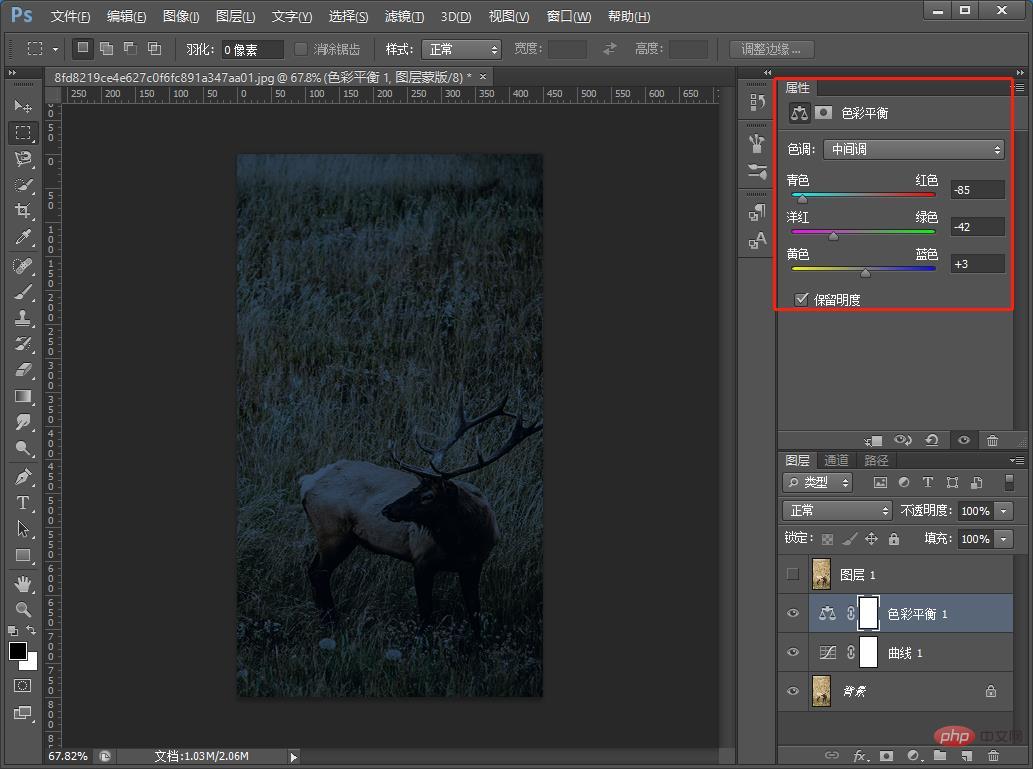
#3. Add the color balance parameters to the [Background Layer] as shown below.
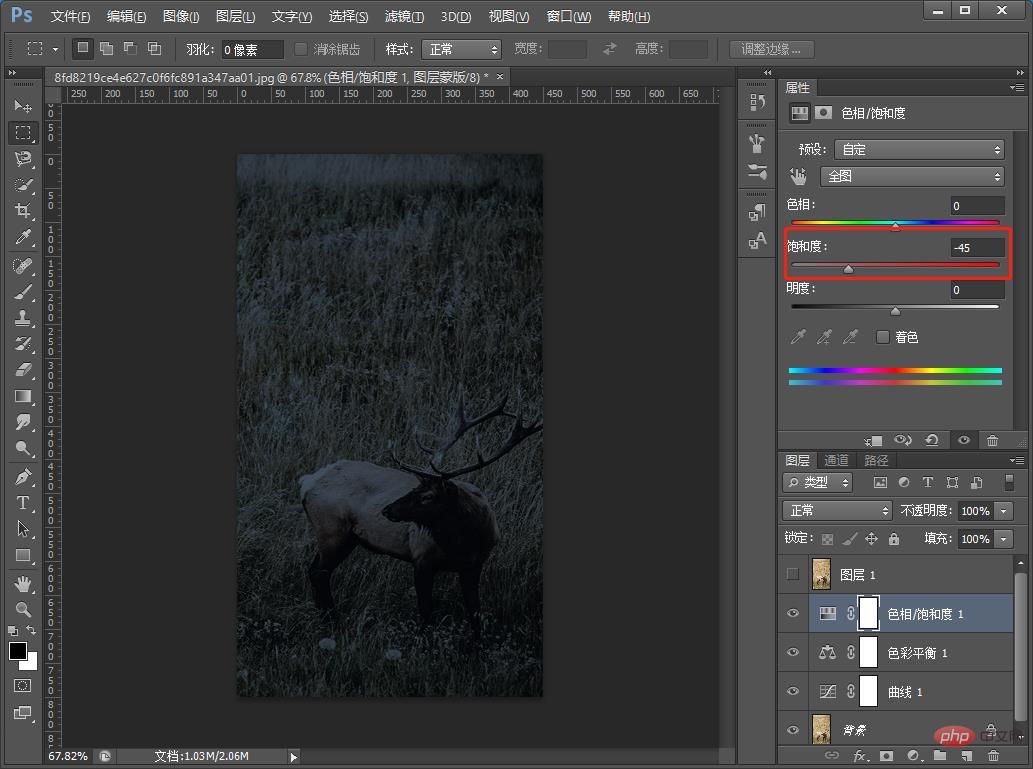
4. Finally, add the hue/saturation parameters to the [Background Layer] as shown below
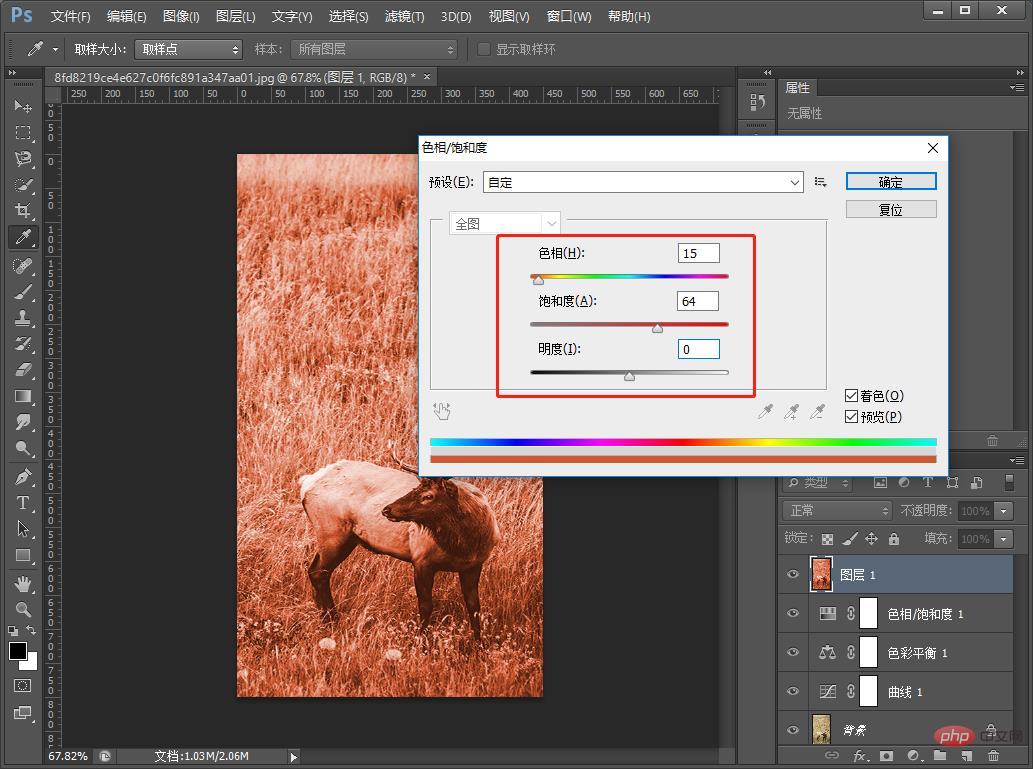
5. Add hue/saturation parameters to [Layer 1] as shown below.
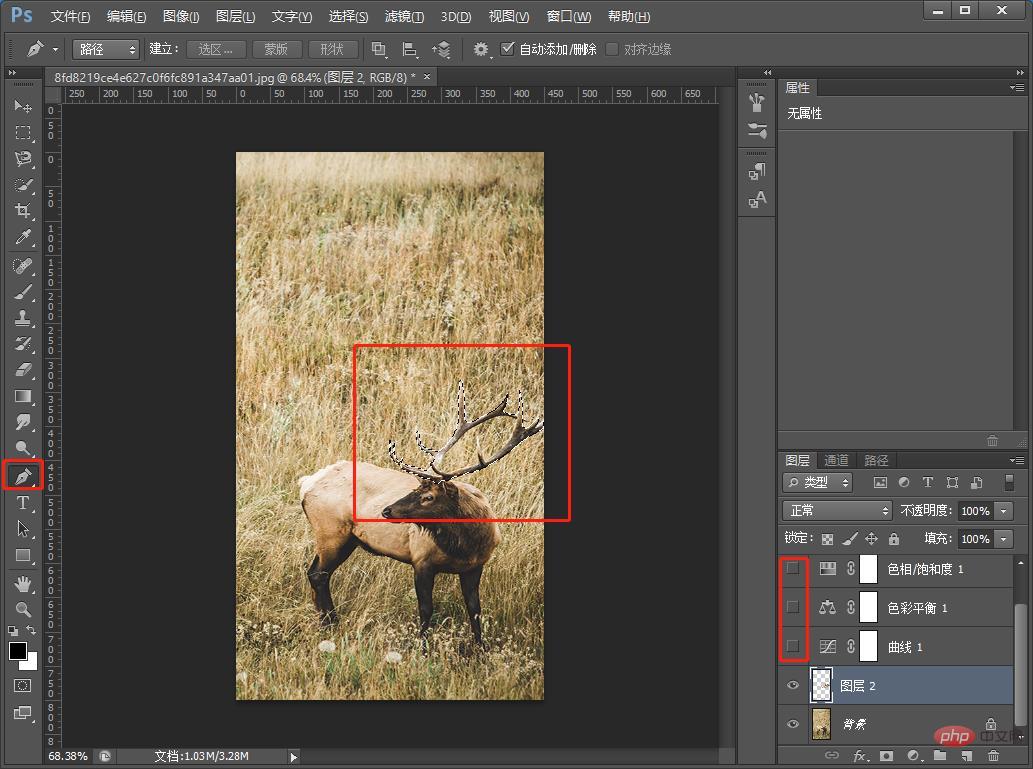
#6. Cut out the antlers and copy them to the top.
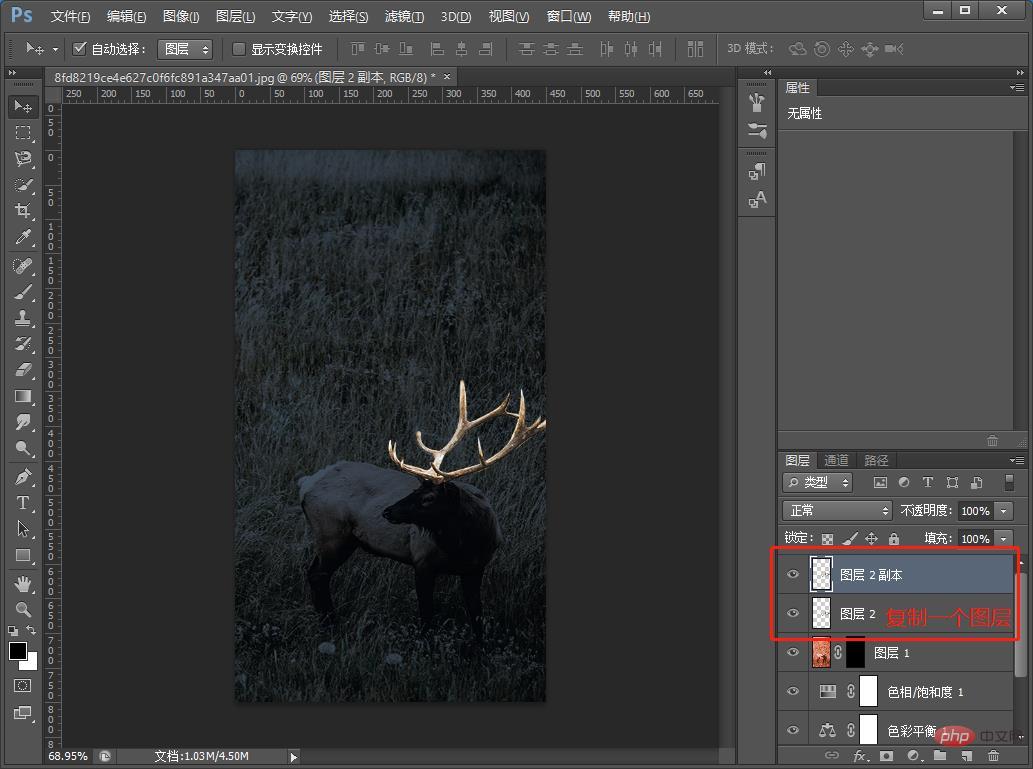
7. Duplicate another layer.
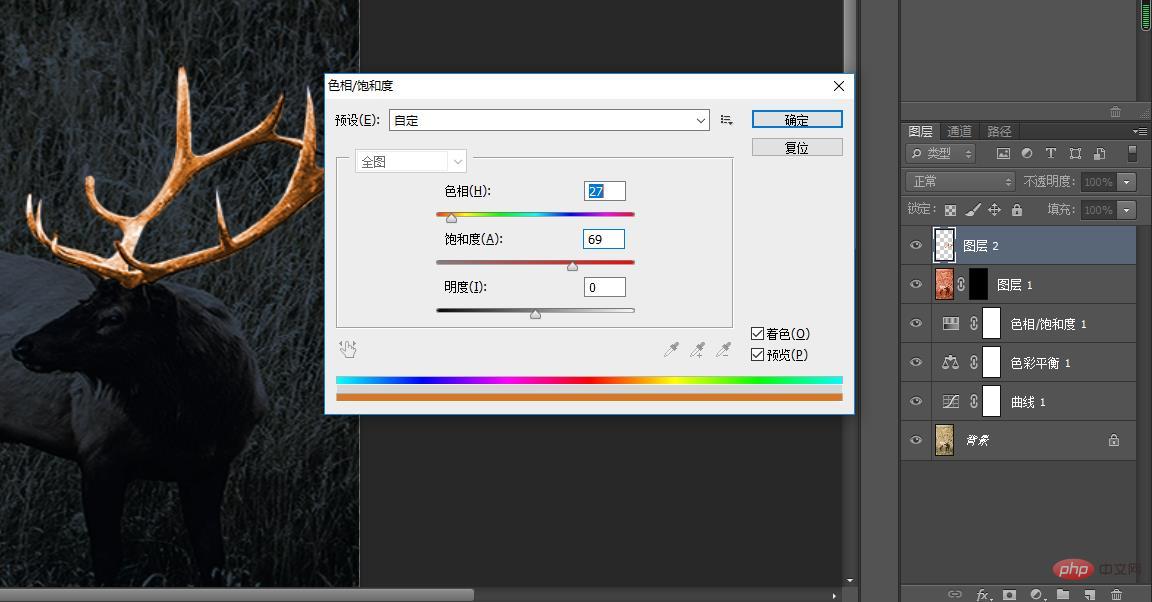
8. Add hue/saturation to [Layer 2] and press Ctrl U.
10. Add a curve to [Copy of Layer 2] and press Ctrl M.
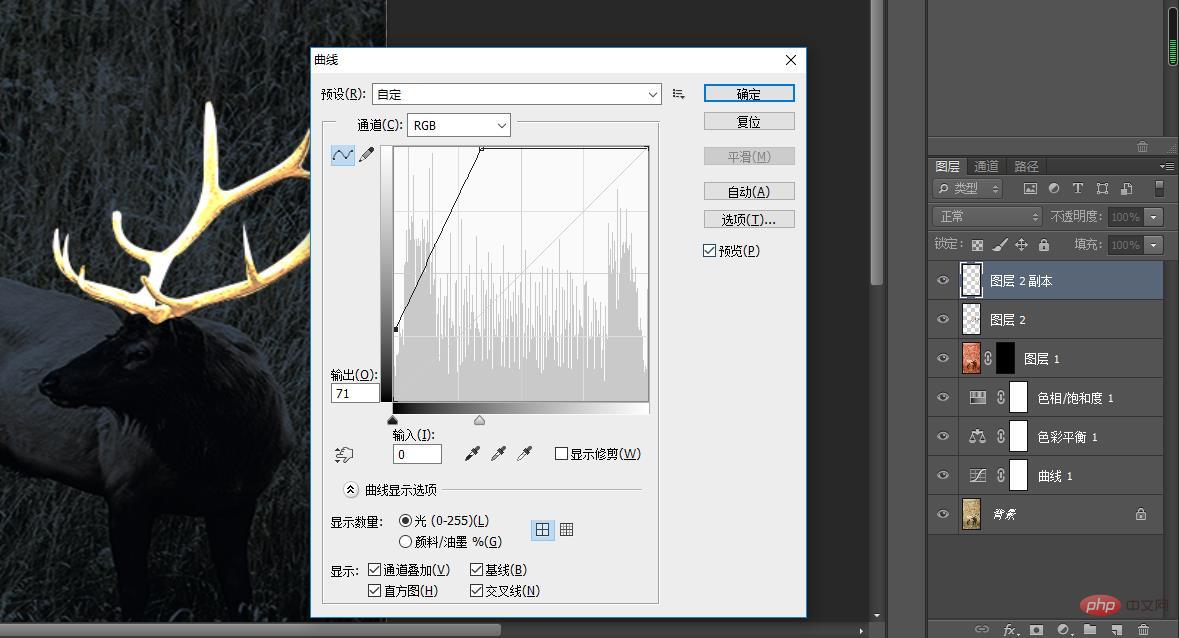
11. Add a layer mask to [Layer 2 copy] and use the white soft edge brush Antlers, and then add a layer mask to [Layer 1]. Use the white Soft Edge Brush for the deer body, and finally use the Orange Rubbed Edge Brush to paint the halo.
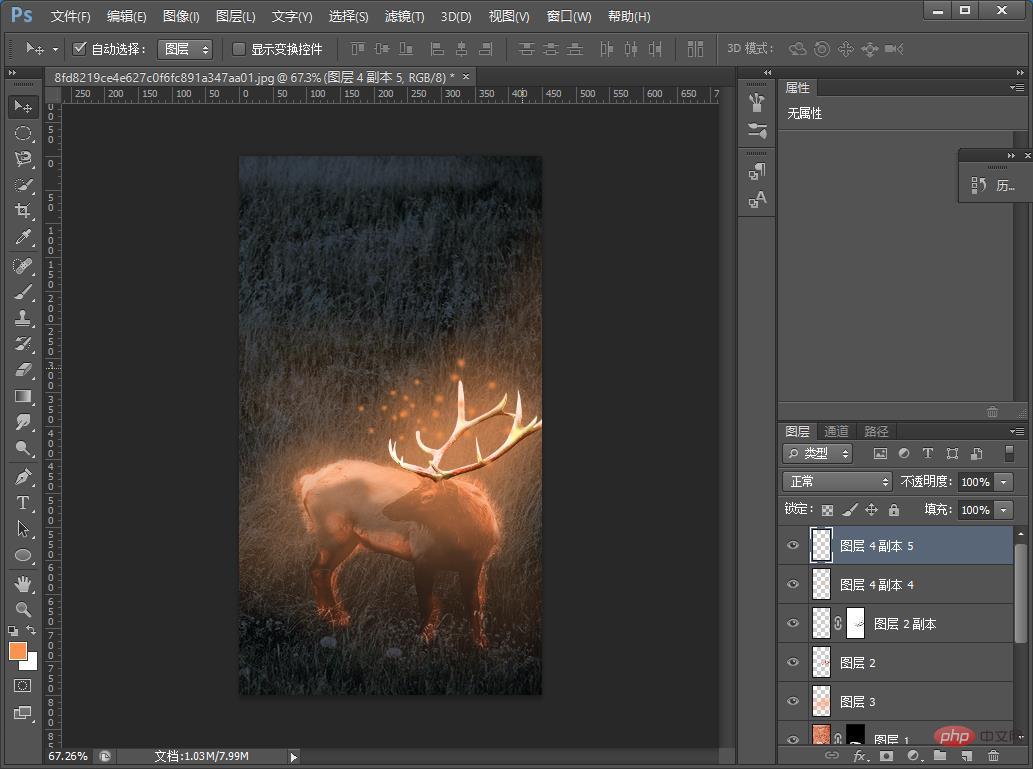
#12. You can add copywriting to complete the effect.
Recommended learning: PS video tutorial
The above is the detailed content of Teach you step by step how to use PS to turn ordinary pictures into glowing creative effect posters (share). For more information, please follow other related articles on the PHP Chinese website!