
In the previous article "Teach you step-by-step how to use PS to add Tyndall light effects to pictures (share)", I introduced you to a quick little trick on how to add Tyndall light effects to pictures. Dahl light effect. The following article will introduce to you how to use PS to create a split font effect. Let’s see how to do it together.

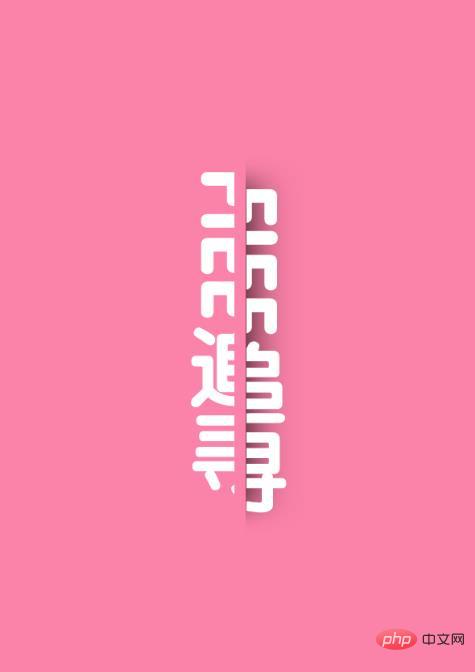
The split font effect is as follows
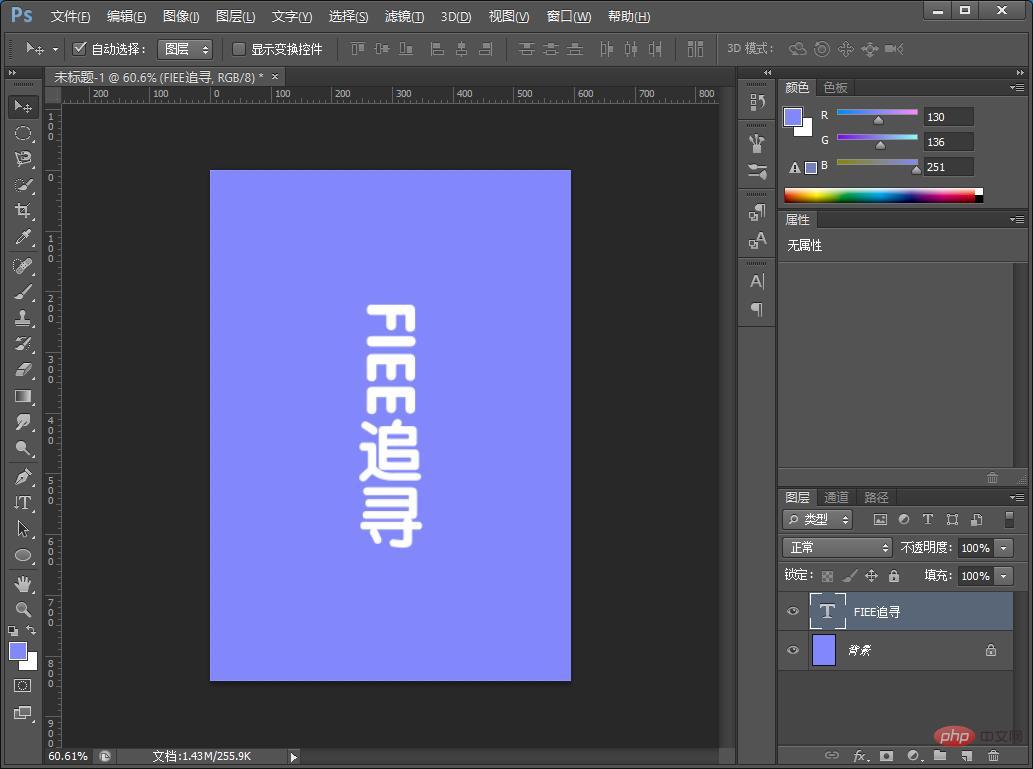
1 , open ps, create a new document background and fill it with blue, create a new layer and add text.
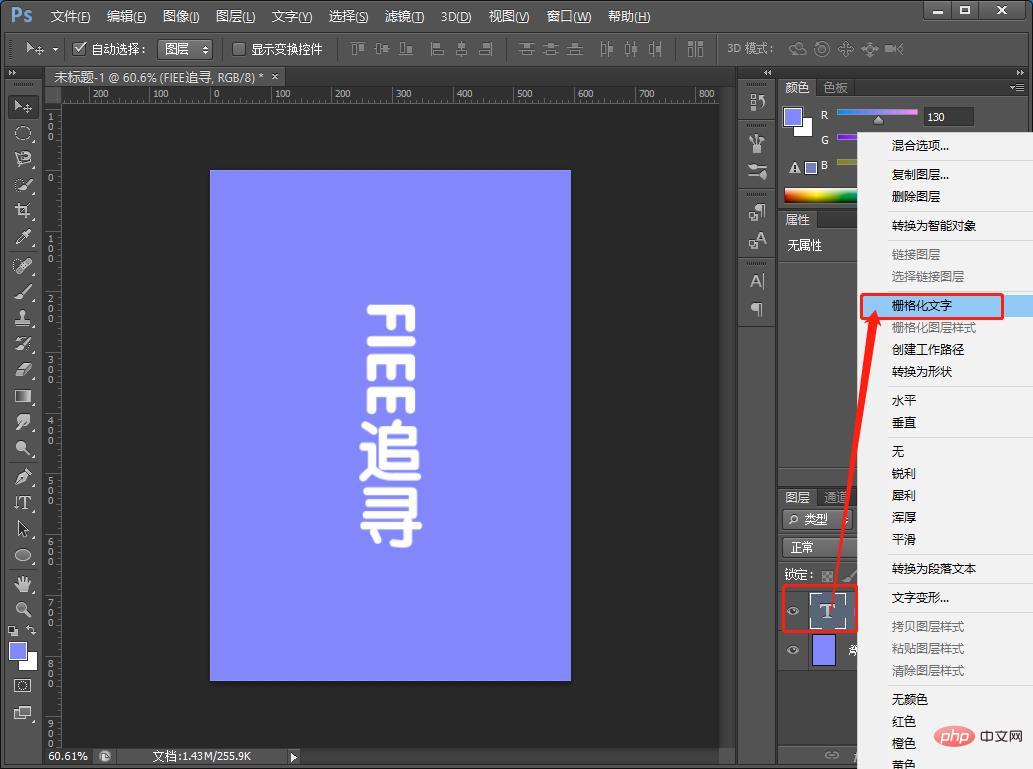
#2. Right-click [Text] to pop up and select "Grid Layer".
#3. Select the rectangular marquee tool, select the position you want to move, and hold down Ctrl shlft J.
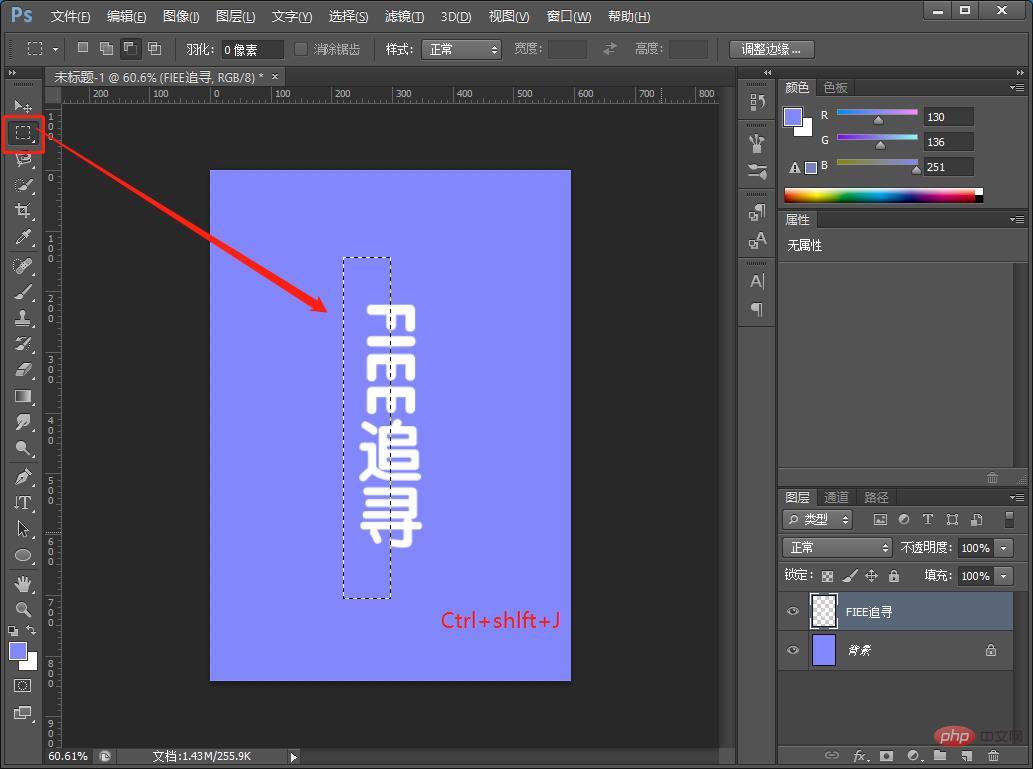
#4. Then use the rectangular marquee tool on the background layer.
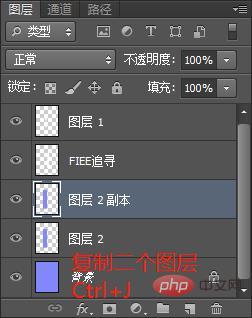
5. Press and hold [Ctrl J] to copy the two layers.

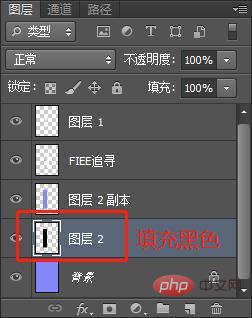
#6. Fill [Layer 2] with black.
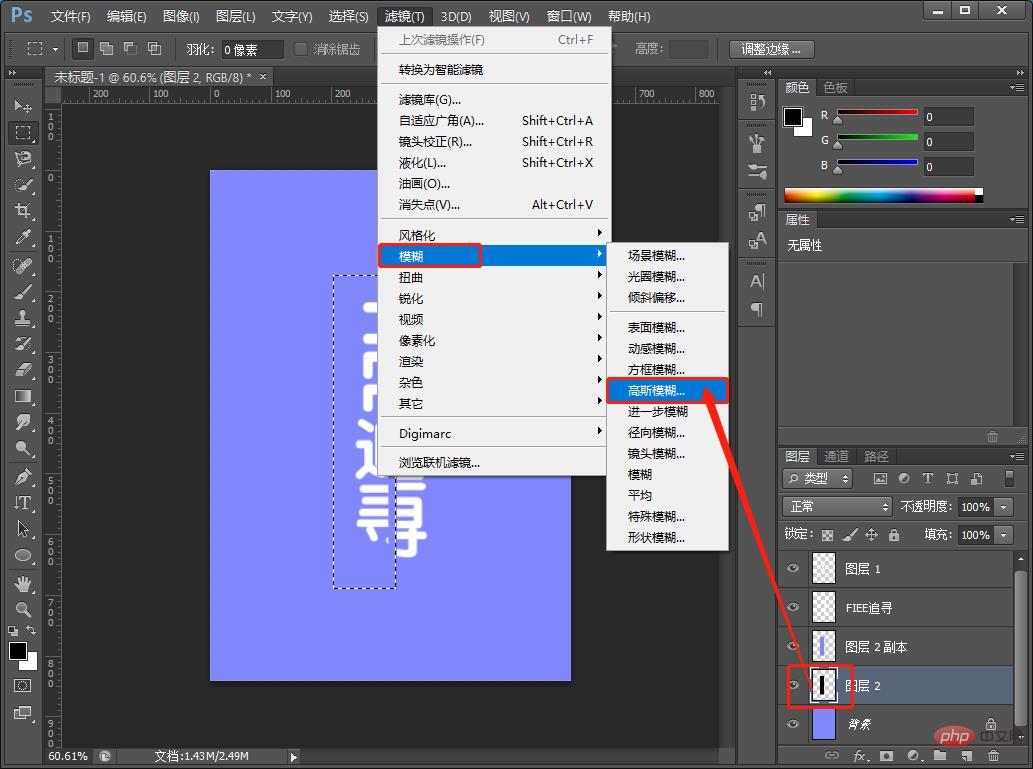
7. Hold down [Ctrl D] to cancel the selection, and click [Filter]-[Blur]-[Gaussian Blur].
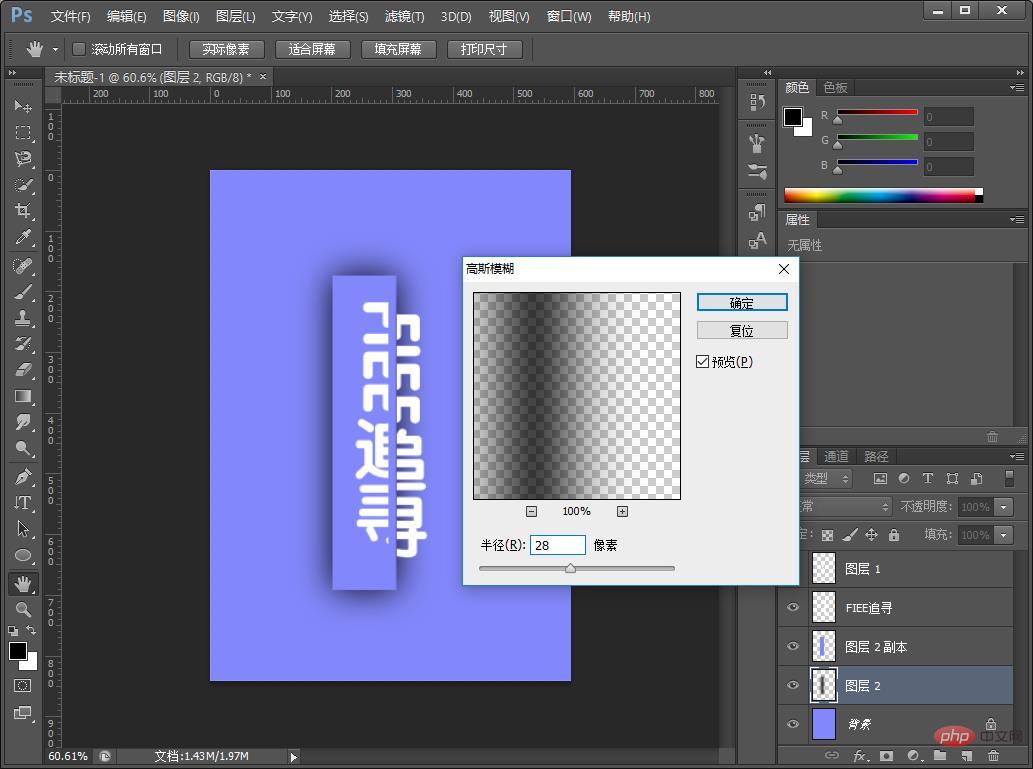
#8. Gaussian fuzzy numerical parameter map.
9. Add a mask to [Layer 2] and erase it with a brush.
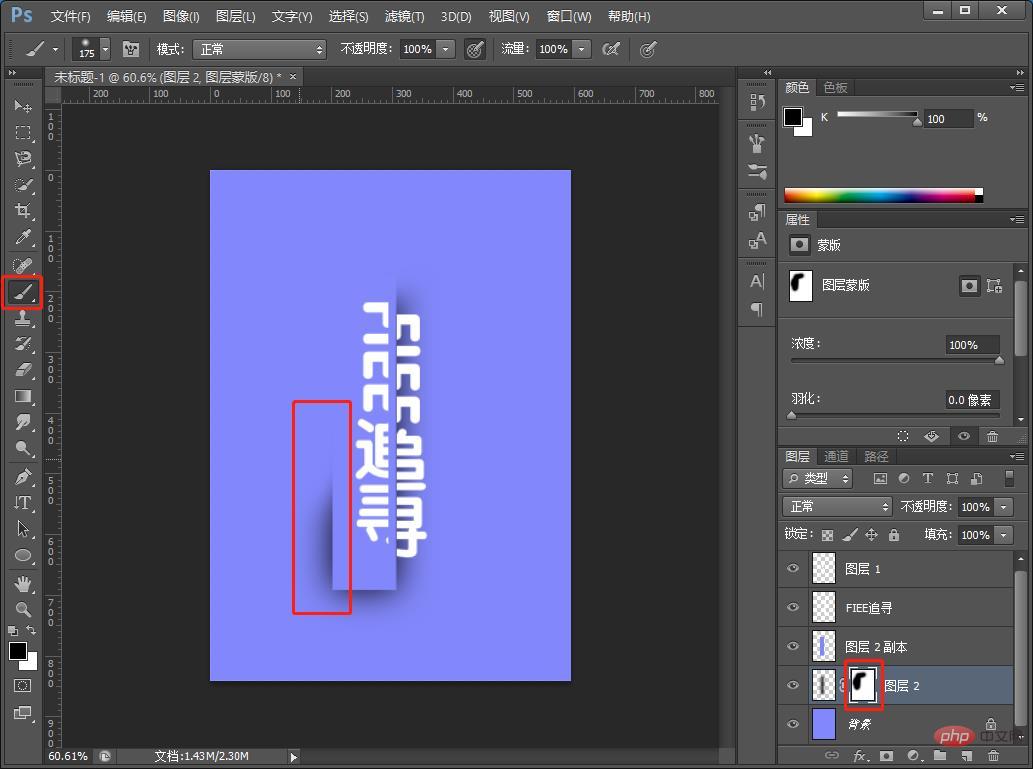
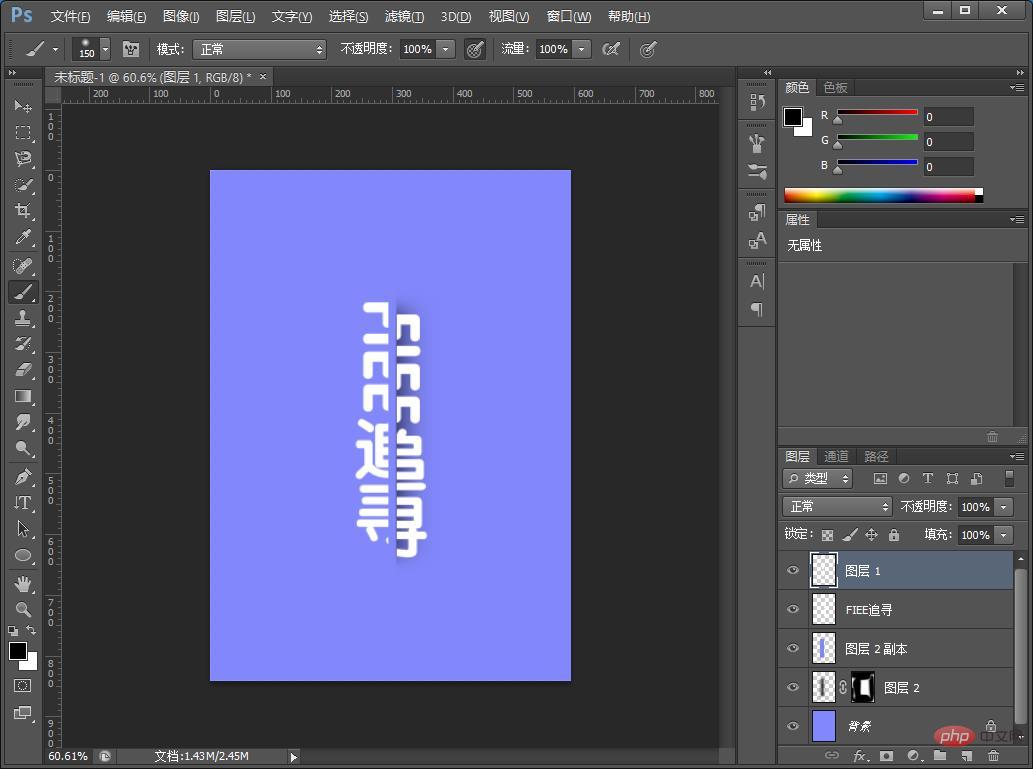
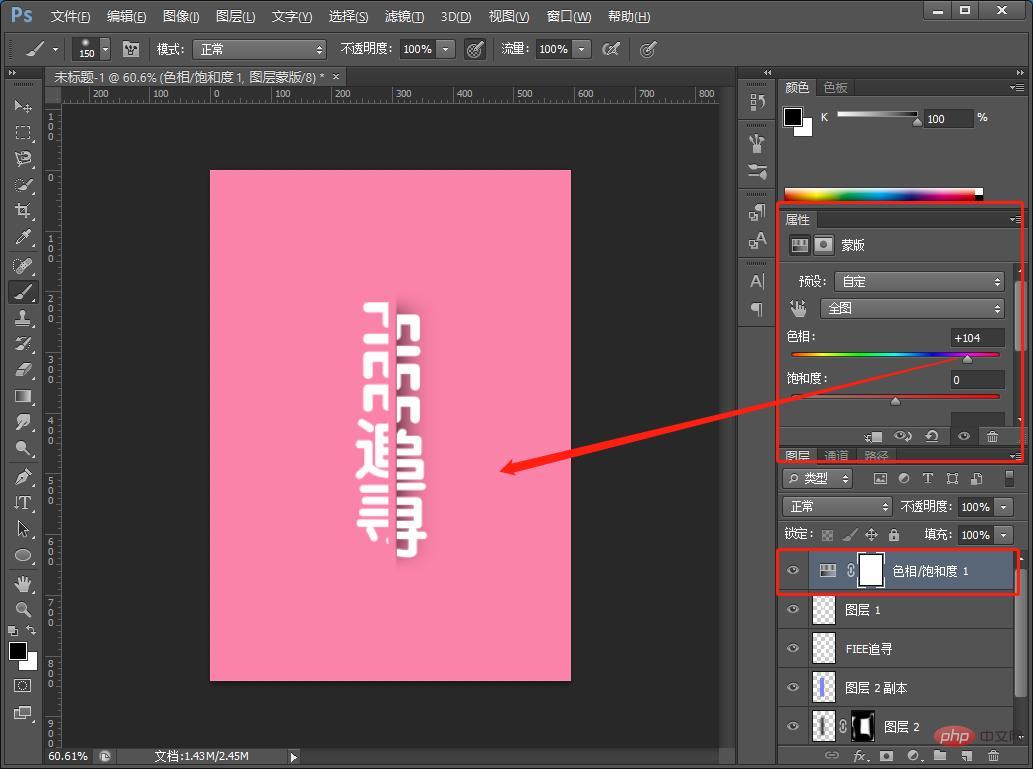
#10. The effect is like this. If you want to change the color of the background, you can add hue/saturation.
11. The color effect is completed.
Recommended learning: PS video tutorial
The above is the detailed content of Teach you how to use PS to create split font effects (skill sharing). For more information, please follow other related articles on the PHP Chinese website!


