In the previous article "ps Beginner's Article: How to add pattern effects to cups (5 steps in total)", I introduced you to a quick little trick on how to add patterns to cups. effect method. The following article will introduce to you how to use PS to quickly create technological glare effects. Let’s see how to do it together.

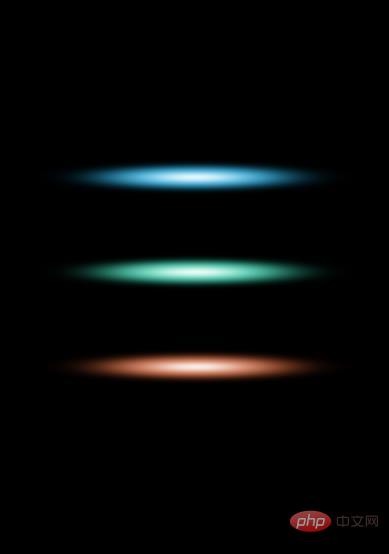
The technological glare effect picture is as follows

##ps method to quickly create technological glare effect
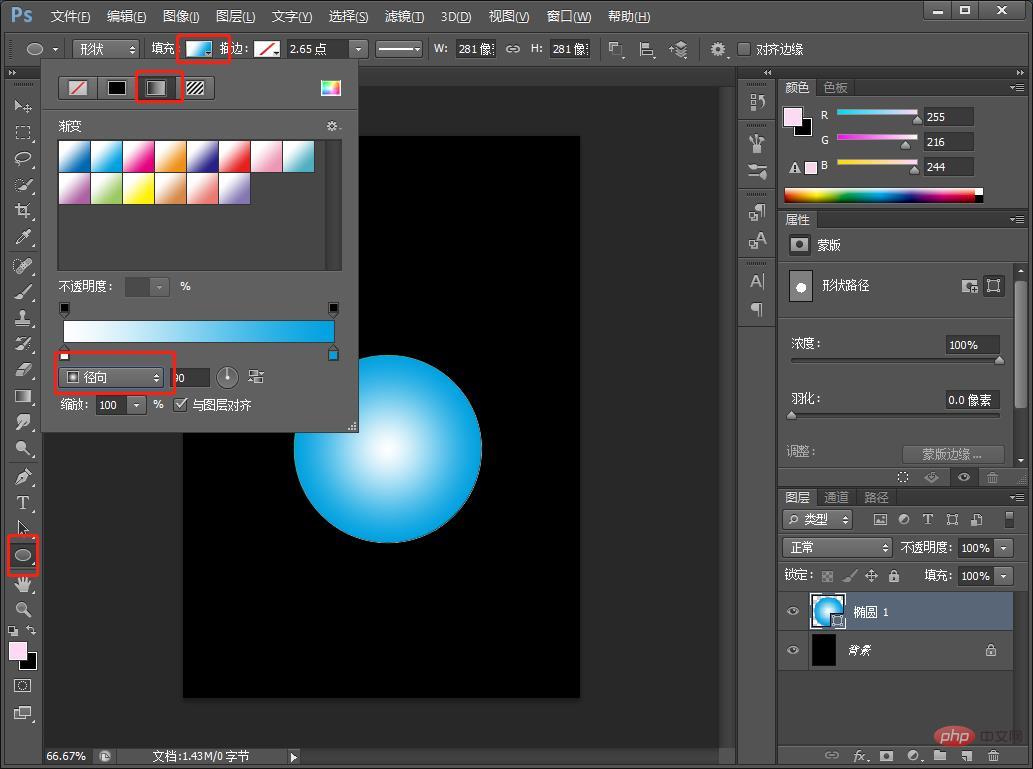
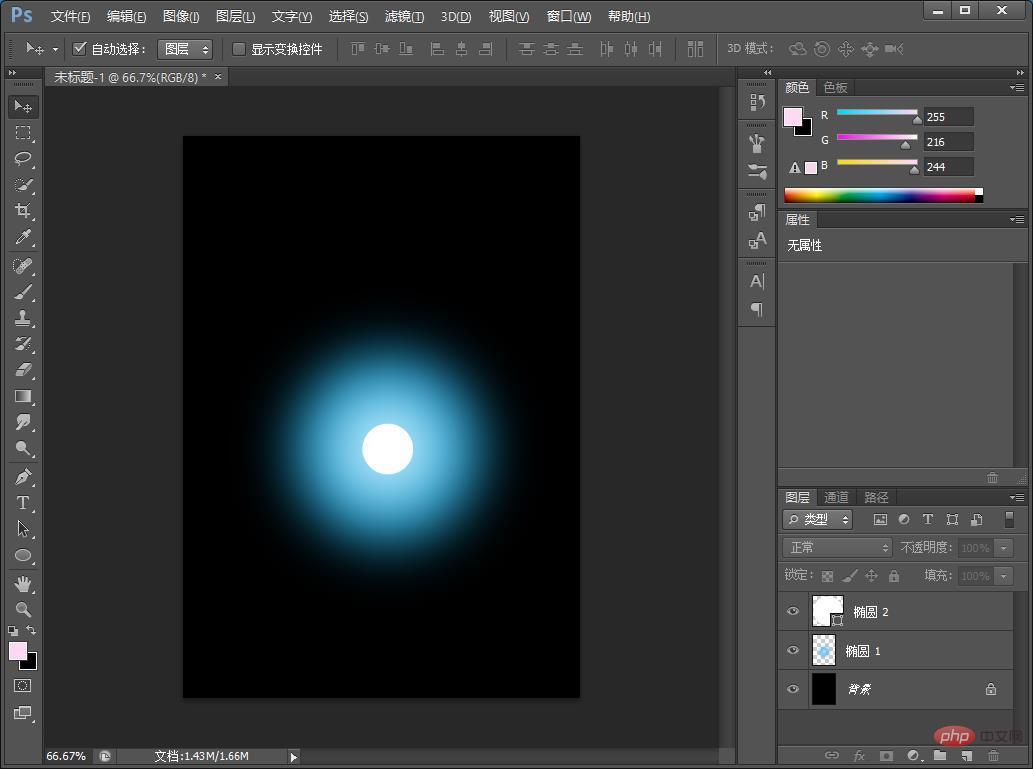
1. Open ps, fill it with black, create a new blank layer, use the [Ellipse Tool] to select the gradient and set it to radial to draw a circle.

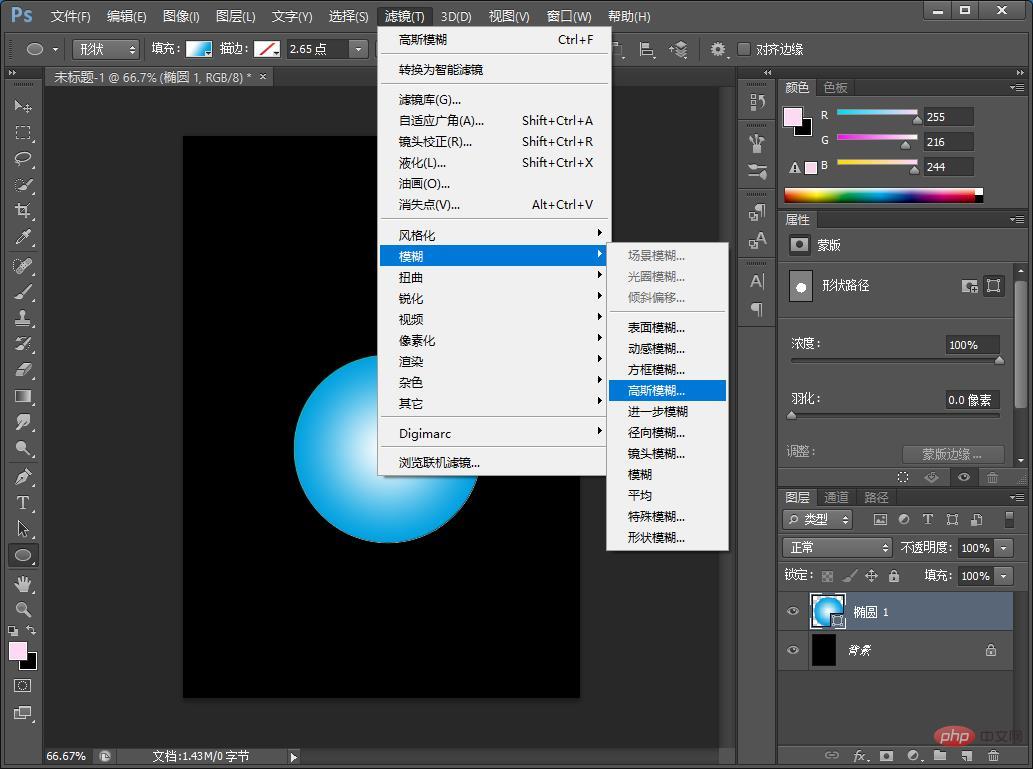
2. Add Gaussian Blur to the [Ellipse Layer] by clicking [Filter]-[Blur]-[Gaussian Blur].

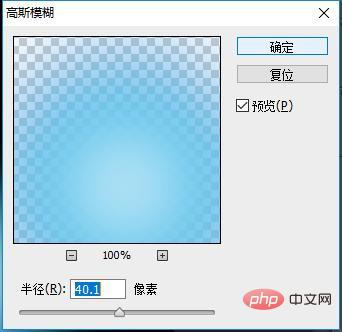
#3. Set the adjustment radius in the dialog box to 40 pixels.

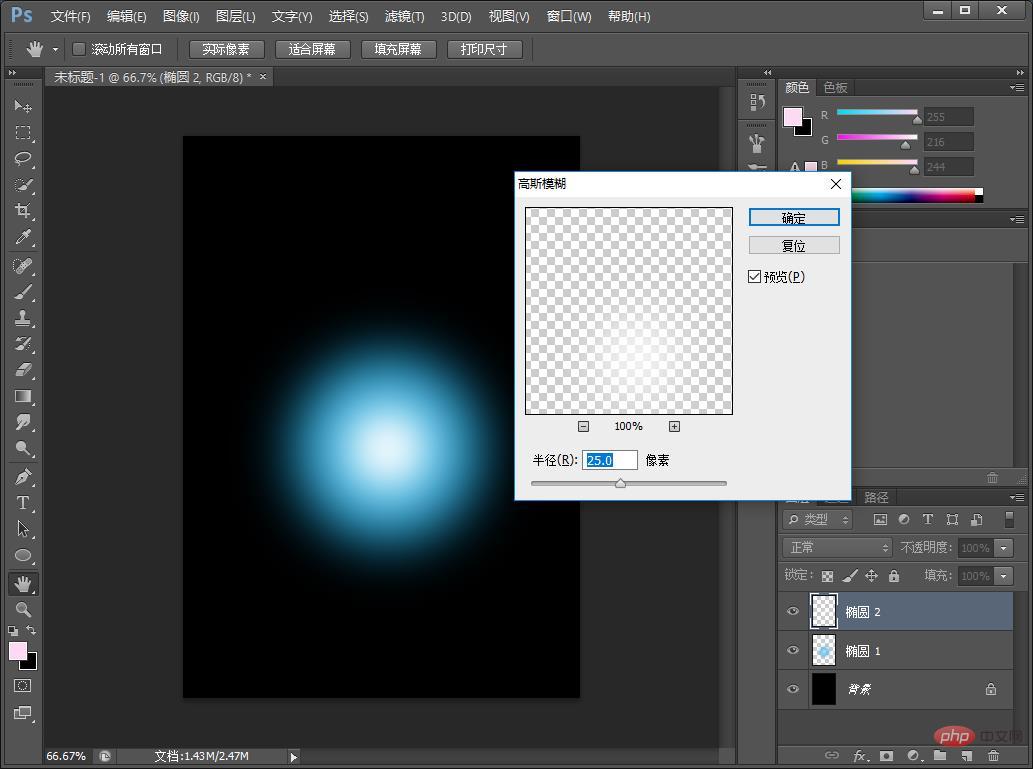
#4. Draw a new small circle and turn on [Gaussian Blur].

#5. Set the adjustment radius in the dialog box to 25 pixels, and adjust it according to your own needs.

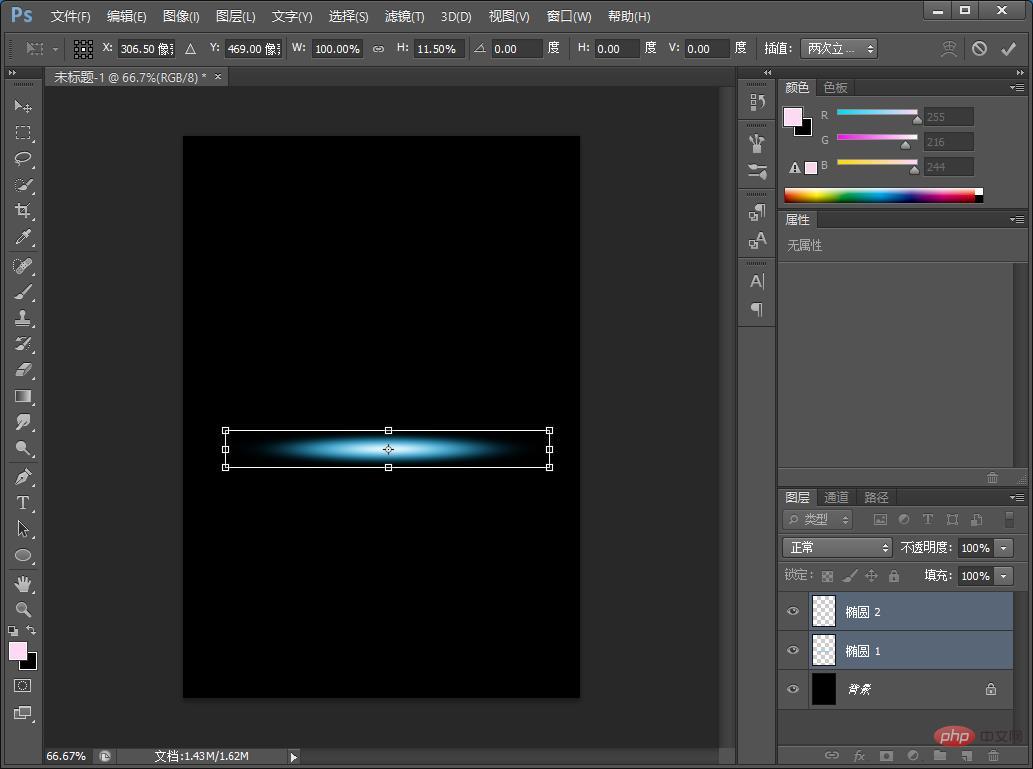
#6. Select the layer where the picture is located and press Ctrl T to freely transform the picture.

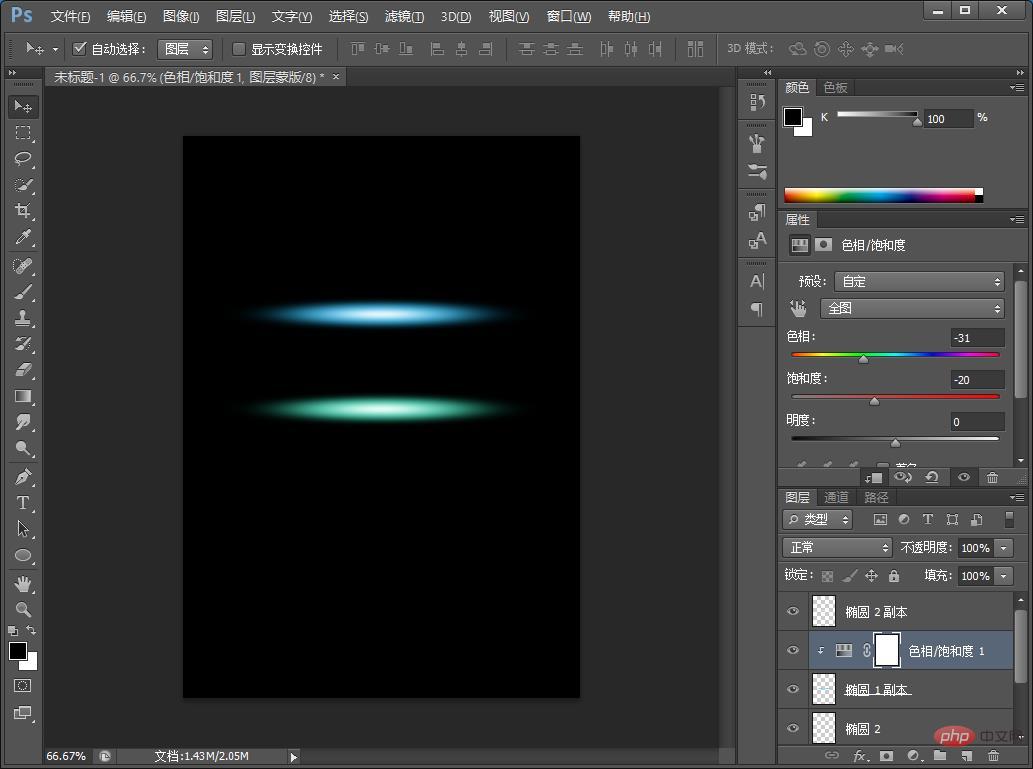
7. Find [Image]-[Adjustment]-[Hue Saturation] shortcut key [Ctrl U] in the menu bar to intuitively adjust the color according to the three elements. For color grading, the effect is complete.

Recommended learning:
PS video tutorial
The above is the detailed content of PS Tips: How to quickly create technological glare effects (share). For more information, please follow other related articles on the PHP Chinese website!


