
Last week, Sister Ping asked me how to capture the ratings of stores on Tmall. I saw that it was quite simple, so I spent some time writing a Python script and added web.py to make a web service. Use It looks pretty good. When I looked at it today, I found that it was a bit crude to use web.py directly for convenience. I haven’t written anything in flask for a long time. I plan to use flask to write it again and review the old knowledge. If you are Beginners of flask can refer to this example.
Tips: The blogger assumes that you already have the basic knowledge of Python and can write some Python scripts smoothly, Otherwise you will It's more difficult to understand.
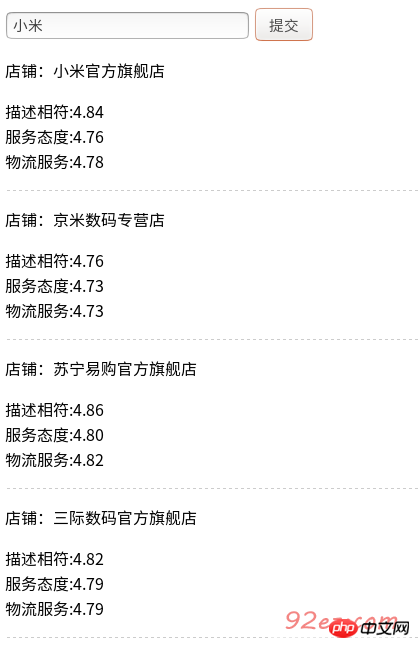
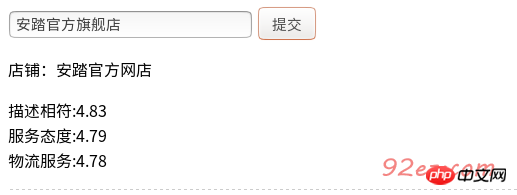
Here are some screenshots of the old version, what it looks like during initialization

Fuzzy query
Precise query
This application is relatively simple and uses relatively few technologies. The main technical points are as follows
requestsSimulation requests
Regular matching keywords
web.py builds the web environment
vue.js does automatic data binding
Is not it simple?
Flask Web Development Practical Web Application Development Based on Python pdf
When using web.py in this small application, the directory structure is like this

The static directory stores static resources

##The structure is quite simple
python codeAll Python code is given here#!/usr/bin/env python# coding=utf-8import requestsimport jsonimport webimport sysimport re
reload(sys)
sys.setdefaultencoding('utf8')
urls = ("/", "index","/query", "Query")
render = web.template.render('static', cache=False)class index:def GET(self):return render.index('static')class Query:def POST(self):
keywords = str(web.input().get('shopname'))
url_base = ""+keywords
headers = {"User-Agent": "iphone7"}try:
result_base = requests.get(url=url_base, headers=headers, timeout=15).content.replace('\n', '').replace(' ','')
infostr = re.findall(r'j_shop_moreshop_more\">(.+?)</div>', result_base)
shoplist = []for item in infostr:
scorelist = re.findall(r'\">(.+?)</span><iclass=\"', item)
thisShopname = re.findall(r'<span>(.+?)</span>', item)[0]
shoplist.append('{"shopname": "'+ thisShopname +'" , "dsr": "'+scorelist[0]+'", "service": "'+scorelist[1].split('">')[1]+'","ship": "'+scorelist[2].split('">')[1]+'"}')return json.dumps({"code": 0, "rows":list(set(shoplist))})except Exception, e:print ereturn json.dumps({"code": -1, "msg": "没查询到相关店铺"})if __name__ == "__main__":
app = web.application(urls, globals())
app.run()$def with (urlbase)<!DOCTYPE html>
<html lang="zh-CN">
<head>
<meta charset="utf-8">
<meta http-equiv="X-UA-Compatible" content="IE=edge">
<meta name="renderer" content="webkit">
<meta name="viewport" content="width=device-width, initial-scale=1">
<title>Hello world</title>
</head>
<body>
<input type="text" name="shopname">
<input type="button" value="提交" @click="query">
<div class="info" v-for="item in shopes" style="border-bottom: #ccc 1px dashed">
<p>店铺:{{ item.shopname }}</p>
<p>描述相符:{{ item.dsr }}<br>服务态度:{{ item.service }}<br>物流服务:{{ item.ship }}</p>
</div>
<script type="text/javascript" src="$urlbase/jquery.min.js"></script>
<script type="text/javascript" src="$urlbase/vue.js"></script>
<script type="text/javascript" src="$urlbase/index.js"></script>
</body>
</html>var mainVM = new Vue({
el: 'body',
data: {
shopes:[
{
shopname:'未查询',
dsr:'未查询',
service:'未查询',
ship:'未查询'}
]
},
methods:{
query:function(){
var _self = this,keyword = $('input[name="shopname"]').val();
$.post('/query',{"shopname":keyword},function (data) {if(data.code == 0){
_self.shopes = [];for(var k in data.rows){
var thisdata = JSON.parse(data.rows[k]);
_self.shopes.push({
shopname:thisdata.shopname,
dsr:thisdata.dsr,
service:thisdata.service,
ship:thisdata.ship
})
}
}else{
alert('查询出错,错误信息:'+data.msg);
}
},"json");
}
}
});可以说代码部分也是相当简单,前端HTML和js的代码就不解释了,很容易看懂,这里只对app.py做简单的解释。
观察天猫的搜索页面,发现天猫pc端跟手机端页面都可以轻松抓取,但是使用手机端页面会更加快速方便,因为结构上更加清晰,而且数据量少,抓取速度更快
如何实现只抓取手机端页面的数据呢?很简单,这里我们只需要定义以下HTTP的请求头信息就可以了,也就是headers,如下定义
headers={"User-Agent":"iphone7"}
天猫的搜索链接是使用的get请求,地址为
"https://list.tmall.com/search_product.htm?q="+keywords
参数只需要传入一个关键字就可以了,前端使用ajax把数据POST给服务端,服务端接收使用下面的这句话
keywords=str(web.input().get('shopname'))
是不是马上就搞定了关键的几步了?接下来发起请求拿到数据就可以了
result_base=requests.get(url=url_base,headers=headers,timeout=15).content.replace('\n','').replace('','')
注意,这里我把返回的结果中的换行跟空格都去掉了,因为我这里所需要的数据很简单,为了匹配方便我直接给替换成可空,也就是后面的这个
.replace('\n','').replace('','')
然后根据正则匹配的字符串进行遍历组合成结果返回给前端就好了,前端直接使用vue.js进行数据的绑定,几乎不需要DOM操作就可以完成结果列表的渲染,棒!(这里强行安利一波vue.js)
前后端通信使用json进行数据交互,友好而且方便。
上面给出了所需要的技术要点和关键代码,那么现在我需要使用flask重写一遍,当然了,关键部分还是不用变动,只是处理方式上稍微有些差异,如果会用web.py,那么使用flask上手应该是很快的。
在使用web.py的时候我们启动一个web服务很简单,通常执行以下命令
python app.py
这样我们就启动了一个web服务,但是这样的话会有很多问题,主要有以下几点
不能关闭终端窗口,否则应用结束,一般用于调试
多个应用的时候公用Python环境会引起冲突
web.py并不适合高并发的应用,但是作为一般应用还是可以轻松应对的。
以上命令执行后web.py会在8080端口绑定一个web服务,如果你想创建多个应用,那么你应该在后面加上端口号
如果你使用了多个域名指向一台机器的多个应用,那么你应该使用nginx来转发请求,而不是直接输入域名加端口号
在远程vps上运行开发完成的应用时,你可以执行以下命令把web以后台服务的形式运行
nohup python app.py
这种方式简单粗暴,但是仅仅作为临时方案是可行的,运行上述命令后你可以安心的关掉终端,而且web服务依然在运行,但是一旦重启了服务器,那么就得重新登录vps再次执行命令,不是很方便。
flask和web.py类似,它自带了一个web服务器,默认绑定在5000端口,但是它本身自带的web服务器并不是很好,安全性也不高,作为开发使用还是足够的,正式生产环境中不太建议直接使用flask自带的web服务。
好了,现在可以开始了,为了解决上面提到几个问题,这里咱们来使用一个新东西,上面说了多应用环境冲突的问题,在这儿可以使用一个叫做“虚拟环境”的东西解决。
“虚拟环境”就是直接复制一个Python的全局环境,但是是独立出来的,你可以在这个环境里面安装各种模块,而且不会影响到Python的全局环境,也就是说如果你把其中的一个“虚拟环境”给玩坏了,起不来了,那么你只需要删掉坏的“虚拟环境”重新创建一个就可以了,这些操作都不会对Python全局环境有任何的影响,安全又方便,下面咱们就来创建一个“虚拟环境”。
博主使用的开发环境是Ubuntu 16.04 并没有自带这个软件,使用下面的命令安装
sudo apt-get install python-virtualenv -y
安装完之后测试下是否安装成功
~$ virtualenv --version
15.0.1
接下来咱们创建一个叫 tmall 虚拟环境用于运行我们的应用
~$ virtualenv tmall
Running virtualenv with interpreter /usr/bin/python2
New python executable in /home/kbdancer/tmall/bin/python2
Also creating executable in /home/kbdancer/tmall/bin/python
Installing setuptools, pkg_resources, pip, wheel...done.
创建的时候会给出创建的位置,如果你需要在指定的目录下面创建虚拟环境,那么你得切换到目标目录,然后执行创建命令,博主这里直接在自己的用户目录下面执行的创建命令,自然就是在用户目录下面生成的一个 tmall 文件夹,文件夹下面自动生成了Python环境

安装完之后需要将这个环境激活才能使用,执行下面的命令进行激活
~$ source tmall/bin/activate
(tmall) :~$
接着在虚拟环境中安装flask环境(博主默认你的Python全局环境中已经有了easy_install或者pip),博主这里使用pip进行安装
~$ pip install flask
好了,所需要的环境配置完成,接下来就可以开始写小应用了。
编码这个环节应该是快速而且高效的,上面我们已经给出了旧代码,关键部分直接复制过来就能用,稍微改改就可以跑起来了。
flask默认使用Jinja2作为模板引擎,Jinja2在进行模板渲染的时候通常会识别{{}}中的内容进行填充,但是这里博主遇到了一个尴尬的问题,Vue.js也是使用的{{}}作为标识符进行渲染,这就导致了冲突,访问页面的时候就会出现如图所示的错误
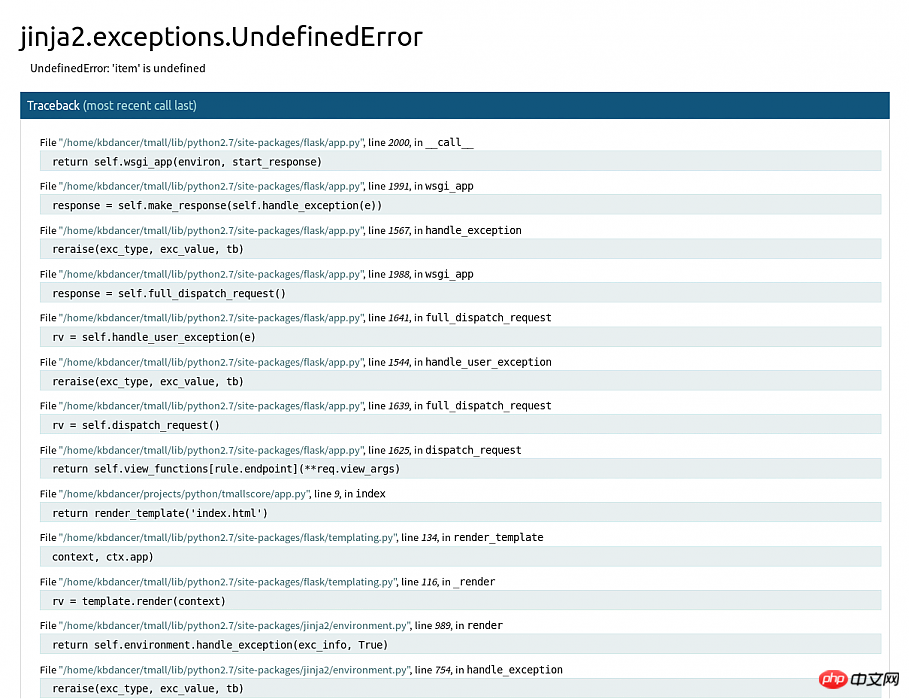
当然,解决方法还是有的,参考这篇文章进行配置 解决Jinja2与Vue.js的模板冲突 解决思路也比较简单,就是在需要Jinja2渲染的时候添加一个空格,而vue.js渲染的时候则不需要空格,python脚本如下
from flask import Flask, render_template

app = Flask(__name__)
app.jinja_env.variable_start_string = '{{ '
app.jinja_env.variable_end_string = ' }}'前端HTML代码修改后就成了这样
<!DOCTYPE html><html lang="zh-CN"><head><meta charset="utf-8"><meta http-equiv="X-UA-Compatible" content="IE=edge"><meta name="renderer" content="webkit"><meta name="viewport" content="width=device-width, initial-scale=1"><title>Hello world</title></head><body><input type="text" name="shopname"><input type="button" value="提交" @click="query"><div class="info" v-for="item in shopes" style="border-bottom: #ccc 1px dashed"><p>店铺:{{item.shopname}}</p><p>描述相符:{{item.dsr}}<br>服务态度:{{item.service}}<br>物流服务:{{item.ship}}</p></div><script type="text/javascript" src="{{ url_for('static', filename='jquery.min.js') }}"></script><script type="text/javascript" src="{{ url_for('static', filename='vue.js') }}"></script><script type="text/javascript" src="{{ url_for('static', filename='index.js') }}"></script></body></html>Jinja2默认会在templates目录下面寻找模板文件,而静态文件比如css,js之类的默认存储在static目录下面,这里我们按照Jinja2的默认设置稍微进行修改,当然,如果你想自定义模板目录或者静态文件的目录也是可以的,只需要稍微的配置下就行了,博主这里按照默认的规则来设置。
很快,我们的小应用就跑起来了
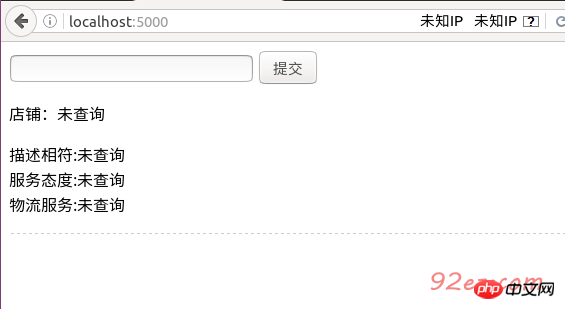
这里还是需要提到几个关键点:
flask中接收前端传递过来的参数用到的是request对象,前端使用json把数据post到后端,后端使用下面这句进行接收
request.form.get('shopname')更多详细使用方法参考这个地址 浅入浅出Flask框架:处理客户端通过POST方法传送的数据 接着测试下小应用能不能正常运行
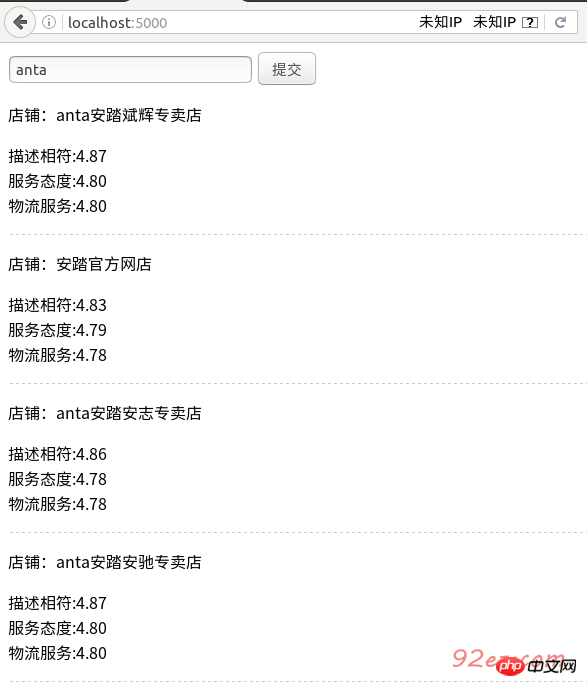
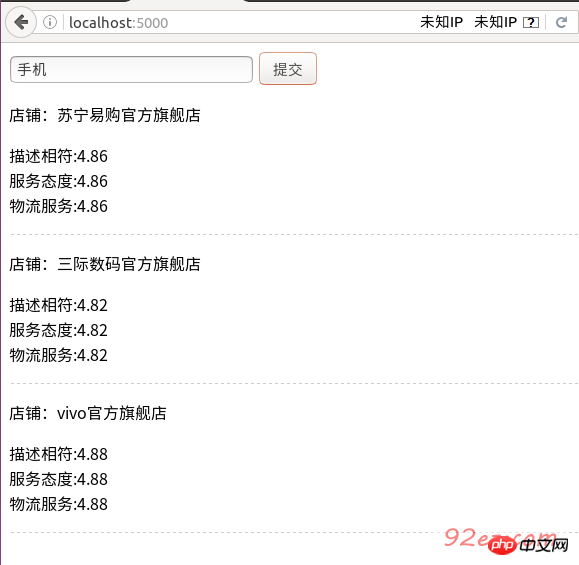
OK,测试通过。
由于这个小应用比较简单,部署起来可以按照常规的部署方式进行,但是并不适合生产环境,所以这里暂时不写如何部署,下次有大型网站案例的时候再详细写如何部署以及优化。
#!/usr/bin/env python# coding=utf-8from flask import Flask, render_template, requestimport requestsimport jsonimport re
app = Flask(__name__)
app.jinja_env.variable_start_string = '{{ '
app.jinja_env.variable_end_string = ' }}'@app.route('/')def index():return render_template('index.html')@app.route('/query', methods=['POST'])def query():
keywords = request.form.get('shopname')
url_base = "https://list.tmall.com/search_product.htm?q=" + keywords
headers = {"User-Agent": "iphone7"}try:
result_base = requests.get(url=url_base, headers=headers, timeout=15).content.replace('\n', '').replace(' ', '')
infostr = re.findall(r'j_shop_moreshop_more\">(.+?)</div>', result_base)
shoplist = []for item in infostr:
scorelist = re.findall(r'\">(.+?)</span><iclass=\"', item)
thisShopname = re.findall(r'<span>(.+?)</span>', item)[0]
shoplist.append('{"shopname": "' + thisShopname + '" , "dsr": "' + scorelist[0] + '", "service": "' + scorelist[1].split('">')[1] + '","ship": "' + scorelist[2].split('">')[1] + '"}')return json.dumps({"code": 0, "rows": list(set(shoplist))})except Exception, e:print ereturn json.dumps({"code": -1, "msg": "没查询到相关店铺"})if __name__ == "__main__":
app.run(debug=True)<!DOCTYPE html><html lang="zh-CN"><head><meta charset="utf-8"><meta http-equiv="X-UA-Compatible" content="IE=edge"><meta name="renderer" content="webkit"><meta name="viewport" content="width=device-width, initial-scale=1"><title>Hello world</title></head><body><input type="text" name="shopname"><input type="button" value="提交" @click="query"><div class="info" v-for="item in shopes" style="border-bottom: #ccc 1px dashed"><p>店铺:{{item.shopname}}</p><p>描述相符:{{item.dsr}}<br>服务态度:{{item.service}}<br>物流服务:{{item.ship}}</p></div><script type="text/javascript" src="{{ url_for('static', filename='jquery.min.js') }}"></script><script type="text/javascript" src="{{ url_for('static', filename='vue.js') }}"></script><script type="text/javascript" src="{{ url_for('static', filename='index.js') }}"></script></body></html>没有做任何改动,就不贴出来了
写这篇文章的目的一来是复习下flask的一些知识,二来是与web.py做个对比,再者就是给入门的朋友提供一个实战的例子,方便参考。
The above is the detailed content of flask completes a small application method. For more information, please follow other related articles on the PHP Chinese website!


