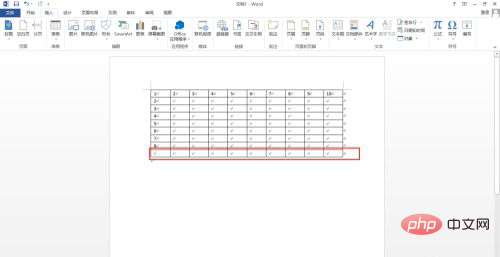
How to add rows to a word table: First open the word document where rows need to be added and insert a table; then select the corresponding rows according to your needs, right-click the mouse, and click the "Insert" button in the right-click menu. .

The operating environment of this tutorial: Windows 7 system, Microsoft Office word 2016 version, Dell G3 computer.
Create a new word document and double-click to open it.

Find "Insert" - "Table" on the menu bar. There are three ways to insert a table in word: 1. If the number of rows and columns is relatively small, you can use Swipe directly from the square area to select the number of rows and columns of the table to be created; 2. Click "Insert Table Options" to customize the number of columns and rows of the table; 3. Draw manually. The way to create a table in this case is the first one (the row and column numbers are manually entered by the editor).

Select the place where rows need to be inserted. For example, the current requirement is to insert a new row in the last row of the current table. At this time, drag the mouse to select the last line, right-click and find Insert.

According to actual needs, for example, in this case, to insert a new row in the last row (eighth row) of the current table, select the "Insert" option. Option "Insert row below".

At this time, a new row (the ninth row) will be inserted into the table, and the red frame is the newly inserted row.

Recommended tutorial: "Word Tutorial"
The above is the detailed content of How to add rows to word table. For more information, please follow other related articles on the PHP Chinese website!
 How to change word background color to white
 How to delete the last blank page in word
 Why can't I delete the last blank page in word?
 Word single page changes paper orientation
 word to ppt
 Word page number starts from the third page as 1 tutorial
 Tutorial on merging multiple words into one word
 word insert table