In the previous article "Practical Word Tips Sharing: Making Pages Automatically Scroll", we learned the techniques for making pages automatically scroll in Word. Next, this article will share with you a practical Word skill. Let’s take a look at how to set underlines. Come and save it for use!

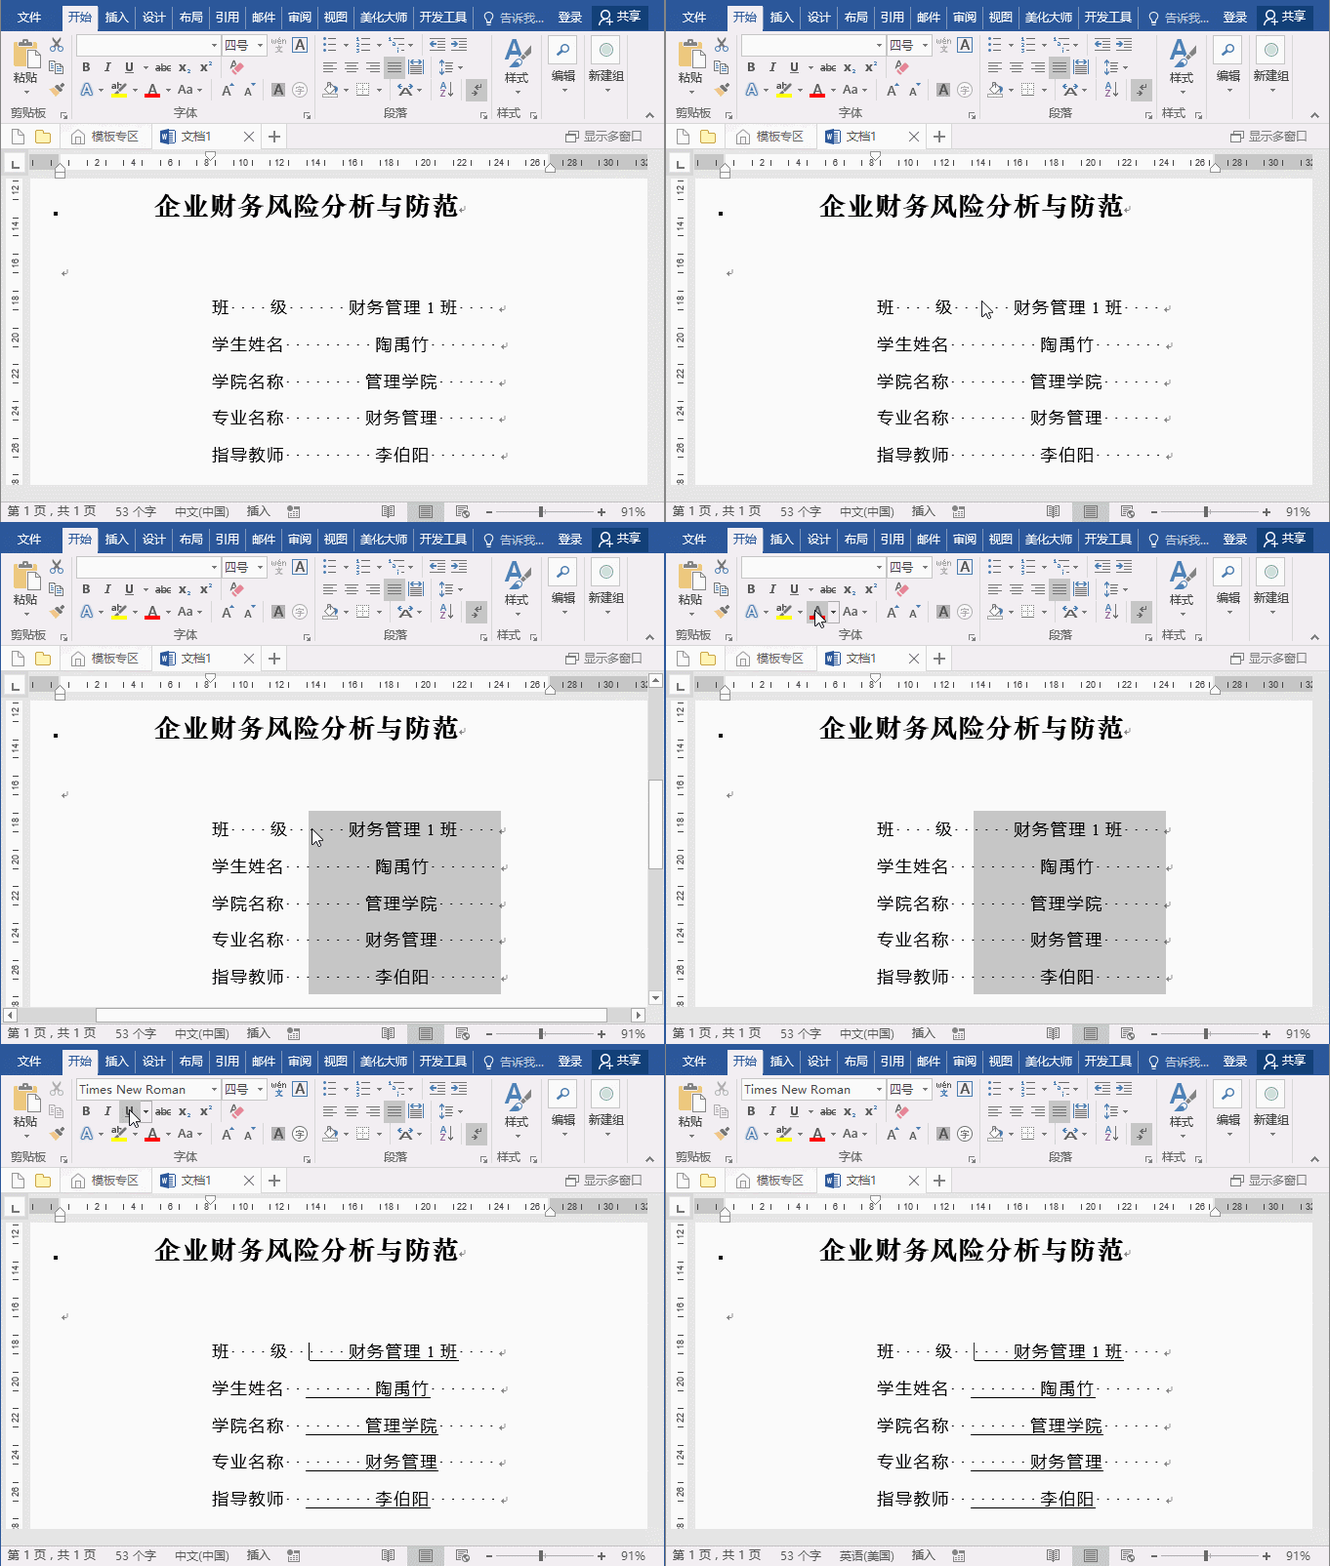
Recently, a friend left a message asking for help: During the process of editing a document, when there is an area that needs to be filled in, we usually add underlines to it, as shown in the picture. .
However, there is a problem. Why is the underline set, but the underline cannot be added at the end of the selection area?

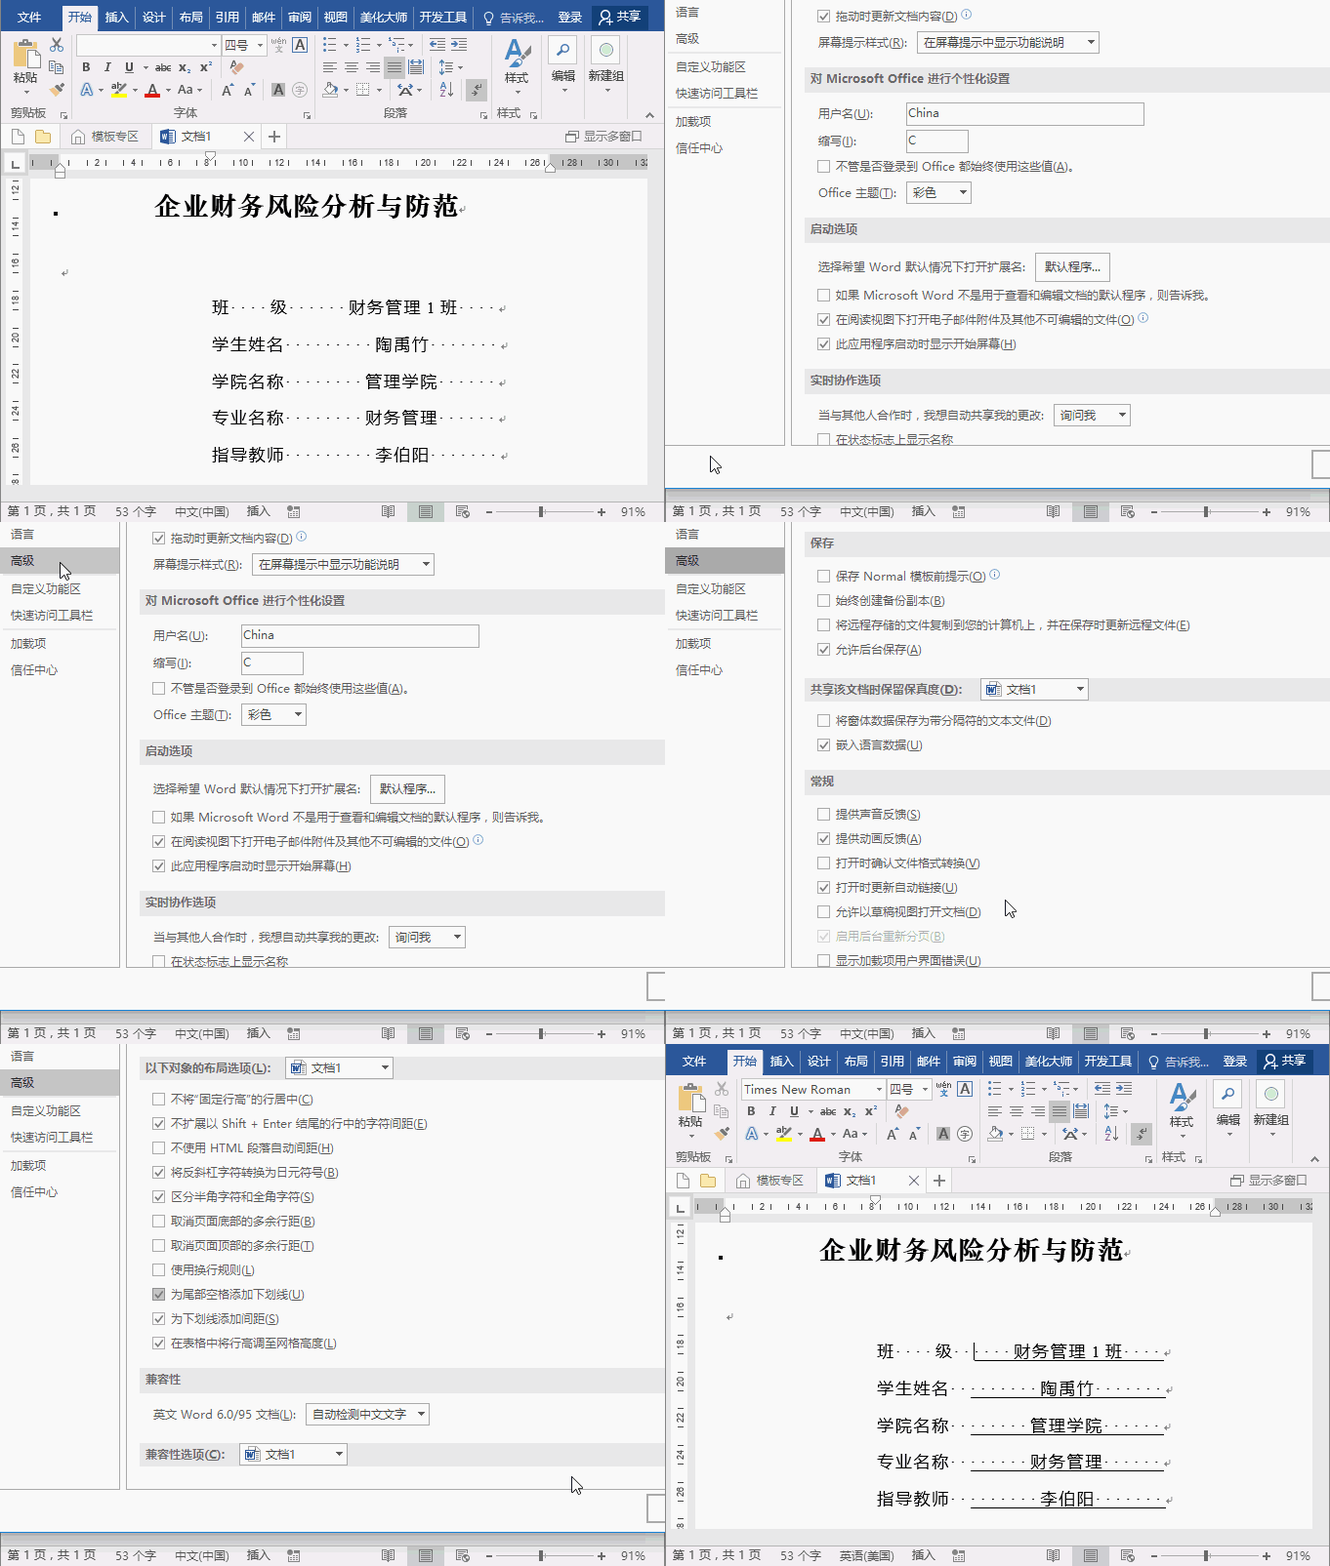
Many people are troubled by this. In fact, the solution is very simple, you only need to check one option:
Click [File]-[Options]-[Advanced] tab, and check "Layout Options for the Following Objects" column Underline trailing spaces" checkbox and click the OK button to solve this problem.

OK, solved! A very simple tip, I hope it can help everyone.
Recommended tutorial: "Word Tutorial"
The above is the detailed content of Practical Word Tips Sharing: How to set underline. For more information, please follow other related articles on the PHP Chinese website!
 How to change word background color to white
 How to delete the last blank page in word
 Why can't I delete the last blank page in word?
 Word single page changes paper orientation
 word to ppt
 Word page number starts from the third page as 1 tutorial
 Tutorial on merging multiple words into one word
 word insert table