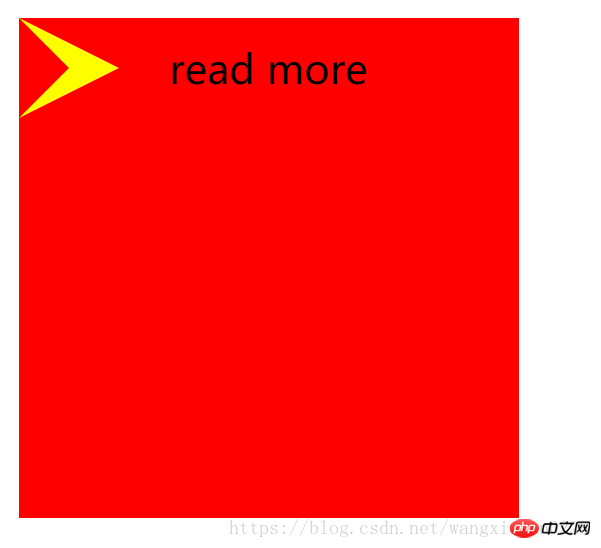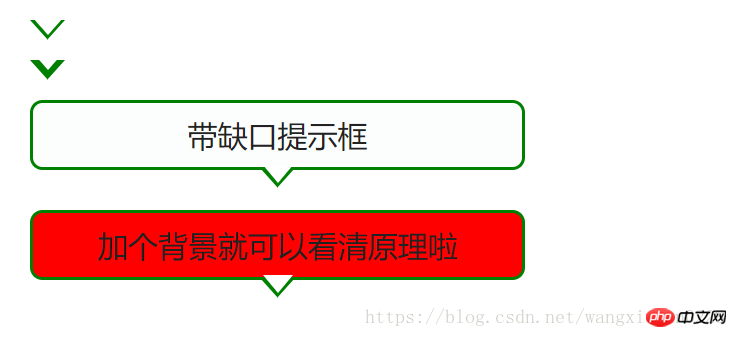
1. Implement the arrow as shown in the figure
 ##
##
<!DOCTYPE html>
<html>
<head>
	<title></title>
<style type="text/css">
.out{
	width: 200px;
	height: 200px;
	background: #f00;
	position: relative;
}
.word{
	position: absolute;
	left: 60px;
	line-height: 40px;
}
.triangle-out{
	position: absolute;
	top: 0px;
	left: 0px;
	width: 0px;
	height: 0px;
	display: block;
	border-top: 20px solid #f00;
	border-right: 20px solid #f00;
	border-bottom: 20px solid #f00;
	border-left: 40px solid #ff0;
}
.triangle-in{
	position: absolute;
	top: 0px;
	left: 0px;
	width: 0px;
	height: 0px;
	display: block;
	border-top: 20px solid transparent;
	border-right: 20px solid transparent;
	border-bottom: 20px solid transparent;
	border-left: 20px solid #f00;
}
</style>
</head>
<body>
	<p class="out">
		<span class="triangle-out"></span>
		<span class="triangle-in"></span>
		<span class="word">read more</span>
	</p>
</body>
</html>
<!DOCTYPE html PUBLIC "-//W3C//DTD XHTML 1.0 Transitional//EN" "http://www.w3.org/TR/xhtml1/DTD/xhtml1-transitional.dtd">
<html xmlns="http://www.w3.org/1999/xhtml">
<head>
<meta http-equiv="Content-Type" content="text/html; charset=utf-8" />
<title>带缺口的提示框-/</title>
<style>
.wrap{
	font-size: 12px;
	margin:40px auto;
	width:600px;
}
.ui-slider-tooltip{
	background:#FCFDFD;
	border:1px solid green;
	color:#222222;
	display: block;
	text-align: center;
	padding: 5px 3px 5px 3px;
	width: 190px;
	position: relative;
}
.ui-corner-all {
	-moz-border-radius-bottomleft:5px;
	-moz-border-radius-bottomright:5px;
	-moz-border-radius-topleft:5px;
	-moz-border-radius-topright:5px;
	-webkit-border-top-left-radius:5px 5px;
	-webkit-border-top-right-radius:5px 5px;
	-webkit-border-bottom-right-radius:5px 5px;
	-webkit-border-bottom-left-radius:5px 5px;
}
.ui-tooltip-pointer-down {
	border-bottom-width: 0;
	border-left: 7px dashed transparent;
	border-right: 7px dashed transparent;
	border-top: 8px solid green;
	bottom:	-8px;
	display: block;
	height:0;
	left: 50%;
	margin-left: -7px;
	position: absolute;
	width:0;
}

.ui-tooltip-pointer-down-inner {
	border-left: 6px dashed transparent;
	border-right: 6px dashed transparent;
	border-top: 7px solid #fff;
	left: -6px;
	top: -9px;
	position: absolute;
}

.a{
	display: block;width:0;height:0;
	border-left: 7px dashed transparent;
	border-right: 7px dashed transparent;
	border-top: 8px solid green;
	border-bottom: 0;
	position: absolute;
}
.b{
	position: absolute;
	border-left: 6px dashed transparent;
	border-right: 6px dashed transparent;
	border-top: 7px solid #fff;
	top: -9px;
	left: -6px;
}
</style>
</head>
<body>
<p class="wrap">
	<h1>用CSS实现带缺口的提示框</h1>
	<span class="a">
		<span class="b"></span>
	</span>
	<br/>
	<span class="a">
		<span class="b" style="top:-11px;"></span>
	</span>
	<br/>


	<span class="ui-slider-tooltip  ui-corner-all">
		<span>带缺口提示框</span>
		<span class="ui-tooltip-pointer-down">
		<span class="ui-tooltip-pointer-down-inner" ></span>
		</span>
	</span>
	<br/>
	<span class="ui-slider-tooltip  ui-corner-all" style="background: #f00">
		<span>加个背景就可以看清原理啦</span>
		<span class="ui-tooltip-pointer-down">
		<span class="ui-tooltip-pointer-down-inner" ></span>
		</span>
	</span>
</p>
</p>
</body>
</html>Front-end engineers learn basic knowledge
Related explanations about object-oriented designRelated explanations
The above is the detailed content of css to implement arrows and prompt boxes with gaps. For more information, please follow other related articles on the PHP Chinese website!


