
There are currently only two rendering tags in the WeChat applet: conditional rendering and list rendering.
1. Conditional rendering
In the framework, we use wx:if="{{condition}}" to determine whether the code block needs to be rendered, because wx:if is a control attribute and needs to be added to On a label, that is, on the view label. But if we want to judge multiple component tags at once, we can use a
.js
Page({
  data:{
    text:"这是www.html51.com的内容",
    btnText:"这是按钮的内容",
},.wxml
<button type="default"  hover-class="other-button-hover"> default </button>
<button type="primary" bindtap="btnClick"> {{btnText}} </button>

<view wx:if="{{true}}">{{text}}</view>1). When the if condition is true, "This is the content of www.html51.com" can be displayed, as shown in the following figure:

2). When the if condition is false, "This is the content of www.html51.com" will not be displayed, as shown in the following figure:
<view wx:if="{{false}}">{{text}}</view>
3). Of course, true and false in the above example can also be implemented in data binding format, so when the condition value of wx:if is switched, the framework has a partially rendered process as it ensures that the conditional block is destroyed or re-rendered on switch. The code and implementation renderings are as follows:
  data:{
    text:"这是www.html51.com的内容",
    btnText:"这是按钮的内容",
    show :true,
},<view wx:if="{{show}}">{{text}}</view>
4). We can also make dynamic conditional rendering judgments and perform conditional rendering when the mouse is clicked:
  data:{
    text:"这是www.html51.com的内容",
    btnText:"这是按钮的内容",
    show :true,
}, btnClick: function() {
console.log("按钮被点击了了...")
var isShow = this.data.show;
console.log("isShow:" + isShow)
this.setData({text:"这是新的51小程序内容"})
}After compiling, you can see:
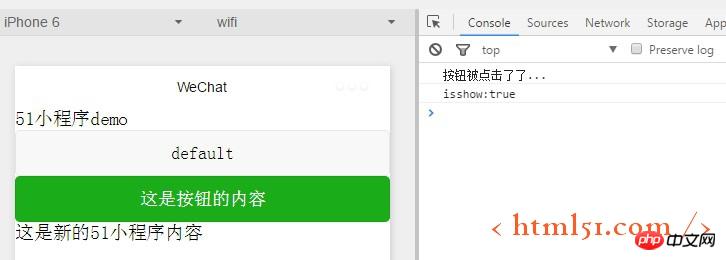
After setting show:false, you can see:
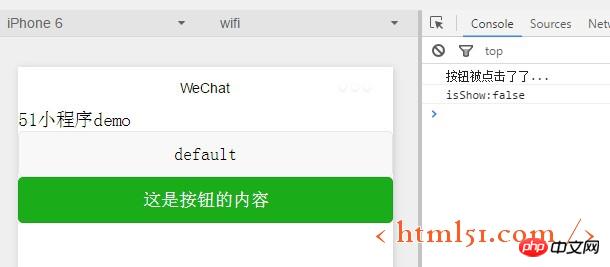
5). We still have to make another The loop action of "hide"-"show" after clicking.
  btnClick: function() {
      console.log("按钮被点击了了...")
      var isShow = this.data.show;

      console.log("isShow:" + isShow)
      this.setData({text:"这是新的51小程序内容",show:!isShow})
}The compiled display result is as follows:
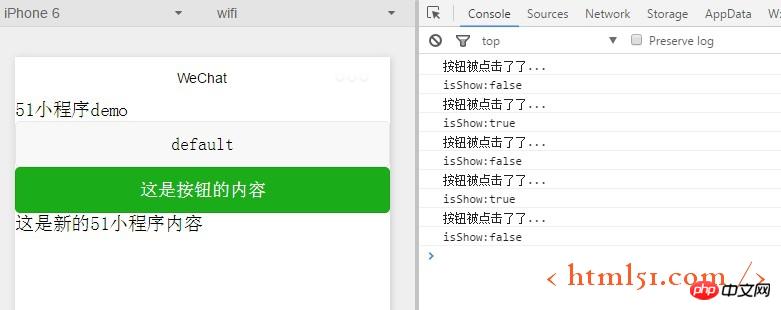
6) You can also use wx:elif and wx:else to add an else block, as follows Display:
<button type="default"  hover-class="other-button-hover"> default </button>
<button type="primary" bindtap="btnClick"> {{btnText}} </button>

<view wx:if="{{show}}">{{text}} 1</view>
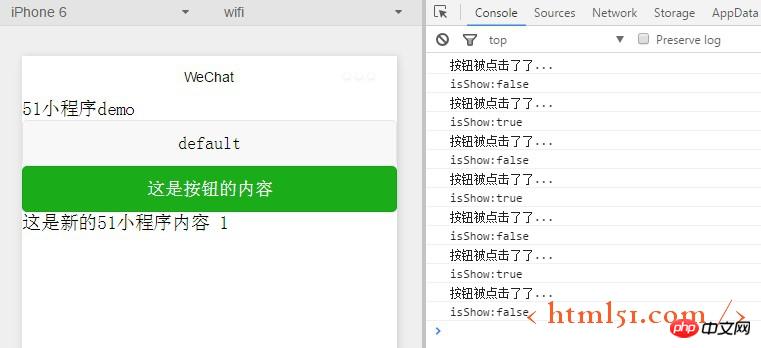
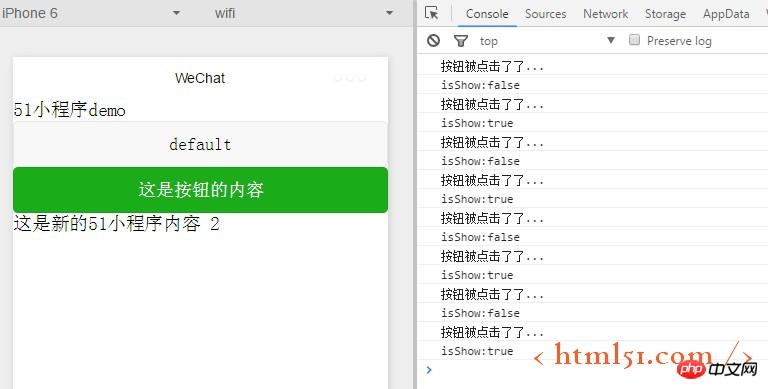
<view wx:else>{{text}} 2</view>According to the above code, when we click the mouse, it will display 1 2 in a loop. Let’s take a look at the result:
List rendering is actually what we often call for loop rendering. Using list data, we can loop through a bunch of news data, etc., and use the wx:for control attribute on the component to bind an array. , the component can be repeatedly rendered using the data from each item in the array.
<view wx:for="{{array}}">
  {{index}}: {{item.message}}
</view><view wx:for="{{['aaa','bbb','ccc']}}">
www.html51.com小程序教程循环播放...
</view>
  data:{
    text : "这是www.html51.com的内容",
    btnText : "这是按钮的内容",
    show : false,
    news : ['aaa','bbb','ccc'],
},<blockquote>51小程序demo
<view wx:for="{{news}}">
{{item}}

</view>
<view wx:for="{{news}}">
{{index}} : {{item}}

</view> 
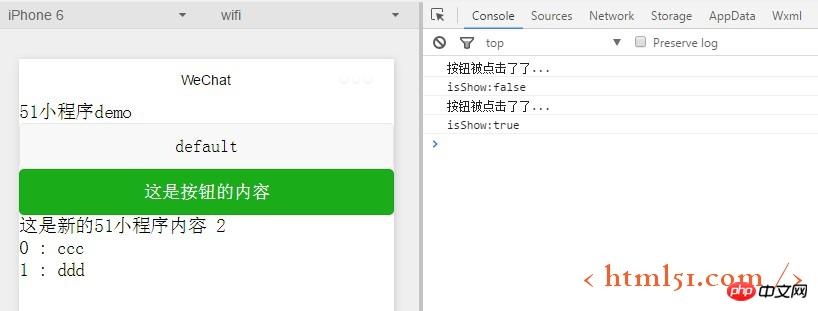
  btnClick: function() {
      console.log("按钮被点击了了...")
      var isShow = this.data.show;
      var newsData = this.data.news;
      newsData.shift();

      console.log("isShow:" + isShow)
      this.setData({text:"这是新的51小程序内容",show:!isShow,news:newsData})
  }
Notes in this section:
1. When assigning show in data, double quotes are not required.
For more WeChat applet: related articles on the use of rendering tags, please pay attention to the PHP Chinese website!
 How to read py files in python
 Why can't I access the Ethereum browser?
 How to use insert statement in mysql
 div scroll bar
 How to export word from powerdesigner
 What is the difference between webstorm and idea?
 How to register on Matcha Exchange
 localstorage usage
 What should I do if my iPad cannot be charged?


