網站後台的模組介紹 - 新增用戶
上節是教大家遍歷出後台用戶的所有信息,本節我們來詳解一下後台是如何添加用戶的。
先在usermessage.php上面增加一個按鈕,如圖所示:

#點擊跳到adduse.html。如圖

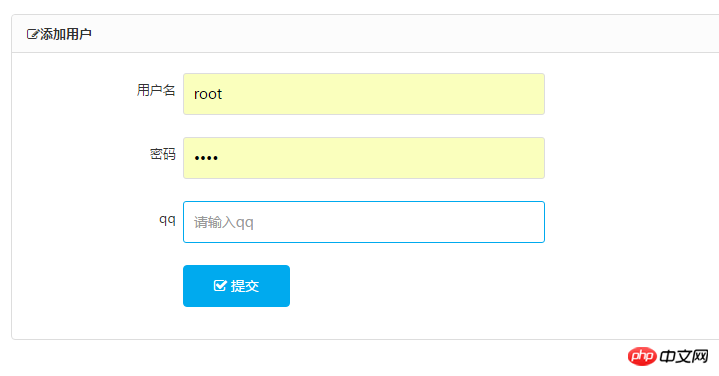
adduse.html程式碼如下:
<!DOCTYPE html>
<html>
<head>
<meta http-equiv="Content-Type" content="text/html; charset=utf-8" />
<meta http-equiv="X-UA-Compatible" content="IE=edge">
<meta name="viewport" content="width=device-width, initial-scale=1.0, maximum-scale=1.0, user-scalable=no" />
<meta name="renderer" content="webkit">
<title></title>
<link rel="stylesheet" href="style/css/pintuer.css">
<link rel="stylesheet" href="style/css/admin.css">
<script src="style/js/jquery.js"></script>
<script src="style/js/pintuer.js"></script>
</head>
<body>
<div class="panel admin-panel">
  <div><strong><span></span>添加用户</strong></div>
  <div>
    <form method="post" action="adduser.php" enctype="multipart/form-data">
      <div>
        <div>
          <label>用户名</label>
        </div>
        <div>
          <input type="text" class="input w50" id="username" name="username" size="50" placeholder="请输入用户名" />
          <div></div>
        </div>
      </div>
       <div>
        <div>
          <label for="sitename">密码</label>
        </div>
        <div>
          <input type="password" class="input w50" id="password" name="password" size="50" placeholder="请输入密码" data-validate="required:请输入原始密码" />
        </div>
      </div>
       <div>
        <div>
          <label>qq</label>
        </div>
        <div>
          <input type="text" class="input w50" id="qq" name="qq" size="50" placeholder="请输入qq" />
          <div></div>
        </div>
      </div>
      <div>
        <div>
          <label></label>
        </div>
        <div>
          <button class="button bg-main icon-check-square-o" type="submit"> 提交</button>
        </div>
      </div>
    </form>
  </div>
</div>
</body></html>
頁面寫好後,我們就開始做新增使用者的功能了,先建立一個adduser. php
程式碼如下:
<?php
  session_start ();
  require_once("../config/config.php");
  $username = $_POST ["username"];
  $password = $_POST ["password"];
  $qq = $_POST ["qq"];
  mysql_query("insert into user (username,password,qq) values ('$username','$password','$qq')");
  @mysql_select_db("read", $con);
 ?>
 <script type="text/javascript">
    alert("添加成功");
    window.location.href="usermessage.php";
  </script>
這樣,後台的新增功能就可以了。


