

OSX as Transparent Wifi MITM Proxy

Yesterday I was in the situation where I wanted to debug an iOS deviceand what network calls it would make. Normally the trivial step is tojust define an HTTP proxy server in the wifi settings but that will onlywork for as long as you have
Yesterday I was in the situation where I wanted to debug an iOS device and what network calls it would make. Normally the trivial step is to just define an HTTP proxy server in the wifi settings but that will only work for as long as you have something that actually honors this proxy server. But there are better ways to transparently proxy connections from a device connected via Wifi which does not require any changes on the actual device.
The Tools
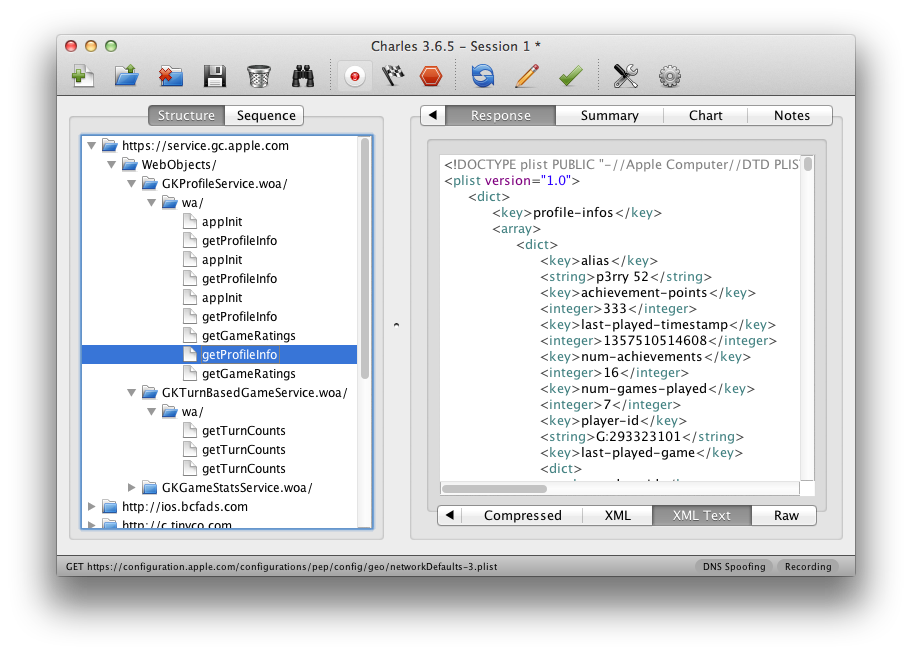
In order for this to work you need a device running OS X which is connected to the same network as the Wifi. Then you need to convince the Wifi device to see you as the gateway instead of the actual gateway. The easiest way is just to go to the settings and change the gateway to your computer's IP. The second ingredient is an HTTP proxy, ideally one that can also decrypt and reencrypt SSL traffic. Personally I can recommend Charles for that. Lastly you will need another proxy that can work transparently which sits between your device and Charles. On OS X redsocks gets this job done.
If you don't want to spend the money on Charles or you want to rewrite traffic with Python you can use mitmproxy.
The Setup
The first thing you will notice is that when you point your Wifi device to your computer it will loose network connectivity. That's because by default your computer won't forward packets. This can easily be changed through sysctl:
$ sudo sysctl -w net.inet.ip.forwarding=1
After that you should be able to browse the internet again on your Wifi device.
The second step is installing redsocks. If you have brew that's a very trivial operation:
$ brew install redsocks
Once installed you will need to create a config file for it. Call it redsocks.conf and place it in a folder from which you run redsocks:
base {
    log_debug = on;
    log_info = on;
    log = stderr;
    daemon = off;
    redirector = generic;
}
redsocks {
    local_ip = 0.0.0.0;
    local_port = 12345;
    ip = 127.0.0.1;
    port = 8889;
    // known types: socks4, socks5, http-connect, http-relay
    type = socks5;
}
Since I'm using Charles I take advantage of it's socks5 support and point it to localhost:8889 where Charles normally starts up if configured as Socks5 proxy. If you're using a regular HTTP proxy you can use http-connect as proxy type. The local_port defines where the actual transparent redsocks proxy opens.
All you have to do then is to start it:
$ redsocks
After that you will need to point all the traffic that is not from your computer and from port 80 and 443 of your Wifi through redsocks. On OS X the firewall canbe controlled through ipfw. In my case the wifi device is en1:
$ sudo ipfw add fwd 127.0.0.1,12345 tcp from not me to any 80 in via en1
$ sudo ipfw add fwd 127.0.0.1,12345 tcp from not me to any 443 in via en1
Working around OS X Bugs
Now currently if you finish that above setup you will notice that nothing actually works. The cause for this is a Bug in the OS X kernel that requires flipping the net.inet.ip.scopedroute flag to 0. I am not entirely sure what it does, but the internet reports that it breaks network sharing through the user preferences. In any case it fixes ipfw based forwarding so you can flip it with sysctl:
$ sudo sysctl -w net.inet.ip.scopedroute=0
Unfortunately in OS X Lion this flag can actually not be flipped from userspace so you need to set it as boot parameter and then restart your computer. You can do this by editing the /Library/Preferences/SystemConfiguration/com.apple.Boot.plist file:
<?xml version="1.0" encoding="UTF-8"?>

<plist version="1.0">
<dict>
  <key>Kernel Flags</key>
  <string>net.inet.ip.scopedroute=0</string>
</dict>
</plist>
Installing SSL Certificates
After all that your HTTP traffic should show up in your SSL interception proxy. SSL will only work if the application on your Wifi device is trusting your SSL interception proxy's CA. For browsers for instance that's trivial to change. The Charles Certificate can be added to the trust store by following this link: charles.crt. Note that this will not work with applications that don't use the system's CA trust store. In that case you will need to recompile your application so that it trusts the Charles CA.
原文地址:OSX as Transparent Wifi MITM Proxy, 感谢原作者分享。

熱AI工具

Undresser.AI Undress
人工智慧驅動的應用程序,用於創建逼真的裸體照片

AI Clothes Remover
用於從照片中去除衣服的線上人工智慧工具。

Undress AI Tool
免費脫衣圖片

Clothoff.io
AI脫衣器

Video Face Swap
使用我們完全免費的人工智慧換臉工具,輕鬆在任何影片中換臉!

熱門文章
熱工具

記事本++7.3.1
好用且免費的程式碼編輯器

SublimeText3漢化版
中文版,非常好用

禪工作室 13.0.1
強大的PHP整合開發環境

Dreamweaver CS6
視覺化網頁開發工具

SublimeText3 Mac版
神級程式碼編輯軟體(SublimeText3)


 惠普印表機連不上wifi怎麼辦-惠普印表機連不上wifi的解決方法
Mar 06, 2024 pm 01:00 PM
惠普印表機連不上wifi怎麼辦-惠普印表機連不上wifi的解決方法
Mar 06, 2024 pm 01:00 PM
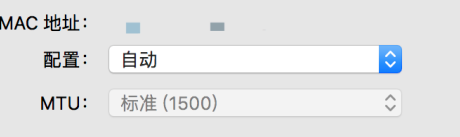
很多用戶在使用惠普印表機的時候,不熟悉惠普印表機連不上wifi怎麼辦?下文小編就為各位帶來了惠普印表機連不上wifi的解決方法,讓我們一起來下文看看吧。惠普印表機mac位址設定為自動選擇自動加入網路勾選變更網路設定使用dhcp輸入密碼連接惠普印表機顯示連接wifi
 自己家的wifi顯示不安全網路怎麼回事
Nov 15, 2023 pm 02:39 PM
自己家的wifi顯示不安全網路怎麼回事
Nov 15, 2023 pm 02:39 PM
原因有:1、WiFi本身有問題;2、路由器可能過熱或損壞;3、可能寬頻欠費,導致無法上網;4、WiFi名稱包含中文,導致部分電腦無法連線上網;5、電腦系統問題;6 、IP位址設定問題;7.此無線網路沒有設定無線密碼等。解決方法:1、檢查WiFi連接,確保設備已連接到正確的WiFi網路;2、檢查路由器設置,可以嘗試重新設定路由器,確保SSID和密碼正確等等。
 手機wifi有個感嘆號是為什麼
Sep 18, 2023 pm 04:05 PM
手機wifi有個感嘆號是為什麼
Sep 18, 2023 pm 04:05 PM
手機wifi有個感嘆號的原因可能是無法連接到網路、訊號弱、認證問題和IP位址衝突等。詳細介紹:1、無法連接到互聯網,如果Wi-Fi圖示上出現感嘆號,可能是因為手機無法連接到互聯網,這可能是由於路由器斷網、網路故障或手機設定問題引起的;2、訊號弱,如果Wi-Fi圖示上出現感嘆號,可能是由於Wi-Fi訊號較弱引起的,這可能是由於距離路由器太遠、障礙物阻擋或乾擾訊號等等。
 wifi打不開是什麼原因 附:修復wifi功能打不開的方法
Mar 14, 2024 pm 03:34 PM
wifi打不開是什麼原因 附:修復wifi功能打不開的方法
Mar 14, 2024 pm 03:34 PM
現在手機除了都有數據和wifi兩種上網方法,OPPO手機也不例外,但是我們在使用時打不開wifi功能了要怎麼辦呢?先不要急,不妨看下本期教程,就能幫助到您了!手機wifi功能無法開啟怎麼辦可能是因為WLAN開關開啟時會略有延遲,請等待2秒後觀察是否開啟,請勿連續點選。 1、可嘗試進入「設定>WLAN」,嘗試重新開啟WLAN開關。 2.請開啟/關閉一下飛航模式,嘗試重新開啟WLAN開關。 3.重啟手機嘗試是否能正常開啟WLAN。 4.建議備份資料後恢復出廠設定嘗試。若以上方法均未能解決您的問題,請攜帶購
 win10為何無法連線到Wi-Fi
Jan 16, 2024 pm 04:18 PM
win10為何無法連線到Wi-Fi
Jan 16, 2024 pm 04:18 PM
我們在使用win10作業系統連接wifi無線網路的時候會發現出現了連不上wifi網路受限的提示。對於這種問題小編覺得可以嘗試在網絡和共享中心中找到自己的網絡,然後進行一系列的調整設置。具體步驟就來看看小編是怎麼做的吧~win10為什麼連不上wifi方法一1、在電腦屏幕底部通知區域的無線WIFI圖標處單擊鼠標右鍵,選擇“打開網絡和Internet設置”,接著點擊“更改適配器選項”按鈕。 2.在彈出的網路連接介面中,尋找名為「WLAN」的無線連接,再次按一下右鍵,並選擇「關閉」(或為「停用」)。 3、待
 解決win10無法輸入wifi密碼的方法
Dec 30, 2023 pm 05:43 PM
解決win10無法輸入wifi密碼的方法
Dec 30, 2023 pm 05:43 PM
win10wifi不能輸入密碼是一個非常鬱悶的問題,一般情況下就是卡主了,重新打開一下或者重啟一下電腦就可以了,還是解決不了的用戶,快點來看看詳細的解決教程吧。 win10wifi無法輸入密碼教學方法一:1、無法輸入密碼可能是我們的鍵盤連線出現了問題,仔細檢查鍵盤是否可以使用。 2.如果我們需要使用小鍵盤輸入數字的話,還需要查看小鍵盤是否被鎖定了。方法二:註:部分使用者反映執行此操作後,電腦無法開機。實際上不是此項設定的原因,而是電腦系統本身有問題。執行此操作後,不會影響電腦的正常啟動,電腦系統不
 wifi已連線不可上網是為什麼
Dec 07, 2023 pm 05:00 PM
wifi已連線不可上網是為什麼
Dec 07, 2023 pm 05:00 PM
wifi已連接無法上網的原因:1、WiFi訊號弱;2、IP位址衝突;3、DNS伺服器問題;4、路由器故障;5、網路供應商問題;6、WiFi網路本身的問題;7、路由器問題;8、設備網路設置問題;9、訊號幹擾或障礙物;10、設備問題。詳細介紹:1、WiFi訊號弱,WiFi訊號的強度直接影響到網路的穩定性和速度,如果連接的WiFi訊號較弱,可能會導致網路連線不穩定或無法上網等等。
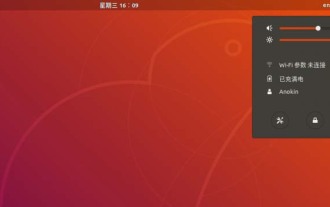 Ubuntu18.04如何連接到隱藏的WiFi網路?
Jan 01, 2024 pm 03:58 PM
Ubuntu18.04如何連接到隱藏的WiFi網路?
Jan 01, 2024 pm 03:58 PM
Ubuntu18.04想要隱藏的無線網路?怎麼連接wifi網路呢?下面我們就來看看詳細的教學。 1.啟動Ubuntu後,點選桌面右上側倒三角。 2.彈出下拉選單,點選選擇【wifi設定】。 3.進入【wifi設定】詳情頁。 4.將滑鼠移至wifi開關狀態的右側三道橫的圖標,點選該圖標。 5.彈出下拉選單,滑鼠點選選擇裡面的【連接到隱藏網路】。 6.彈出【連接到隱藏的WiFi網路】對話框。需輸入WiFi網路名稱、加密方式等資訊。 7.輸入隱藏的WiFi網路名稱;加密方式選擇【WPA及WPA2個人】,然後輸上
