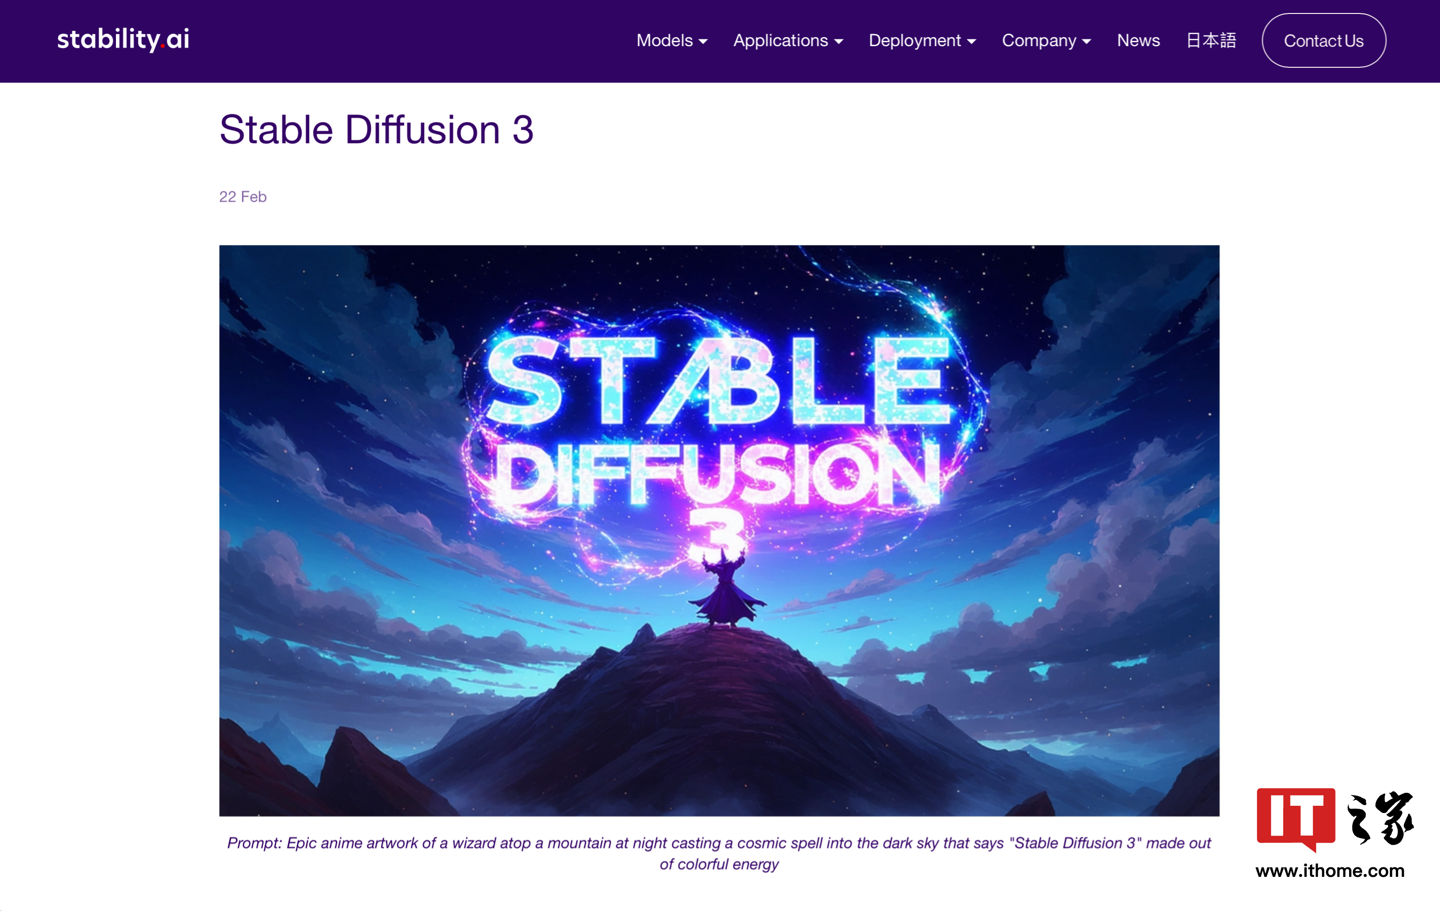
As the latest version of the AI image generation model, Stable Diffusion 3 is here with great expectations. I believe that many friends must have used the image generation model more or less in their work and life, so we will share it below. Let’s take a look at the local construction process of Stable diffusion 3. Without further ado, let’s get down to the practical stuff.
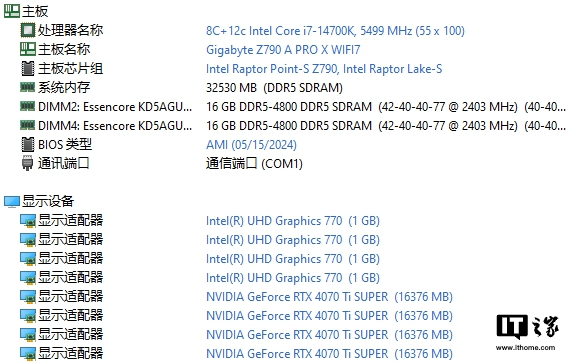
 The platform configuration used in this build is as follows:
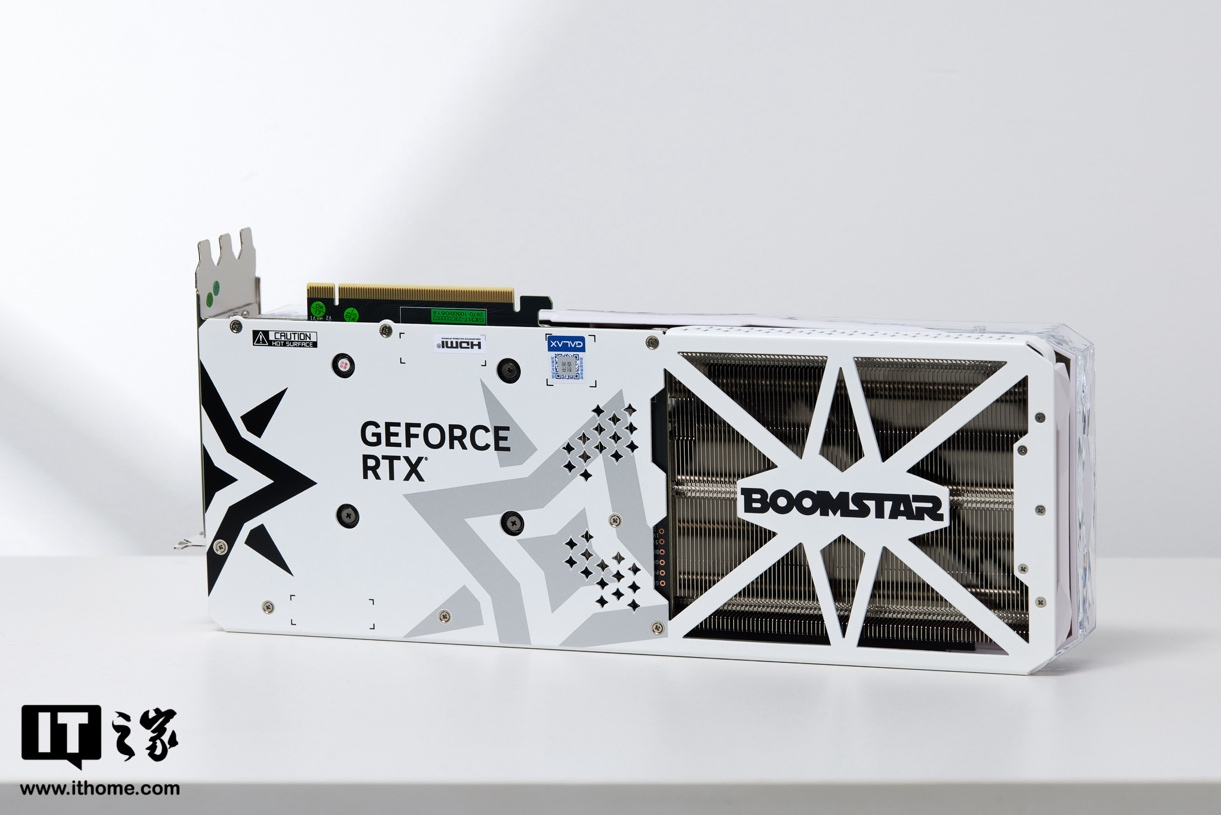
  Considering the strong demand for computing power when running Stable diffusion 3 locally, we chose the GALAXY GeForce RTX 4070 Ti SUPER OC graphics card this time. GEFORCE RTX 4070 Ti SUPER is built based on the AD103 core, which is also the biggest change of this graphics card. It contains 8448 CUDA cores internally, which is an increase of more than 10% compared to the 7680 cores of the RTX 4070 Ti. The memory bit width has been increased to 256bit compared to the RTX 4070 Ti, and the memory specifications have also been increased to 16GB GDDR6X, whether for games or AI. Creation helps.
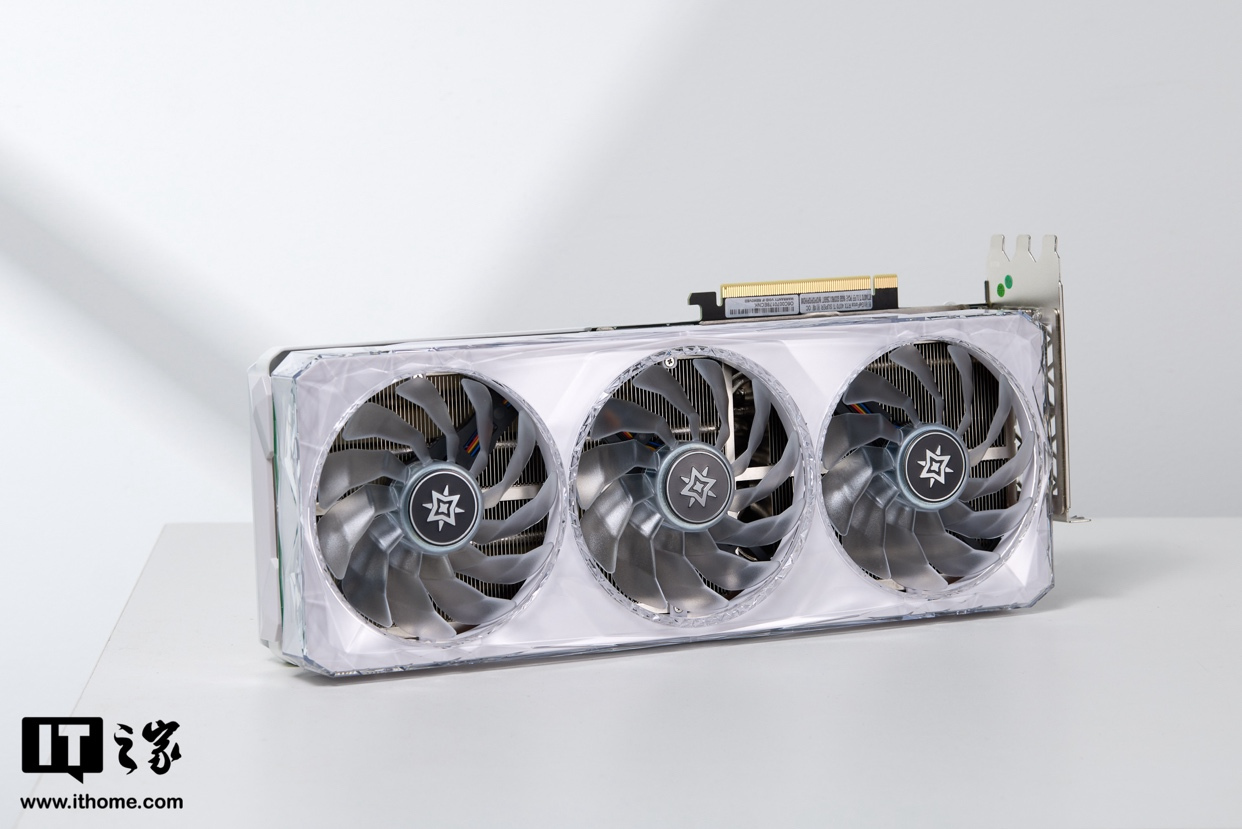
  Choosing this graphics card is a balance between price and performance. This graphics card is equipped with 16GB GDDR6x video memory, with a memory width of 192bit and a length of 35.4cm.
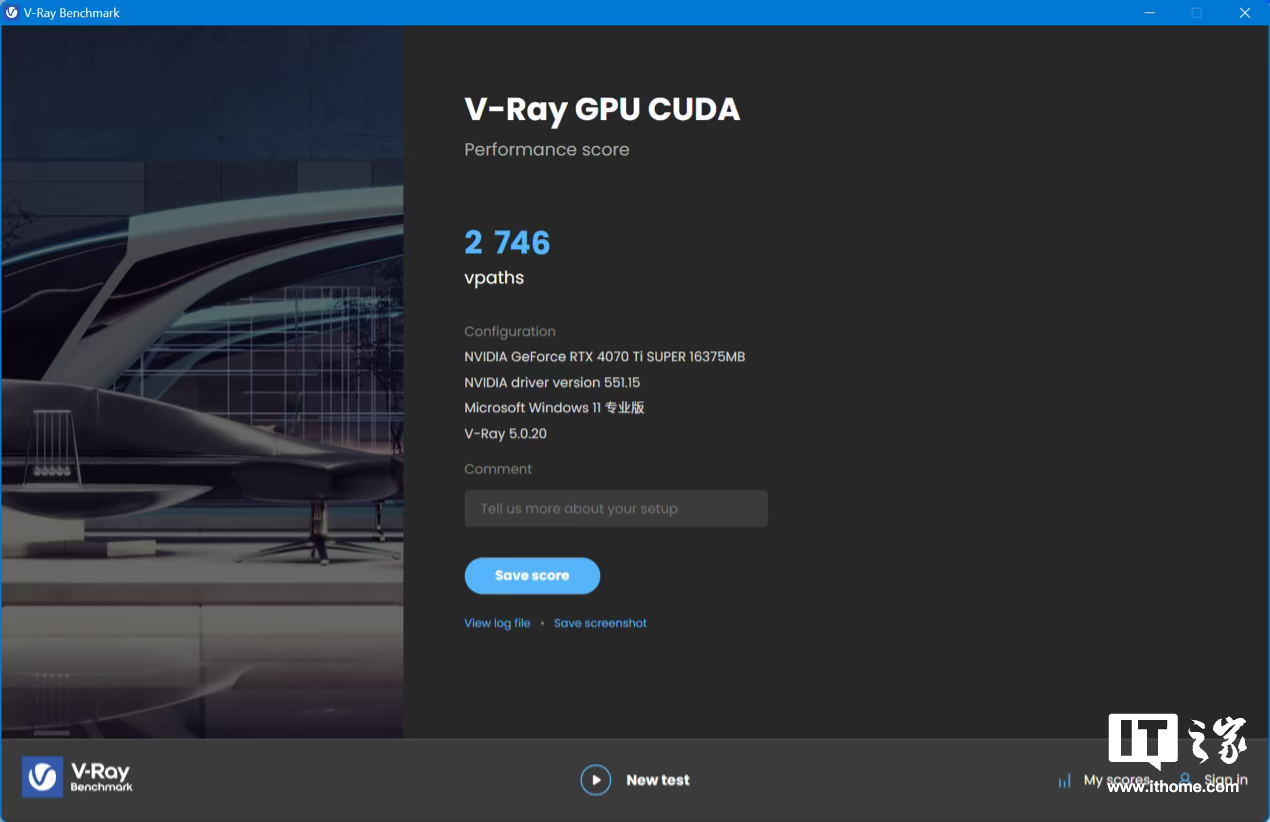
  In order to ensure that this graphics card is qualified for the construction of Stable diffusion 3, some tests were conducted on the computing performance of this graphics card in advance. The 8448 CUDA cores of GeForce RTX 4070 Ti SUPER can provide hardware acceleration, making work more efficient be improved. Almost all modeling software is optimized for NVIDIA GPUs, so it can take into account efficiency, stability, and compatibility. We tested the performance of V-Ray Benchmark. The GPU CUDA test project score is 2746 points.
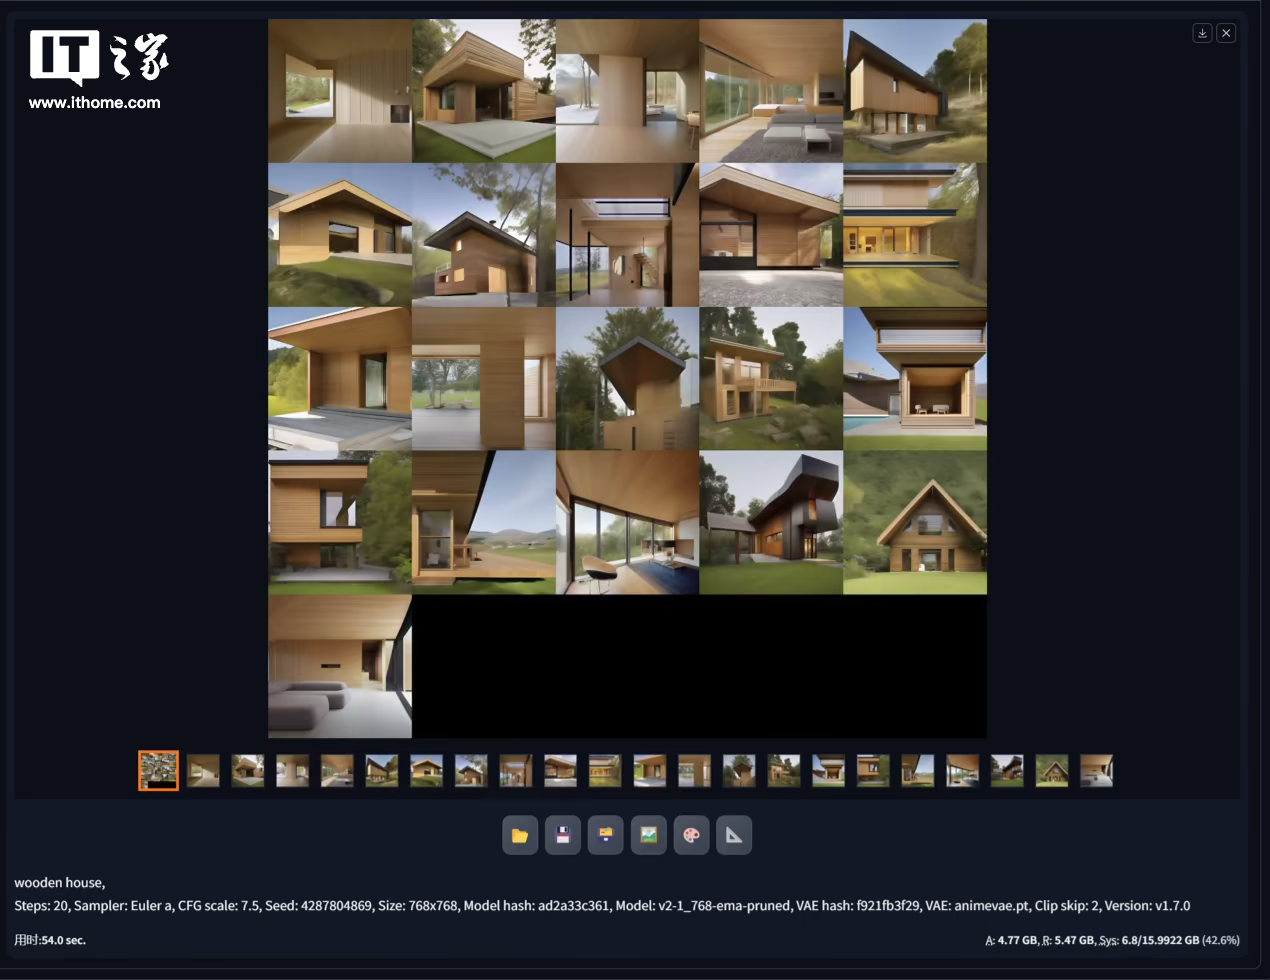
  In the test of Stable Diffusion 1.7, by selecting the model v2-1_768-ema-pruned.ckpt, 21 images of cabins were drawn in the form of Vincentian diagrams. The image resolution was 768*768, and it finally took 54 seconds. Finish. After turning on the TensorRT Engines function, the speed is reduced by half again, and it can be completed in 27 seconds.
  So after a series of tests, we have determined that this graphics card is fully capable of building Stable Diffusion 3. Let’s roll up our sleeves and get started!
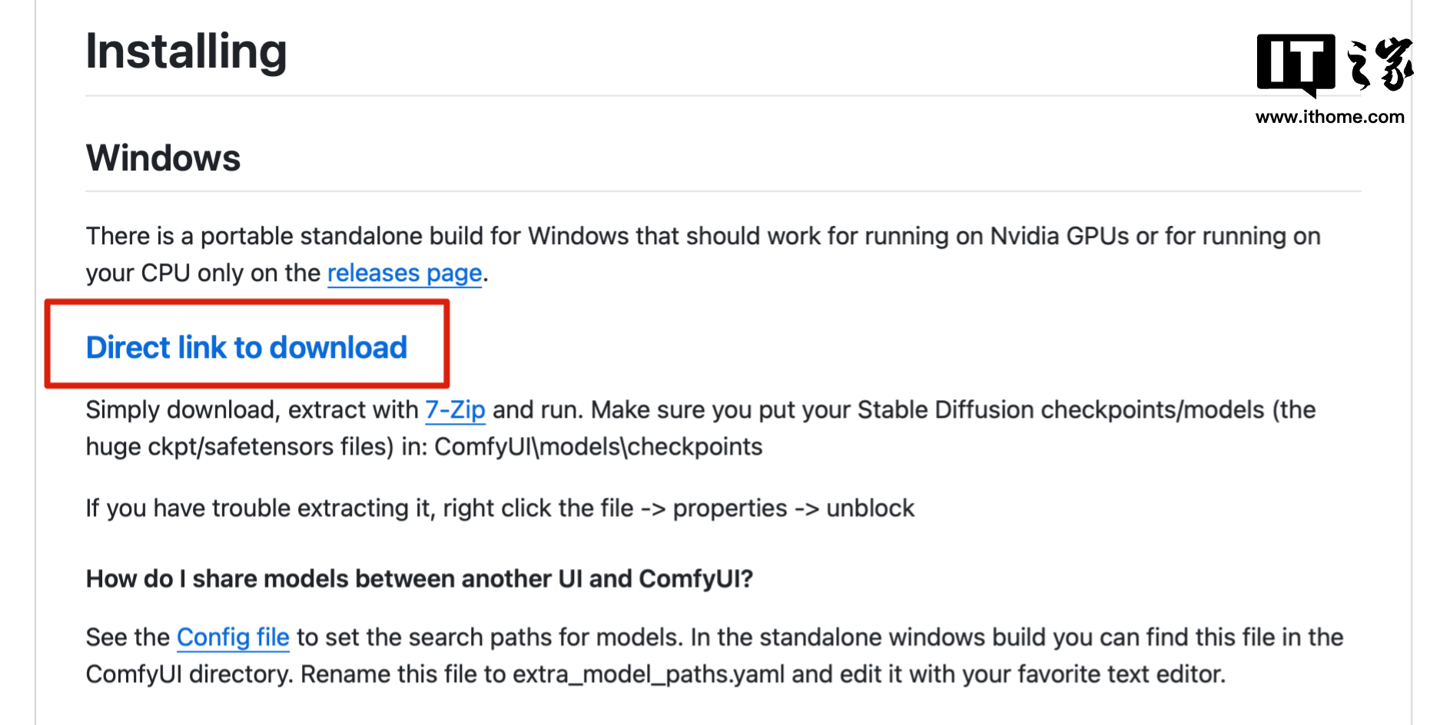
 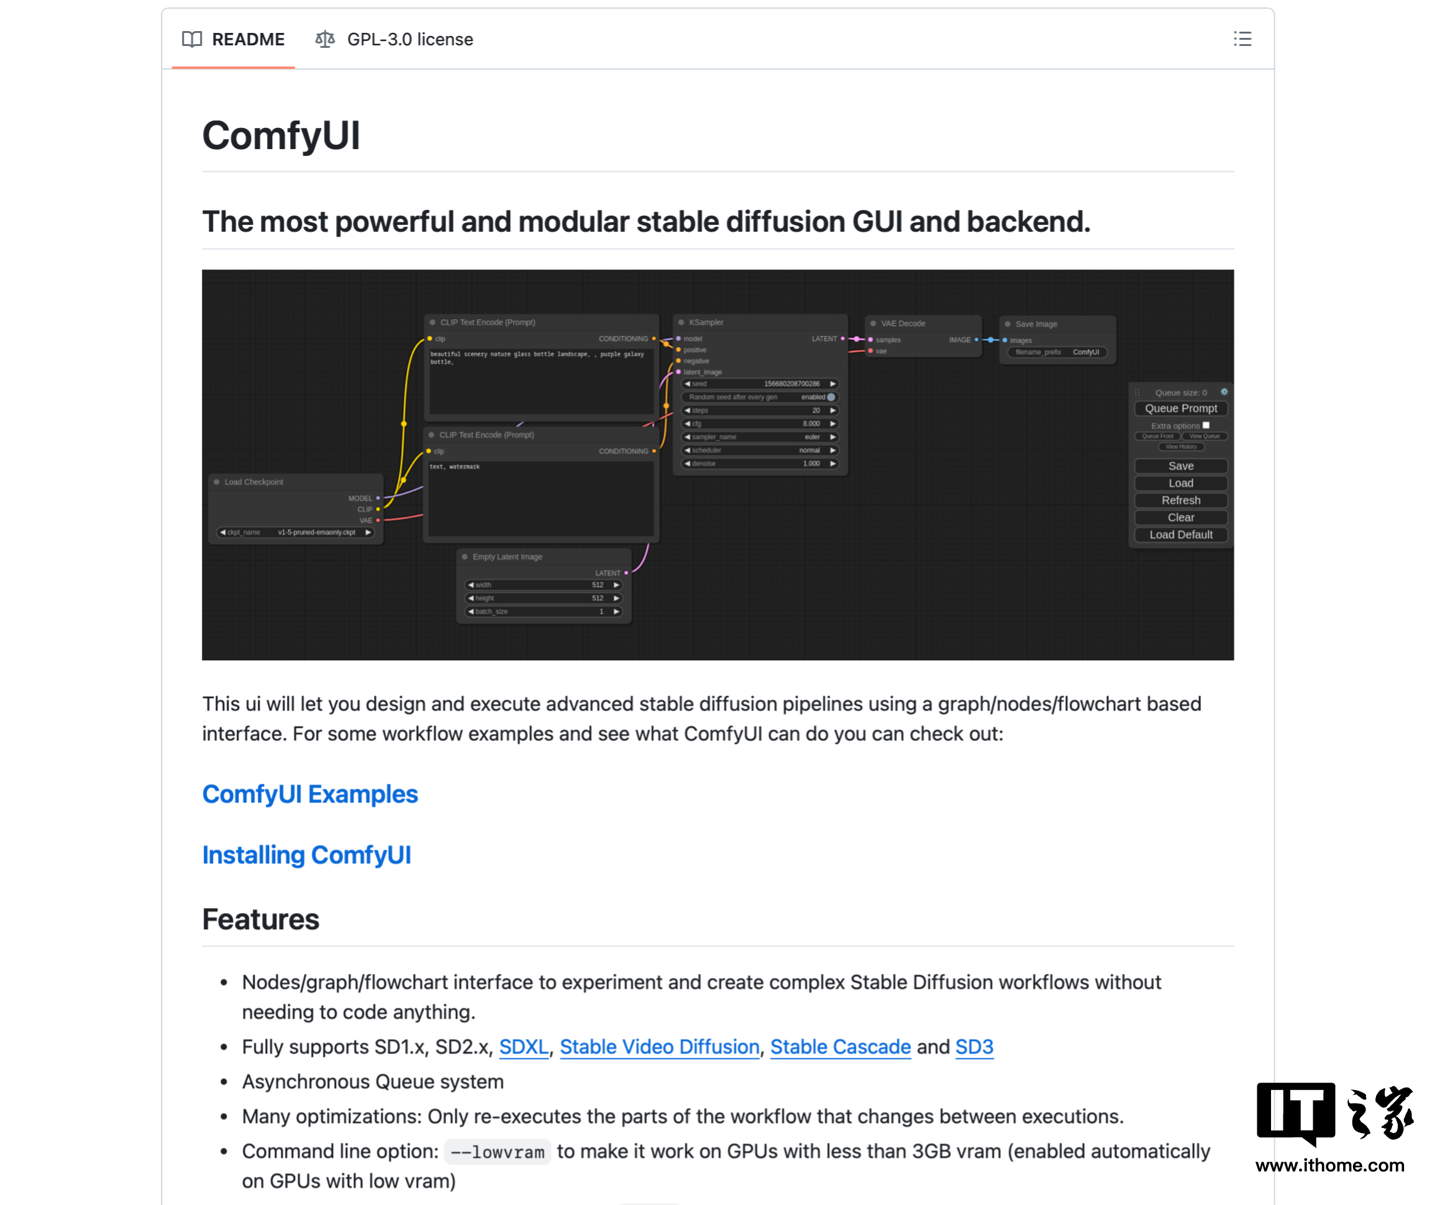 Scroll down to find the download link and click to download.
  UI is downloading first, let’s download the heavy Stable Diffusion 3 model file. The URL is as follows: https://huggingface.co/stabilityai/stable-diffusion-3-medium/tree/main (This URL is redirected from the official link, there is no need to question the authority.)
  Required to download the model file Log in to the website first. Friends who do not have an account can register. The registration process is relatively routine. After registration, you can see the following model file. Just download the three model files marked in the picture first.
 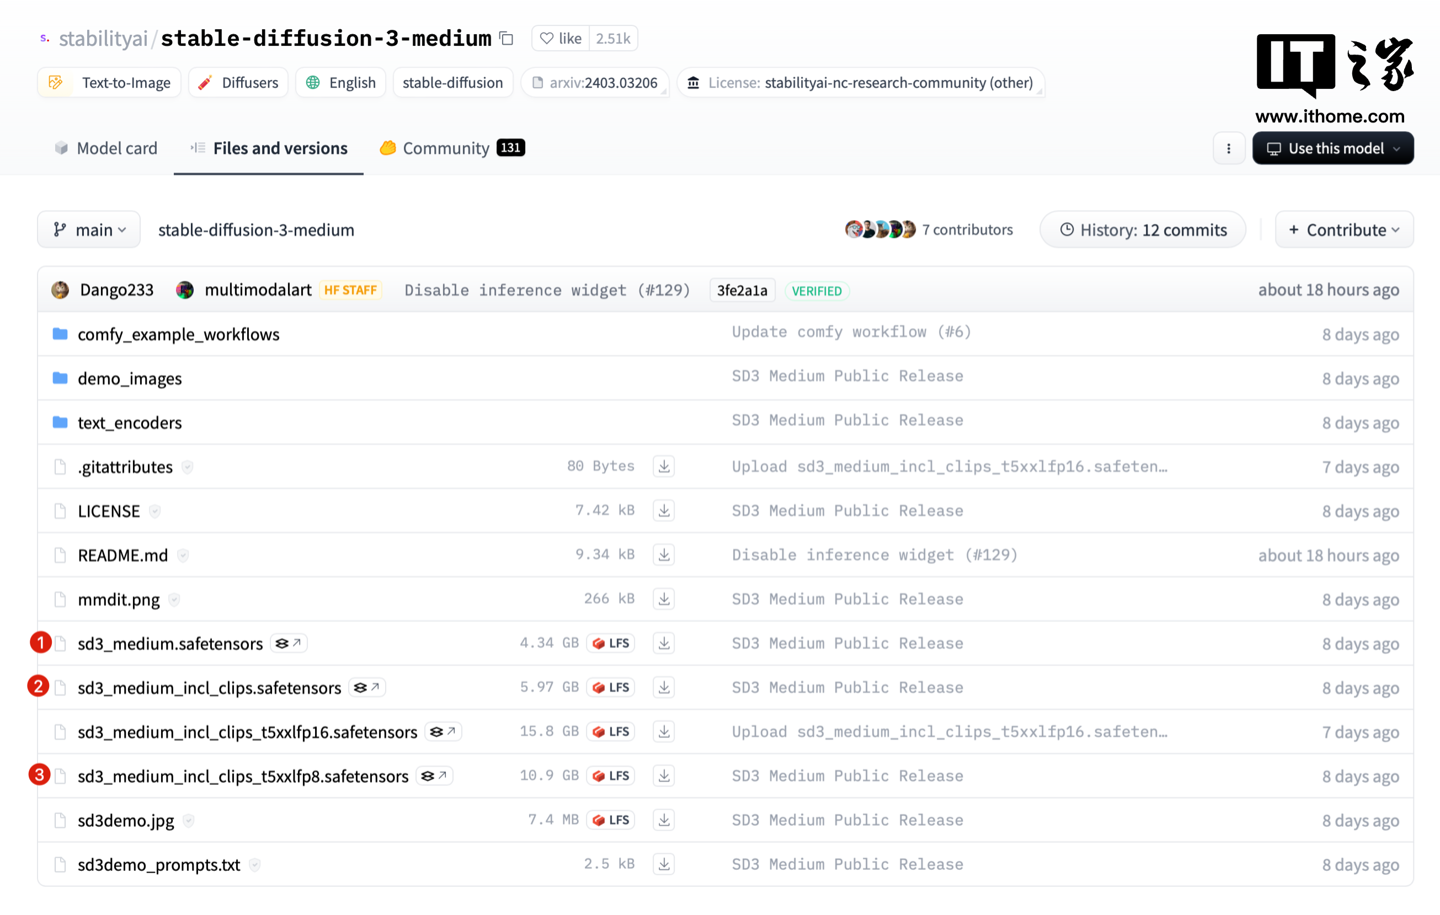 此外,還需要下載這兩個資料夾中的部分檔案。
  text_encoders 資料夾中需要下載這三個檔案。
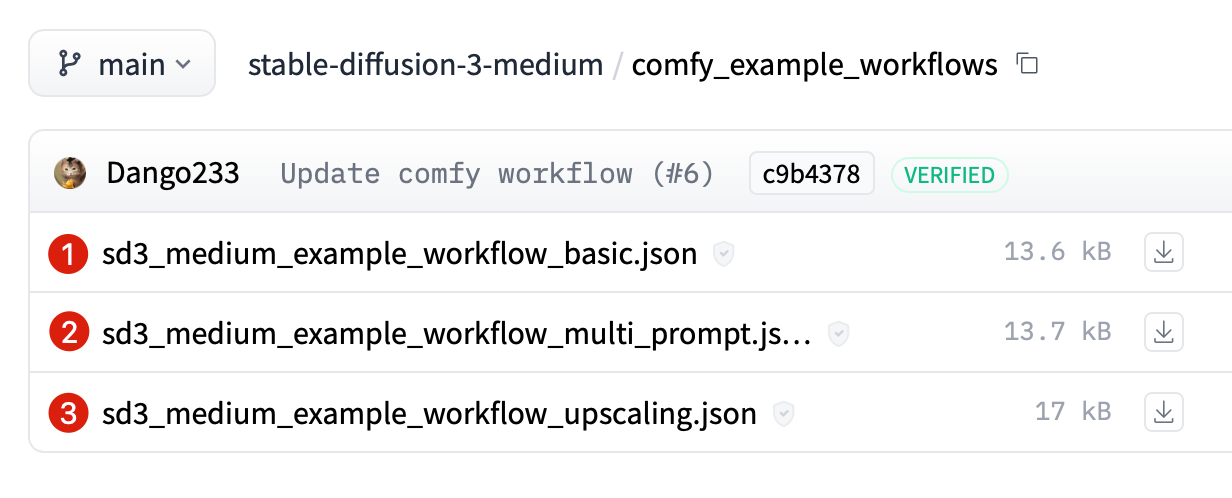
 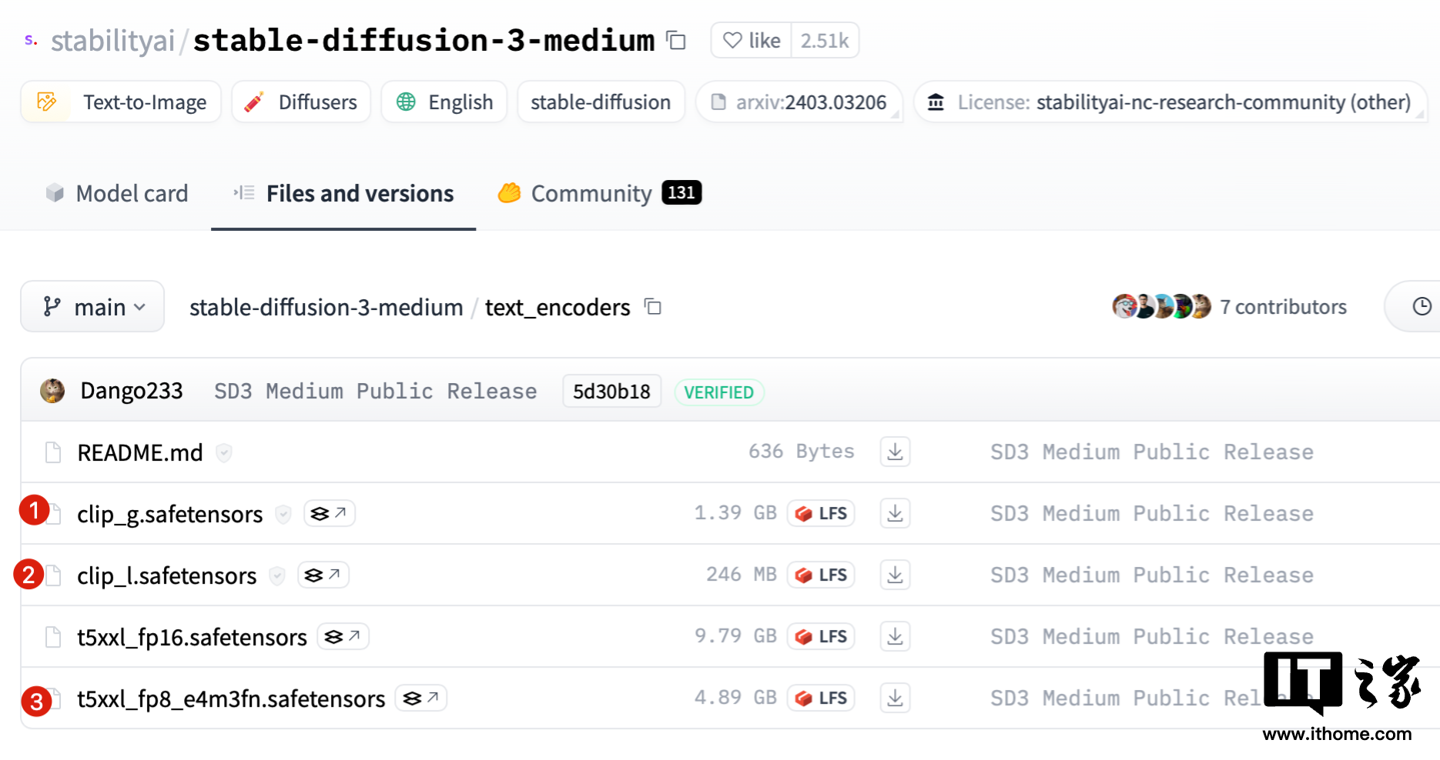 comfy_example_workflows 資料夾中的三個檔案體積比較小,為官方提供的範例工作流程,這裡下載以便後續示範使用,如果不需要也可以不下載。
  如果順利的話,如下這些文件下載好後,我們的搭建工作就可以正式開始啦。
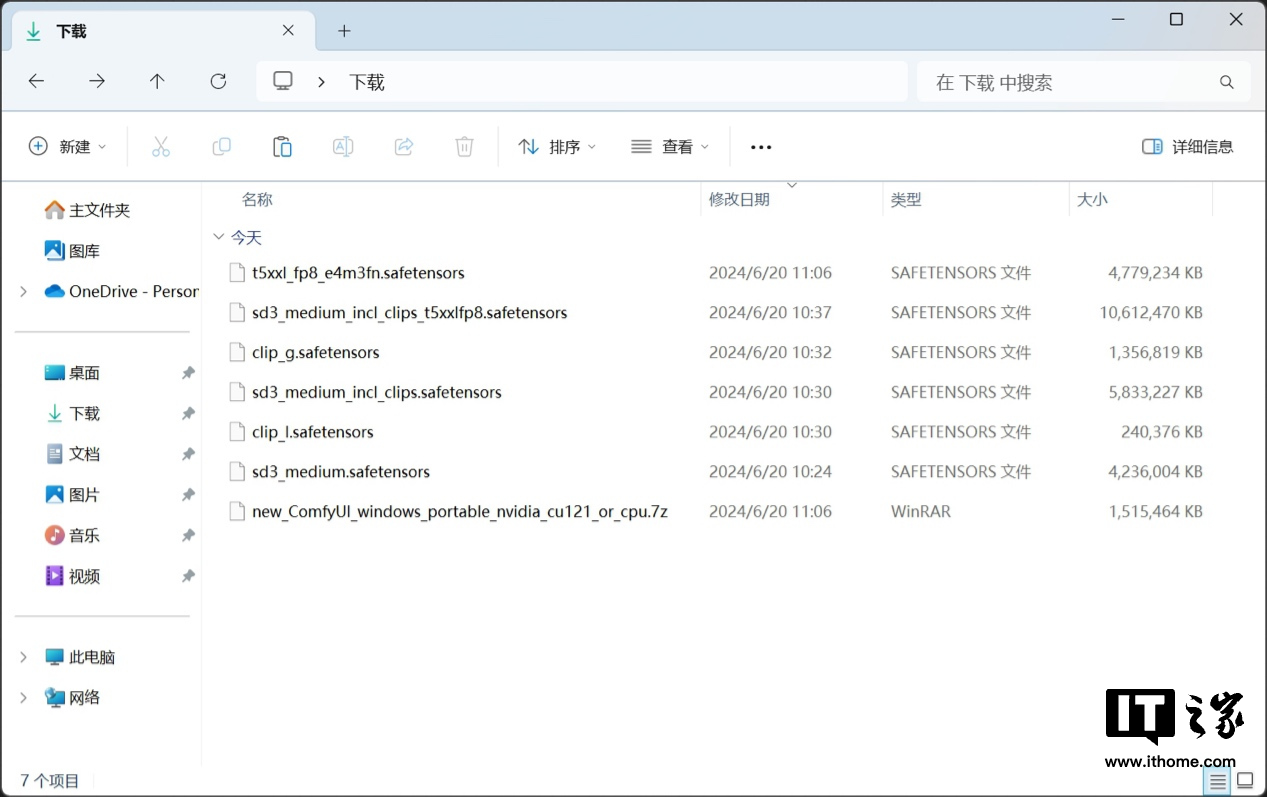
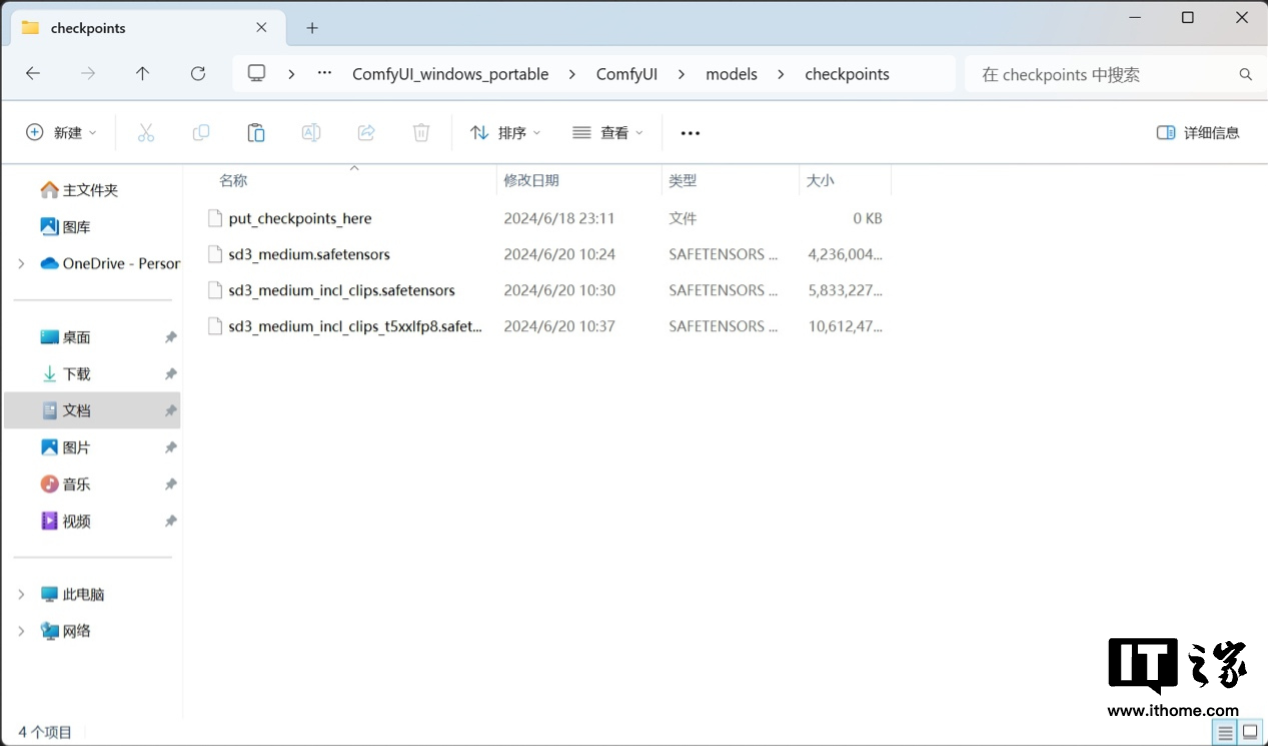
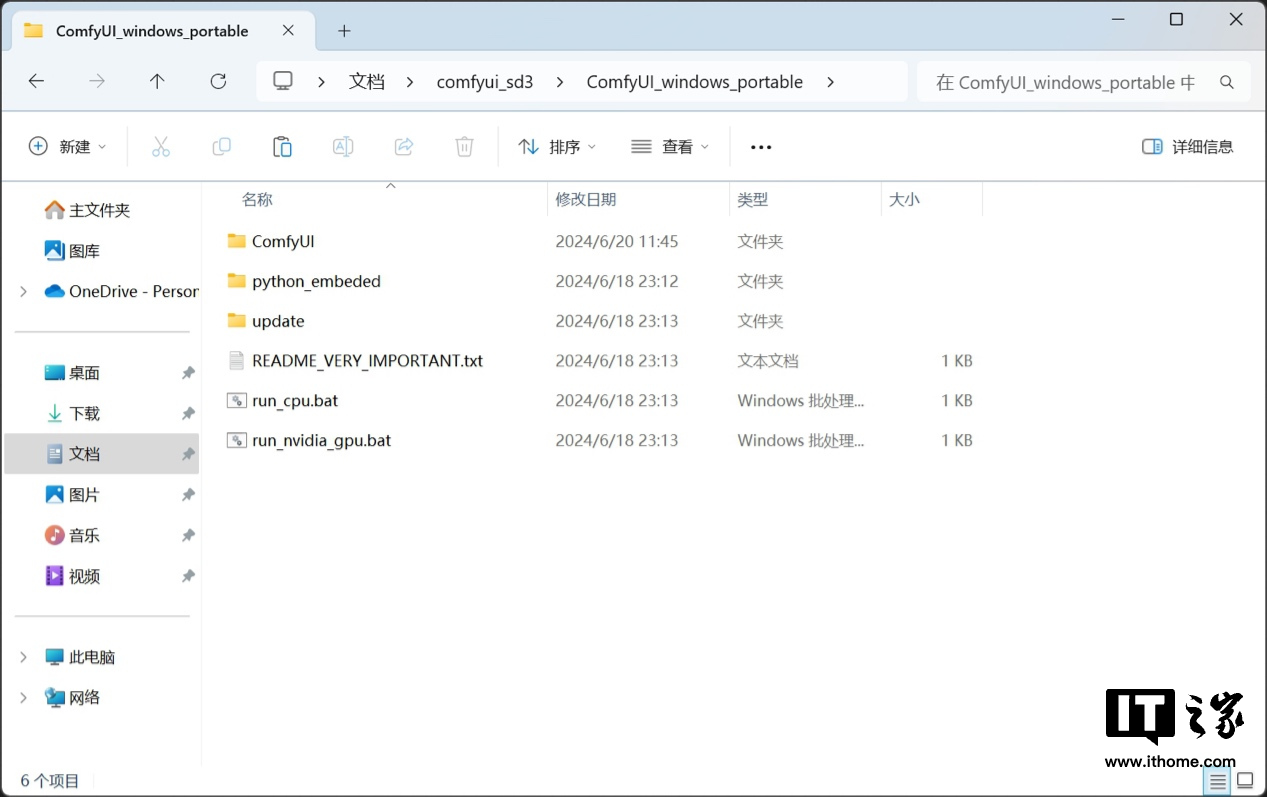 接下來定位到…ComfyUI_windows_portable / ComfyUI / models / checkpoints 資料夾,將我們前面下載的檔案中,三個「sd3」開頭的檔案移到這裡。
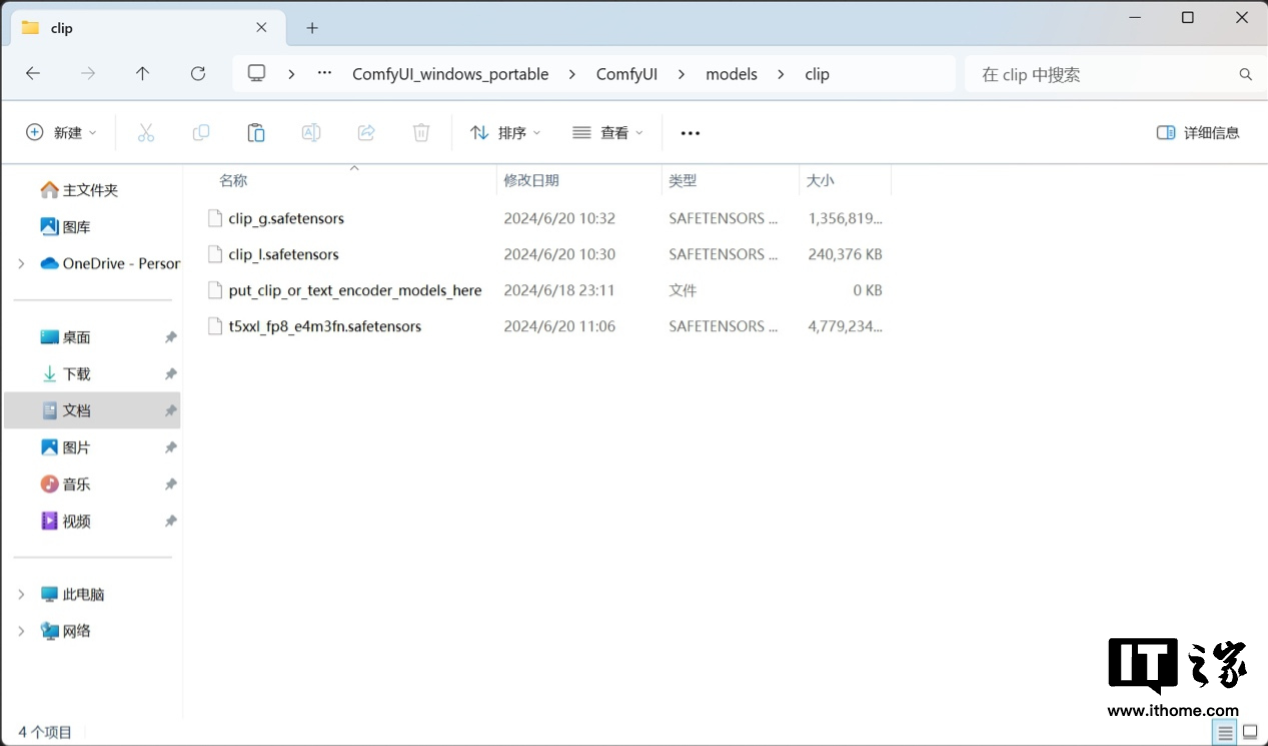
  再定位到…ComfyUI_windows_portable / ComfyUI / models / clip 資料夾,將「clip」和「t5xxl」開頭的三個檔案移到這裡。
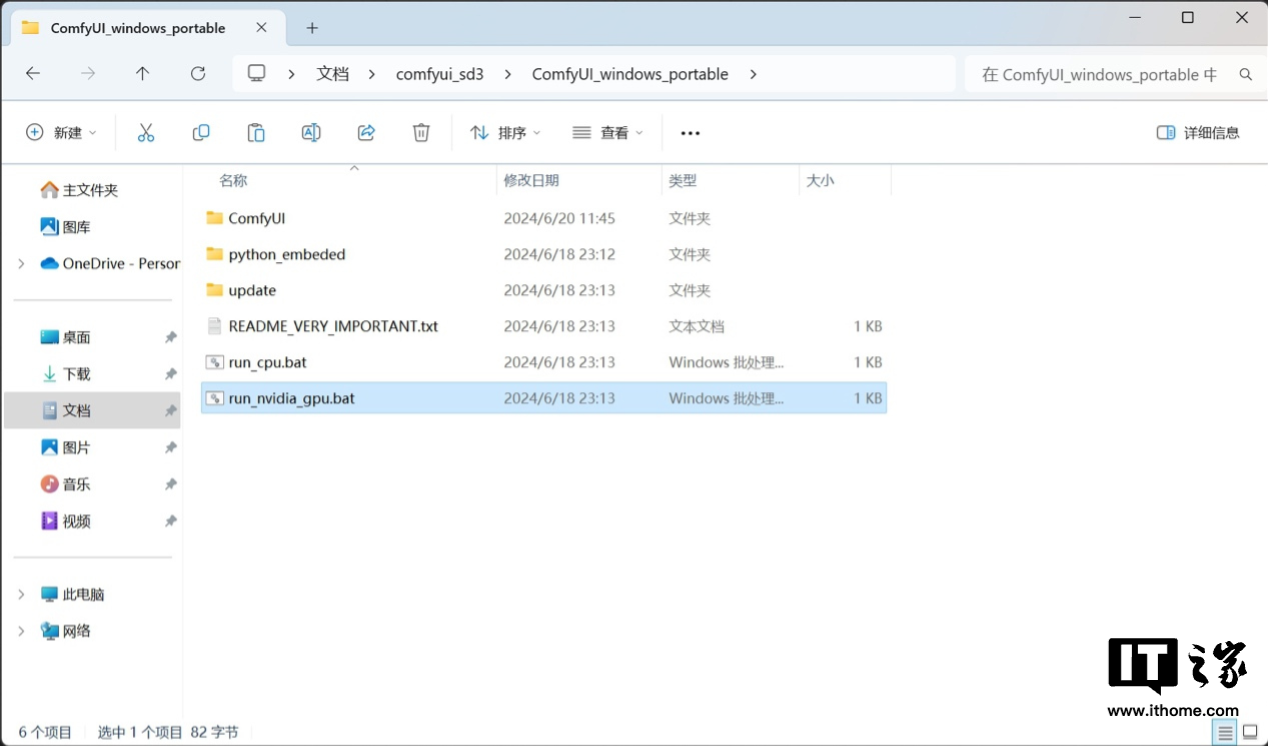
  回到…/ComfyUI_windows_portable/ 資料夾,由於我們主要依靠影馳 GeForce RTX 4070 Ti SUPER 星曜 OC 顯示卡的算力,因此我們在這裡雙擊運行 run_nvidia_gpu.bat。
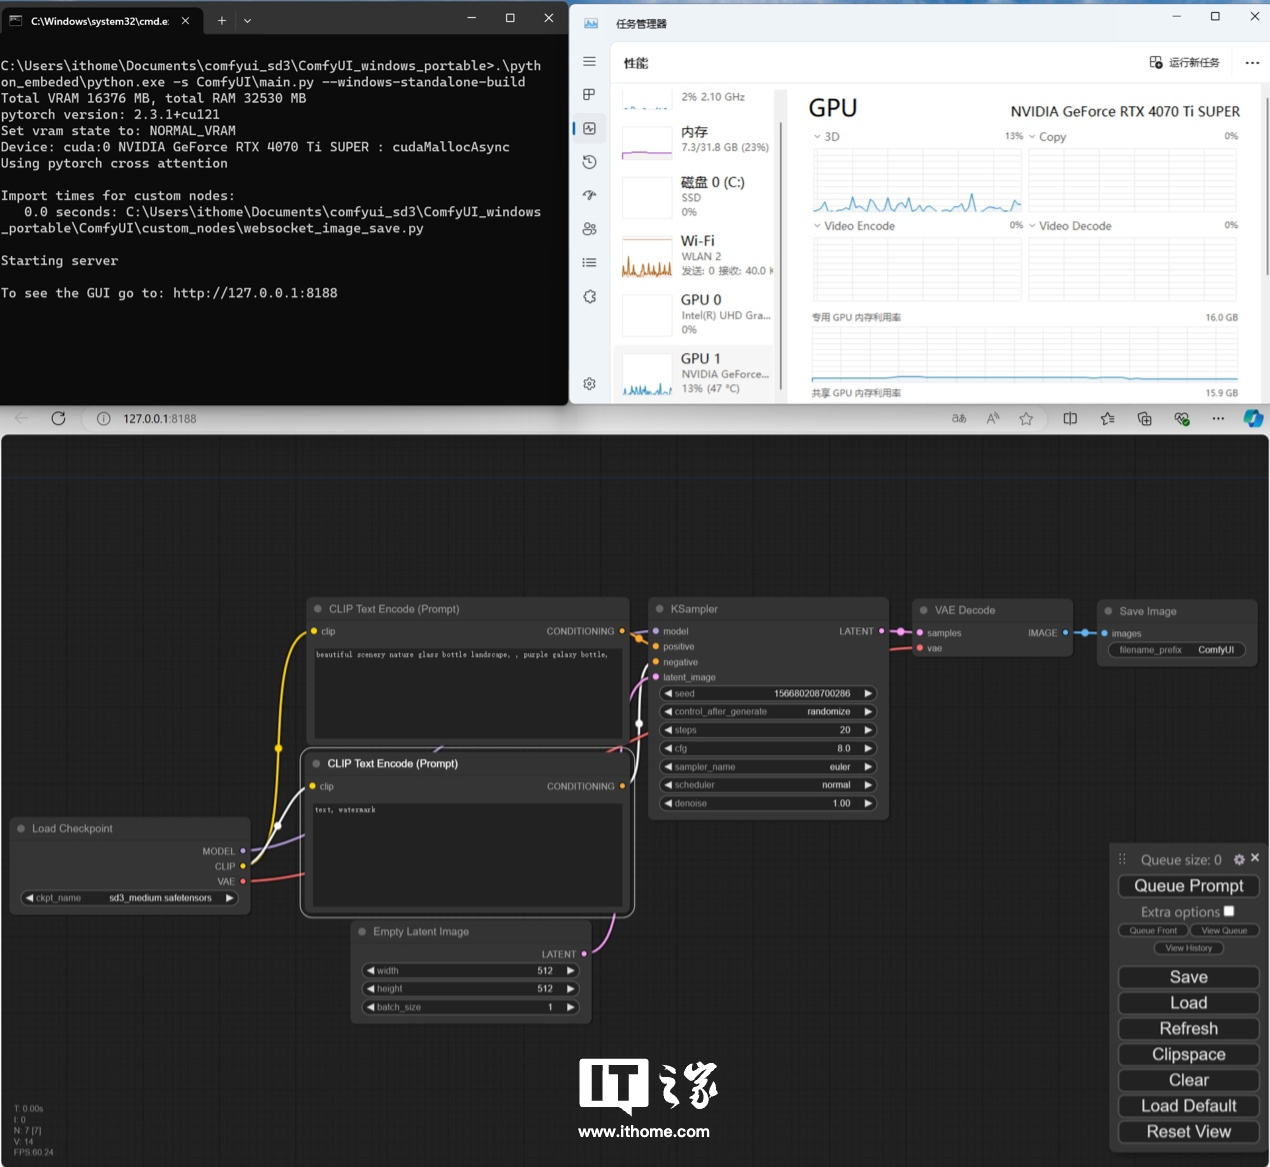
  如果沒有意外的話,打開後你會看到如下的介面,那麼恭喜你,基於 ComlfyUI 的 Stable Diffusion 3 搭建過程就初步完成了。
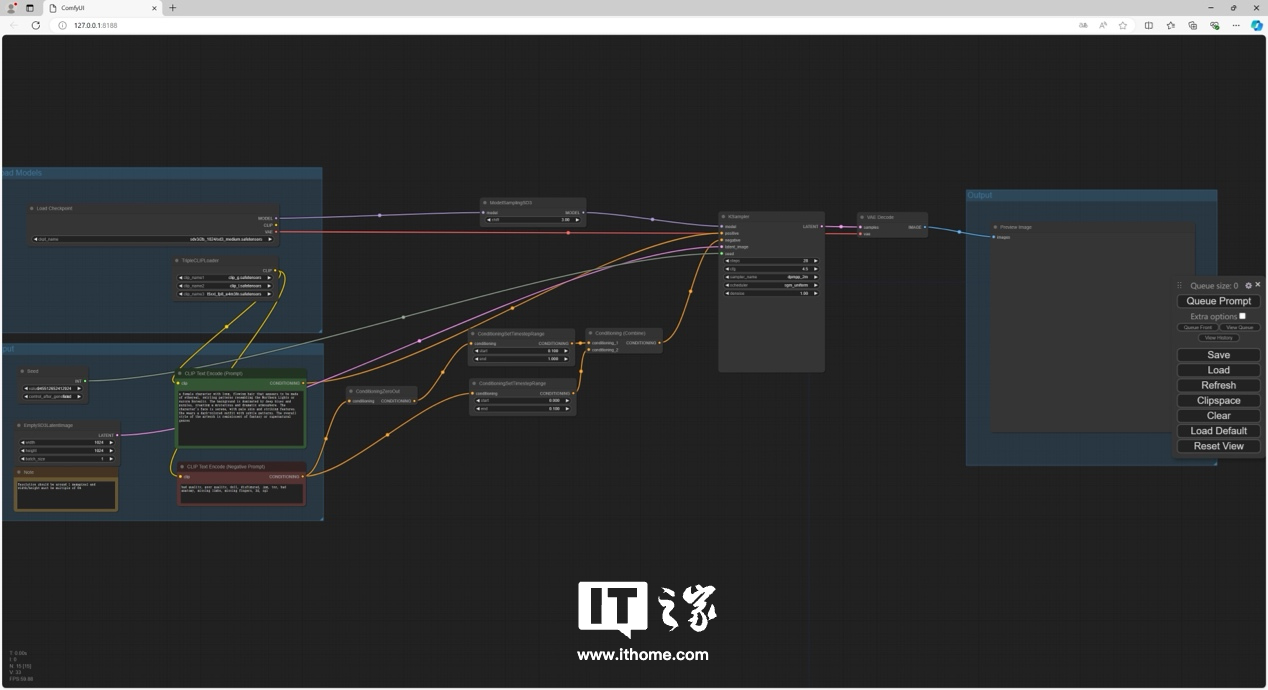
 將下載的第一個.json 檔案直接拖入到 ComfyUI 介面中,可以看到工作流程發生了變化。
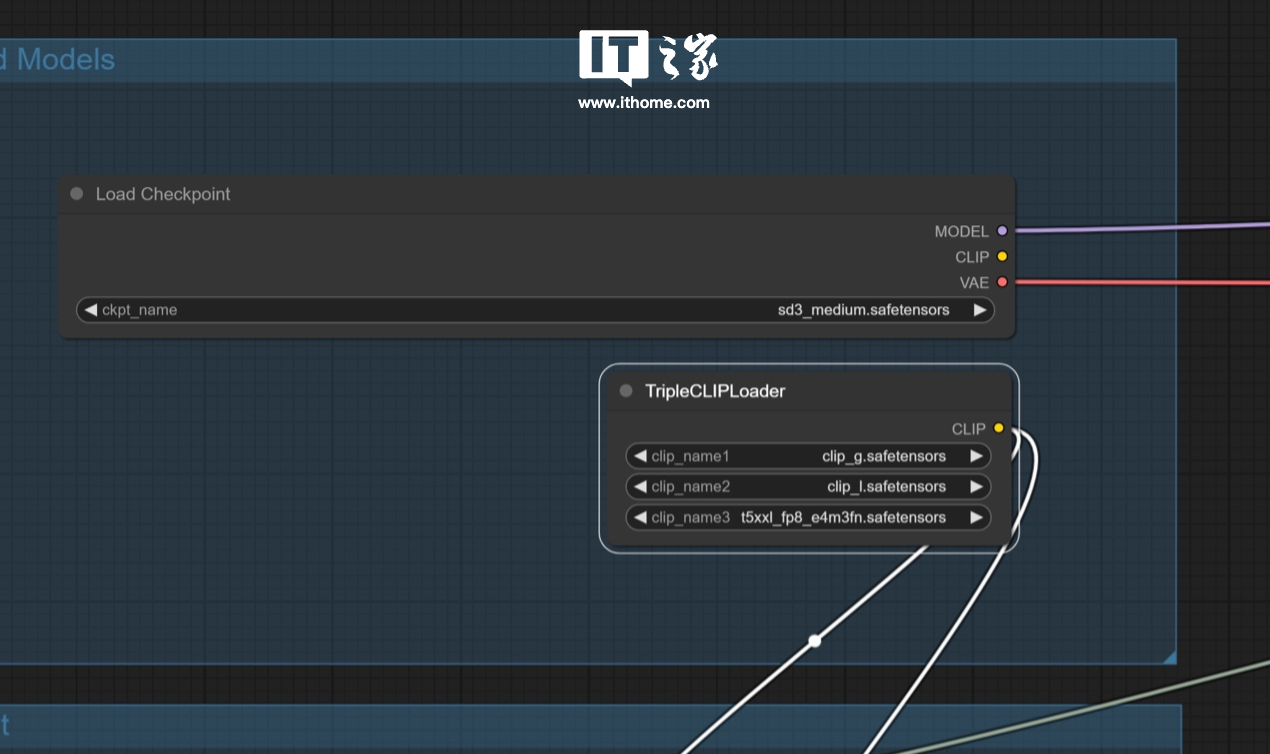
  這時候如果直接運行,是會報錯的,需要重新指定一下模型的檔案位置。在模型這裡,依照原有的模型名稱,對應的選擇我們之前放入的模型檔即可。
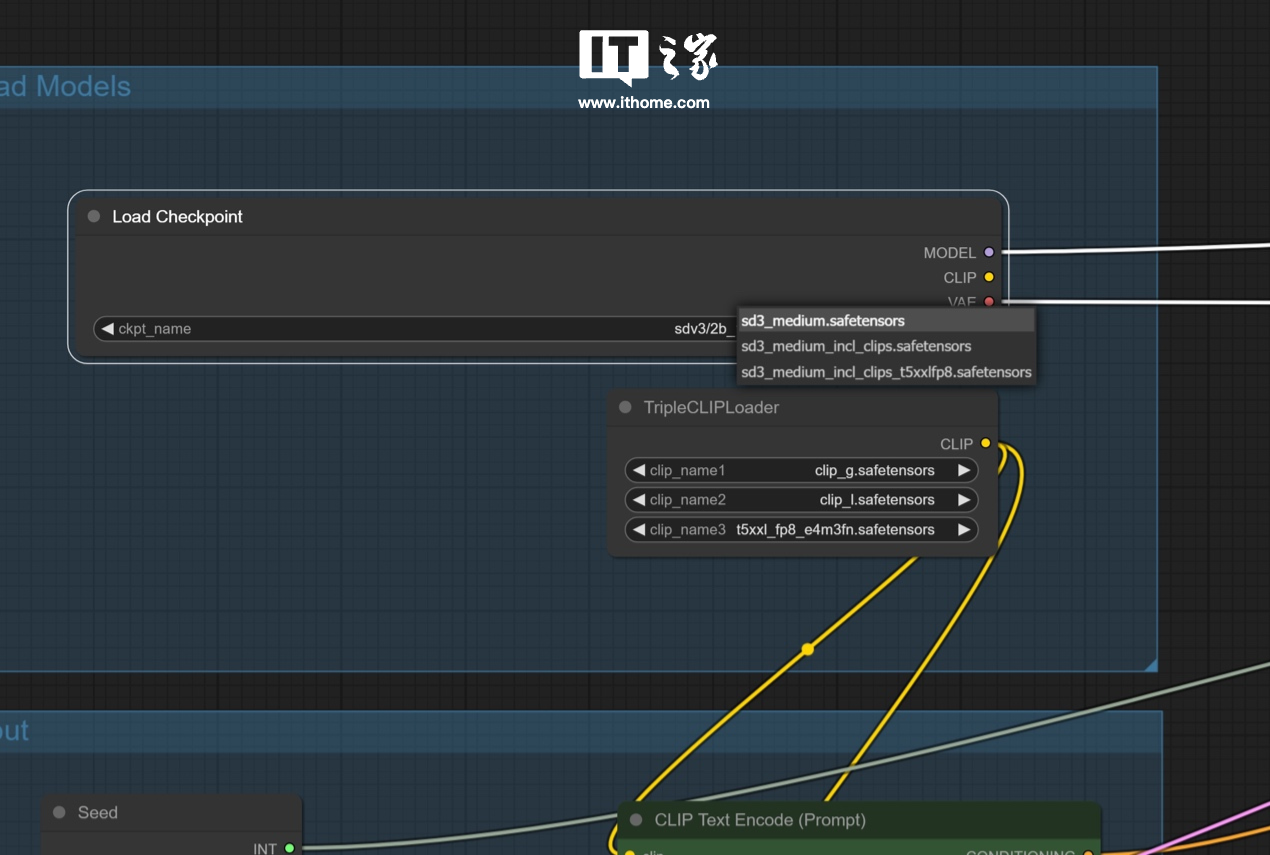
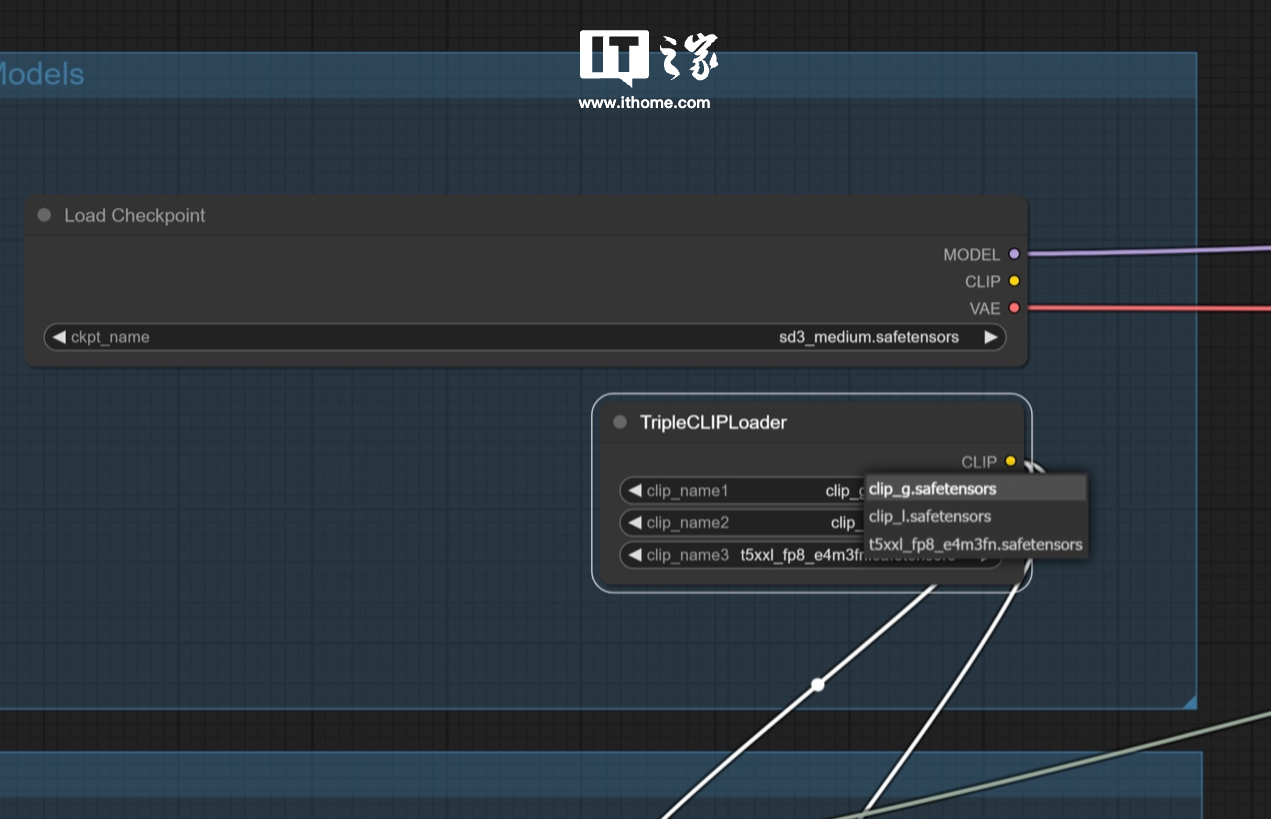 全部選定之後,就可以開始運行了,官方的提示詞為
a female character with long, flowing hair that appears to be made of ethereal, swirling patterns resembling the Northern Lights or Aurora Borealis. The background is dominated by deep blues and purples, creating a backgrounds. with pale skin and striking features. She wears a dark-colored outfit with subtle patterns. The overall style of the artwork is reminiscent of fantasy or supernatural genres.翻譯過來就是
看起來像是用類似北極光或北極光的旋渦圖案製成的。背景以深藍色和紫色為主,營造出神秘而戲劇性的氛圍。角色的臉很平靜,皮膚蒼白,五官精緻。她穿著深色衣服,上面有微妙的圖案。這幅畫的整體風格讓人想起奇幻或超自然體裁。
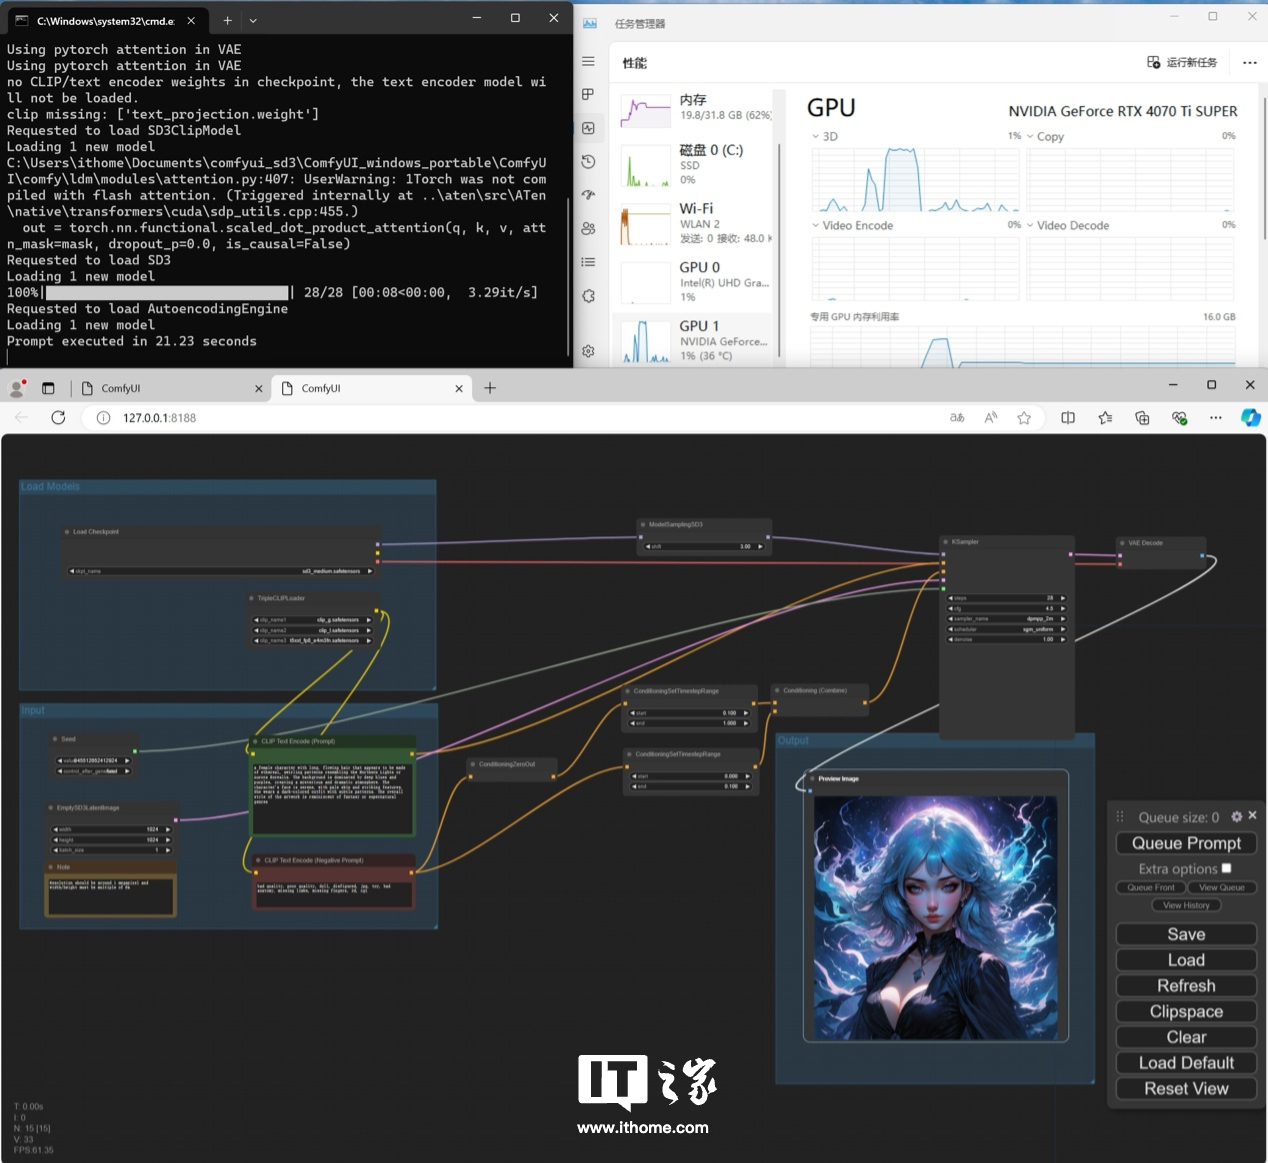 上圖工作流程中綠色文字方塊中就是正向提示字的輸入區域,紅色文字方塊為反向提示字的輸入區域,運行後產生的圖片如下,我們使用影馳GeForce RTX 4070 Ti SUPER 星曜OC 產生這張1024*1024 像素的圖片,僅用了21.23 秒,體驗非常絲滑。可以看到,運行模型的時候,GPU 負載瞬間拉滿,可見模型對 GPU 算力的需求還是相當恐怖的。
  到這裡,官方的基礎工作流程就跑通了,小編又嘗試了一下使用“A SpongeBob SquarePants eating ice cream”(海綿寶寶吃冰淇淋)作為正向提示詞進行生成,得到的圖片如下(上),整體還是比較和諧的,作為對比,可以看一下曾經小編用Stable Diffusion 1.7 使用同樣的提示詞生成的圖片(下)。
 第一個工作流程跑通了,那我們再來試試第二個工作流程。與第一個類似,也是將官方的.json 檔案拖入介面中,得到與剛才類似的工作流程。
 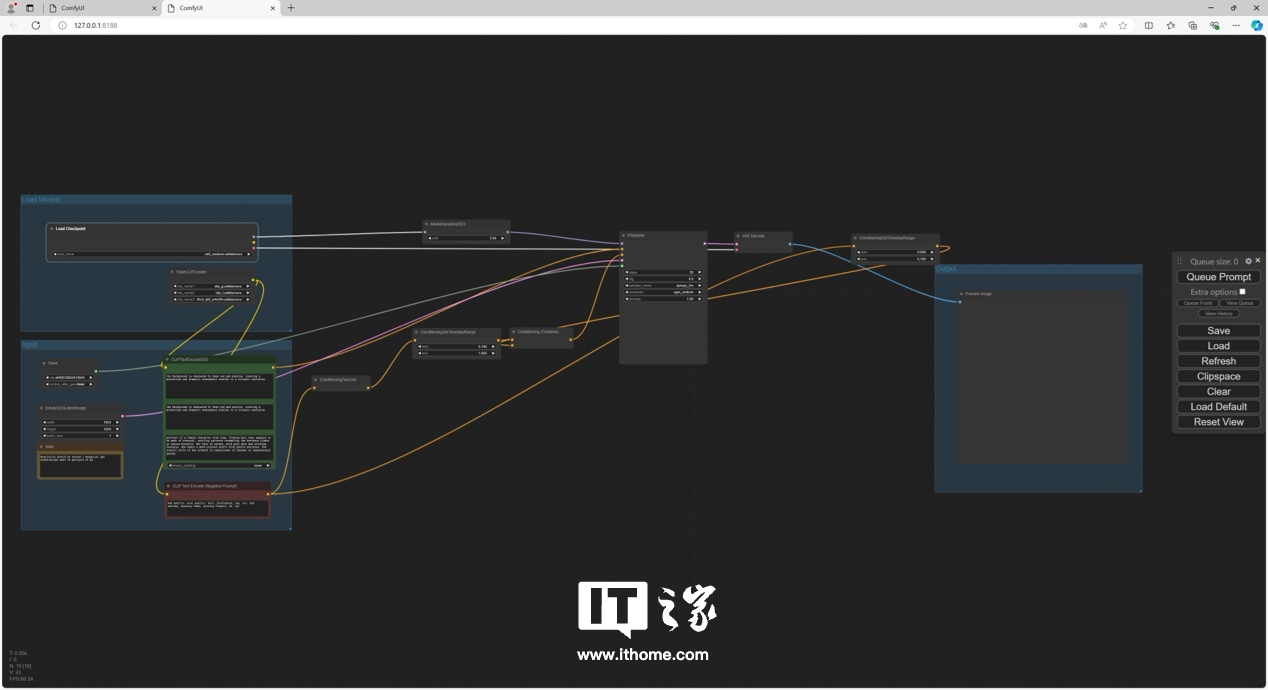 仍然需要對模型檔案位置進行配置。
  配置後,就可以正常運作工作流程了。影馳 GeForce RTX 4070 Ti SUPER 星曜 OC 跑這個模型耗時 14.92s,比上一個短不少。不過運行模型的時候,GPU 負載仍舊是瞬間拉滿。
 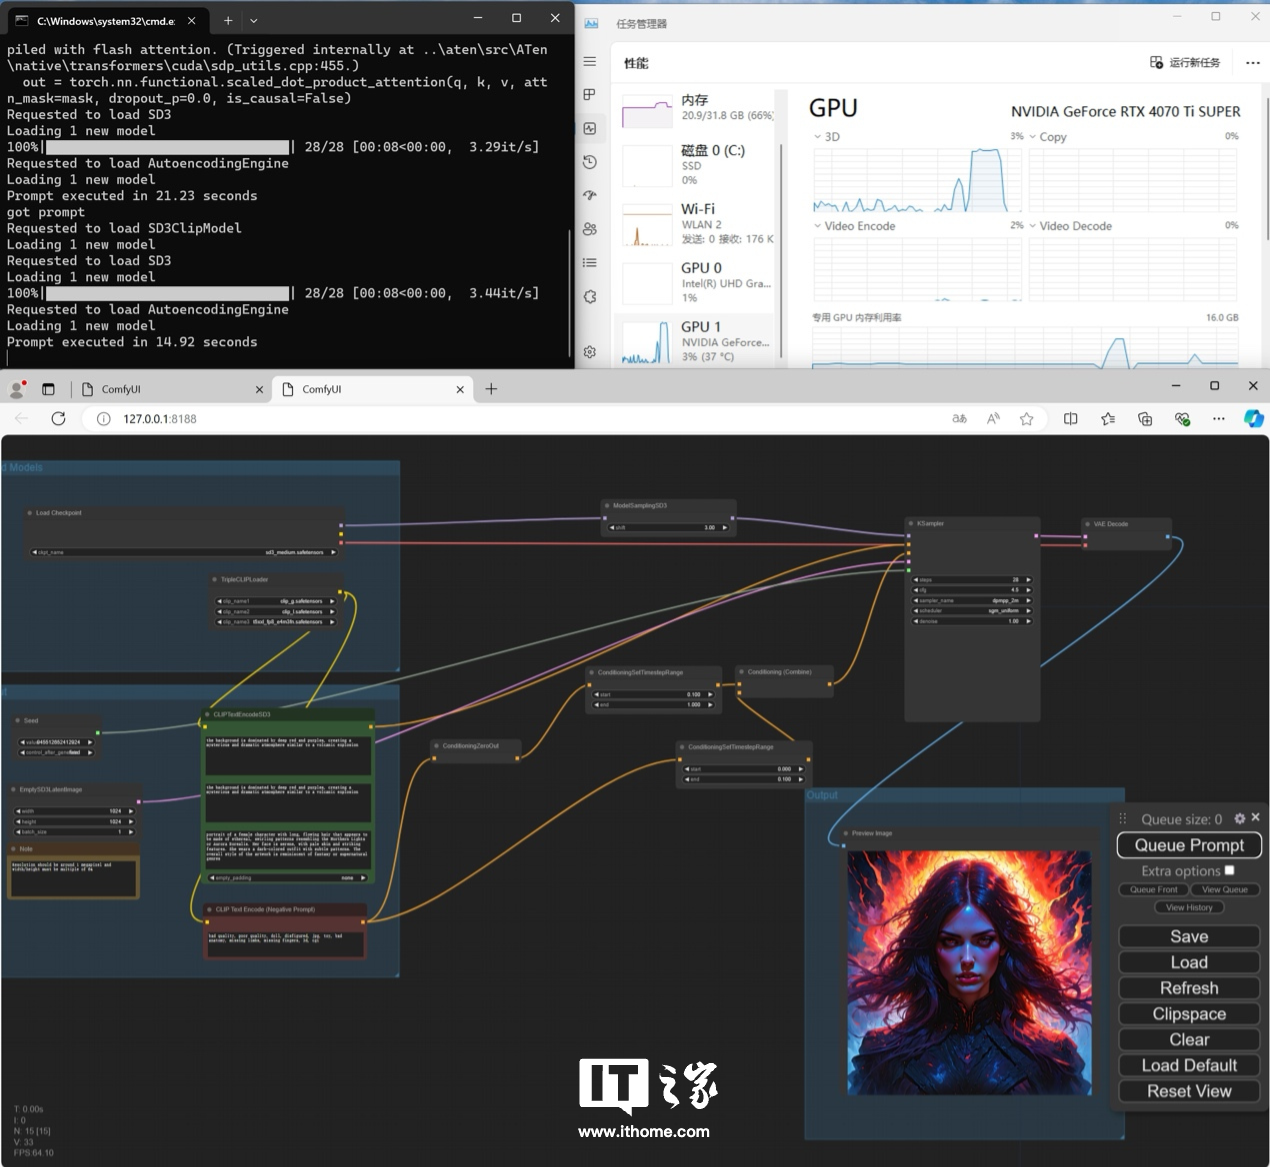 前兩個工作流程整體部署思路上大同小異,主要看大家日常使用時候的需求進行選擇了,跑通之後可以結合個人需求對其中的參數進行進一步調整優化,這裡就不展開了。 接下來我們再來說這第三個工作流程。依樣畫葫蘆,把.json 檔拖進來,就看見了報錯,大概意思為缺少相關的模型檔。
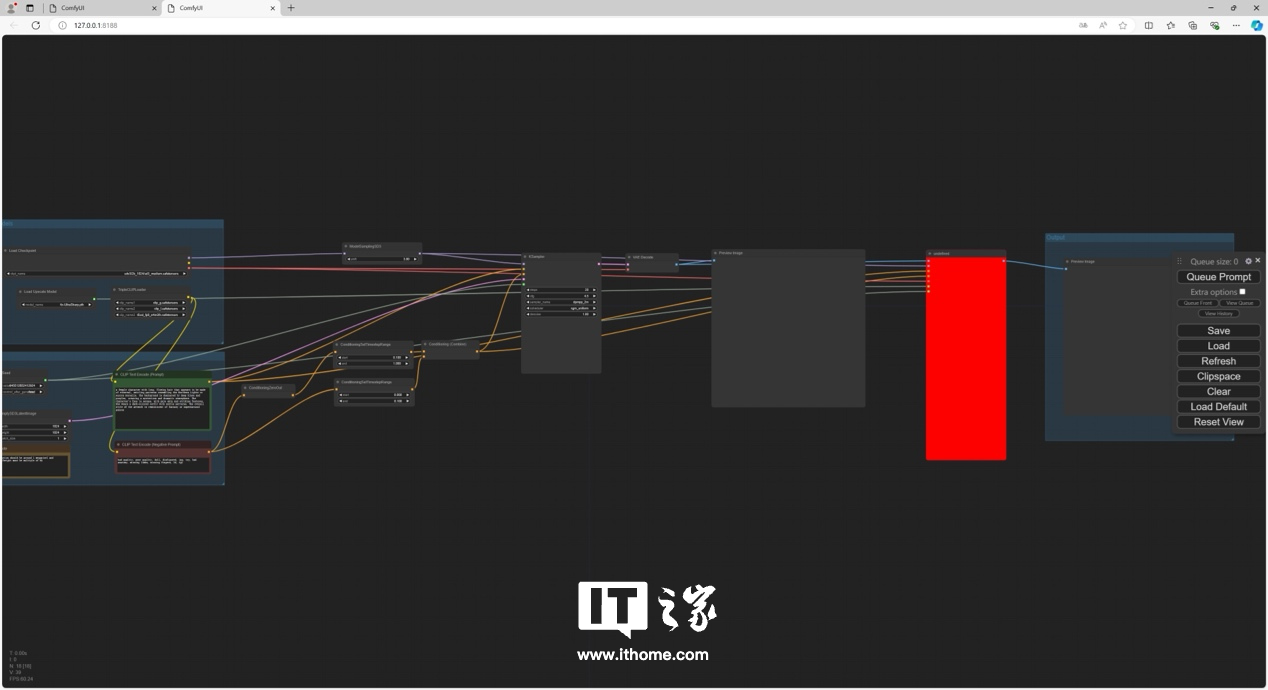
 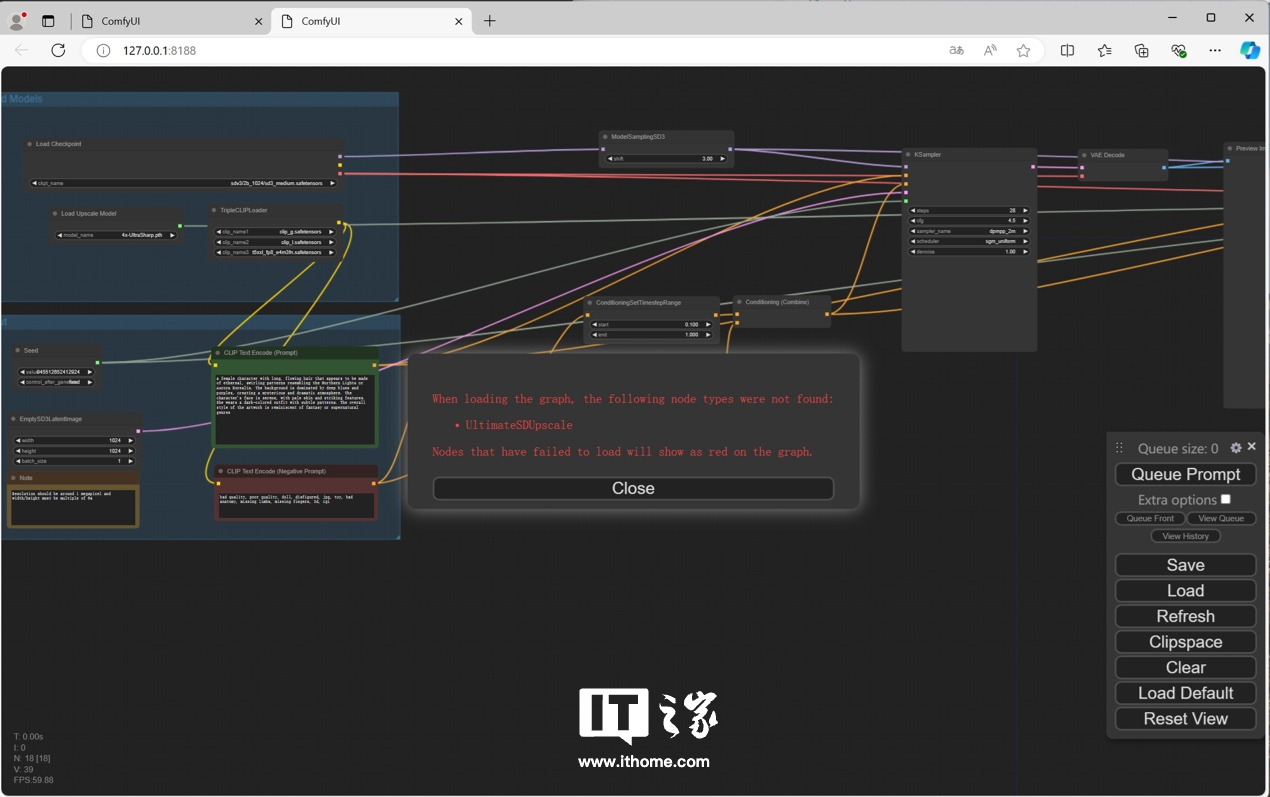 關閉報錯,可以看到有一個流程框是紅色的,這就是提高圖片解析度所需的模型缺失所造成的。
  一勞永逸的解決類似問題的思路是,安裝一個 ComfyUI 的插件 ——ComfyUI Manager,該插件可以檢測、下載並補充當前工作流程中缺少的模型和插件。外掛程式網址如下:https://github.com/ltdrdata/ComfyUI-Manager
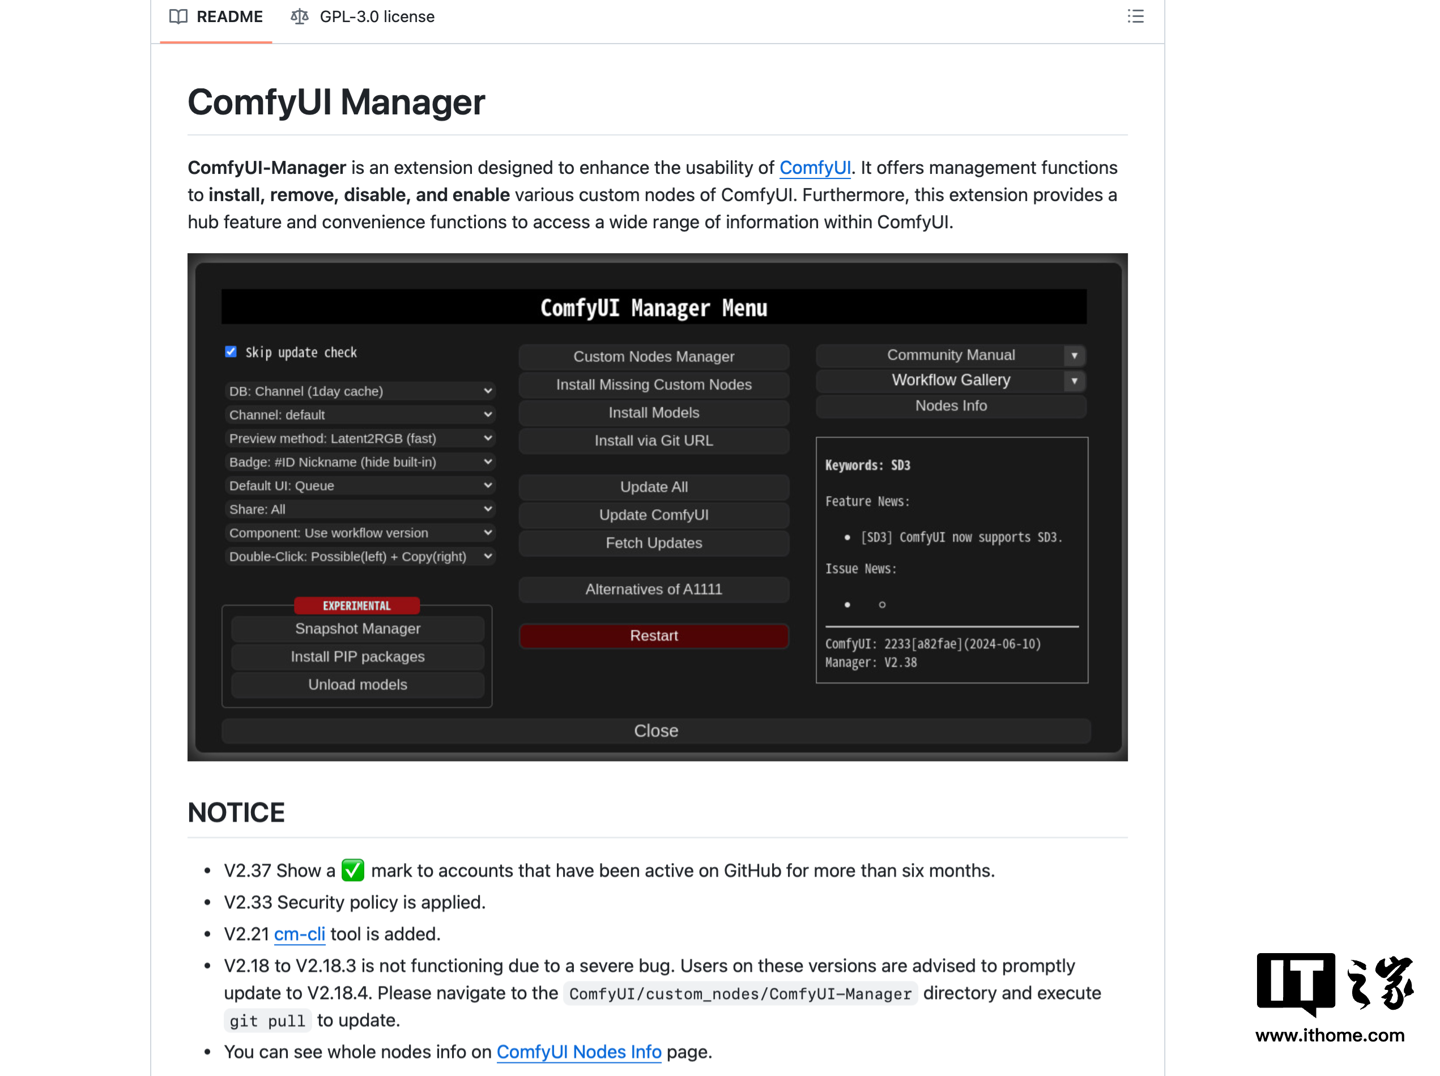 官方提供了多種安裝方法,有興趣的夥伴可以自行研究,我們在這裡選用第一種方法來安裝。安裝前先關閉 ComfyUI 介面。
  雖然官方沒有提及,但使用第一種方法進行安裝,前提還是要先下載並安裝 git,我們這裡下載並安裝 64 位元的 Standalone Installer。
  安裝完成後開啟終端,依序執行以下三個指令。 cdCUsersithomeDocumentscomfyui_sd3ComfyUI_windows_portableComfyUIcdcustom_nodesgitclonehttps://github.com/ltdrdata/ComfyUI-Manager.git其中第一個命令中的資料夾需要根據安裝的資料夾自行安裝。
 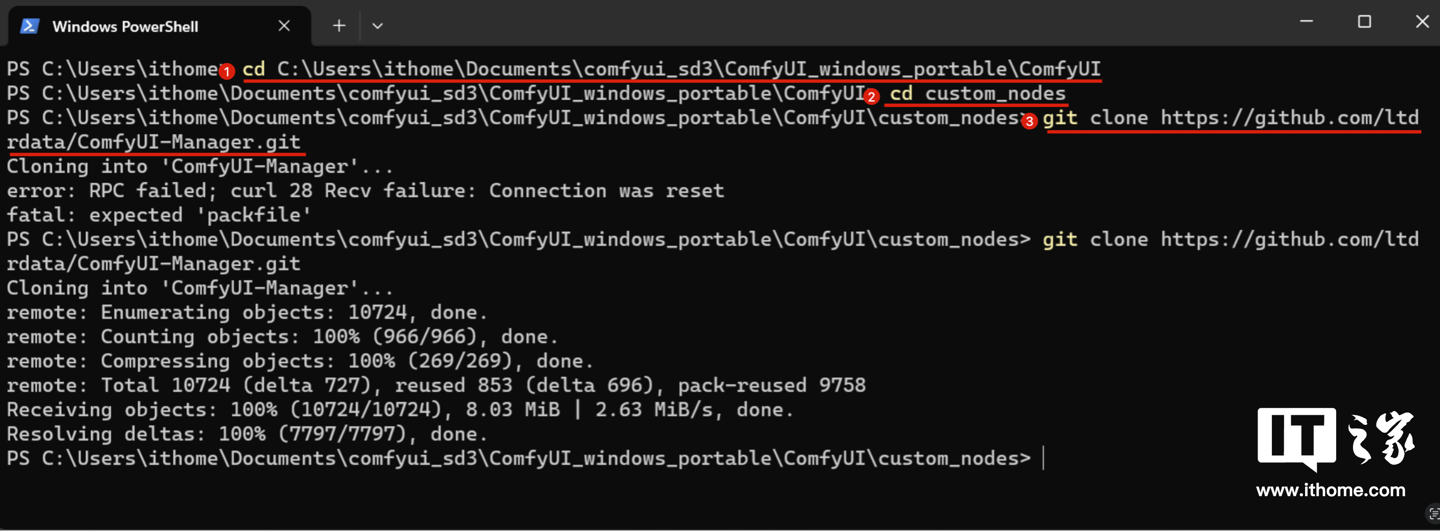 此處對網路要求較高,網路不好的話可能會報錯,多試幾次即可,成功後會看到下載完成的命令。此時再開啟 ComfyUI,可以看到右下角多了兩個按鈕。
 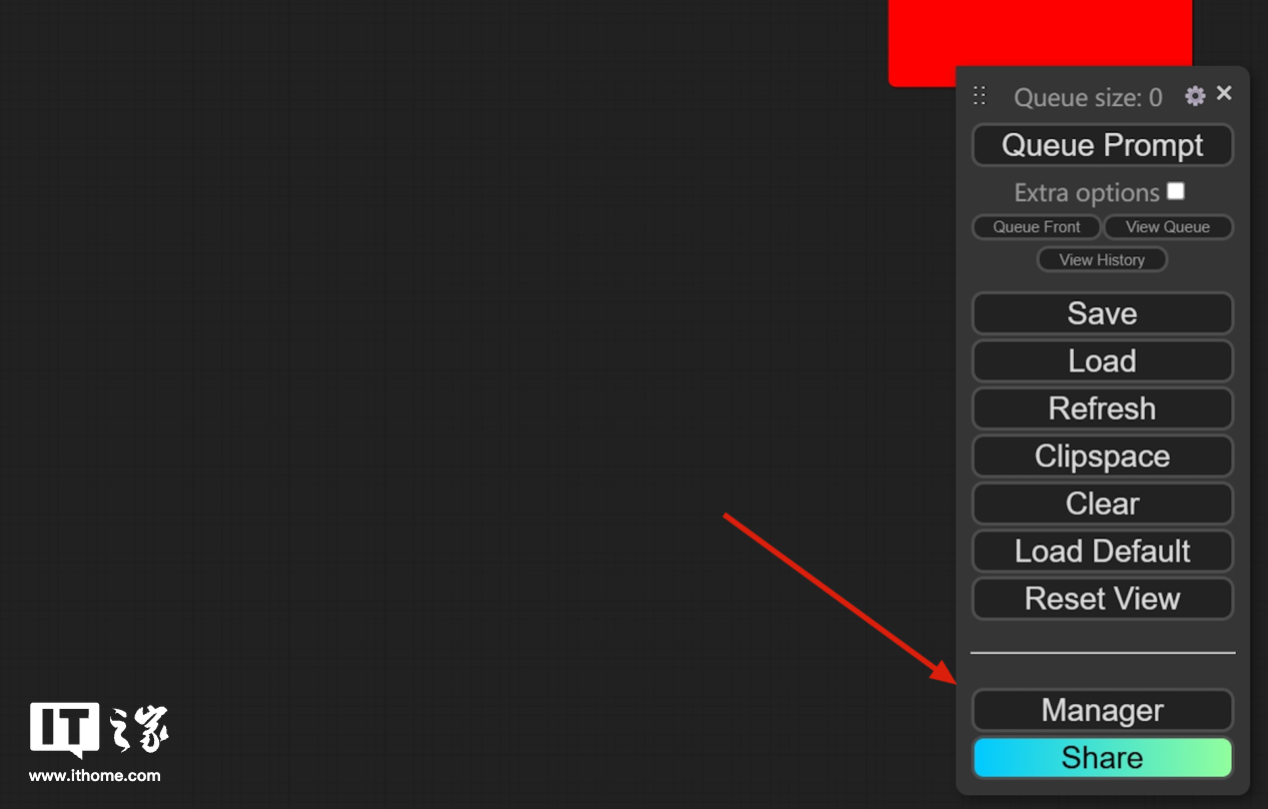 點選 Manager,可以看到豐富的設定項,我們這裡主要用到的是紅框中的兩項。
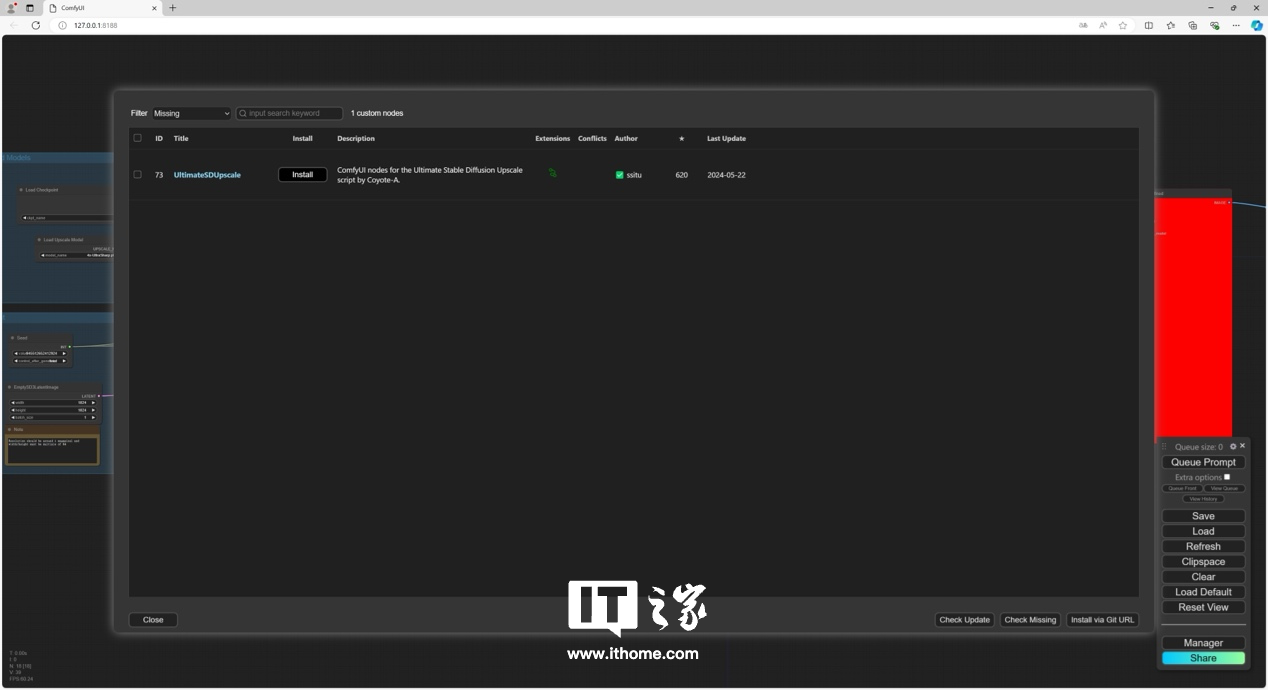
 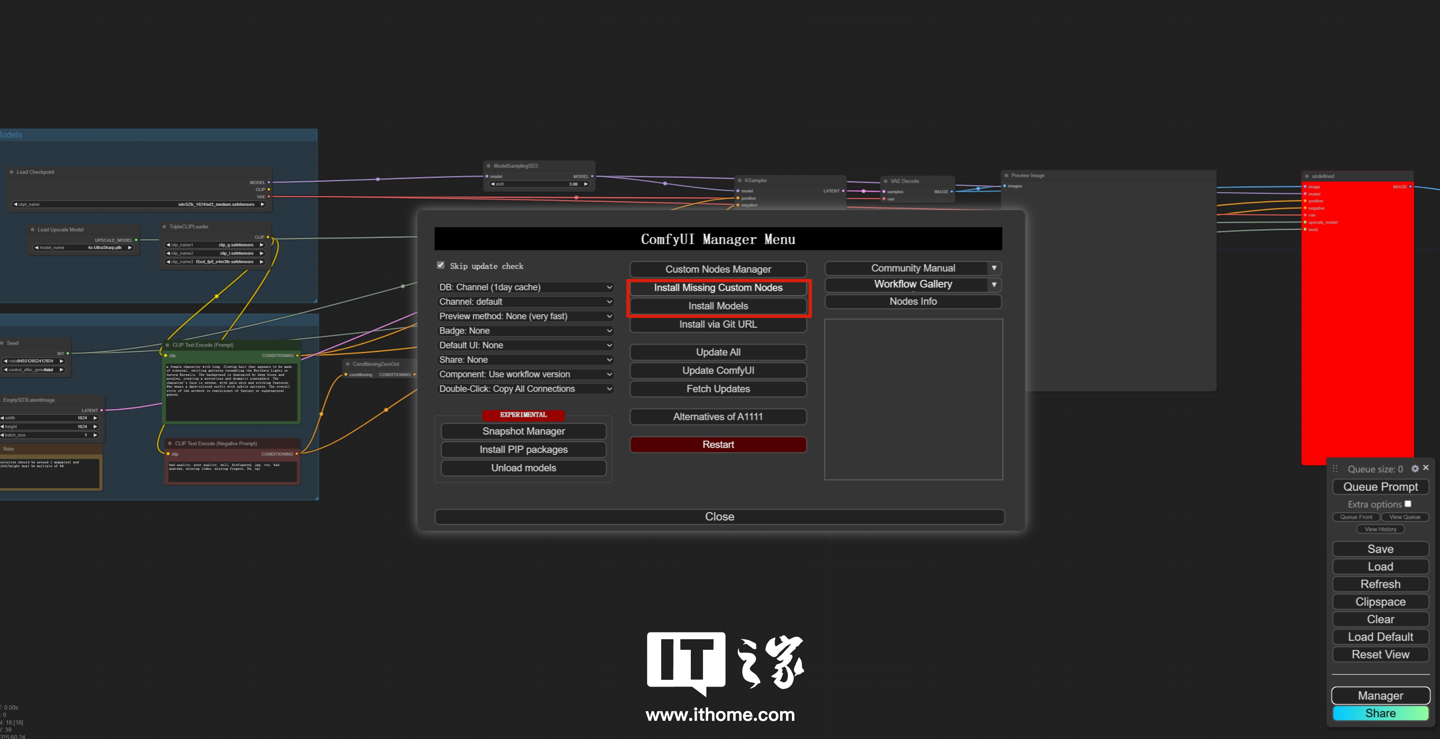 先點擊 install Missing Custom Nodes,可以看到已經偵測到了缺少的插件,點擊安裝即可。
  安裝後可以看到工作流程中的紅色方塊已經恢復正常。
 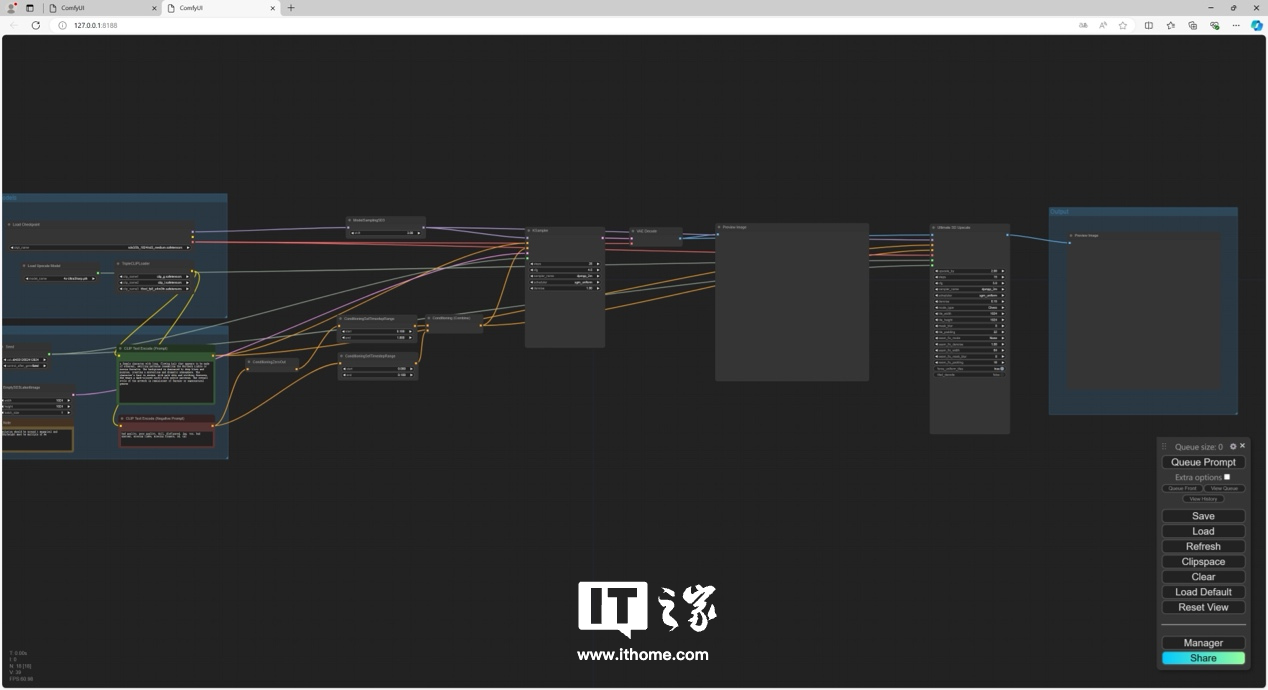 不過如果此時再次運行該模型,會發現只能運行到與第一個官方模型相同的步驟,後面的分辨率提升就停住不跑了。這是因為我們還沒有安裝這個 4x-UltraSharp.pth 模型。
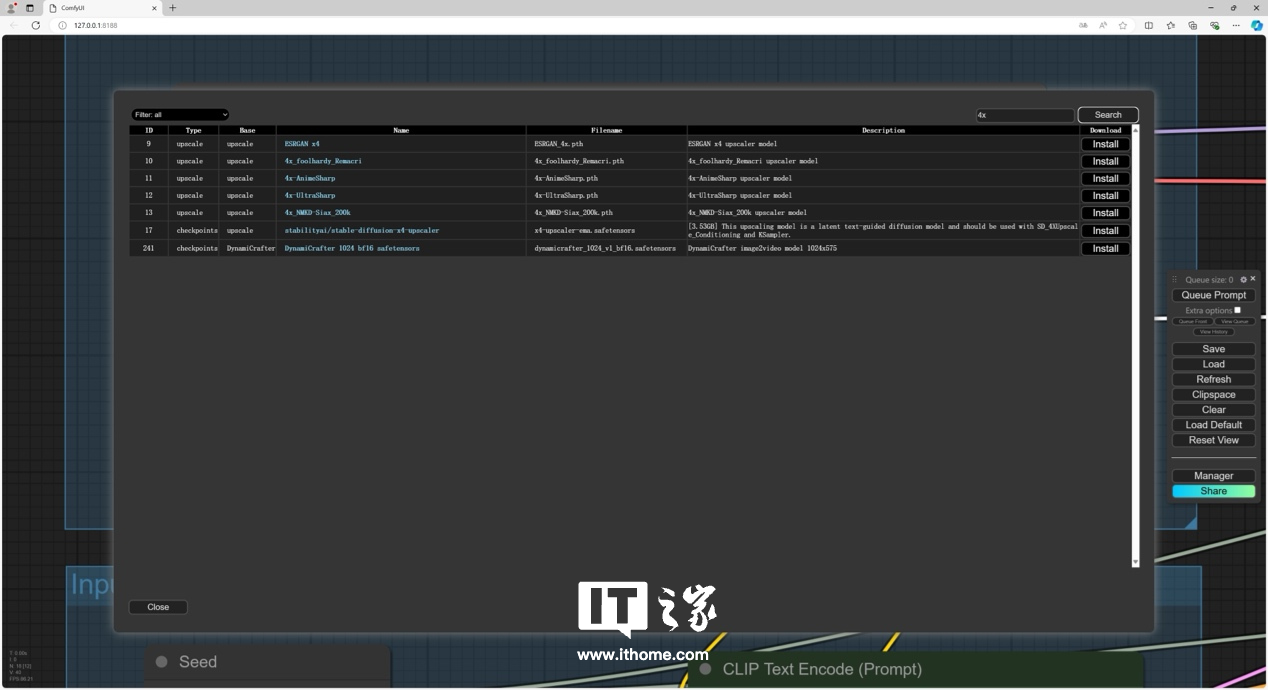
 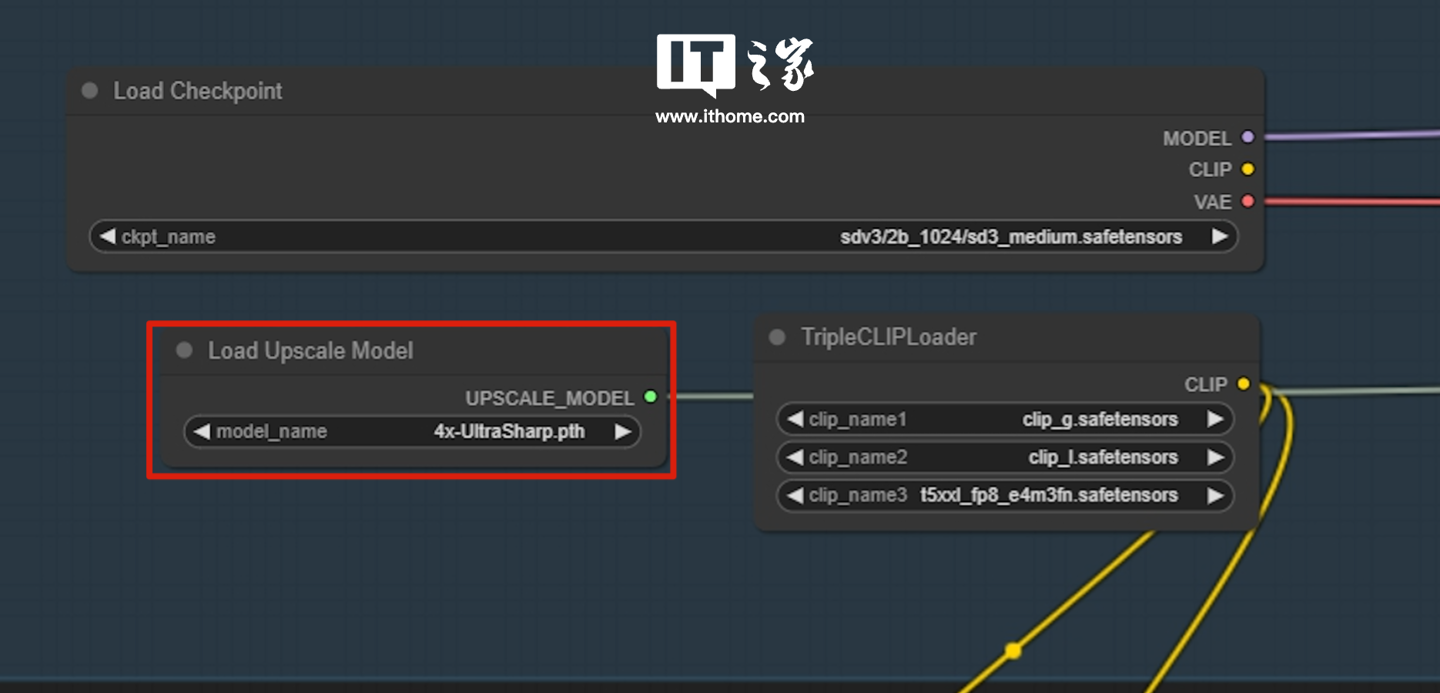 開啟 Manager 中的 Install Models,搜尋 4x-UltraSharp,可以看到相關模型,點擊後邊的 Install 即可。
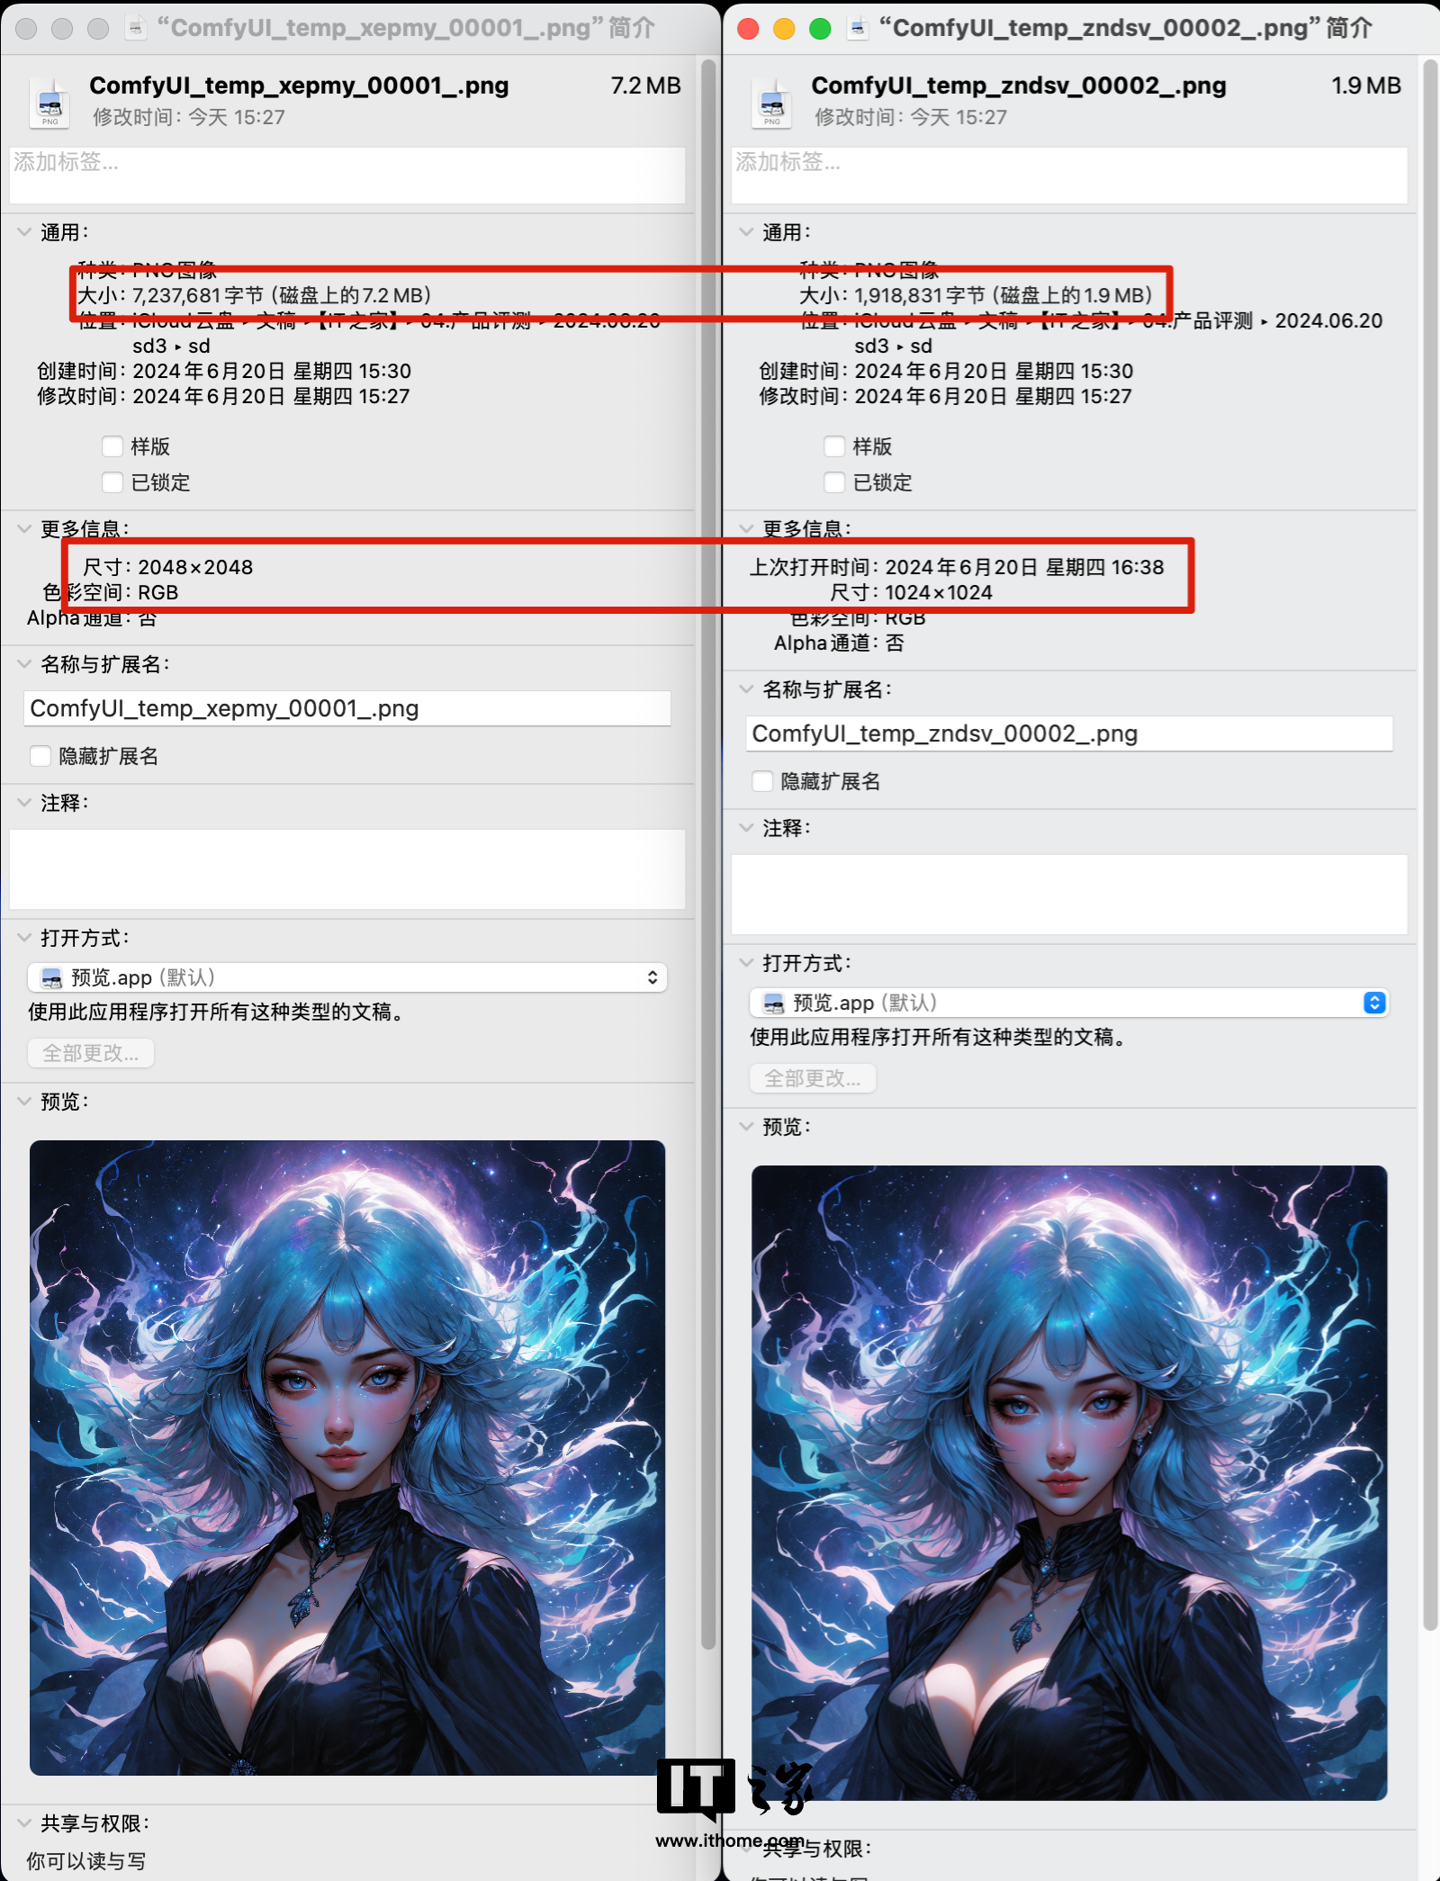
  安裝完成後,再次運行,可以看到,跑完了文生圖的模型後,還會有4 個分辨率提高的模型進程,完整過程用時51.09s,這個工作流的壓力不小,影馳GeForce RTX 4070 Ti SUPER 星曜OC 的表現相當不錯。
 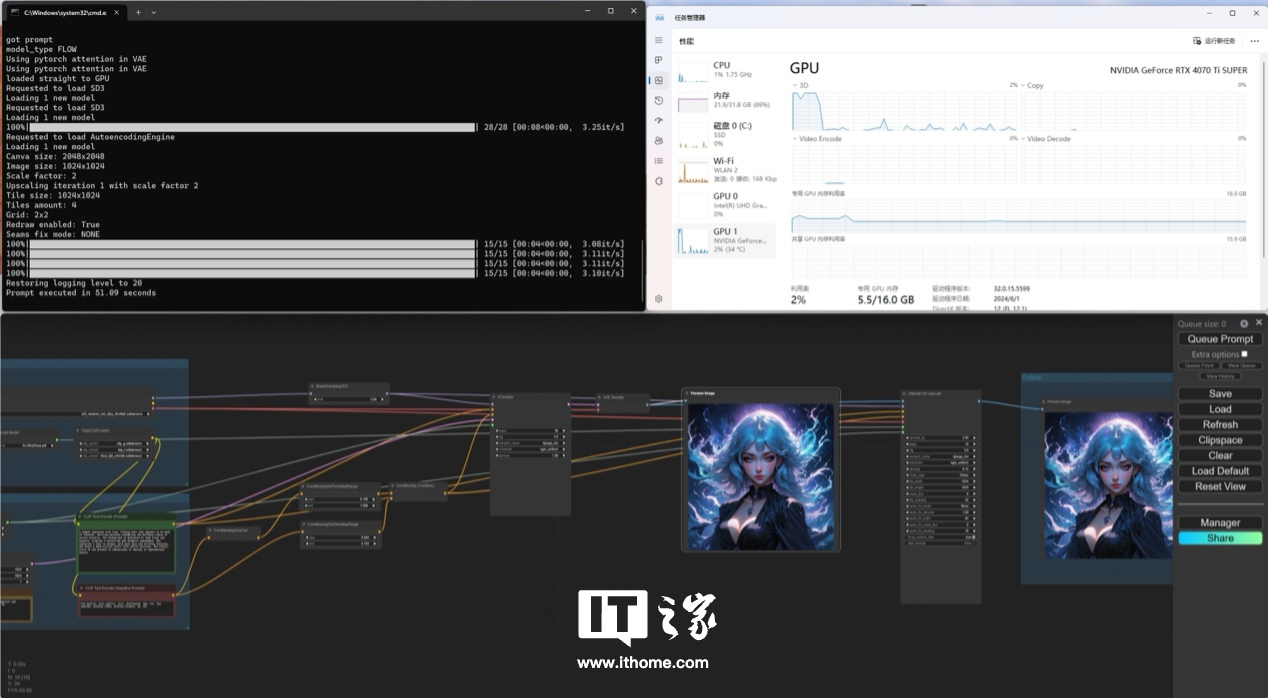 可以看到提升解析度後的圖片
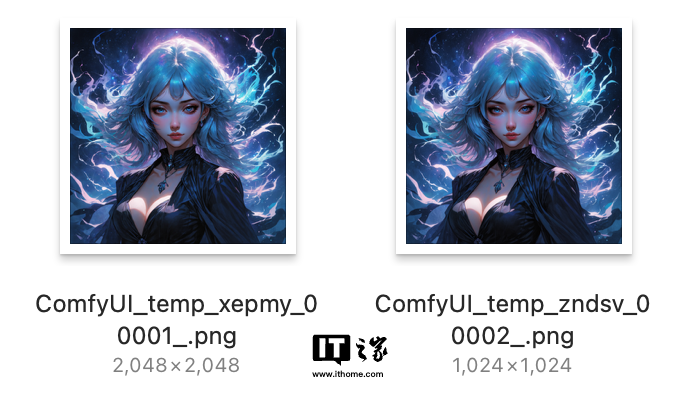 圖片大小也是飆升了約 4 倍。
  那麼到這裡,基於ComfyUI 的Stable Diffusion 3 搭建過程想必大家也都了解了,需要注意的是,由於網絡環境、硬體原因等各方面的差異,搭建過程中可能會遇到各種各樣的意外,也無需焦慮,可以分享在留言區大家一起討論解決。
 以上是Stable Diffusion 3 搭建教學及官方實例演示,影馳 GeForce RTX 4070 Ti SUPER 星曜 OC 瞬間跑滿的詳細內容。更多資訊請關注PHP中文網其他相關文章!

