
金鑰提供了一種現代、安全的方式來驗證使用者身份,而無需依賴傳統密碼。在本指南中,我們將引導您使用 Thymeleaf 作為模板引擎將金鑰整合到 Java Spring Boot 應用程式中。
我們將利用 Corbado 的金鑰優先 UI 元件連接到後端,從而簡化實作過程。本教學假設您對 HTML 和 Java Spring Boot 有基本的了解,並且您已經安裝了 Corbado Java SDK。
看完整原創教學
在開始之前,請確保您的專案設定包含 Corbado Java SDK。在本教程中,我們將使用版本 0.0.1 作為範例。將以下相依性新增至您的 pom.xml 檔案:
<dependency>
  <groupId>com.corbado</groupId>
  <artifactId>corbado-java</artifactId>
  <version>0.0.1</version>
</dependency>
或者,如果您使用 Gradle,請加:
implementation "com.corbado:corbado-java:0.0.1"
首先,透過開發者面板註冊 Corbado 帳戶。在設定過程中,您將透過選擇「Corbado Complete」並為您的環境選擇「Web 應用程式」來設定您的專案。請務必提供應用程式 URL 和依賴方 ID,通常分別設定為 http://localhost:8080 和 localhost。這些設定對於將金鑰綁定到正確的網域至關重要。
接下來,從 Corbado 開發人員面板產生 API 金鑰。這對於後端通訊是必要的,包括使用者資料檢索。
複製 Spring Boot 入門儲存庫:
git clone https://github.com/spring-guides/gs-spring-boot.git
在此專案中,將 HelloController.java 重新命名為 FrontendController.java。該控制器將根據使用者請求提供 HTML 檔案。在您的 application.properties 檔案中,將 projectID 和 apiSecret 儲存為環境變數(兩者都可以從 Corbado 開發人員面板取得)。
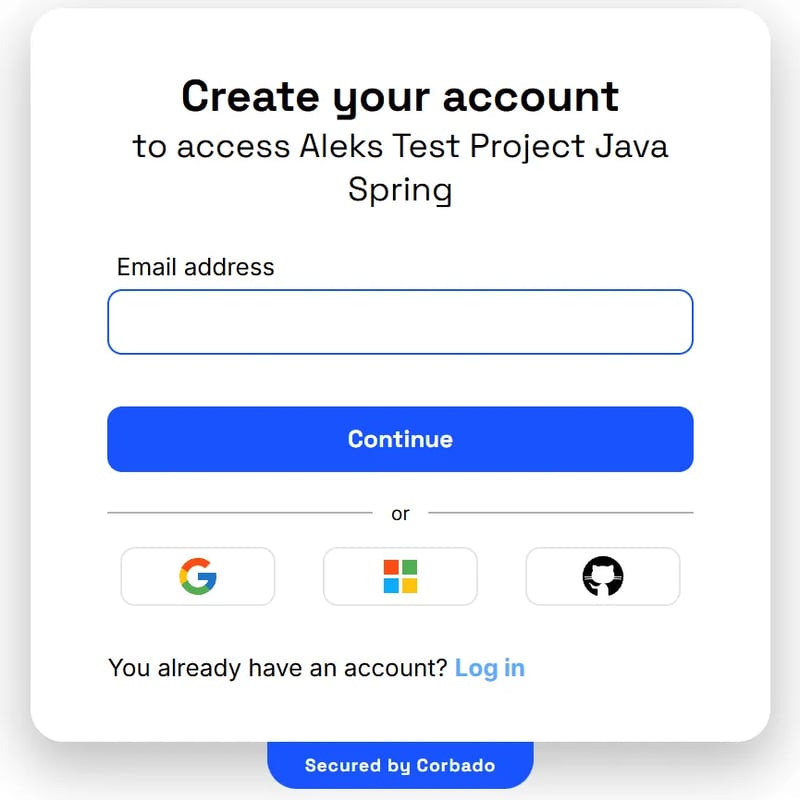
在 /complete/src/main/resources/templates 目錄中建立一個 index.html 檔案。該文件將用作登入頁面,嵌入 Corbado 密碼優先 UI 元件。這是基本結構:
<!DOCTYPE html>
<html xmlns:th="http://www.thymeleaf.org">
<head>
  <link rel="stylesheet" href="https://unpkg.com/@corbado/web-js@2.8.0/dist/bundle/index.css"/>
  <script src="https://unpkg.com/@corbado/web-js@2.8.0/dist/bundle/index.js" defer></script>
</head>
<body>
  <div id="corbado-auth"></div>
  <script th:inline="javascript">
    document.addEventListener('DOMContentLoaded', async () => {
      await Corbado.load({
        projectId: '[PROJECT_ID]',
        darkMode: "off",
        setShortSessionCookie: "true"
      });
      Corbado.mountAuthUI(document.getElementById('corbado-auth'), {
        onLoggedIn: () => window.location.href = '/profile',
      });
    });
  </script>
</body>
</html>
在 FrontendController.java 中,定義端點來處理登入和個人資料頁面的請求。 index() 方法應呈現登入頁面,而 profile() 方法將驗證使用者會話並顯示使用者個人資料。
@Controller
public class FrontendController {

  @Value("${projectID}")
  private String projectID;

  @Value("${apiSecret}")
  private String apiSecret;

  private final CorbadoSdk sdk;

  @Autowired
  public FrontendController(
      @Value("${projectID}") final String projectID, @Value("${apiSecret}") final String apiSecret)
      throws StandardException {
    final Config config = new Config(projectID, apiSecret);
    this.sdk = new CorbadoSdk(config);
  }

  @RequestMapping("/")
  public String index(final Model model) {
    model.addAttribute("PROJECT_ID", projectID);
    return "index";
  }
  ...
身份驗證成功後,Corbado UI 元件將重定向使用者。此頁面顯示有關使用者的資訊並提供登出按鈕。在 templates 資料夾中,新增檔案 profile.html,其中包含以下內容:
<!DOCTYPE html>
<html xmlns:th="http://www.thymeleaf.org">
  <head>
    <link
      rel="stylesheet"
      href="https://unpkg.com/@corbado/web-js@2.8.0/dist/bundle/index.css"
      />
      <script src="https://unpkg.com/@corbado/web-js@2.8.0/dist/bundle/index.js" defer></script>
    </head>
    <body>

     <!-- Define passkey-list div and logout button -->
    <h2>:/protected</h2>
    <p>User ID: [[${USER_ID}]]</p>
    <p>Name: [[${USER_NAME}]]</p>
    <p>Email: [[${USER_EMAIL}]]</p>
    <div id="passkey-list"></div>
    <button id="logoutButton">Logout</button>


    <!-- Script to load Corbado and mount PasskeyList UI -->
    <script th:inline="javascript">
        document.addEventListener('DOMContentLoaded', async () => {
            await Corbado.load({
                projectId: /*[[${PROJECT_ID}]]*/,
                darkMode: "off",
                setShortSessionCookie: "true" // set short session cookie automatically
            });

            // Get and mount PasskeyList UI
            const passkeyListElement = document.getElementById("passkey-list"); // Element where you want to render PasskeyList UI
            Corbado.mountPasskeyListUI(passkeyListElement);

            // Get logout button
            const logoutButton = document.getElementById('logoutButton');
            // Add event listener to logout button
            logoutButton.addEventListener('click', function() {
              Corbado.logout()
                    .then(() => {
                        window.location.replace("/");
                    })
                    .catch(err => {
                        console.error(err);
                    });
            });
        })();
    </script>


</body>
</html>
接下來,在 FrontendController.java 中建立一個帶有註解的 profile() 方法:
@RequestMapping("/profile")
public String profile() {
  return "profile";
}
在我們可以使用會話中嵌入的資訊之前,我們需要驗證會話是否有效。因此,我們取得 cbo_short_session cookie(會話)並使用 Corbado Java SDK 中的會話服務來驗證其簽章。這可以透過以下方式完成:
final SessionValidationResult validationResp =
          sdk.getSessions().getAndValidateCurrentUser(cboShortSession);
它採用 cbo_short_session cookie,對其進行驗證並傳回使用者 ID 和使用者全名。
設定檔對應的最終程式碼如下所示:
  @RequestMapping("/profile")
  public String profile(
      final Model model, @CookieValue("cbo_short_session") final String cboShortSession) {
    try {
      // Validate user from token
      final SessionValidationResult validationResp =
          sdk.getSessions().getAndValidateCurrentUser(cboShortSession);
      // get list of emails from identifier service
      List<Identifier> emails;

      emails = sdk.getIdentifiers().listAllEmailsByUserId(validationResp.getUserID());

      //
      model.addAttribute("PROJECT_ID", projectID);
      model.addAttribute("USER_ID", validationResp.getUserID());
      model.addAttribute("USER_NAME", validationResp.getFullName());
      // select email of your liking or list all emails
      model.addAttribute("USER_EMAIL", emails.get(0).getValue());

    } catch (final Exception e) {
      System.out.println(e.getMessage());
      model.addAttribute("ERROR", e.getMessage());
      return "error";
    }
    return "profile";
  }
要啟動 Spring Boot 應用程序,請導航至 /complete 目錄並運行:
./mvnw spring-boot:run
在瀏覽器中造訪 http://localhost:8080 以查看正在執行的登入頁面。
本指南示範如何使用 Corbado 將金鑰整合到 Java Spring Boot 應用程式中。透過以下步驟,您可以有效率、安全地實現無密碼身份驗證。有關會話管理以及將 Corbado 整合到現有應用程式中的更多詳細文檔,請參閱官方 Corbado 文件。
以上是如何將金鑰整合到 Java Spring Boot 中的詳細內容。更多資訊請關注PHP中文網其他相關文章!


