

HTML 必需屬性

它可以表示為布林屬性,有時稱為必填項或開發人員友好的必填欄位。它應該由任何形式的控制項標記,以具有在網頁上提交任何表單之前不應保留為空的值。若要使字段成為必填字段,請在輸入字段的末尾添加屬性。客戶將收到彈出警報,提示應填寫必填字段;同時,它是 HTML5 的新功能,可以很好地處理複選框、單選按鈕、文字等輸入字段,這可能有助於前端驗證。
本文介紹了所需屬性的基本概念,並提供了在 Chrome 6、Firefox 和 Opera 等瀏覽器中啟動和使用的簡單範例,每個瀏覽器都有不同的預設行為。說起來,屬性是一個特殊的詞,它為 HTML 中的任何元素提供功能。與 HTML5 一樣,所需的屬性作為 UI 助理可見。當使用者提交表單時,無論請求是否包含數據,伺服器都會驗證請求。
文法
語法如下所示,您可以做的一個小小的更改是在表單中使用關鍵字「Attribute」建立文字輸入欄位。在提交表格之前,必須填寫必填欄位。為此,需要給出“必需”屬性。
一般語法:此處使用的可能值要麼為空,要麼為必填。
<element required>
輸入元素的語法:
< input type =" " required>
文字區域的語法:
<text area rows =" " cols = " " name =" " required> < /text area>
選擇區域的語法:
<select name =" "required>
<option value >
</option> </select>
什麼是 HTML 必需屬性?
您知道 HTML5 有可以表示為 true 或 false 值的屬性嗎?讓我進一步解釋一下。它們允許我們執行以下操作:
- 請確保在提交表格之前填寫所有字段,以避免任何問題。
- 在任何未選取的欄位上,提供通知訊息。
Html required 屬性應用於下面列出的最常用的三個元素:它們是
- : 此屬性在 中指定。元素。此欄位包括電子郵件、文字、廣播、複選框和 URL 等輸入類型。
-
: 此元素顯示固定寬度大小的無限字元。文字區域由編號決定。
的和,同時顯示。使用 CSS 進行設計時,應利用高度和寬度屬性來指定物件的大小。 HTML5 文字區域具有自動對焦、佔位符、表單、最大長度、必填和換行等屬性。 - Html select 元素提示使用者透過新增一個帶有空值的簡單模式「required」從清單中進行選擇。
HTML 必需屬性範例
讓我們嘗試 HTML 程式碼來了解 HTML 中的必要屬性。首先,我們將使用 屬性。
1. 屬性:必填欄位
將「required」屬性新增到輸入元素中以將欄位標記為簡單。當使用者填寫並提交所有必填欄位時,網頁瀏覽器將根據需要運行。讓我們看看是否在適當的地方添加必需的屬性。
範例#1
代碼:
<html>
<head>
<h3>
Implementation of required attribute using input element
</h3>
<style>
div
{
padding: 12px 1;
}
</style>
<head>
<body>
<form>
<div>
<label> Full Name</label>
<input type="text" placeholder="Enter Full Name" name="name" required>
</div>
<div>
<label> E-id </label>
<input type="email" placeholder="Enter E-ID" name="email" required>
</div>
<div>
<label> Location </label>
<input type="text" placeholder="Enter the Location." name="Loc" required>
</div>
<div>
<label>Password Pin</label>
<input type="password" placeholder="Enter PIN Password" name="pwd" required>
<br>
</div>
<button type="submit" VALUE="SUBMIT"> Login </button>
</form>
</body>
</html>輸出:

範例#2
我們將專注於偵測何時有人未選取單選按鈕。
代碼:
<!DOCTYPE html>
<html>
<head>
<h2>
Required Attribute
<h2>
<style>
h1,
h2 {
color: Orange;
font-style: Verdina;
}
body {
text-align: center;
}
</style>
</head>
<body>
<h1>EDUCBA Tutorial</h1>
<h2>
HTML required Attribute with Input
</h2>
<form action="">
<label for="name"> Full Name (5 to 9 characters): </label>
<input type="text" id="name" name=" Full name" required
minlength="5" maxlength="9" size="14">
Mandatory:
<input type="radio"
name="radiocheck"
required>
<br>
<input type="submit">
</form>
</body>
</html>輸出:

2. 屬性
這個布林屬性指定文字區域元素在提交之前永遠不應該離開,並且還指定多行輸入控制。下面的範例說明了在表單之外使用此屬性。
代碼:
<!DOCTYPE>
<html>
<head>
<title>Required Attribute implementation</title>
<style>
h1
{
color: brown;
font-style: Arial;
}
body {
text-align: center;
}
</style>
</head>
<body>
<h1> Text Area Required Attribute</h1>
<form action="updates.jsp" id="user idform">
E-mail id: <input type="text" name="username">
<input type="submit">
</form>
<br>
<textarea rows="10" cols="60" name="comment" form="user idform">
Enter text here... </textarea>輸出:
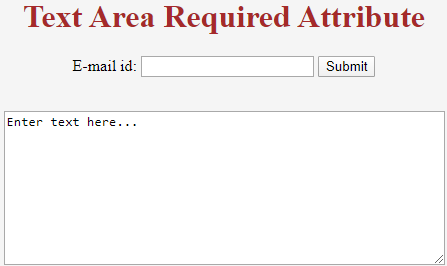
即使在上面的範例中,我們也可以使用最小和最大長度屬性來指定它。
3. 屬性
下面的範例示範了帶有
範例#1
代碼:
<!DOCTYPE html>
<html>
<body>
<form action="/act_page.php">
<select required>
<option value="">Select</option>
<option value="Air India">Hadoop</option>
<option value="Emirates"> R programming</option>
<option value="Doha">PHP</option>
<option value="Spice Jet"> Java</option>
</select>
<input type="submit">
</form>
</body>
</html>
輸出:


熱AI工具

Undresser.AI Undress
人工智慧驅動的應用程序,用於創建逼真的裸體照片

AI Clothes Remover
用於從照片中去除衣服的線上人工智慧工具。

Undress AI Tool
免費脫衣圖片

Clothoff.io
AI脫衣器

Video Face Swap
使用我們完全免費的人工智慧換臉工具,輕鬆在任何影片中換臉!

熱門文章
熱工具

記事本++7.3.1
好用且免費的程式碼編輯器

SublimeText3漢化版
中文版,非常好用

禪工作室 13.0.1
強大的PHP整合開發環境

Dreamweaver CS6
視覺化網頁開發工具

SublimeText3 Mac版
神級程式碼編輯軟體(SublimeText3)


 您如何在PHP中解析和處理HTML/XML?
Feb 07, 2025 am 11:57 AM
您如何在PHP中解析和處理HTML/XML?
Feb 07, 2025 am 11:57 AM
本教程演示瞭如何使用PHP有效地處理XML文檔。 XML(可擴展的標記語言)是一種用於人類可讀性和機器解析的多功能文本標記語言。它通常用於數據存儲
